
Recommended WebEx Event Setup Process
If you believe you will need support setting up and managing the WebEx Event, submit a request for assistant here. Select "Meeting Setup" and fill out all the details that are requested. You can view the calendar of Event Webinars that the Service Desk is currently supporting here.
If you think that you'll need help with your meeting from the Service Desk please submit a ticket as soon as possible. Service Desk resources are limited, and we can support only so many Events. If you submit your event without enough notice, or if there are already many events scheduled that require Service Desk support we may not be able to assist. You will have to reschedule, or run the event on your own.
However, if you are comfortable setting up and managing your own event, please follow the instructions below:
Setting up a WebEx Event
- WebEx Events can support 1000 participants. If you're unsure if you need to host an Event, check this page WebEx: When to Set Up a Meeting vs. an Event.
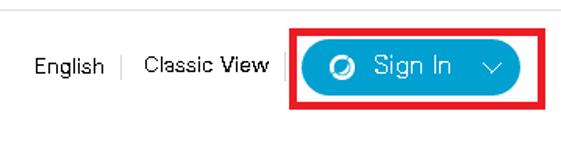
- In your Internet browser, go to nyserdany.WebEx.com and click on the sign-in button in the upper right-hand corner
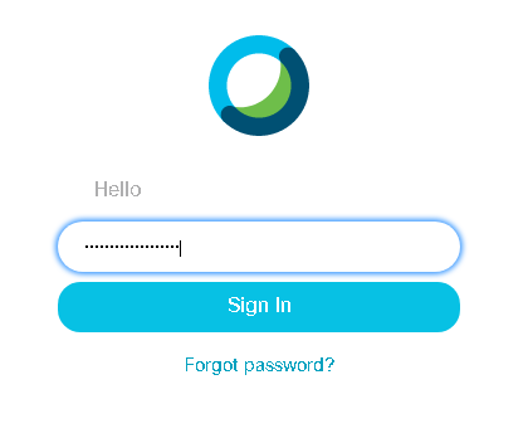
- Enter in your email address and WebEx password to sign in.
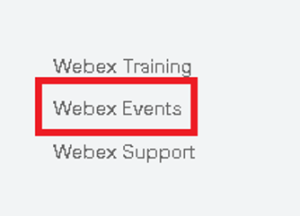
- At the bottom of the left hand navigation click on “WebEx” Events
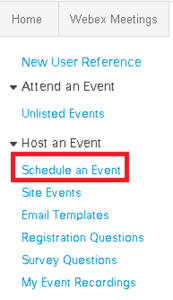
- Click on “Schedule an Event” in the left-hand navigation
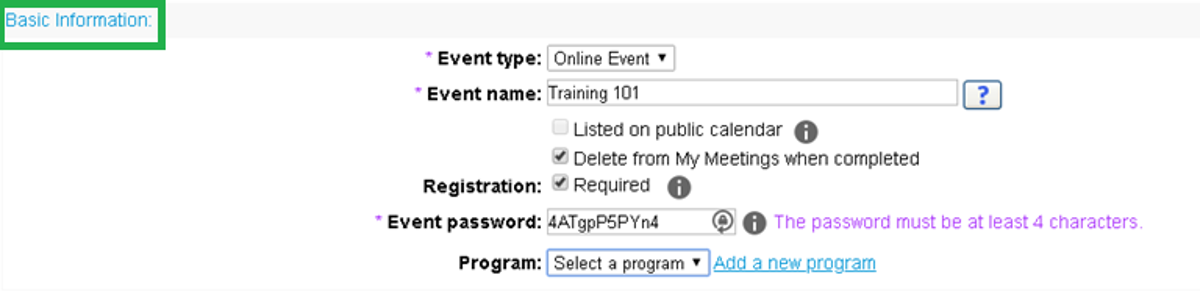
Basic Information:
Event type: Online Event
Event Name: Enter in the name of your Event. Here I have used “Training 101”
Listed on public calendar: unchecked
Delete from My Meetings when Completed: This means that the meeting will no longer show in your meeting list on your main page. It will still show as occurring in your history.
Registration: Requiring registration will force your attendees to first register to attend your event in order to allow you to see who will be attending.
Event Password: The system will set a default event password, but you can change it to be what you would like as long as it’s at least 4 characters. In most cases attendees will not need to use this password to join your meeting.
Program: No programs are preloaded into our system.
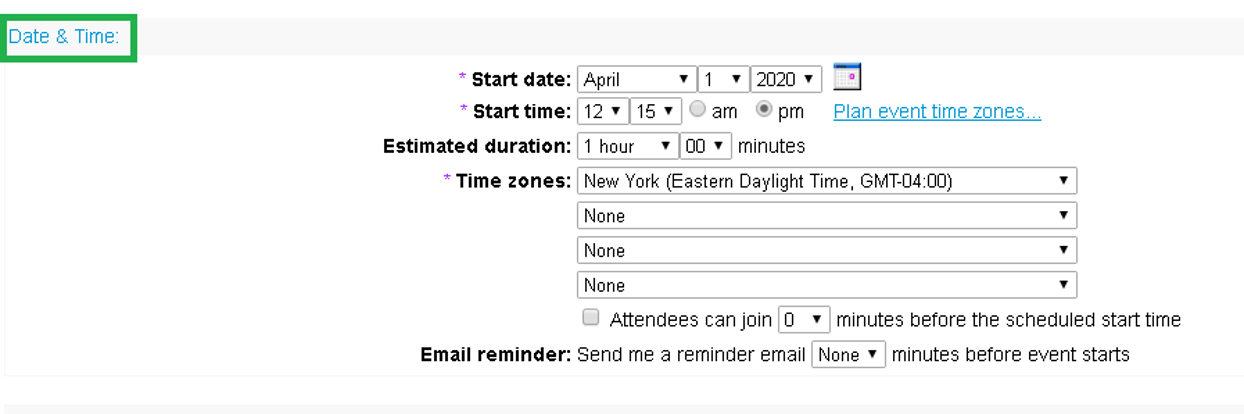
Date & Time:
Start date: Enter in the start date for your webinar. Here we see April 1,2020.
Start time: Enter in the start time for your webinar (actual time). Here we see 12:15pm
Estimated duration: This will configure the calendar that is sent with the invite from the system.
Time zones: If you know you will be inviting others from different time zones you can set an adjusted time here
Attendees can join X minutes before the scheduled start time: By default, attendees can join as soon as you launch the meeting. Adjusting this setting will allow you to limit how soon attendees can join.
Email reminder: This will send you an email reminder X minutes before your event starts
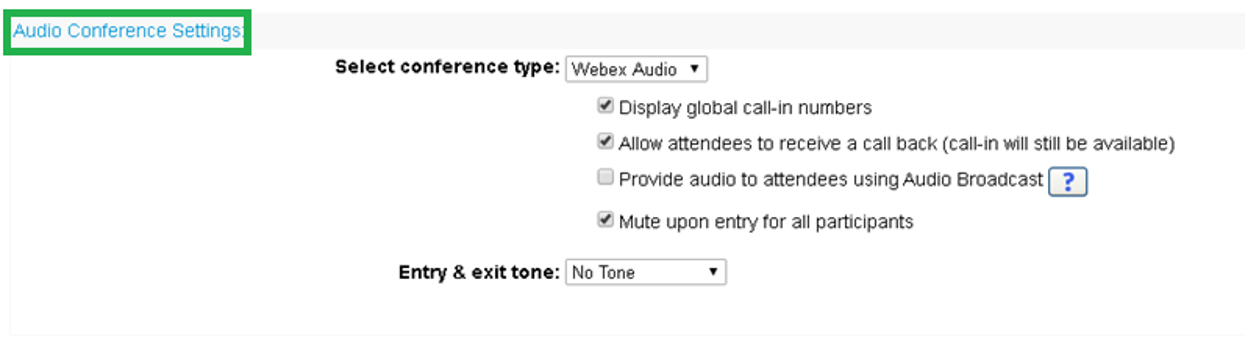
Audio Conference Settings:
Select conference type: You should use WebEx Audio. This will allow your attendees to use whatever method audio is best for them.
Display global call-in numbers: This will show a phone connection that will work globally in addition to the standard call-in line
Allow attendees to receive a call back (call-in will still be available): allows users to automatically join call-back teleconferences without pressing "1"
Provide audio to attendees using Audio Broadcast: This allows attendees to use their computer speakers but requires that they submit a request first. When unchecked attendees will be able to use the speakers without approval.
Mute upon entry for all participants: Users will come into the event muted. You can unmute any or all in the live meeting, so this is advised.
Entry & exit tone: This is advised for events so that you are not listening to hundreds of tones as people enter and exit.
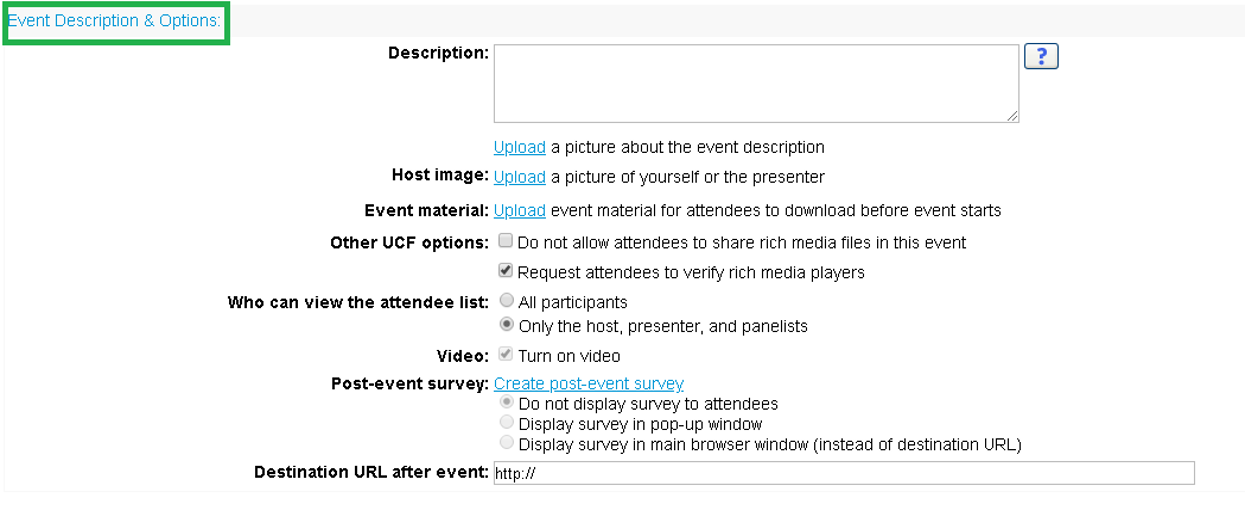
Event Description & Options
NOTE – all blue text acts as a link to allow you to customize your event
Description: This is a description of your event that will show when you first launch your event
Host image: Defaultly the system will show a basic silhouette, but you can upload a photo of yourself or the presenter
Event material: This will be material that will be available to attendees prior to the start of the event
Other UCF options: These default options should be left alone
Who can view the attendee list: For best performance, the attendee list should be left as visible to only the host, presenter, and panelist.
Video:
Post-event survey: Clicking on the blue link allows you to create a custom survey that will show up when your attendees leave the webinar. You can set it to show as a pop up or as another tab in the attendees’ internet browser.
Destination URL after event: You can set the event so that when an attendee closes out of the webinar it opens a specific tab. This can be helpful when you are doing a presentation regarding a specific program.
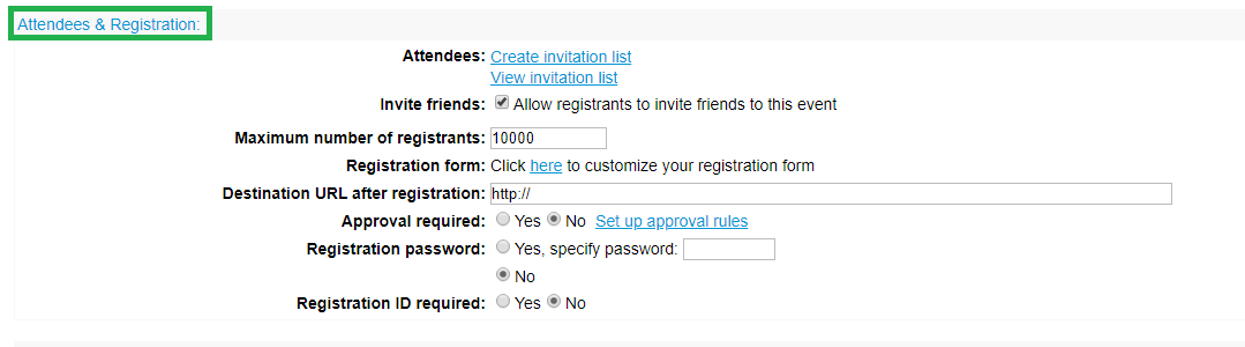
Attendees & Registration:
NOTE – all blue text acts as a link to allow you to customize your event
Attendees: You can add email addresses directly here or use a link that is provided after creation for posting or to be emailed at a later date. It is advised that you add your own name/email so you receive a copy of the invitation to provide to others.
Invite friends: You can limit people from forwarding the invitation onto other people.
Maximum number of registrants: You can limit how many people register for your event. A single event can handle 1,000 attendees
Registration form: Click on “here” to customize your registration form. See image below.
Destination URL after registration: You can enter in a URL that will open after a person fills out the registration form.
Approval required: Registrations will require manual approval before a person is sent the join information
Registration password: You can set a password that will be
Registration ID required:
Registration Form
The system requires First name, Last Name, and Email for all registration forms but all other questions can be set to be removed or set to be optional or required. Once you have the form set click on the “save” button to apply it to your event.
The first column if checked shows the question on the form but leaves it as optional.
The second column if checked makes that item required.
The buttons along the bottom will allow you to create custom fields for a person to fill out when they register for the webinar. These can also be made to be optional or required individually.

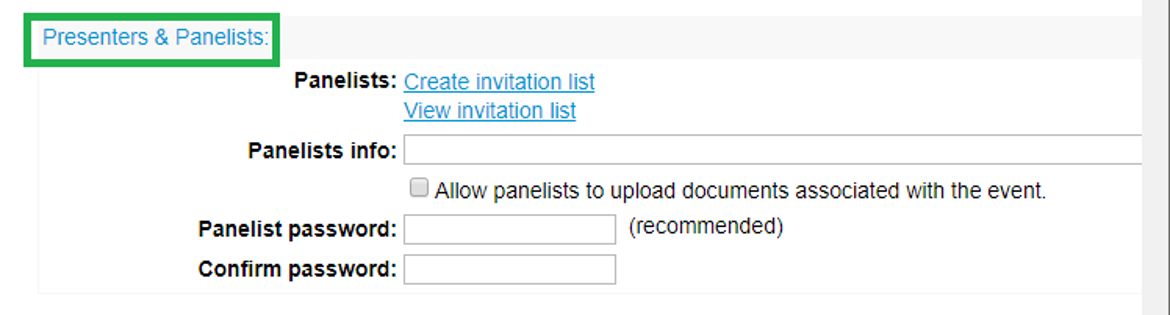
Presenters & Panelists
NOTE – all blue text acts as a link to allow you to customize your event
Panelists: You can upload your panelists directly into here or you can elevate an attendee at the start of your event day of.
Panelists info: This is a brief description of who your panelists are which is available to attendees.
Panelists password: You can set a separate password that your panelists must use when they log in to create an extra level of security.
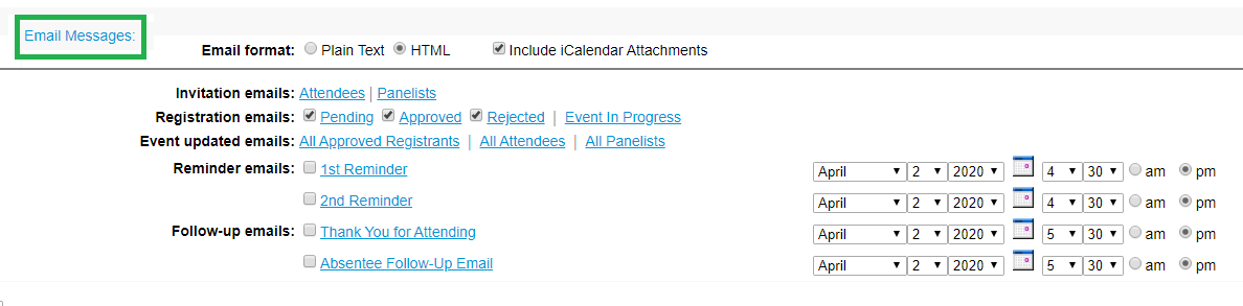
Email Messages
NOTE – all blue text acts as a link to allow you to customize your event
Email format: The emails by default are HTML, this is the standard email format.
Invitation emails: These emails are ones that are sent to attendees or panelists by the system when they are invited through the system. Links can be obtained after setup if you wish to send from your email or post.
Registration emails:
Pending: Emails sent after attendees register but before they are approved if auto approving has been unchecked
Approved: Emails sent after registration is approved. These will contain the join link and other information.
Rejected: Emails sent if a registration is denied.
Event in Progress: Emails sent once the meeting begins to those who have been invited via the system but did not register to attend.
Event updated emails: These are emails that are sent to those who have registered if any updates have been made to the event
Reminder emails: The system can automatically send up to 2 reminder emails at specified times to attendees after they register reminding them about the event.
Follow-up emails:
Thank You for Attending: Emails that are sent at a specified time to those who attended the event.
Absentee Follow-Up Email: Emails that are sent at a specified time to those who register but do not actually attend the event.
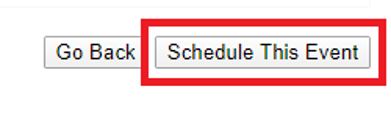
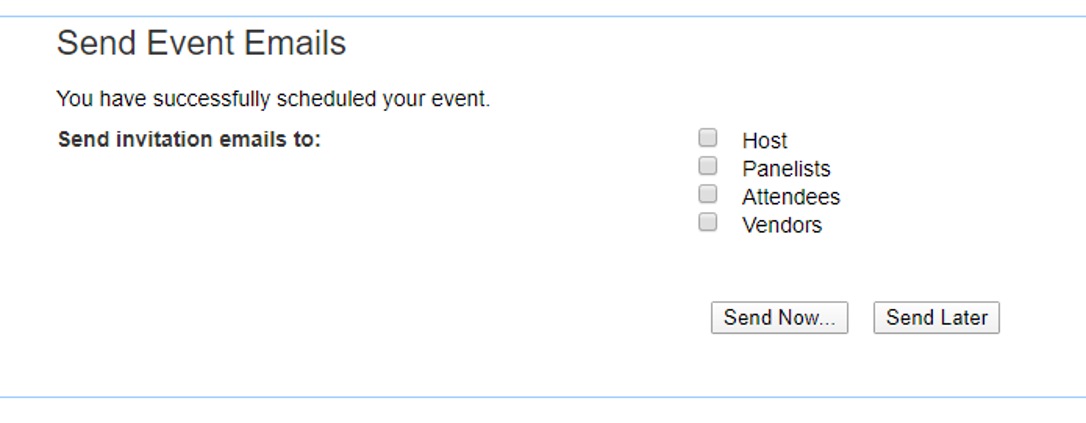
- Click on the “Schedule This Event”
- Choose who to have the system automatically send emails to then click the “Send Now…” button. If you wish to send the emails via your own email or post a link click the “Send Later”
- The system will provide an event summary. The “Event address for attendees” is the link that you can email or post for registration.
Overview
Content Tools