Appliance Upgrade Program: Contractor Application
Navigate to the Appliance Upgrade Program Contractor Application.
Choose the Appliance Upgrade Program option from the Program Family drop-down.
Select the appropriate program from the second drop-down. If only one program option is available, leave the drop-down with the default option.
Click Continue to advance to the next step in the application. Access the Step 1 tab on this page to review the instructions for the next step.
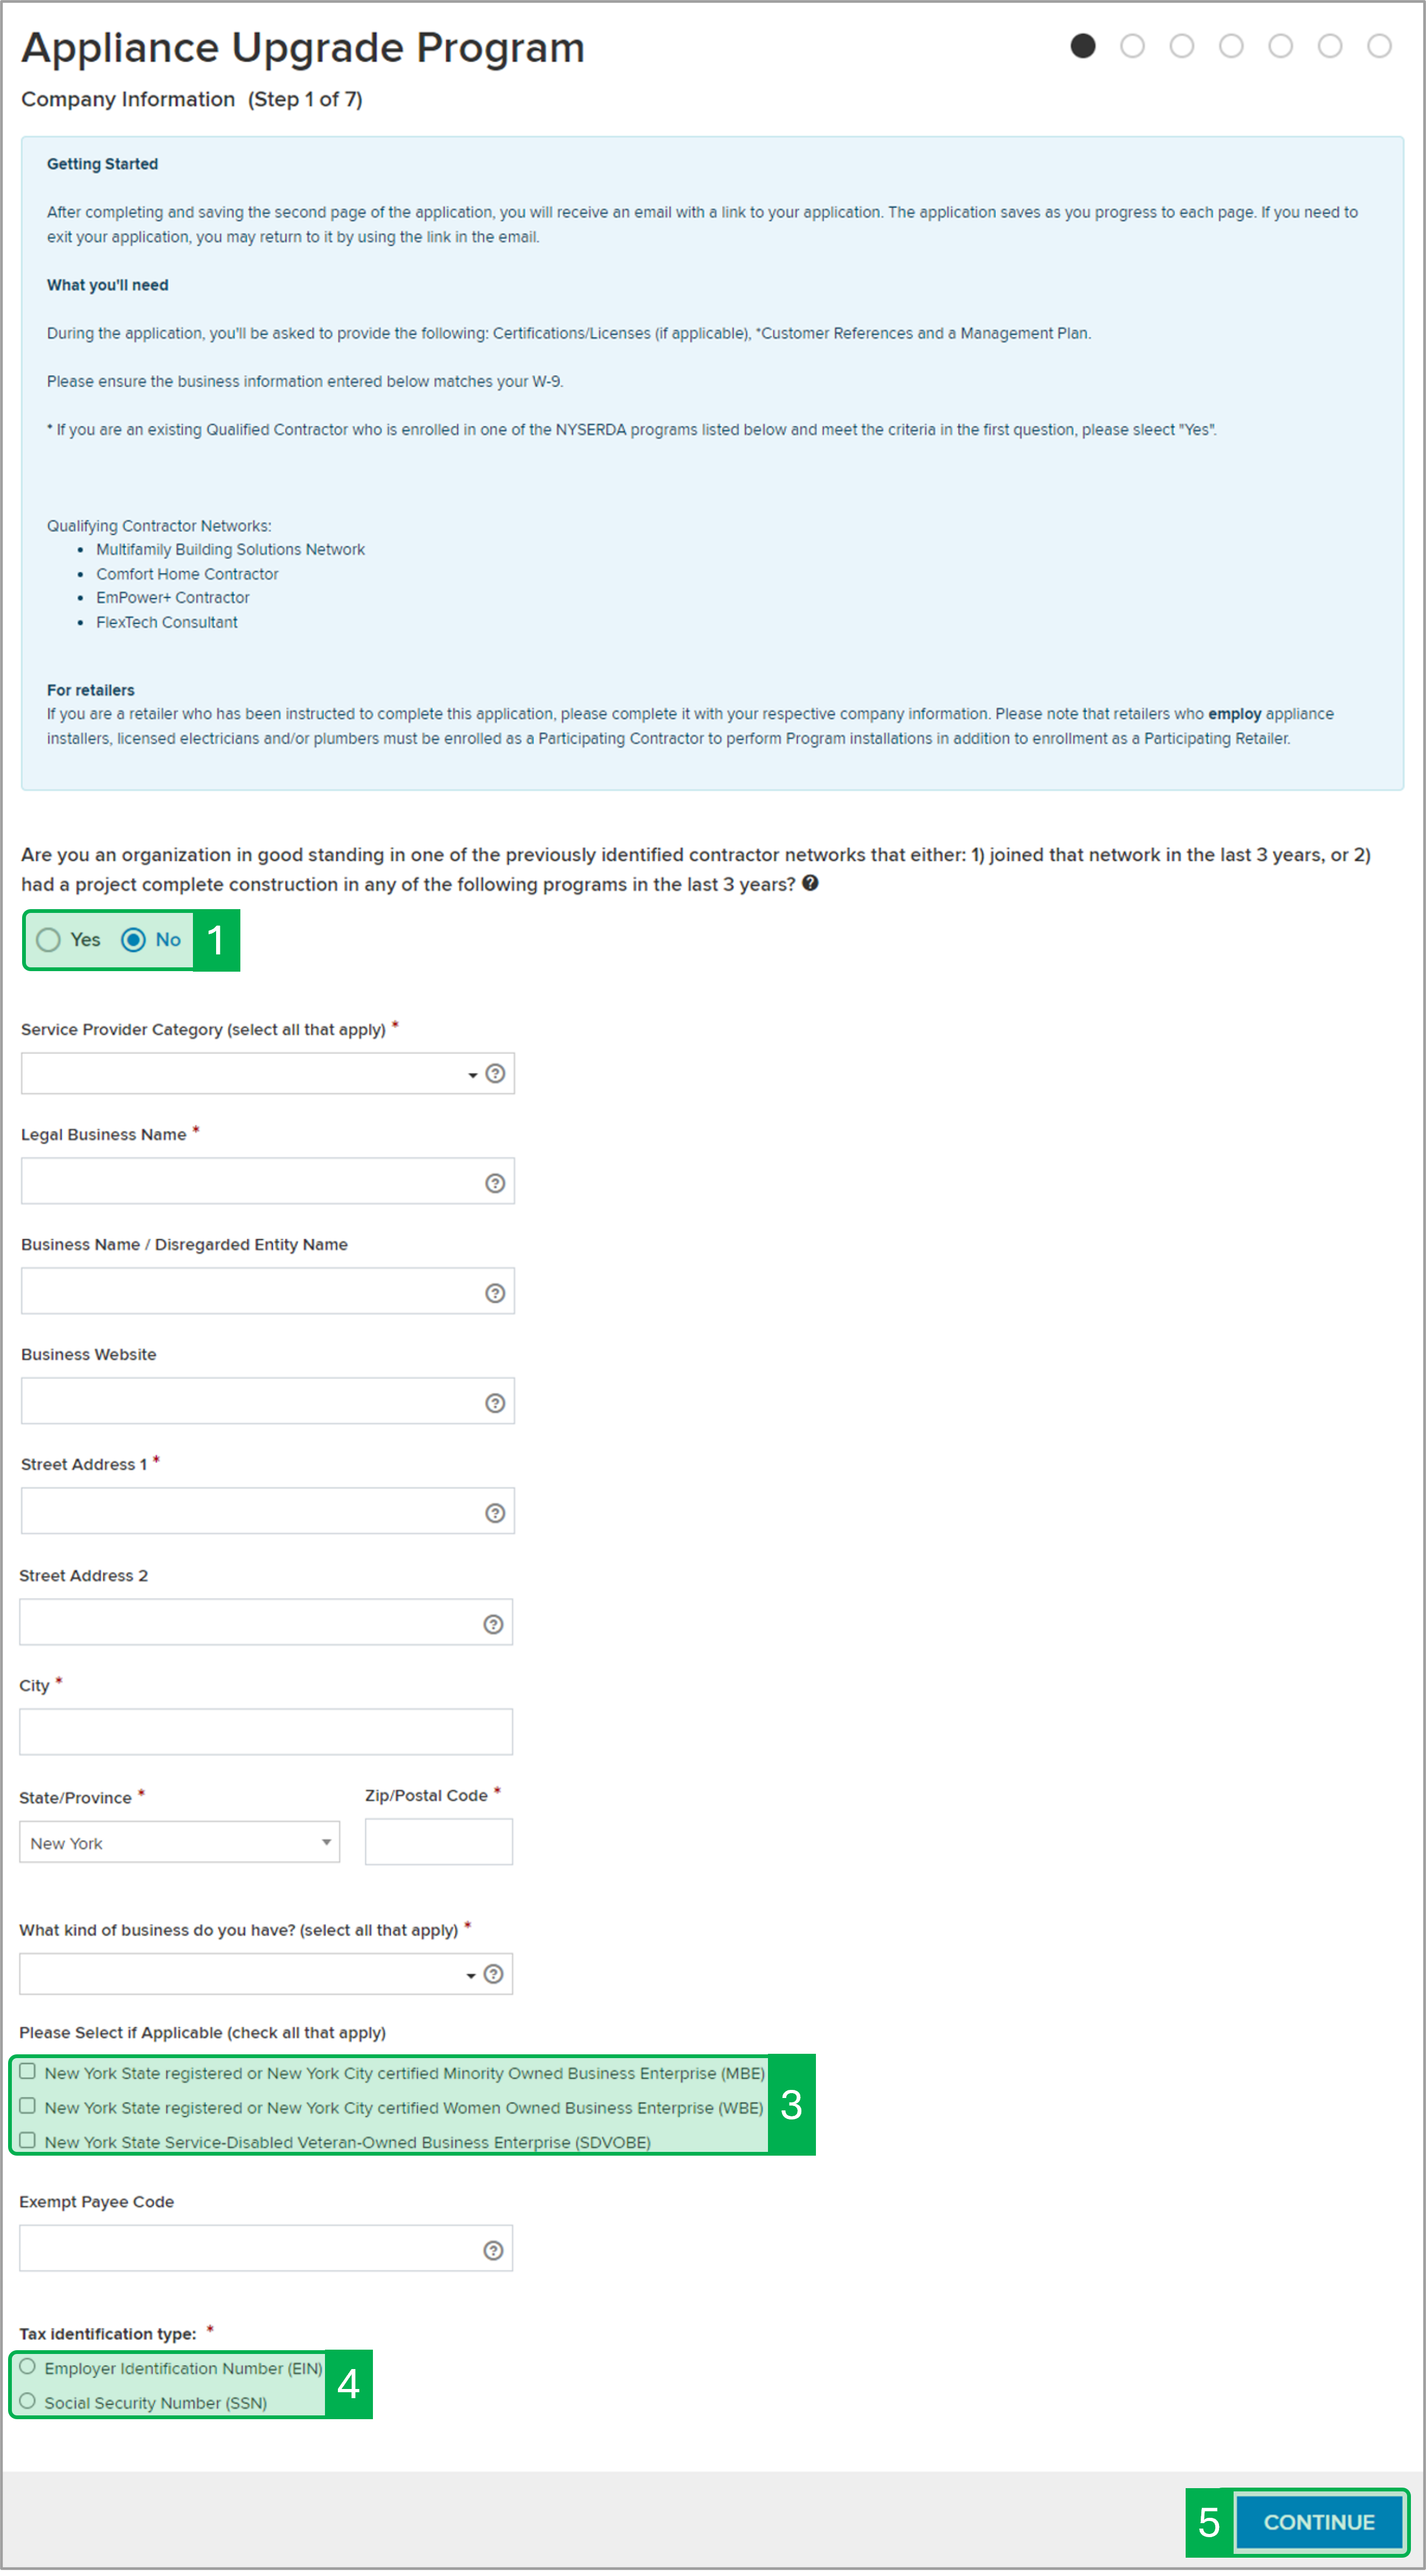
For the first field, per the guidance in the blue information box at the top of the page, select Yes if your organization meets the requirements outlined therein, otherwise select No.
Complete all required fields marked with a red asterisk (*).
Check the correct boxe(s) if your organization is MBE, WBE, and/or SDVOBE. If any of these boxes are checked, additional fields will appear below this field that may be required.
Select Tax Identification Type.
Click Continue to advance to the next step in the application. Access the Step 2 tab on this page to review the instructions for the next step.
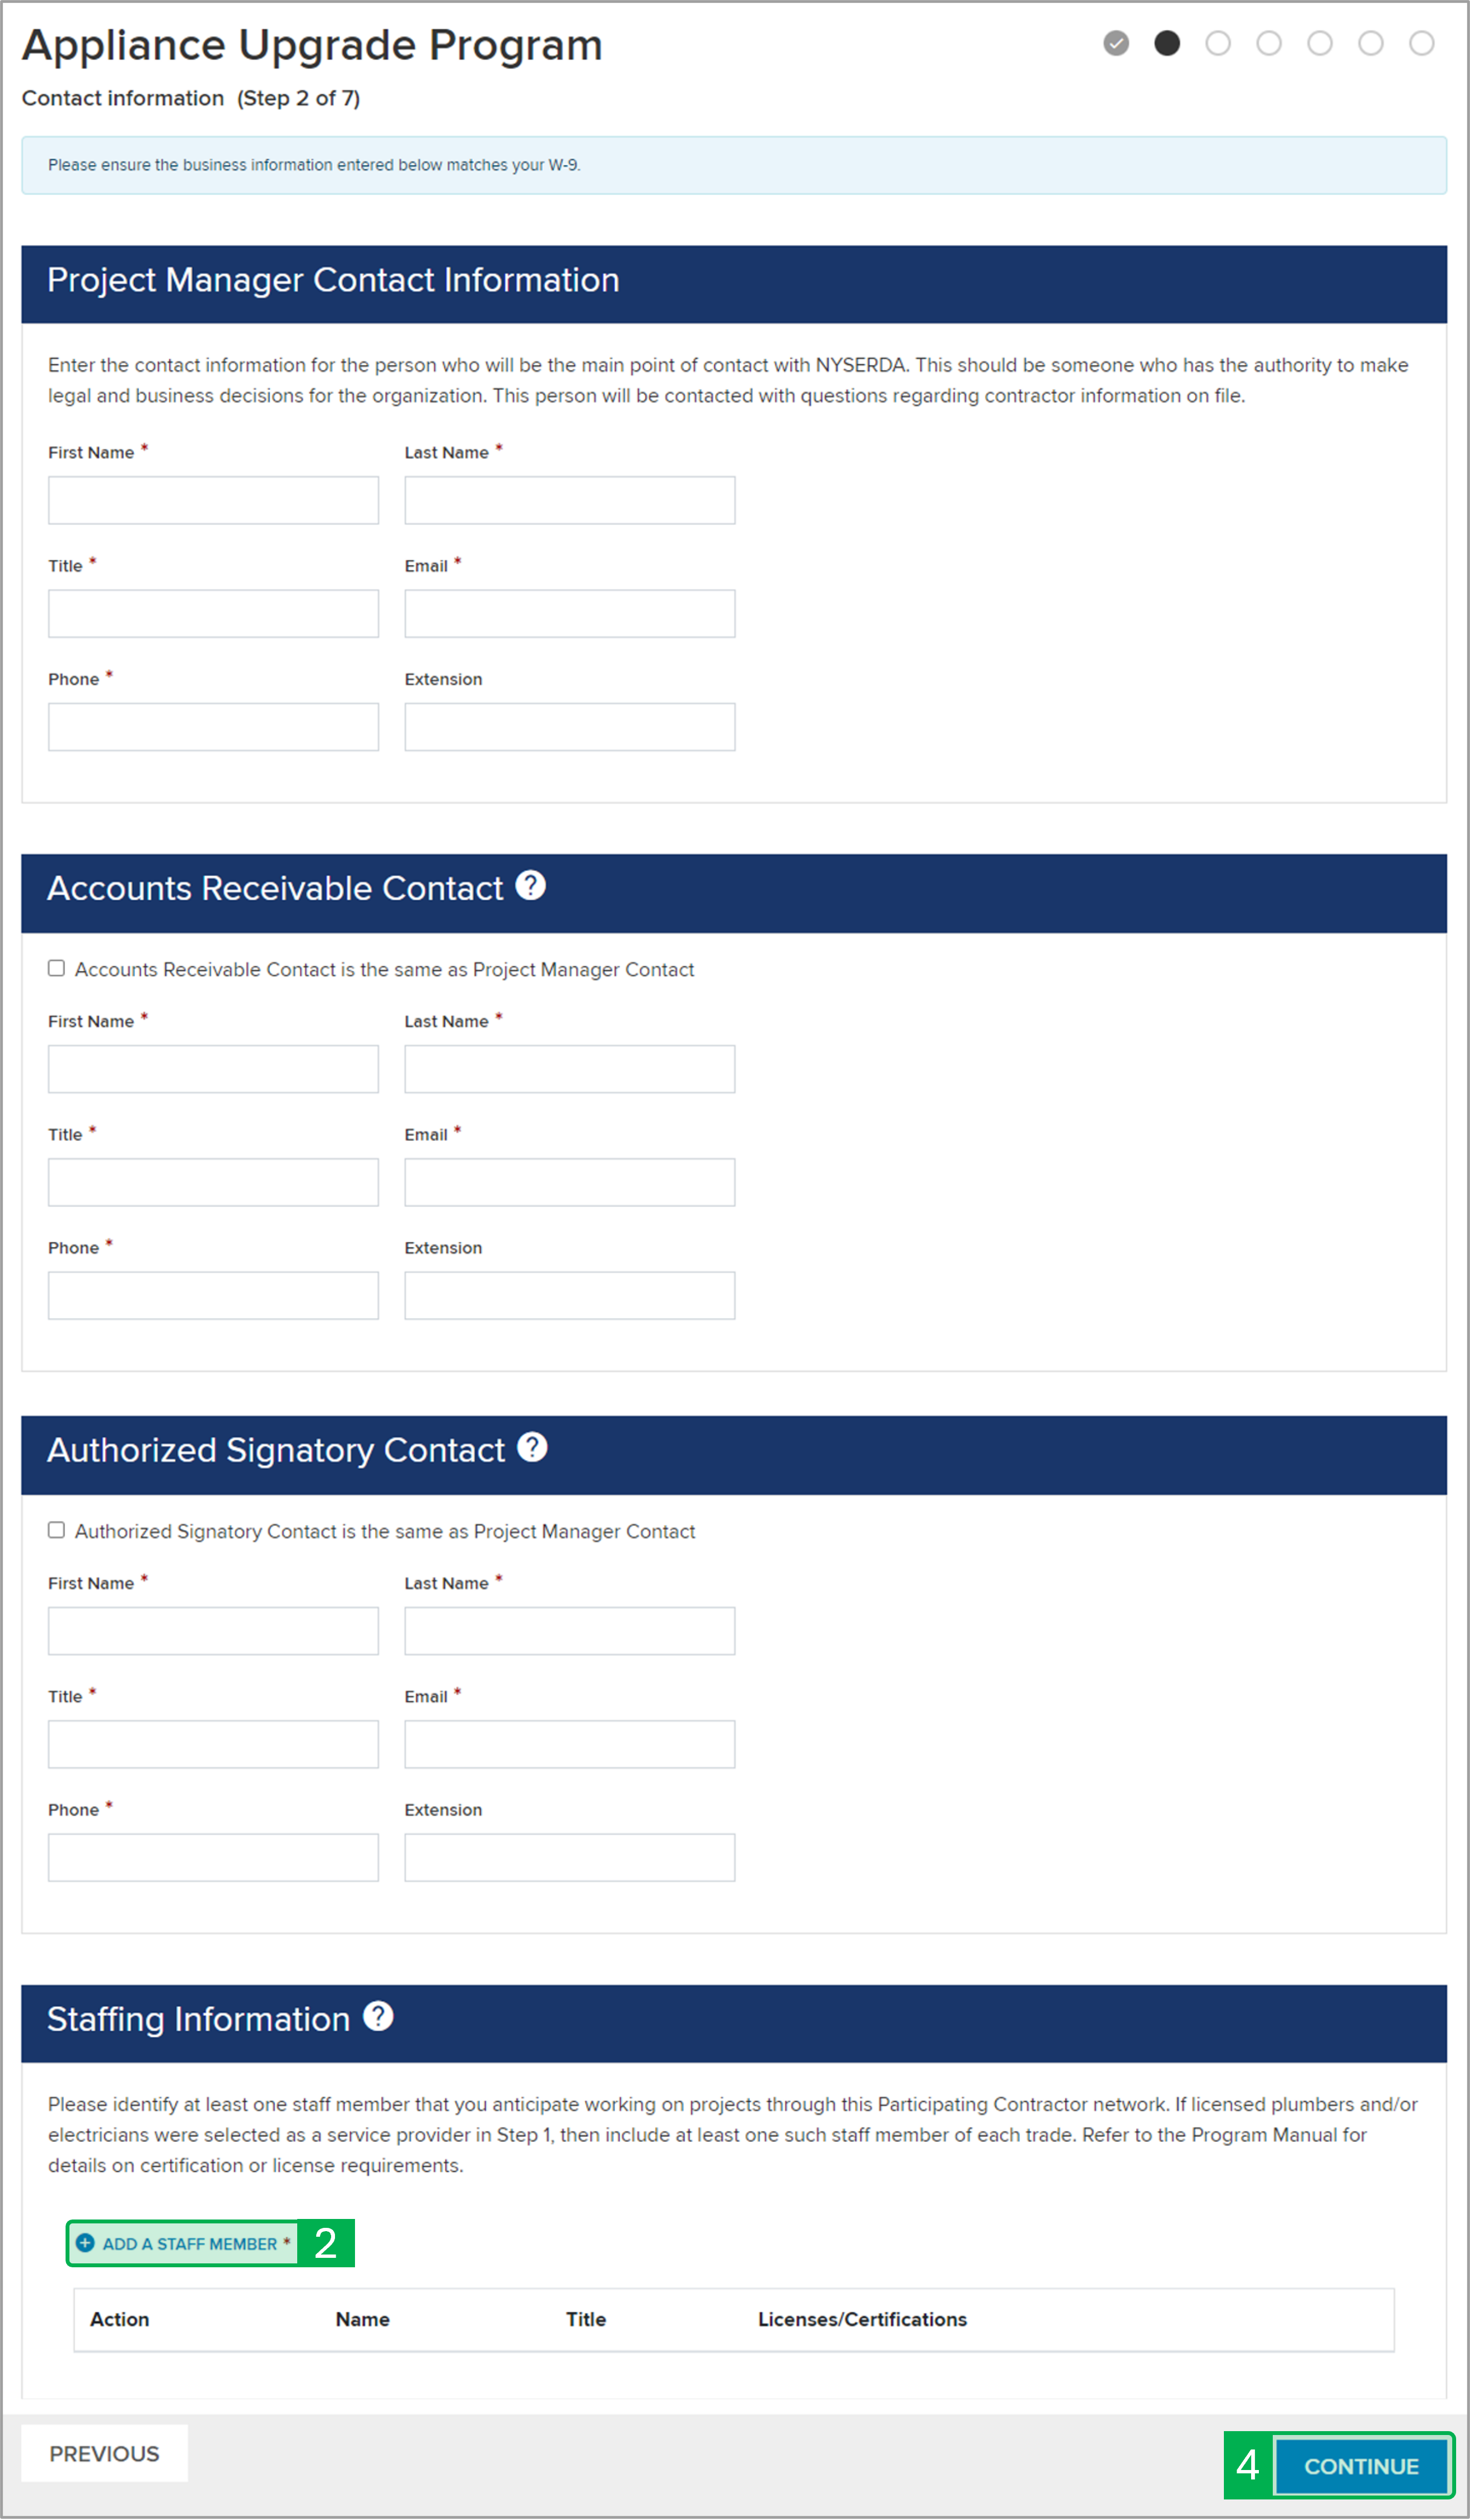
Complete the contact information for the Project Manager, Accounts Receivable, and Authorized Signatory section.
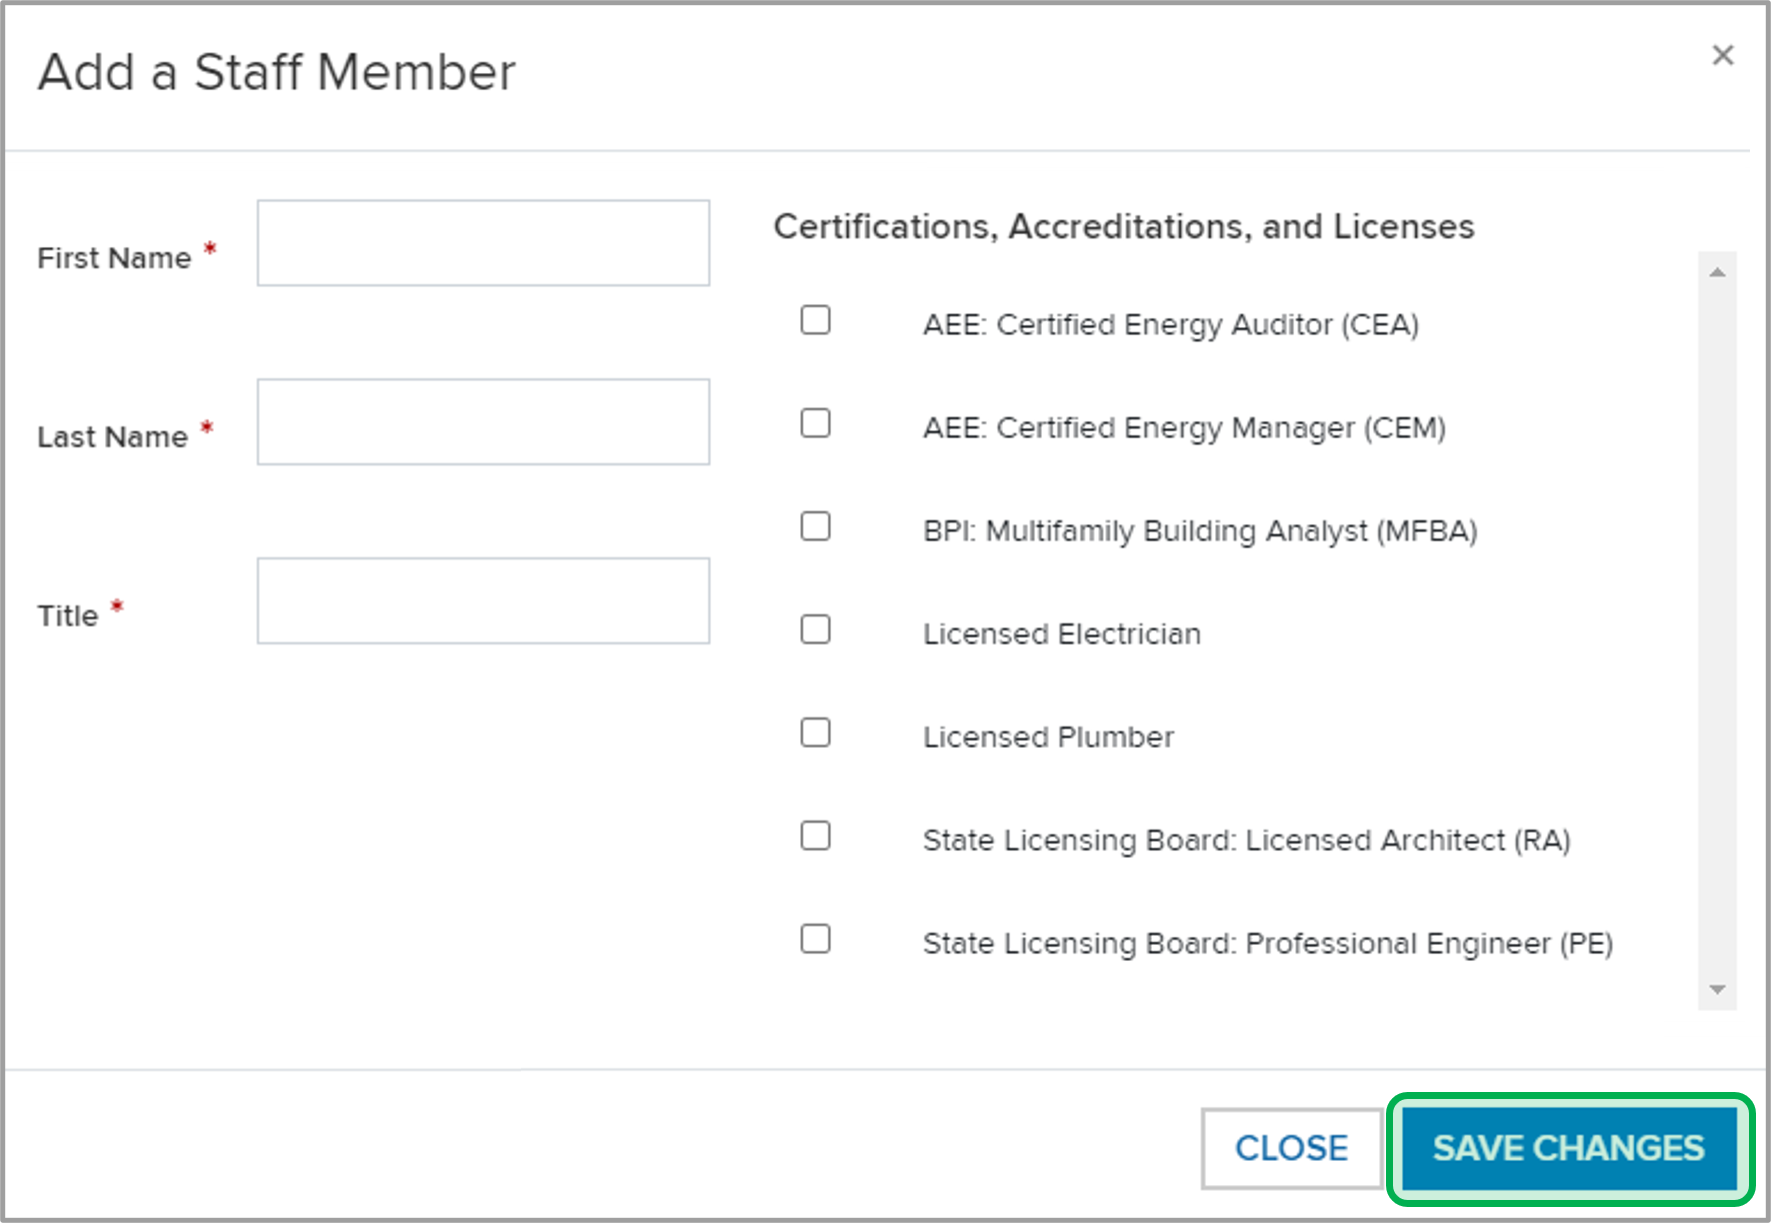
Before you can move onto the next step, at least one (1) staff member in your organization with at least one (1) Certification, Accreditation, or License must be added to the Staffing Information section.
Click Add a Staff Member and complete all required fields in the modal window that opens. Select at least one (1) of the certifications, accreditations, or licenses held by the staff member and click Save Changes.
Click Continue to advance to the next step in the application. Access the Step 3 tab on this page to review the instructions for the next step.
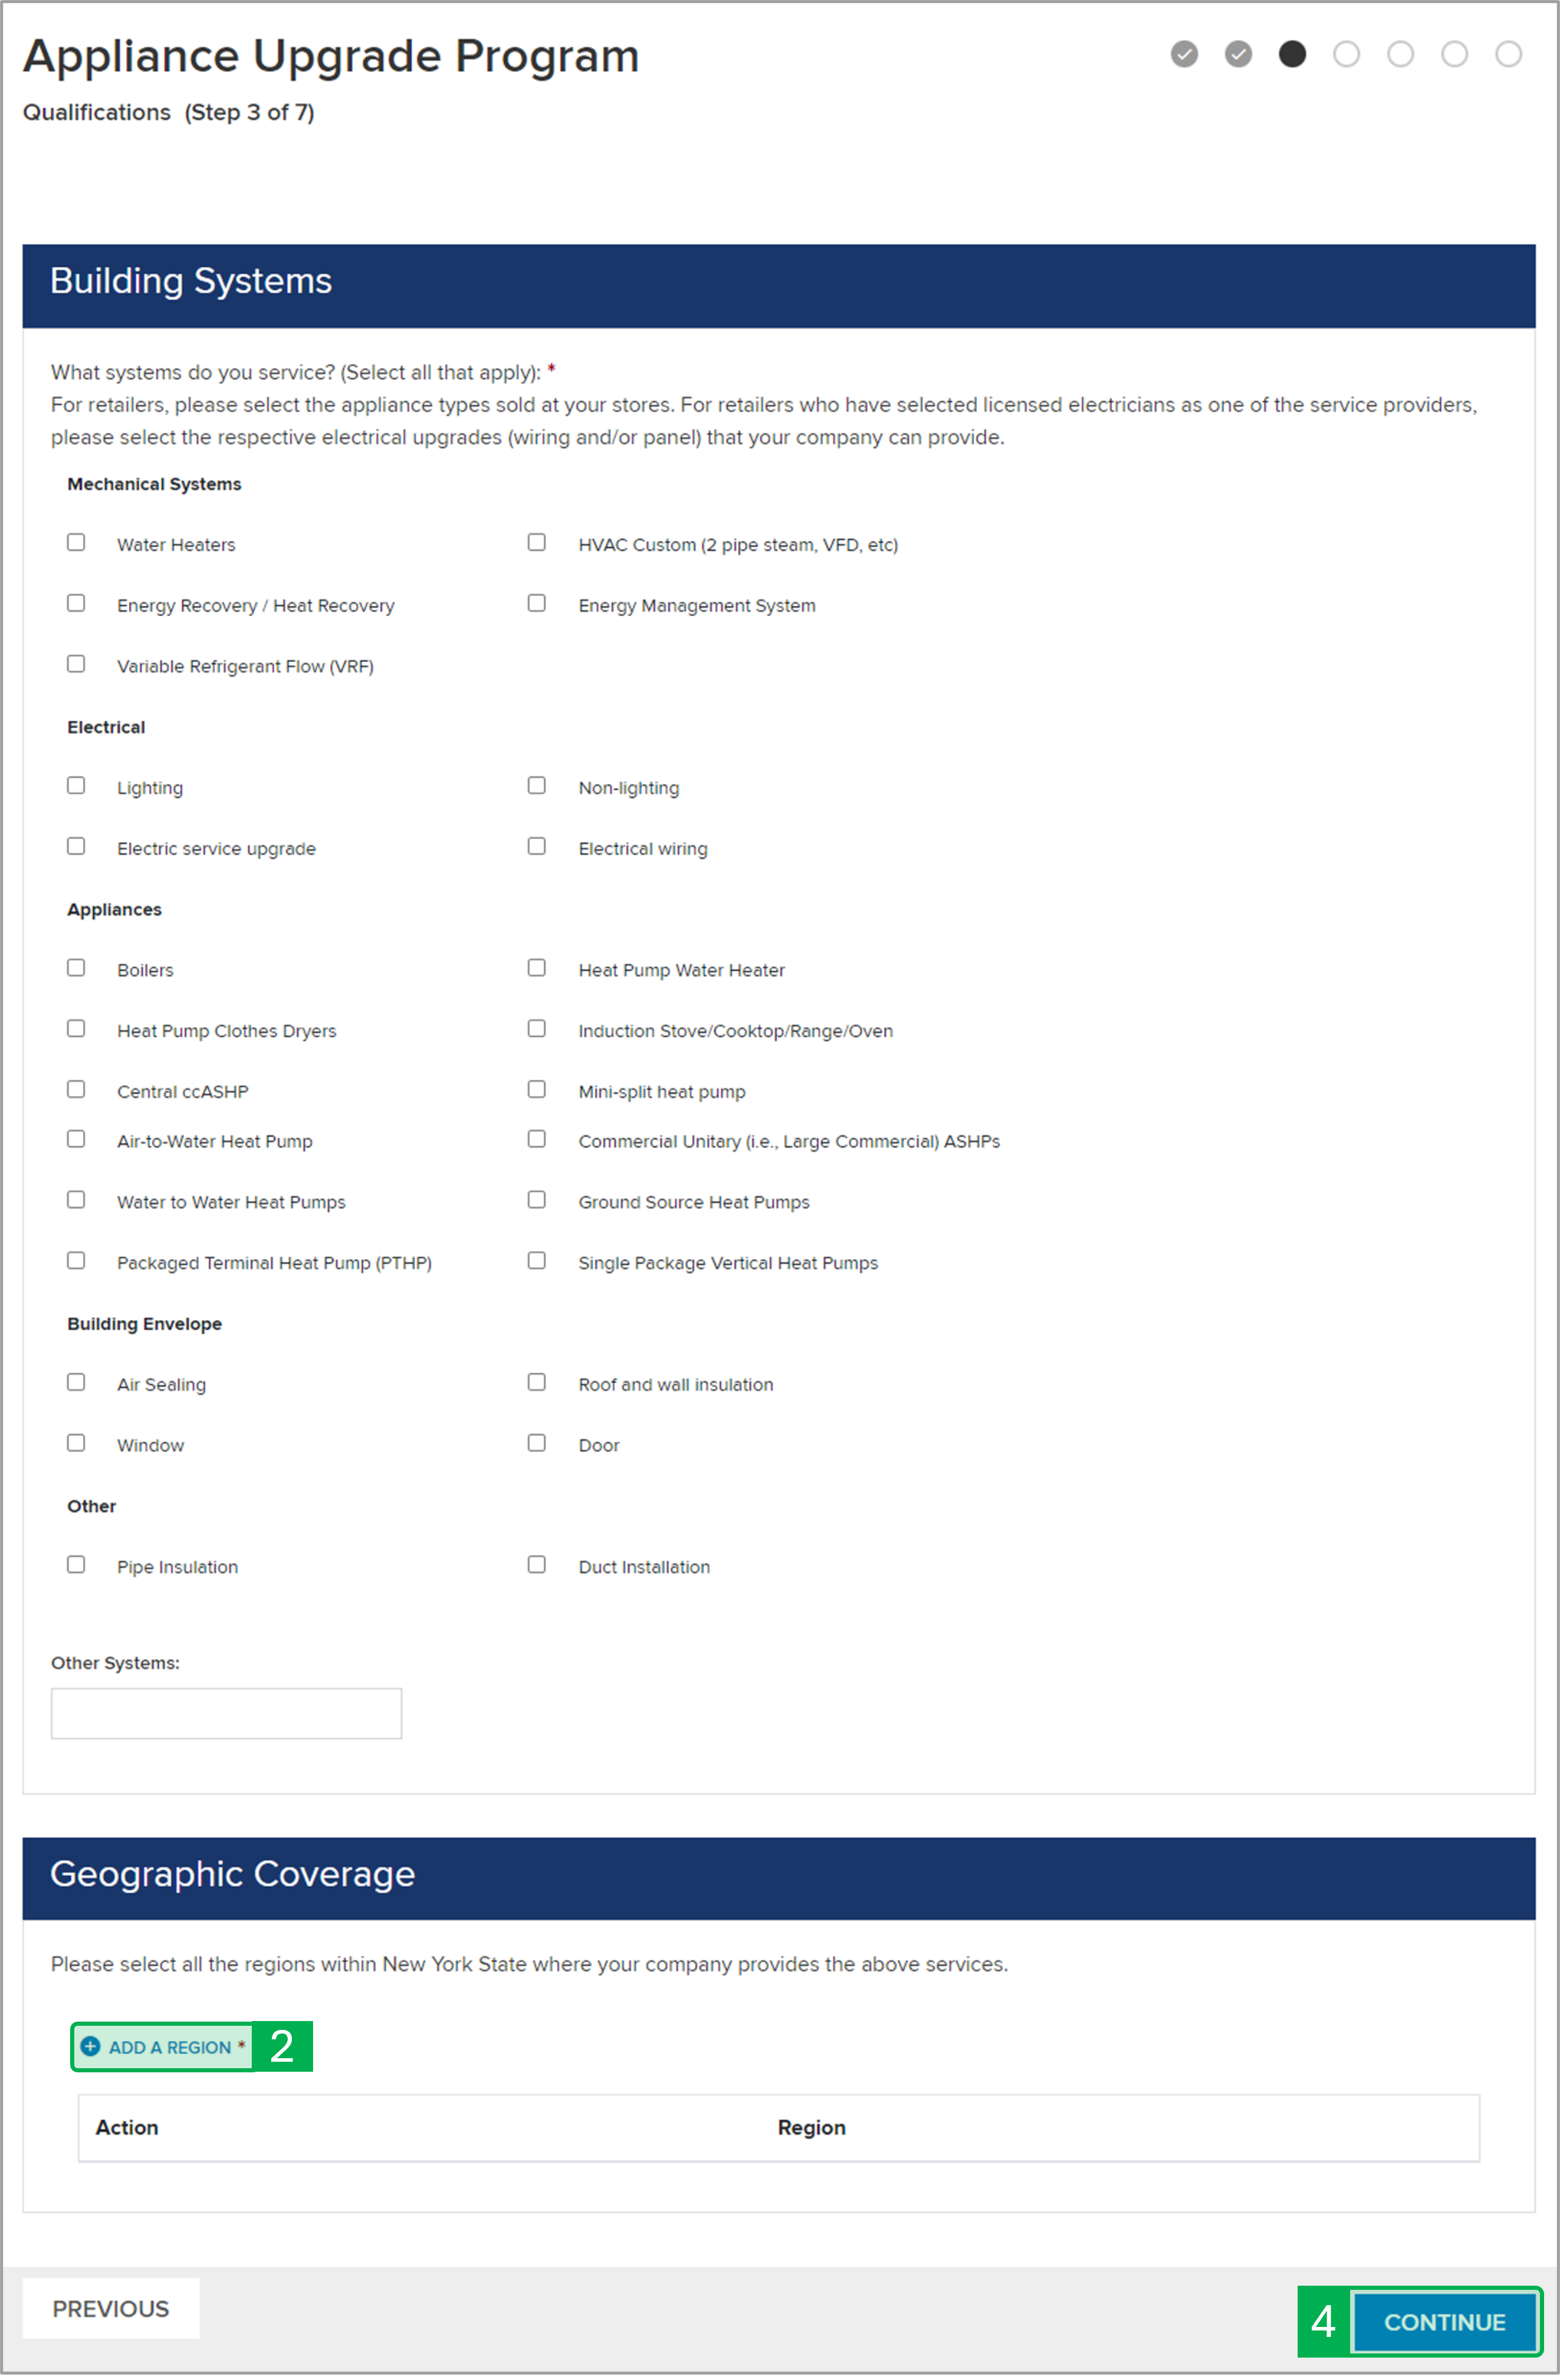
Select the systems, grouped by category, that you service in the Building Systems section. Use the Other Systems field to document systems you service that are not currently listed in this section.
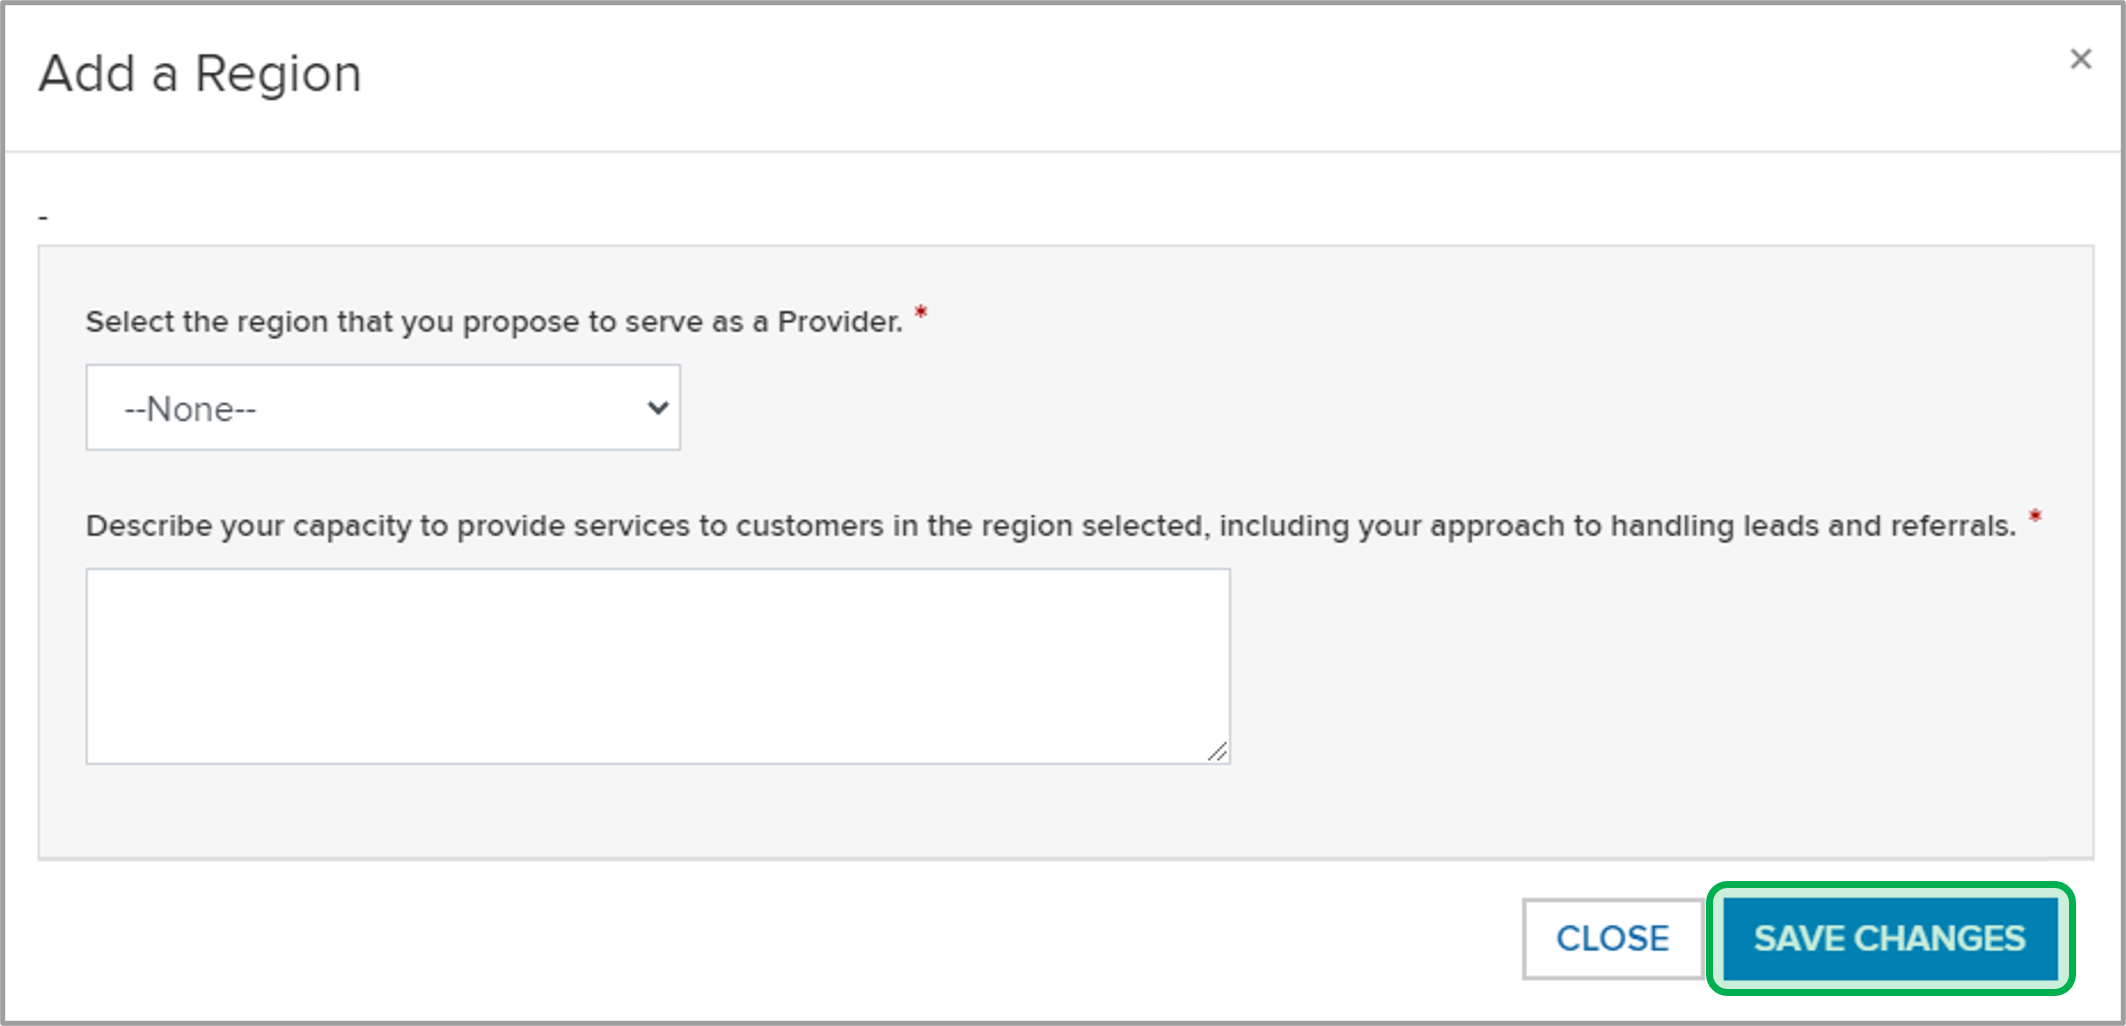
Scroll down to the Geographic Coverage section and click the Add a Region hyperlink to add a new region. A modal window will open.
On the modal window, complete all required fields for the new region then click Save Changes to add the region and return to the application.
Click Continue to advance to the next step in the application. Access the Step 4 tab on this page to review the instructions for the next step.
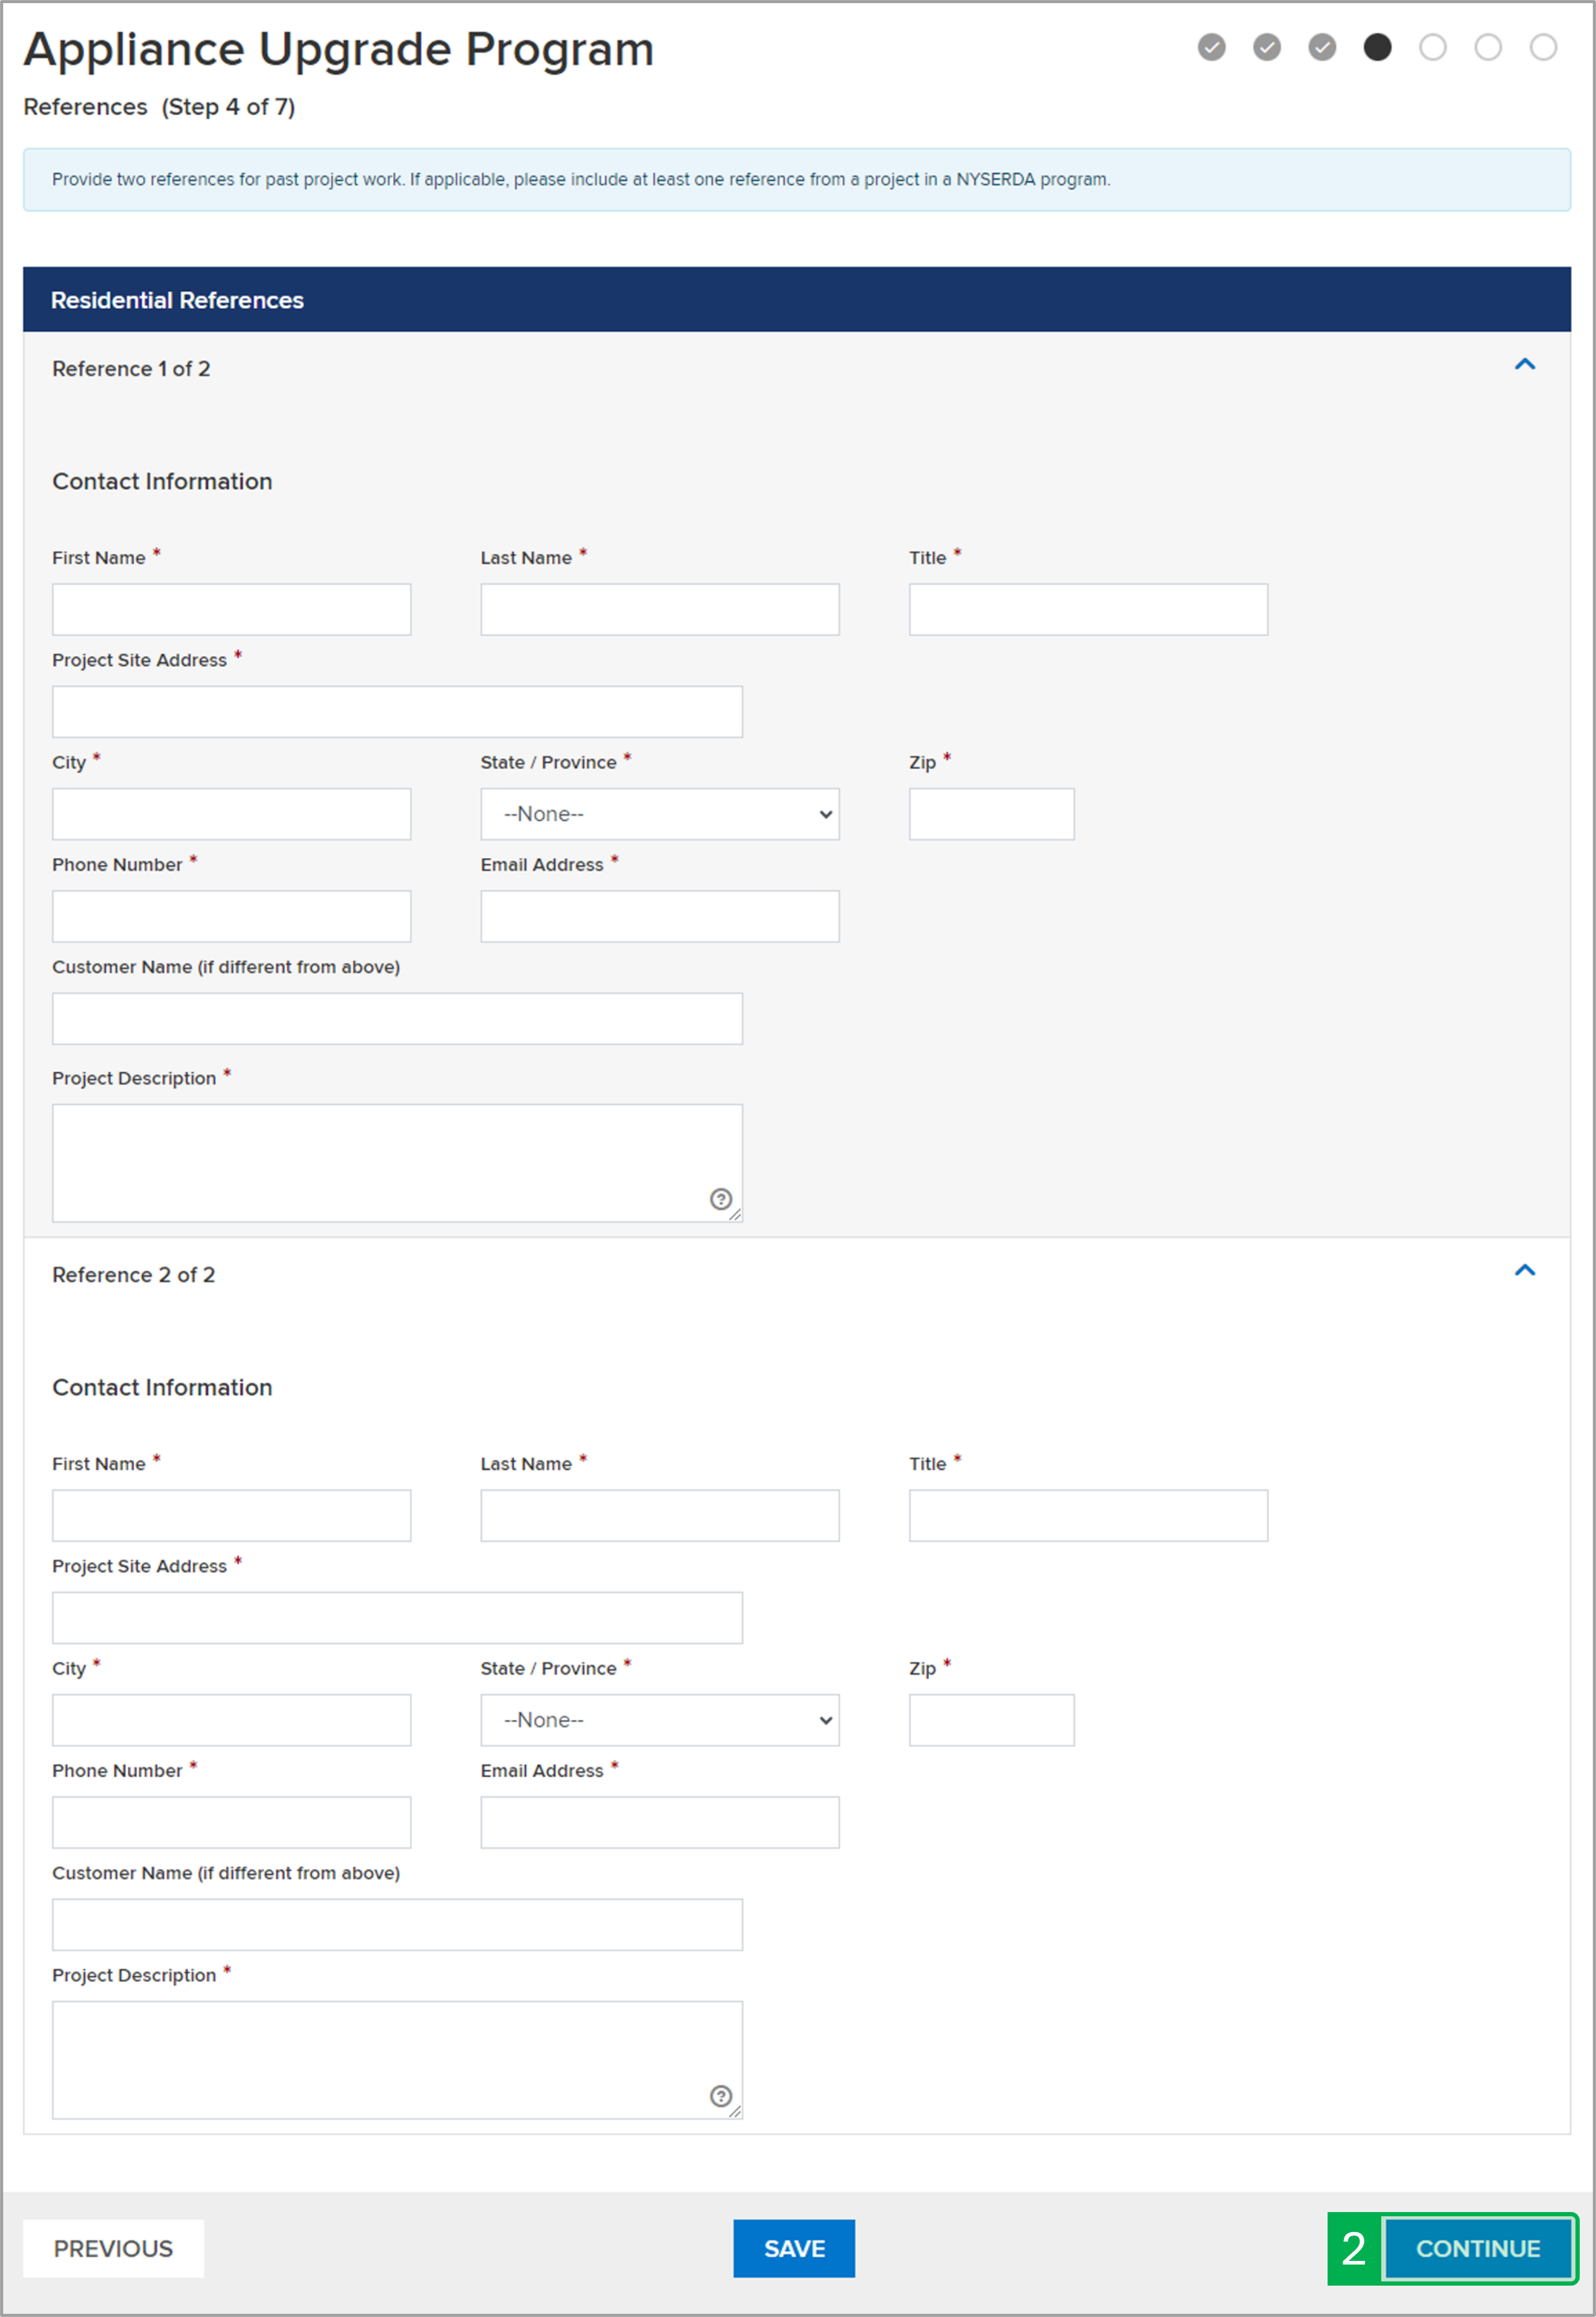
Complete all required fields with a red asterisk (*) for the two Residential References.
Click Continue to advance to the next step in the application. Access the Step 5 tab on this page to review the instructions for the next step.
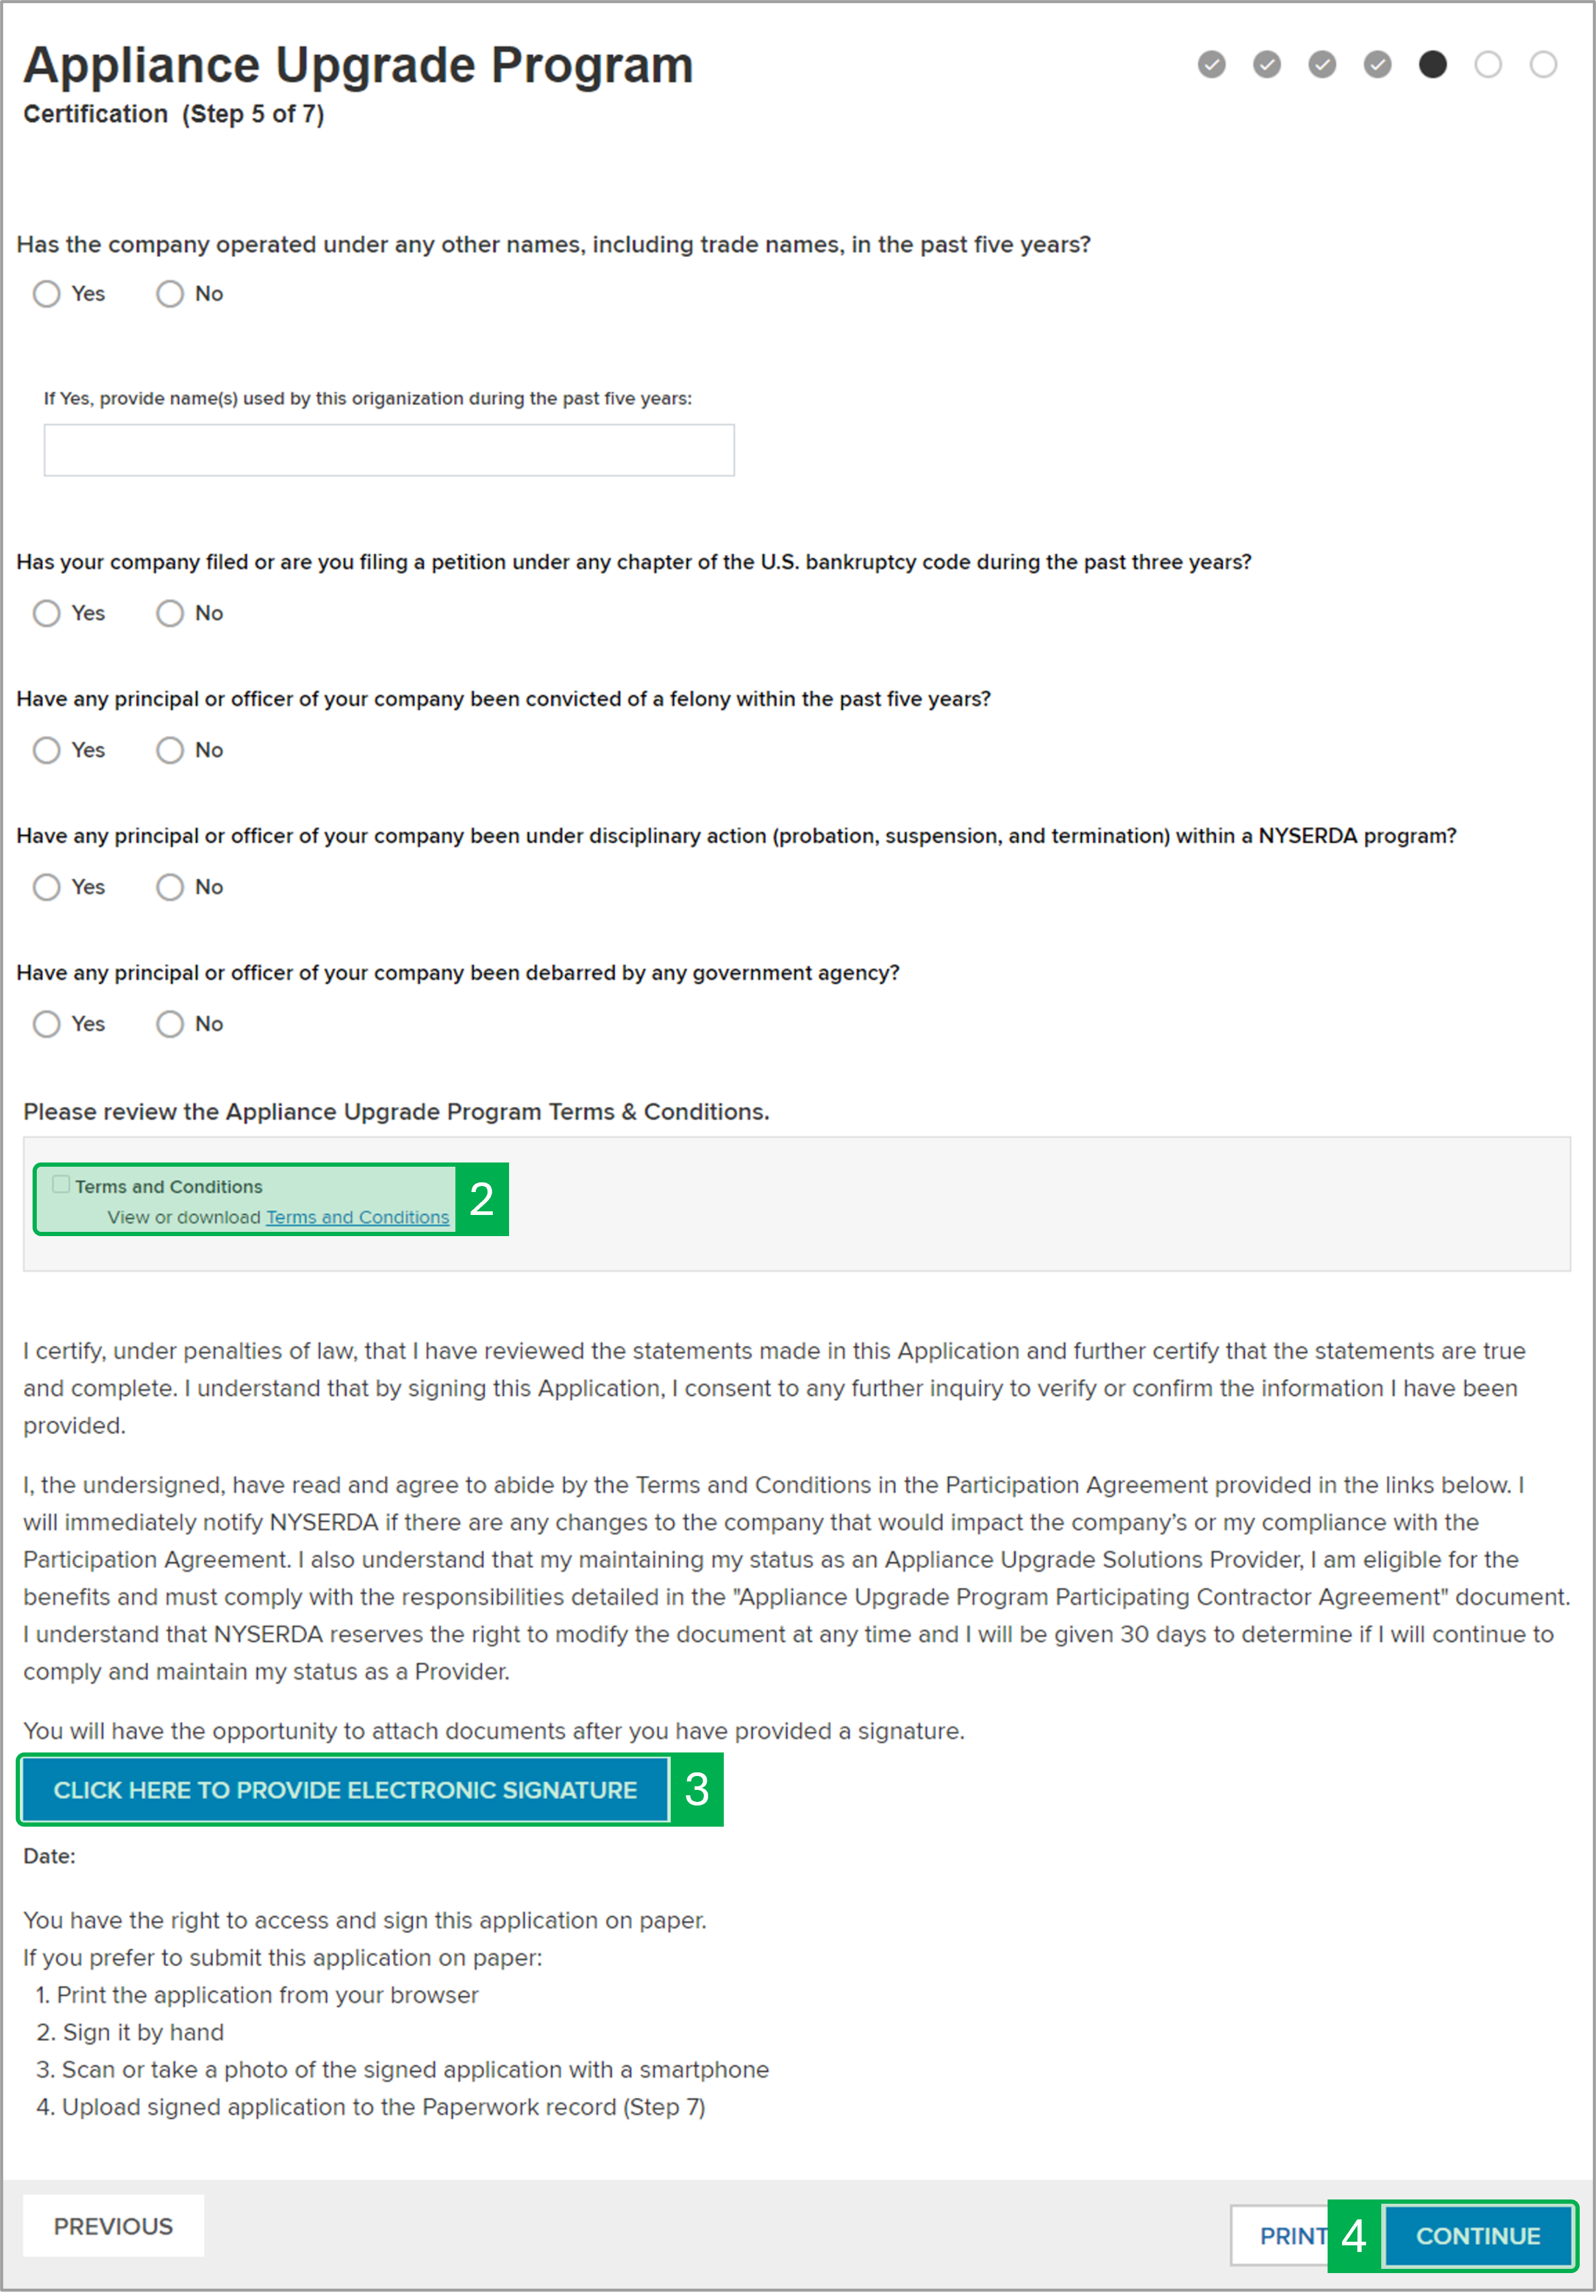
Review all the required questions and select an answer for each.
Click on the Terms and Conditions hyperlink to download and review the program Terms and Conditions. When you have completed your review, click the checkbox.
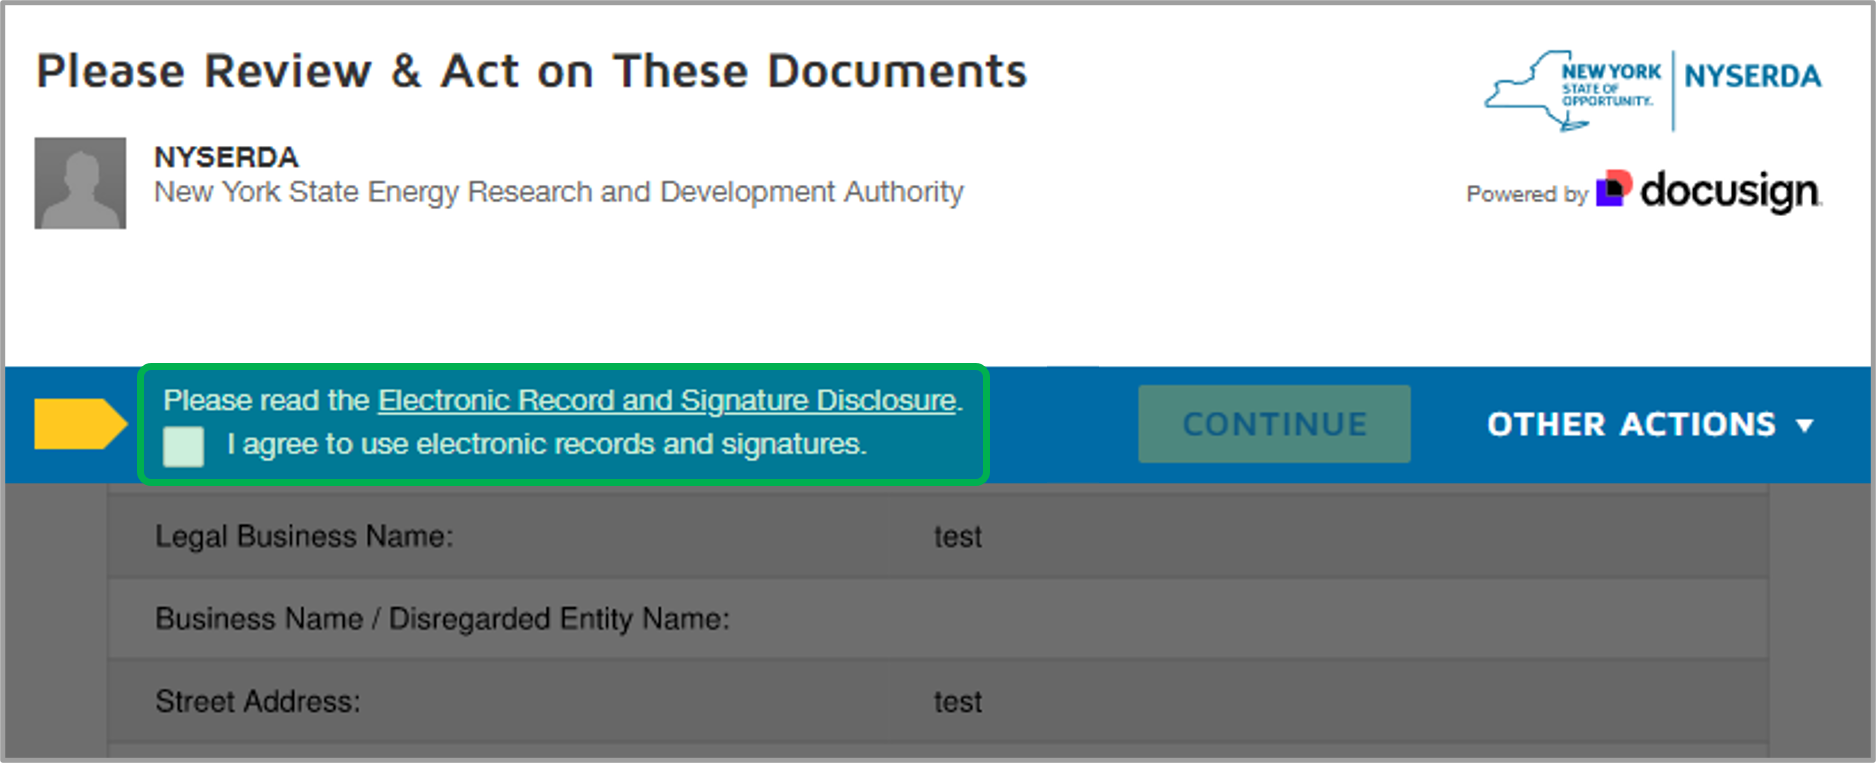
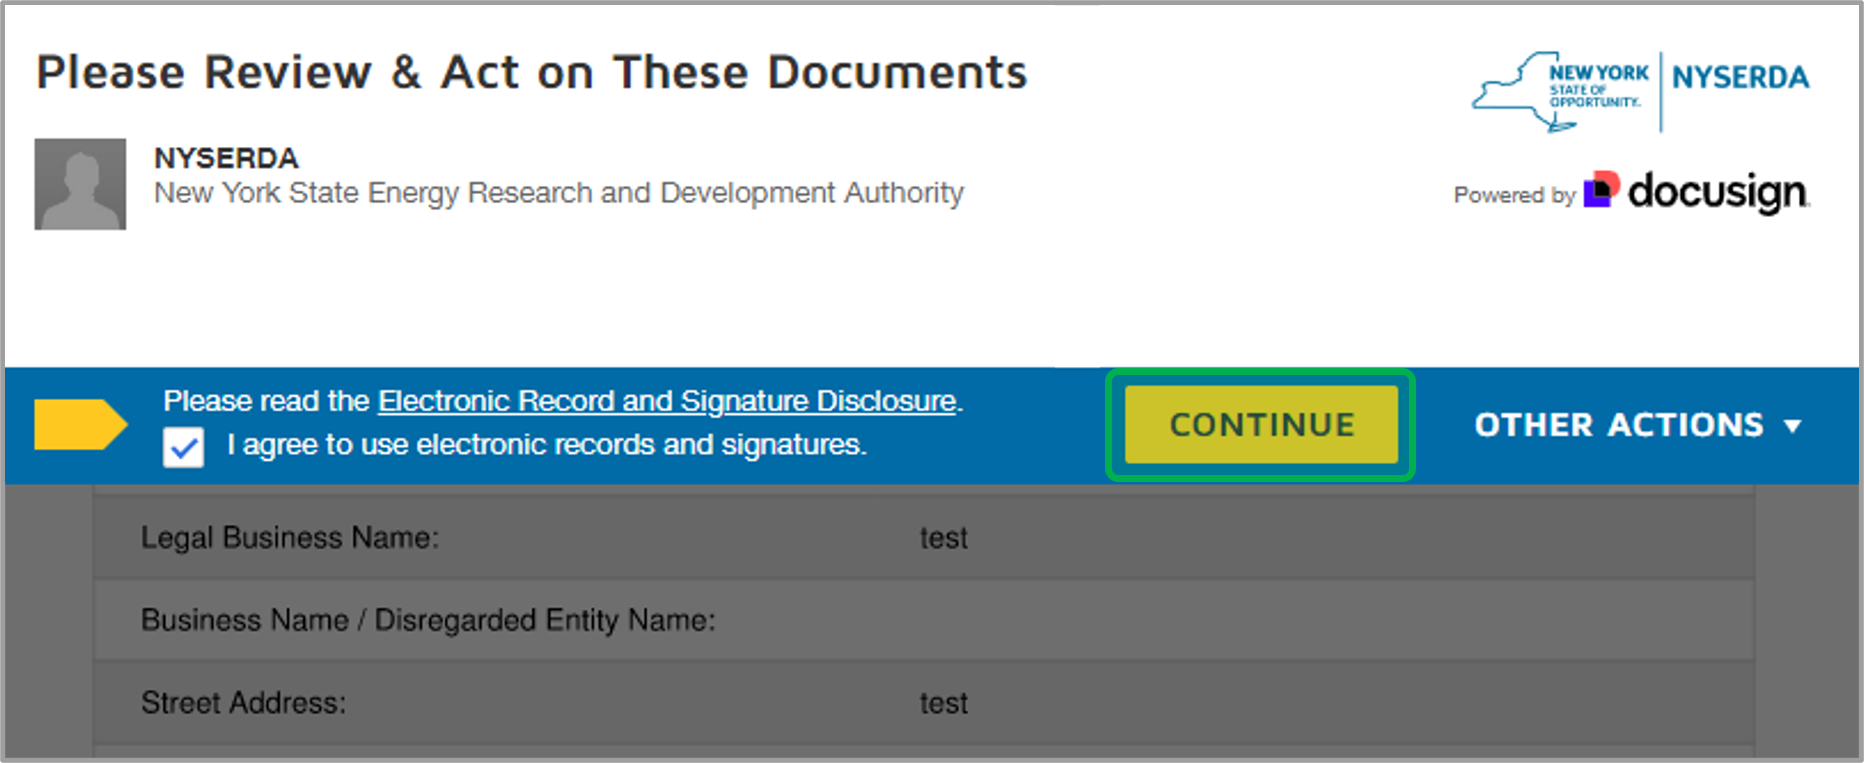
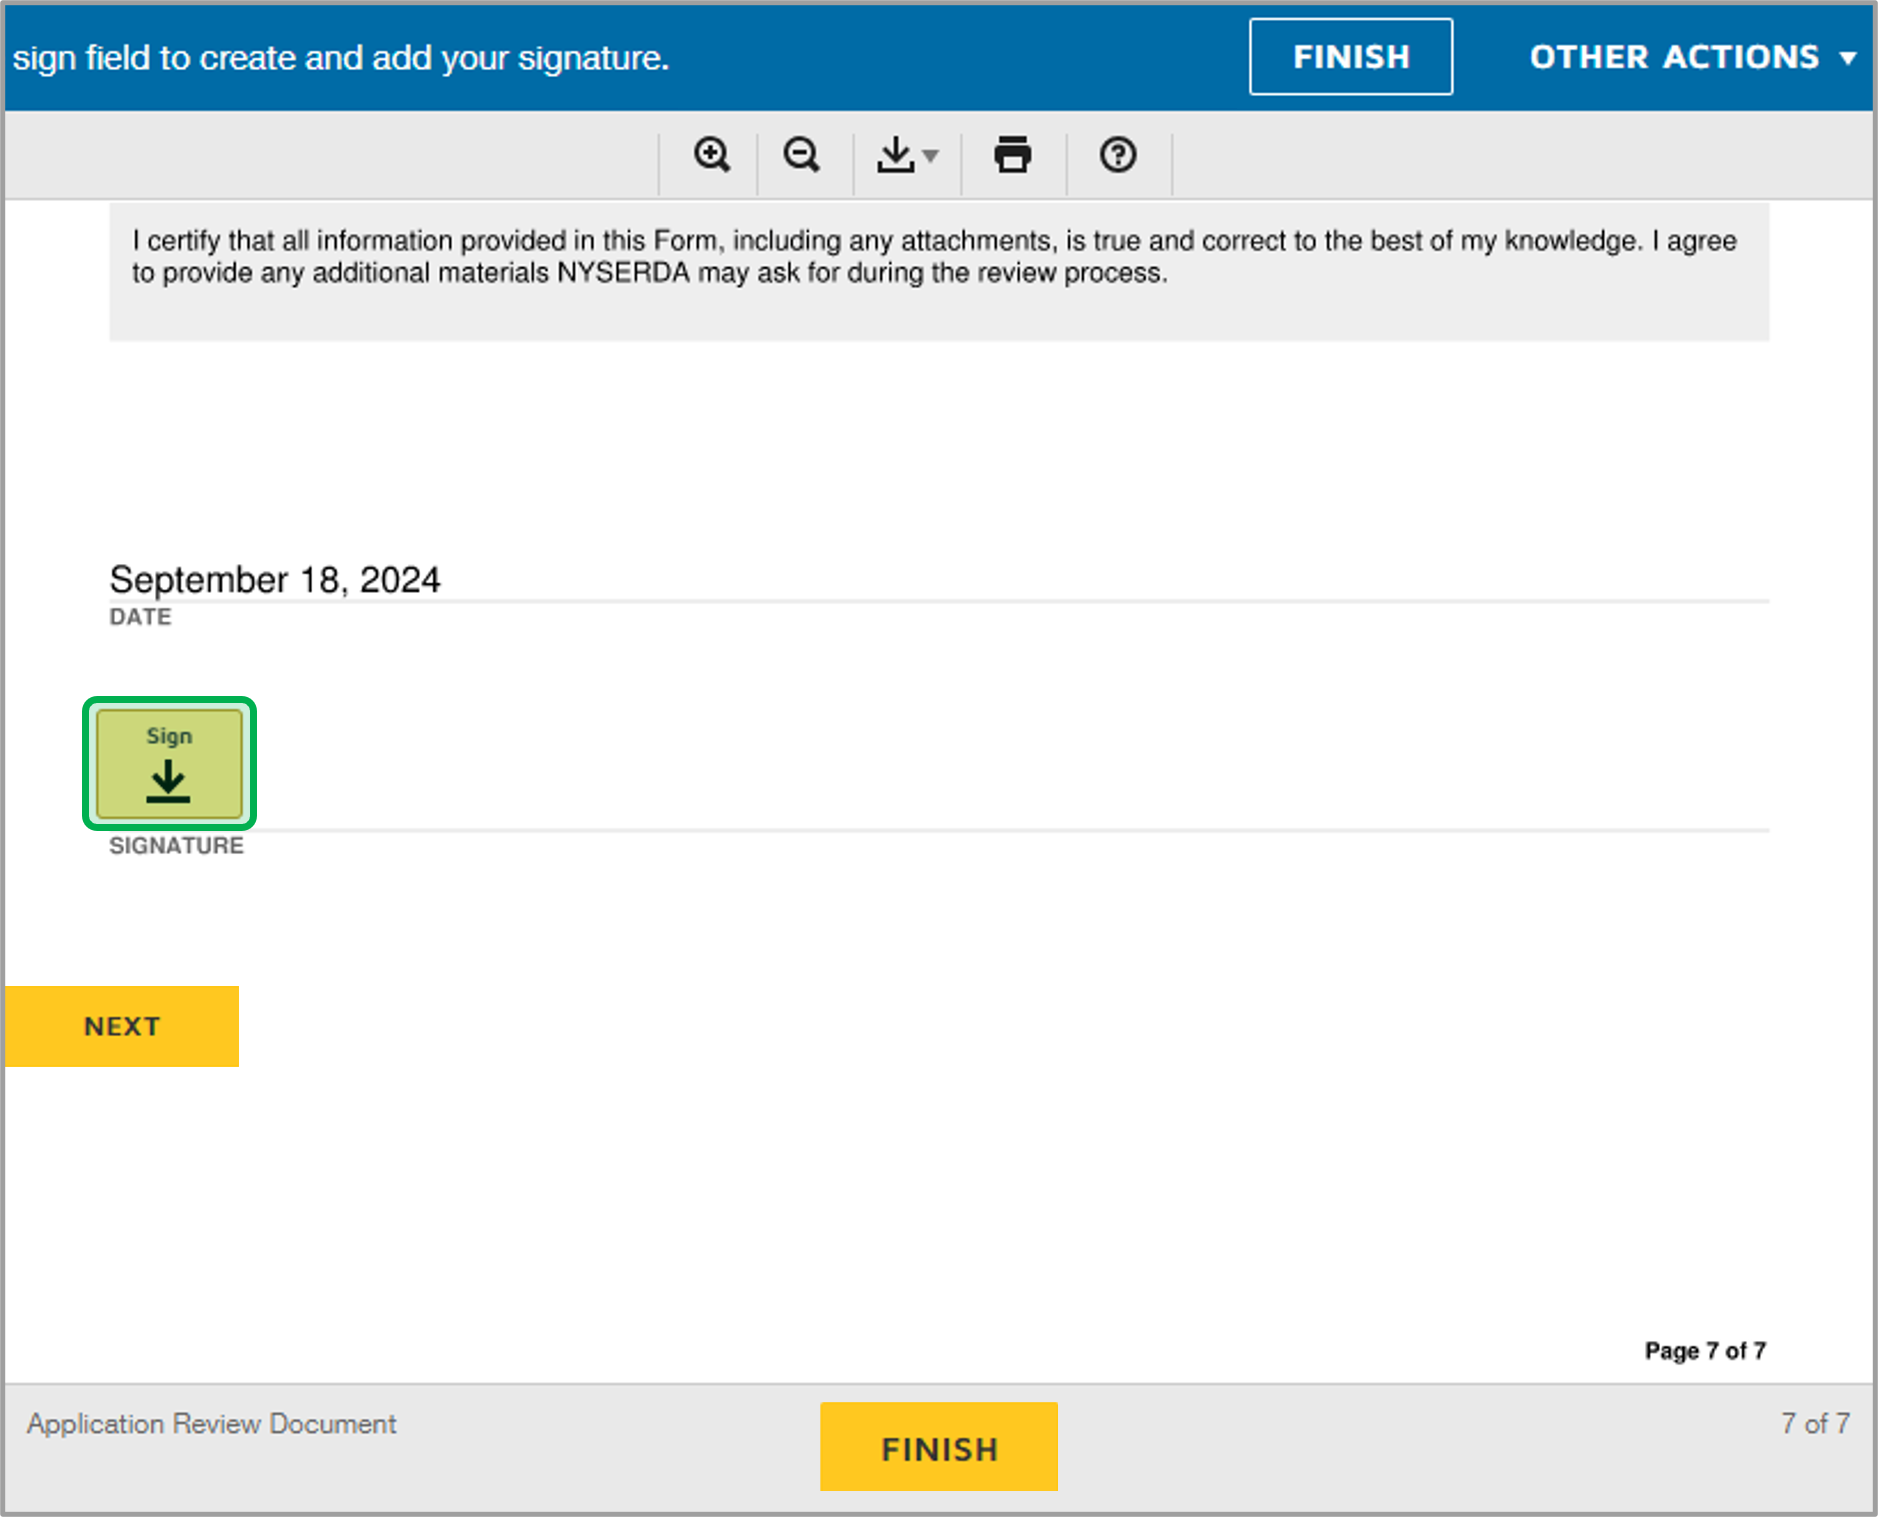
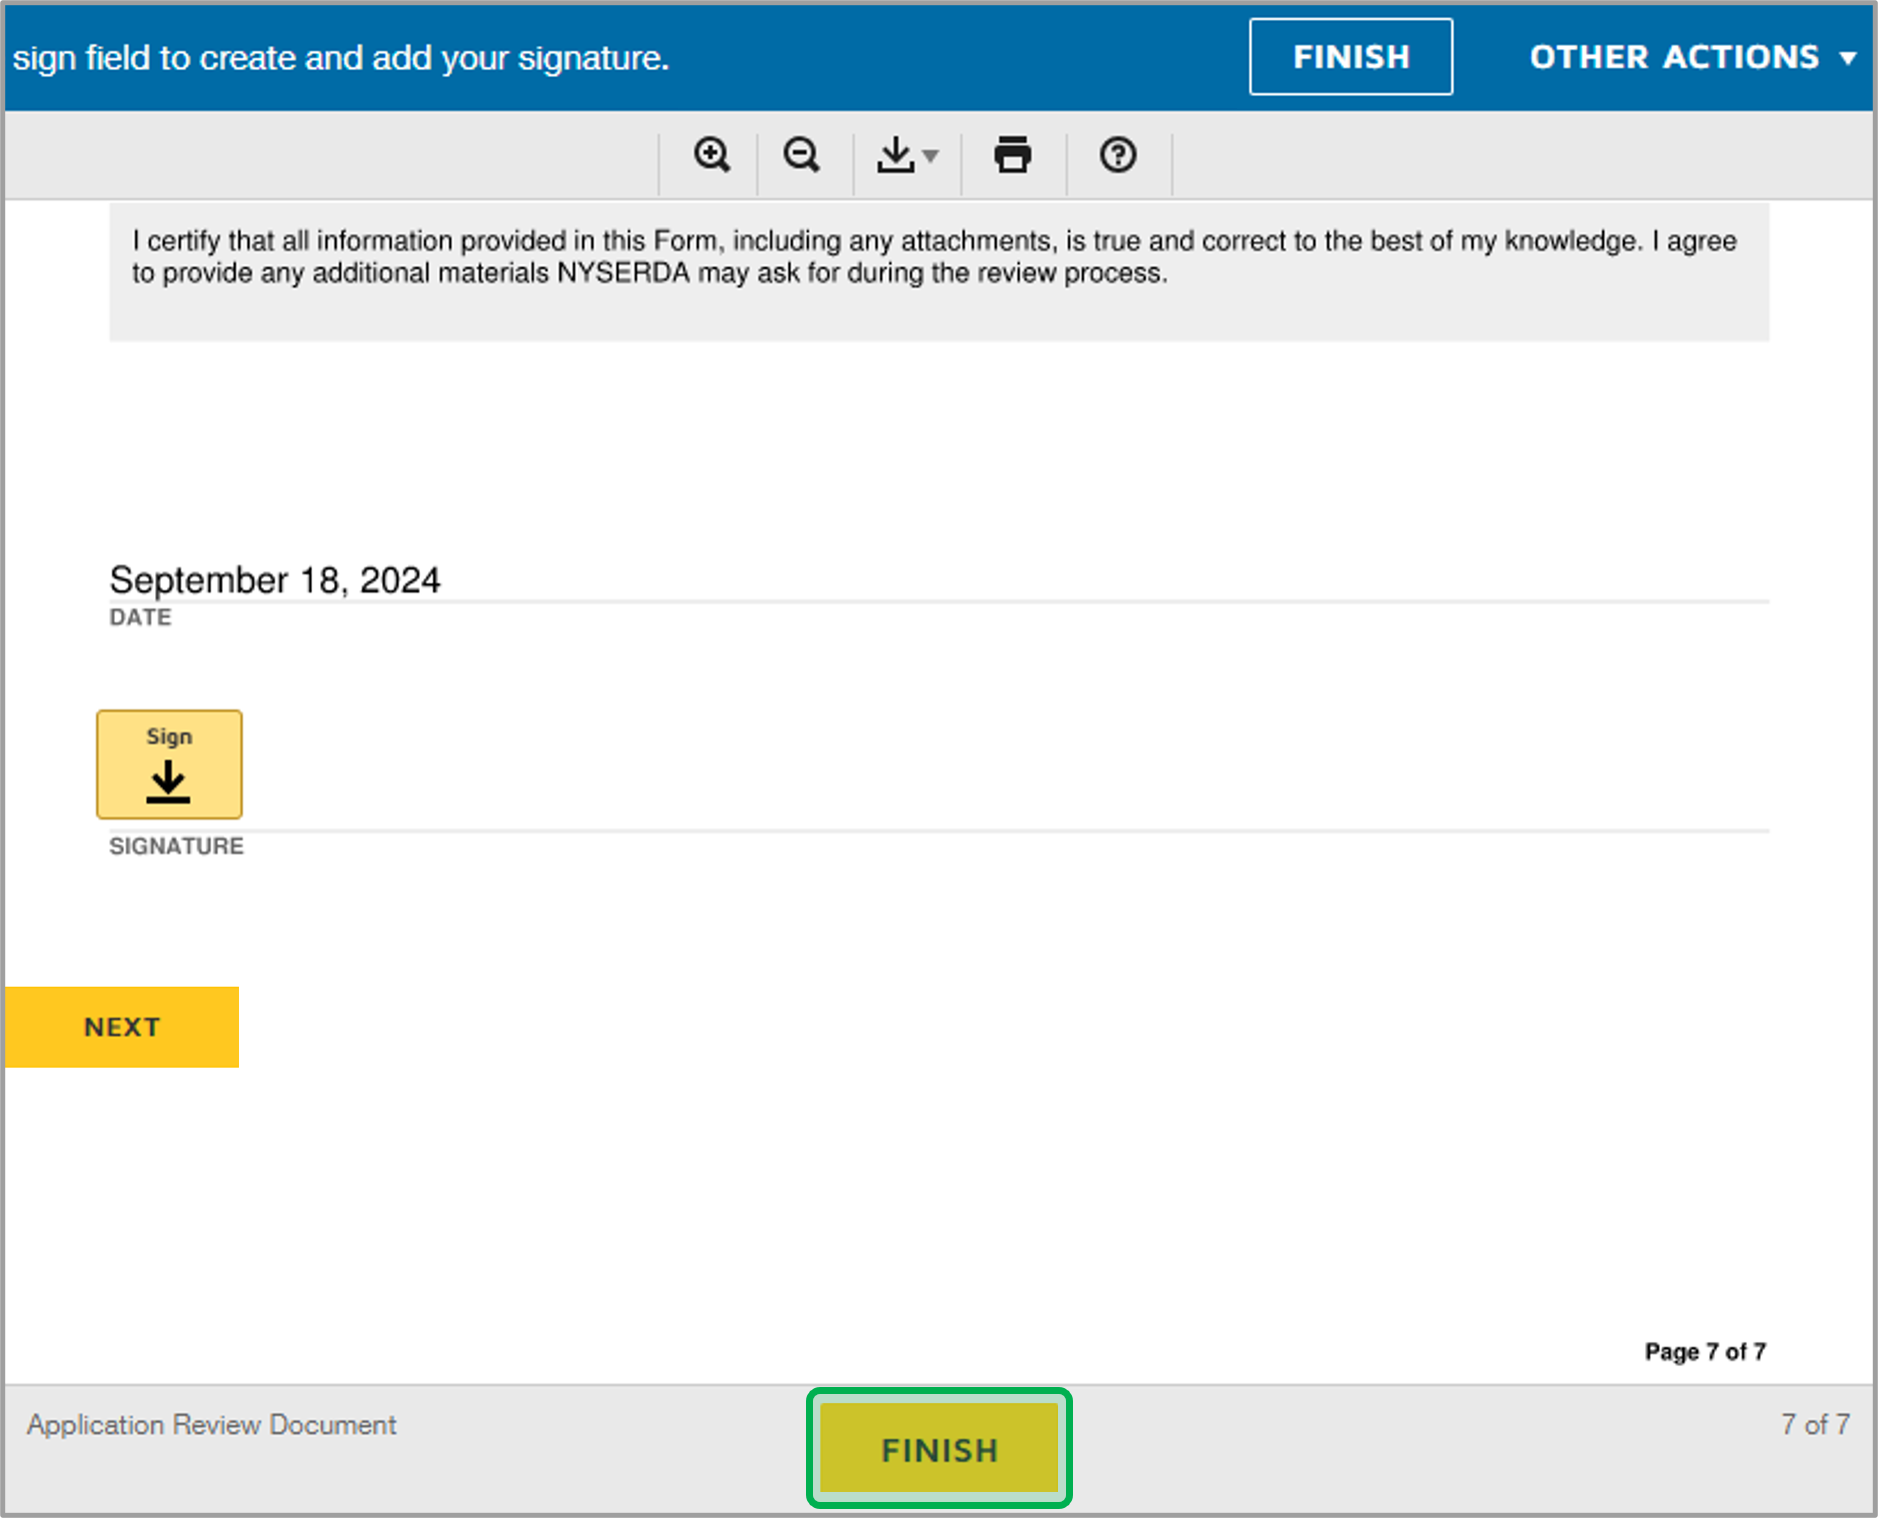
Next, certify your agreement to the attestation in this step. Signatures can be provided either electronically or by printing the attestation and signing by hand. Follow the instructions below to provide your signature electronically using the method you prefer. If you decide to sign electronically, a Docusign modal window will appear. If you prefer to sign by hand, you must upload the sign attestation on the next step.
Click Continue to advance to the next step in the application. Access the Step 6 tab on this page to review the instructions for the next step.
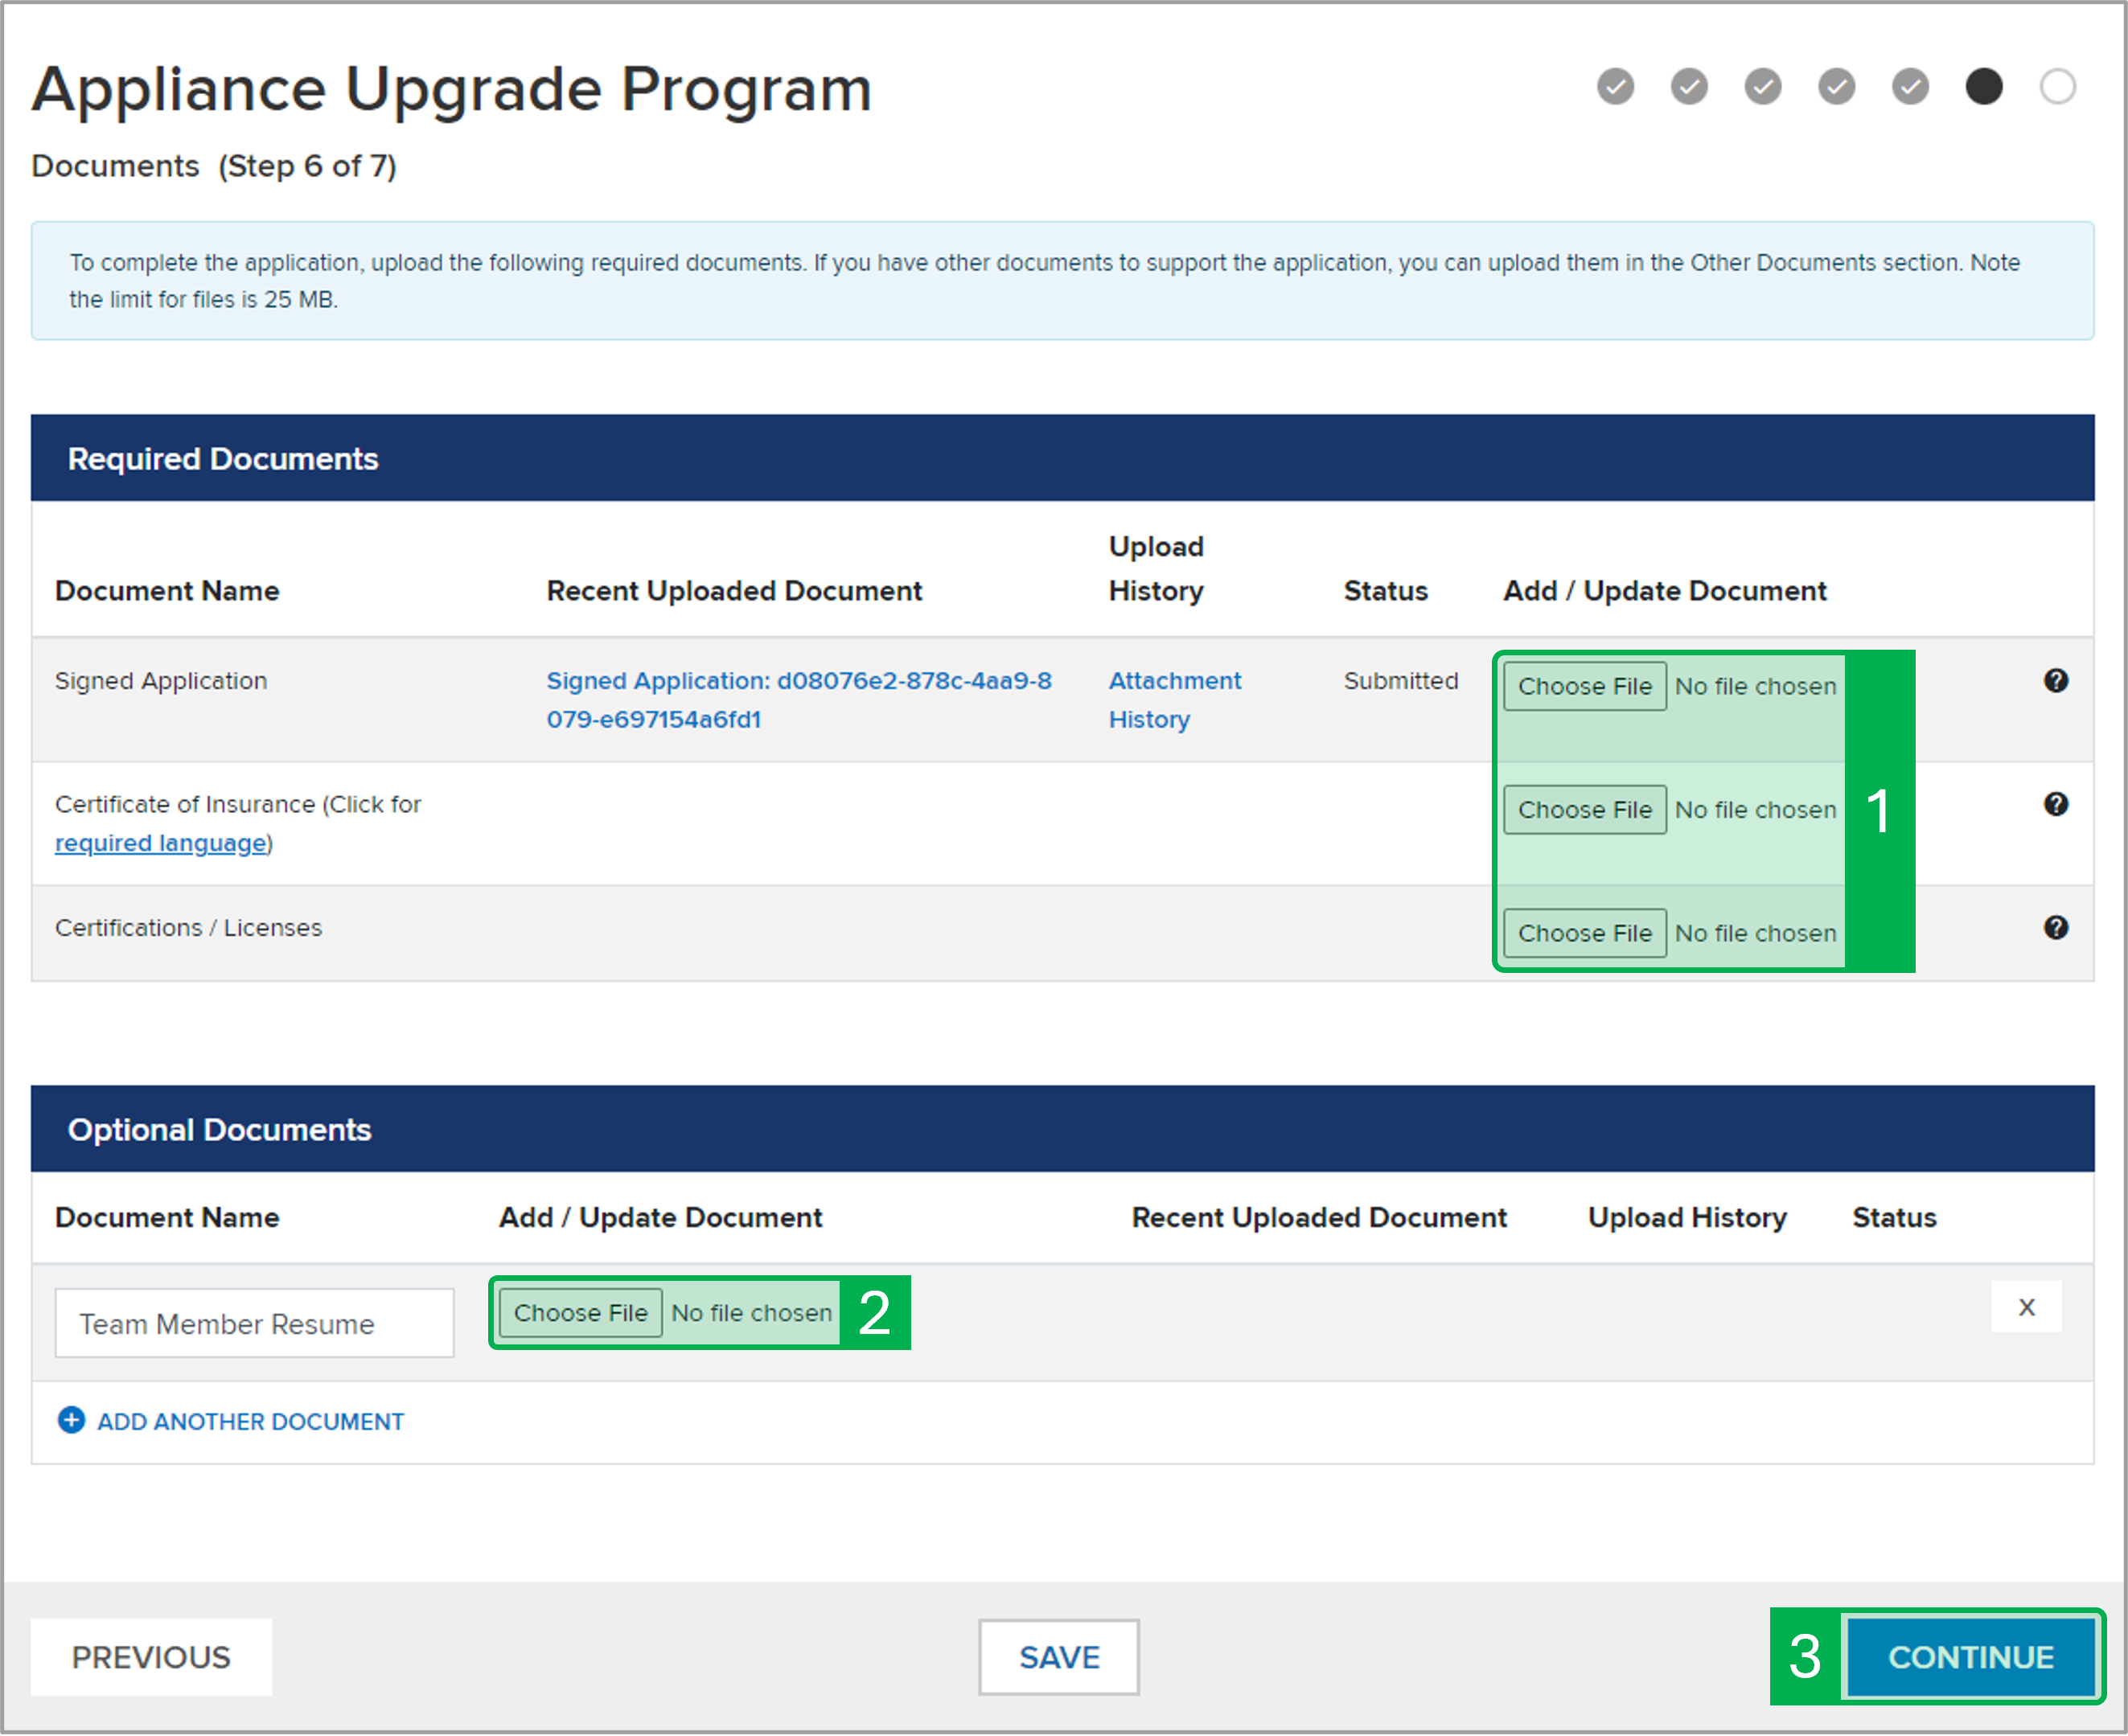
For each required document, click Choose File to locate the associated file on your computer or device to upload to the application. This include the following:
- Signed Application
- Certificate of Insurance
- Certifications / Licenses
The Signed Application will only show as a required document if you chose to hand sign the attestation in Step 5 of the application.
Under Optional Documents click Add Another Document to Upload relevant documents such as:
- Team Member Resume
- Additional Team Member Resume
- Supplemental Customer Reference Documents
- Any Additional Relevant Documents
Click Continue to advance to the next step in the application. Access the Step 7 tab on this page to review the instructions for the next step.
Step 7 completes the application process. Applications must be submitted at this step.
Once you click Submit, the window will update with the Your application has been submitted successfully prompt. Access the Next Steps tab on this page to review the instructions for the next step.
Example email notification of application submission:
Dear [User Name], Thank you for applying for [Legal Business Name] to participate in NYSERDA’s Appliance Upgrade Program. We have received your application and will review it within five business days. We will notify you by email when your application has been approved or if we require additional information. Thank you, |

