Introduction
This page provides instructions for Applicants when completing the Combined Residential Application using the Online Application.
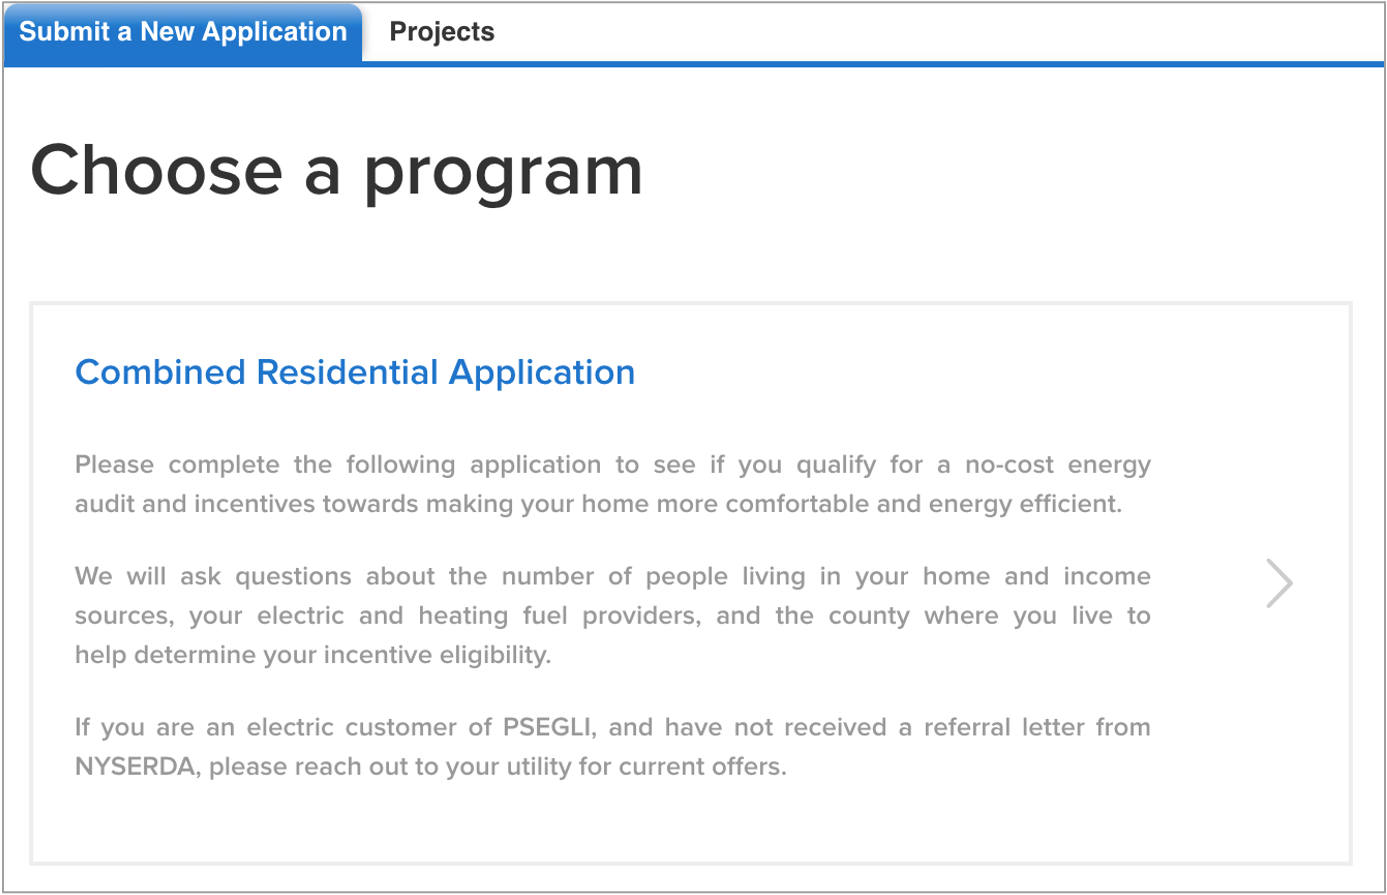
The online application can be accessed by clicking the link below and logging into your Salesforce Portal account, then selecting the Combined Residential Application option.
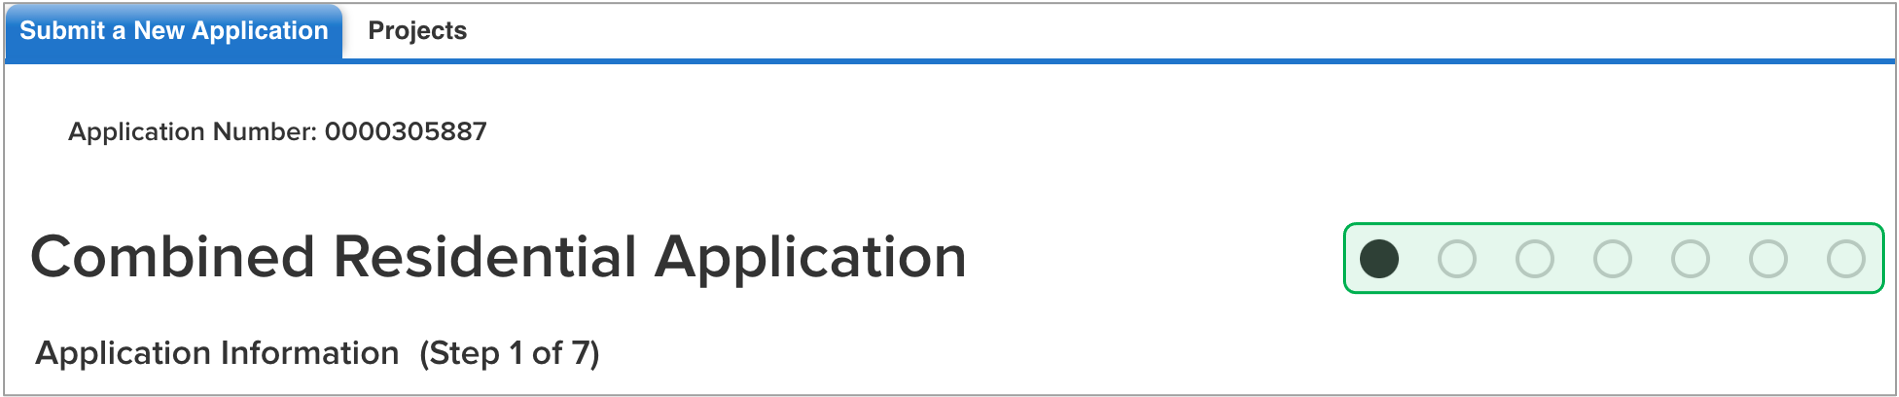
The application is comprised of seven (7) distinct steps, or pages, that you will navigate through as you complete the application. Each page contains fields and information that must be provided as part of the application which are denoted by a red asterisk.
Each step, or page, throughout the application contains instructional text at the top of the page. It is highly recommended that you review these instructional texts as they provide clarity regarding the information requested.
Every step, or page, throughout the application contains a Save button at the bottom of the page. Click Save before exiting the application if you do not have time to complete it in one sitting.

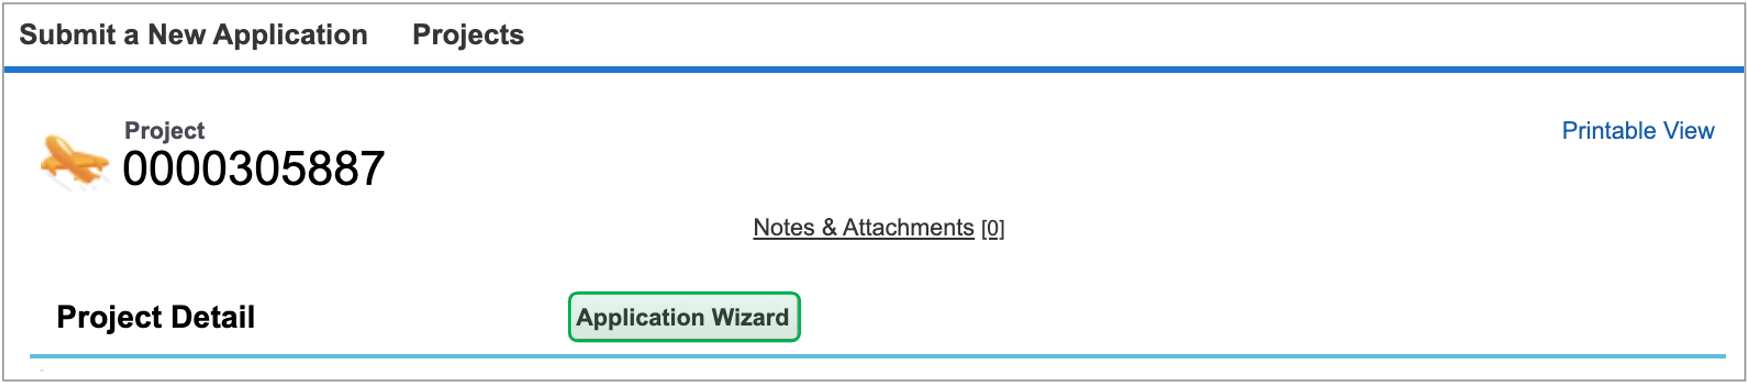
To re-access a Saved and incomplete application:
- Log back into the Salesforce Portal
Select the Projects tab

Locate the correct Application and click on the link in the Project Name column
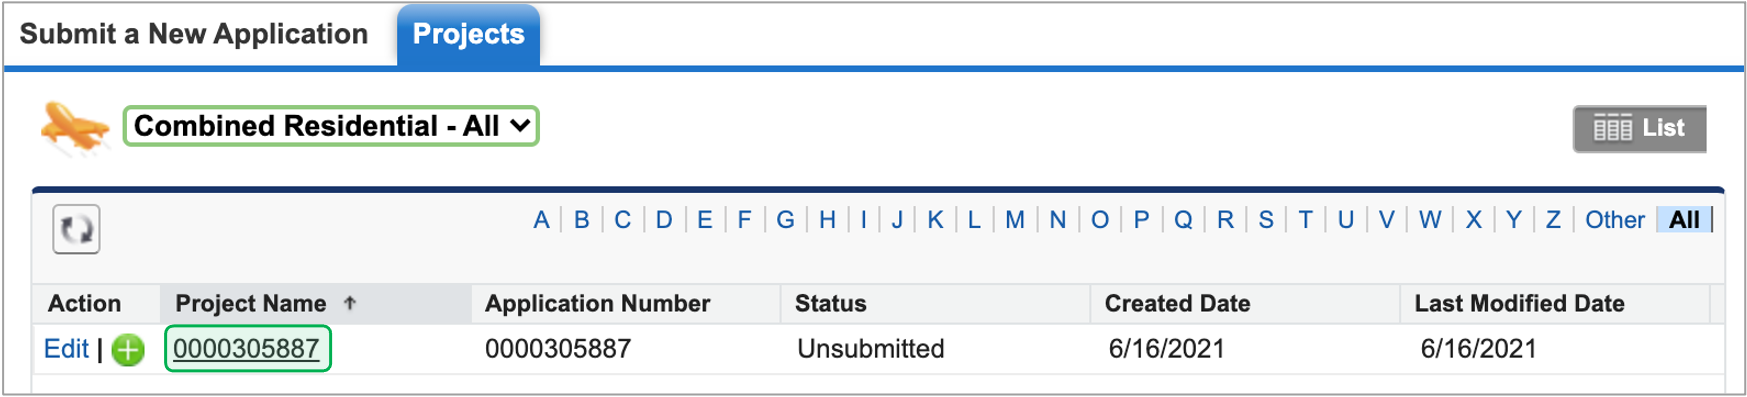
Finally, click on the Application Wizard button to return to your incomplete application.
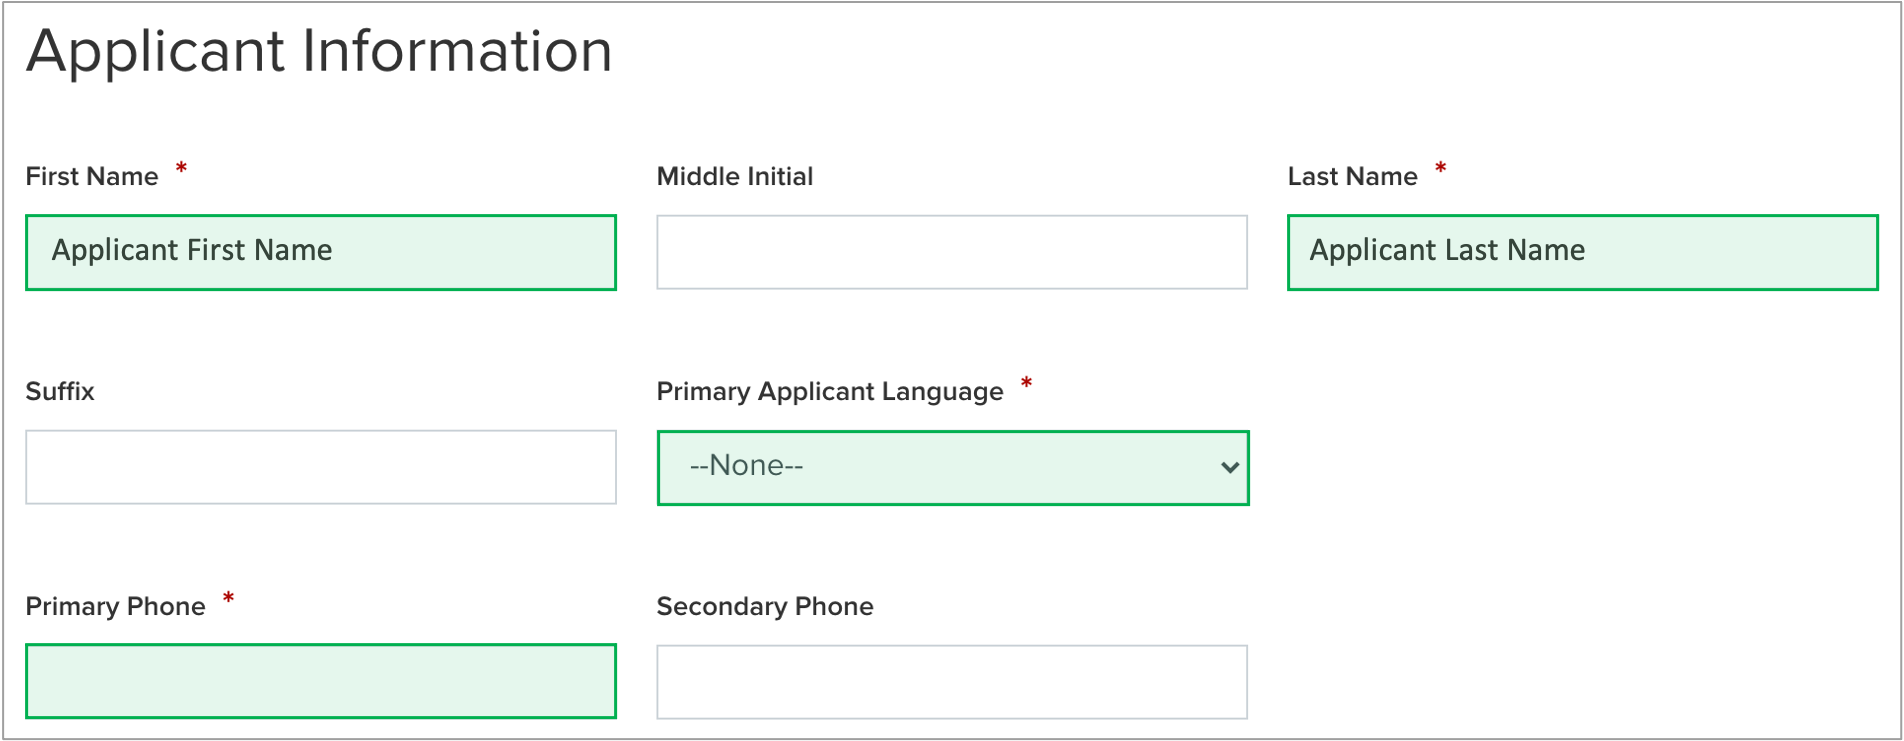
Complete the Application Information section:
Your First Name and Last Name will pre-populate.
Select your Preferred Applicant Language from the drop-down.
Provide your Primary Phone Number.
All other fields are optional and can be completed at need.
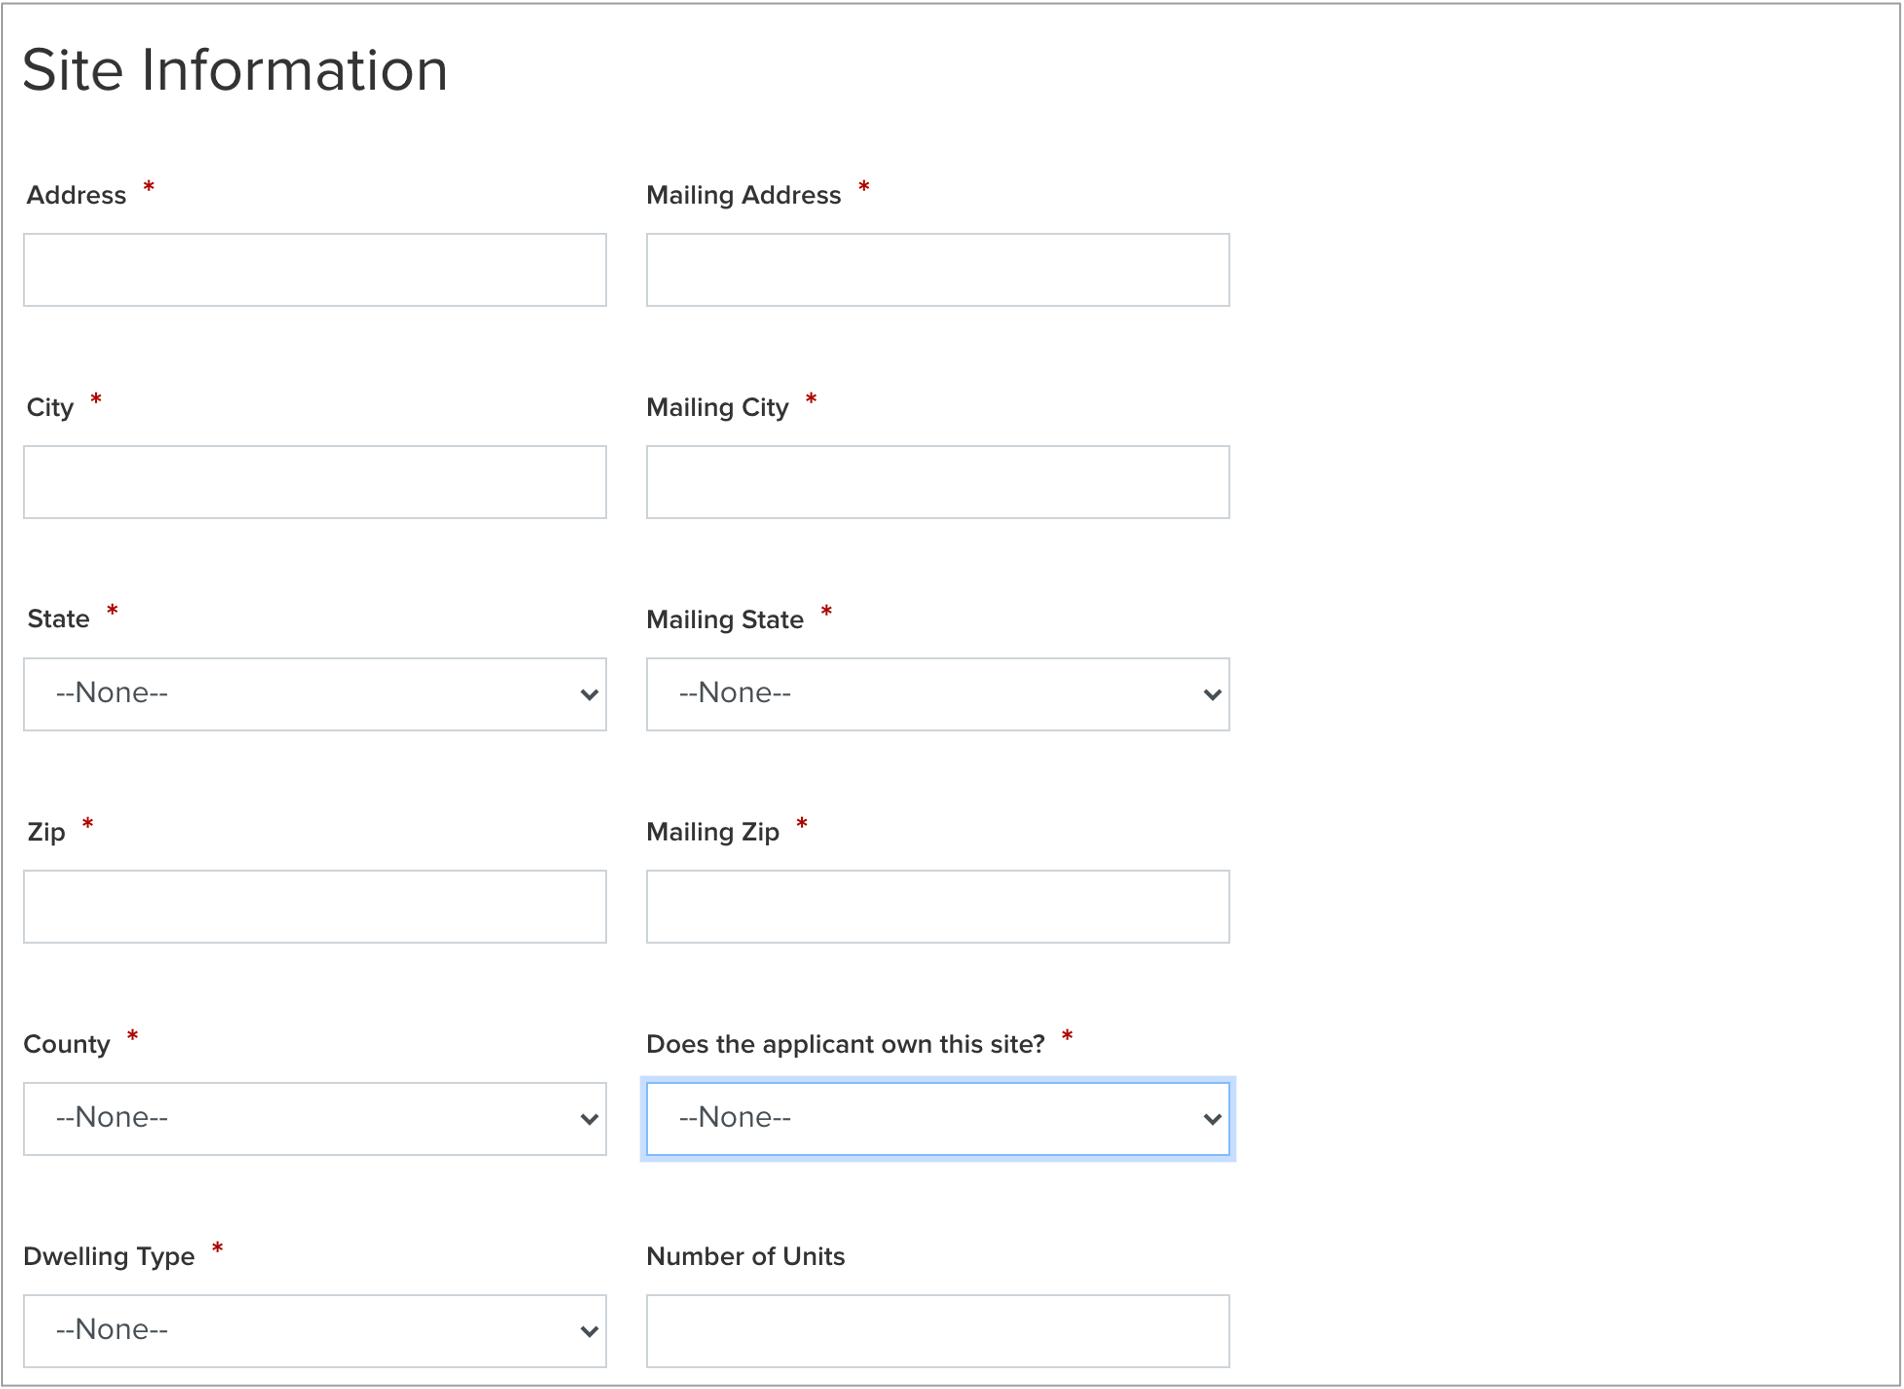
Complete the Utility Site Information section:
Using the Utility Address field, begin typing in your street address. Salesforce will suggest verified addresses below this field as you type. Selecting an option from this list will populate all other Utility and Mailing address fields.
If your Mailing address is different from your Utility address, update the Mailing Address fields as needed.
Select the appropriate response for the Does the applicant own this site drop down. This field identifies if the Applicant is the owner of the dwelling associated with the Utility Address entered into the application.
Select the option from the Dwelling Type drop-down that most closely identifies what type of dwelling exists on the site.
The Number of Units field becomes required if Multi-Family (5+ units) is selected as the Dwelling Type.
Save & Continue:
To advance to the next step, click Continue at the bottom of the page.

It is recommended that you click Save before clicking Continue.
Complete the Utility Information section:
Select the Electric Utility Provider & the Primary Heating Fuel Type for the site.
When selecting either Natural Gas or Other from the Primary Heating Fuel Type drop-down will enable an additional required field for this section that must be completed.
Include Electric Utility and Primary Fuel Account Numbers. These fields are optional. However, providing NYSERDA with this information will enable us to provide the most accurate and effective recommendations for work that will be performed at the site.
If the site has a Secondary Heating Fuel Type, select it from the drop-down. This field is optional.
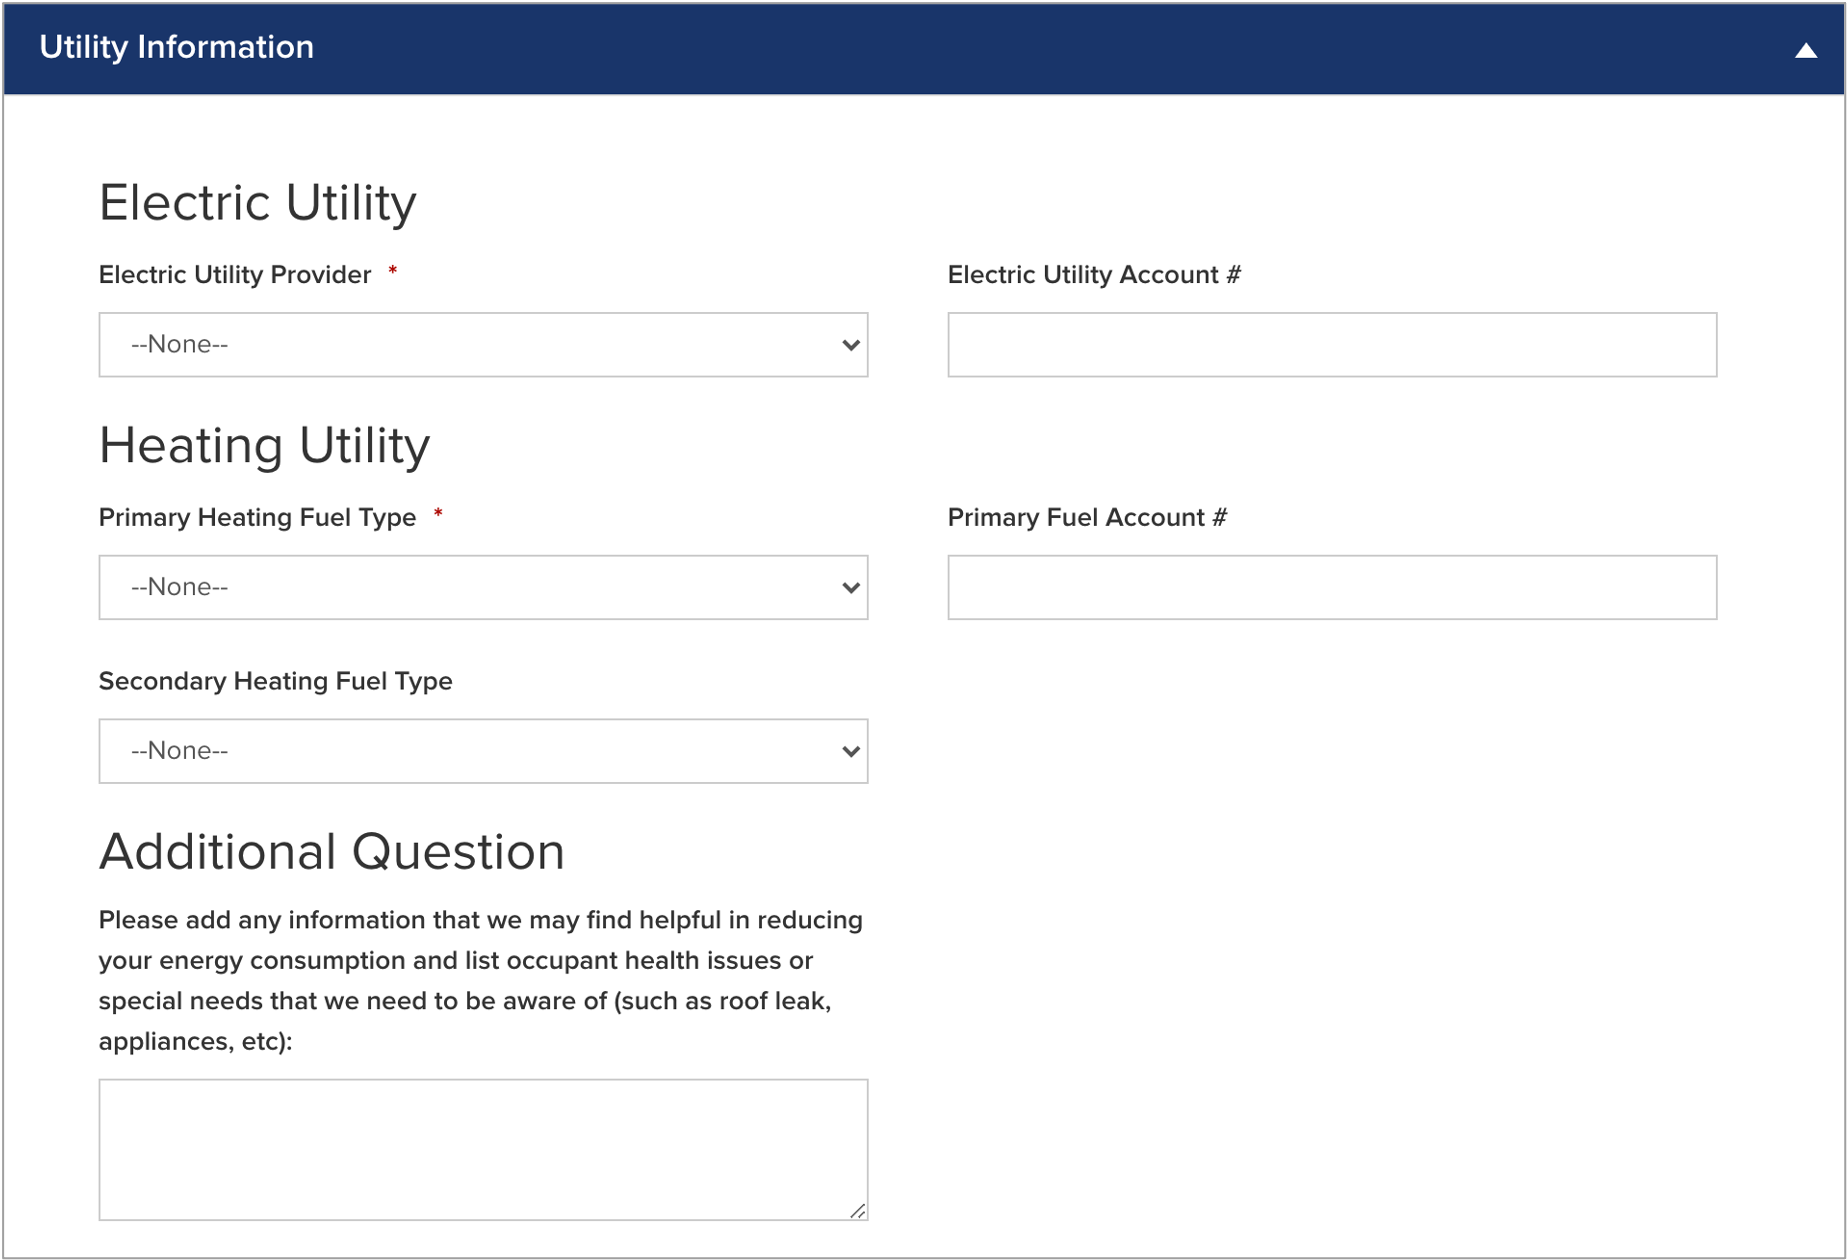
Complete the Additional Question section:
Respond to the question, if applicable or appropriate, with any additional information that will help NYSERDA reduce your energy consumption or reduce risks to occupant health or special needs.

Save & Continue:
To advance to the next step, click Continue at the bottom of the page.
It is recommended that you click Save before clicking Continue.
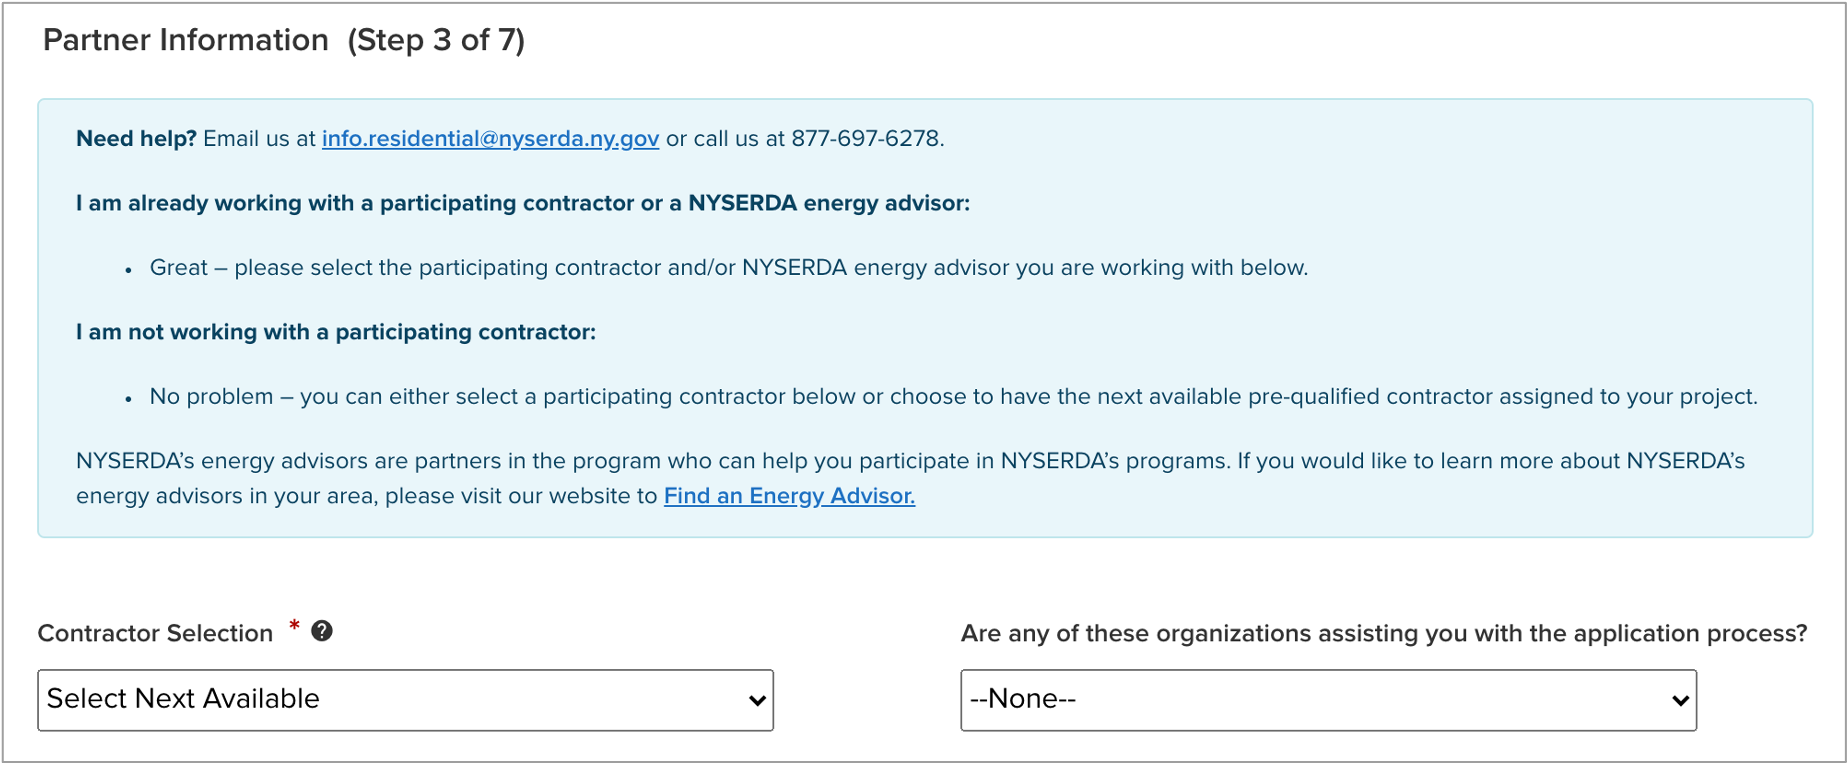
Complete the Partner Information section:
Select a Contractor from the Contractor Selection drop-down.
While not required, you can help NYSERDA understand if an independent organization has been assisting you with the application process. If that organization appears on the other drop-down, select it from the list.
Save & Continue:
To advance to the next step, click Continue at the bottom of the page.
It is recommended that you click Save before clicking Continue.
Review the Geo Eligibility section:
Applicants need only satisfy one Eligibility Requirement.
Geo Eligibility is determined automatically by the system based on the Applicant's address.

Complete the Referral Section:
If you received a letter from NYSERDA with a Referral Code, select Yes in response to the question, enter the Referral Code in the provided field, then skip to Complete the Household Demographics Section below. No additional eligibility questions are required.
However, if you did not receive a letter with a Referral Code, select No. An additional section will appear on the application titled Categorical Eligibility. Review instructions for that section below.

Complete the Categorical Eligibility Section:
This section of the application will only appear if the applicant answers No to the question in the Referral section.
If you or any household member received an award letter for HEAR, SNAP, SSI, TANF, or Public Assistance in the past 12 months, select Yes. Categorical Eligibility is based on the date within the award letter. Award letters are good for one year from the date provided within.
- Multiple options can be selected.
An award letter, for each option selected, must be submitted as part of this application.
- For applicants completing the application online, the award letter can be uploaded during Step 6: Project Documents.
- For Paper Applications, a copy of the award letter can be submitted when mailing in the application.
Once completed, advance to the Household Demographics section.
If you, or any household members did not receive any assistance as listed above, select No. An additional section will appear on the application titled Income Eligibility. Review instructions for that section below.

Complete the Income Eligibility Section:
- This section of the application will only appear if the Applicant:
- Chooses not to accept Geo Eligibility determination that indicates the Applicant is Geo Eligible (if applicable), and/or
- Answered No to the Referral question in this section, or did not receive a Referral Code from their Utility, NYSERDA, or the Office of Temporary and Disability Assistance (OTDA), and/or
Is not eligible for Categorial Eligibility (i.e., did not receive an award letter for HEAR, SNAP, SSI, TANF, or Public Assistance in the past 12 months).
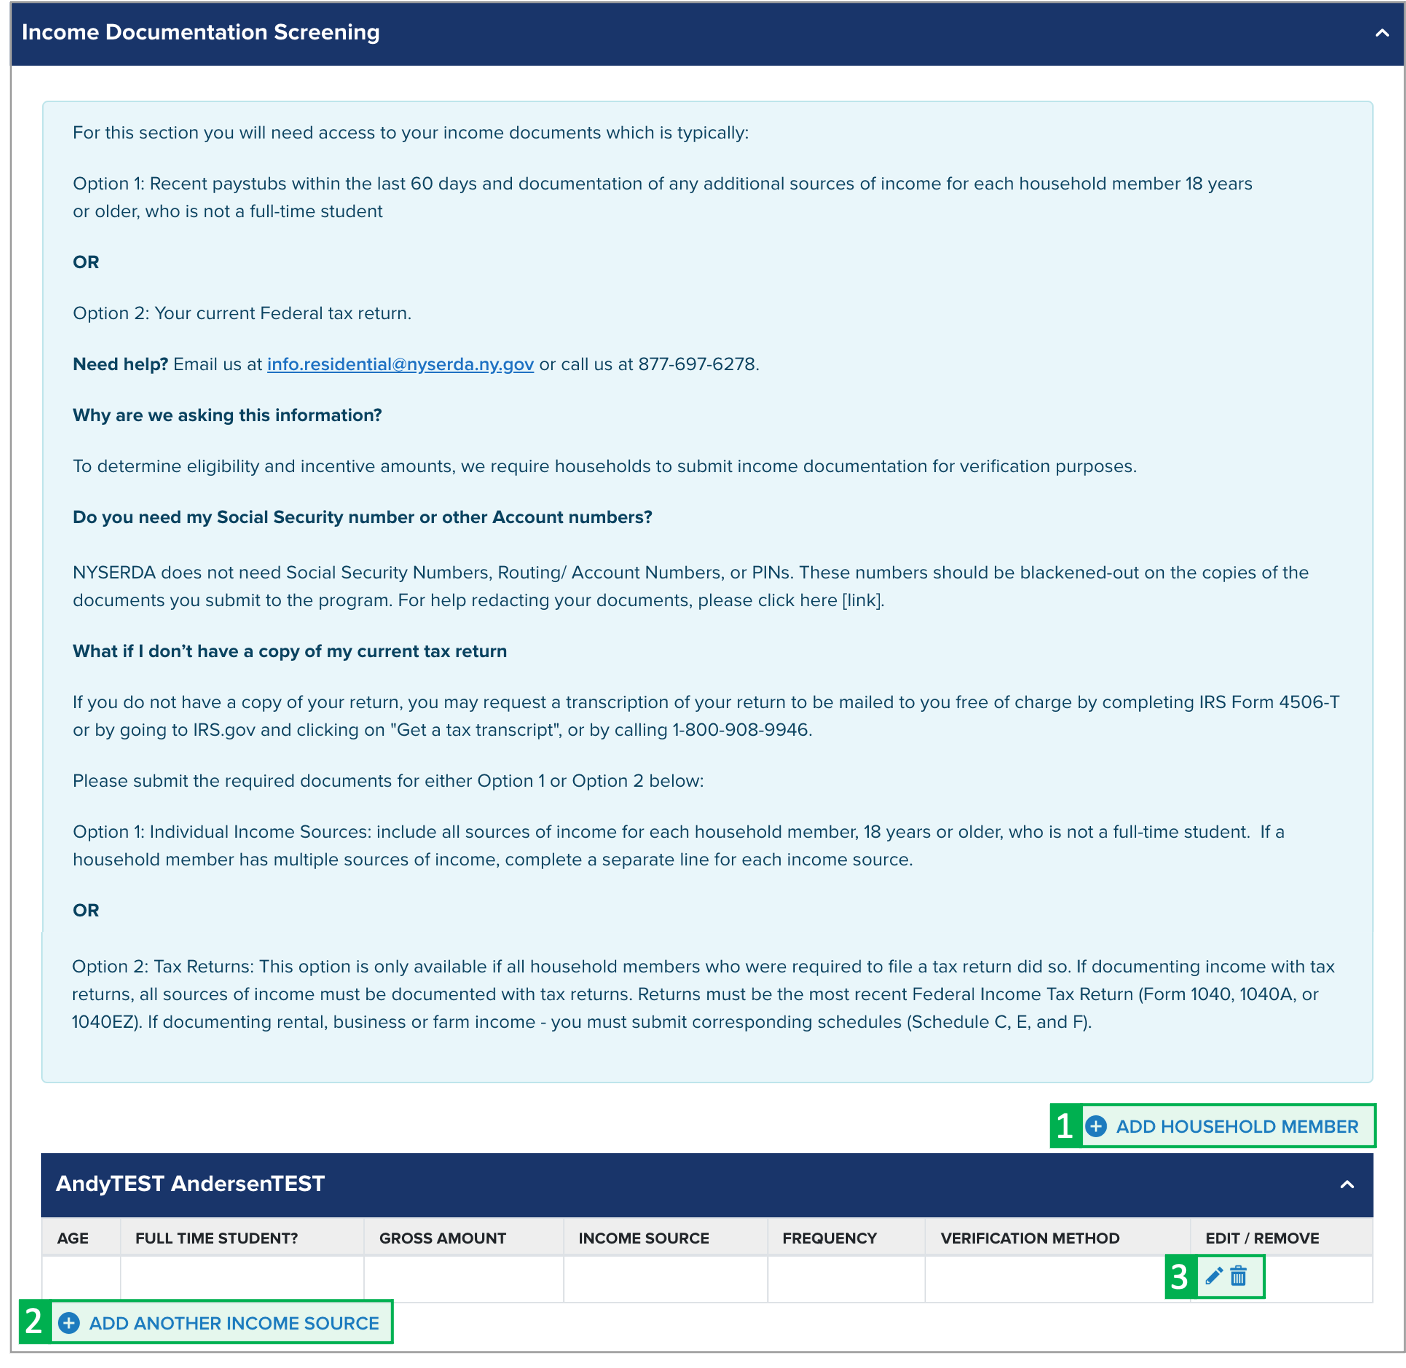
Applicants must document income for all members of the household if all previous eligibility requirements could not be met.
- This section of the application will initially contain a space for the Applicant to add income sources
To add spaces for other members of the household for income documentation purposes, click the Add Household Member option. This will open a modal window for you to document the household member's:
- First Name
- Last Name
- Age
- If they are a Full-time Student
- Gross Income Amount
- Income Source
- Income Source Frequency
- Verification Method
To add an income source for a household member, click the Add Another Income Source option below the household member to document the household member's:
- Age
- If they are a Full-time Student
- Gross Income Amount
- Income Source
- Income Source Frequency
- Verification Method
To edit or delete an income source added to a household member, click the Pencil Icon (edit) or Trashcan Icon (delete) to the far right of the listed income source.
Continue adding household members and income sources as needed.
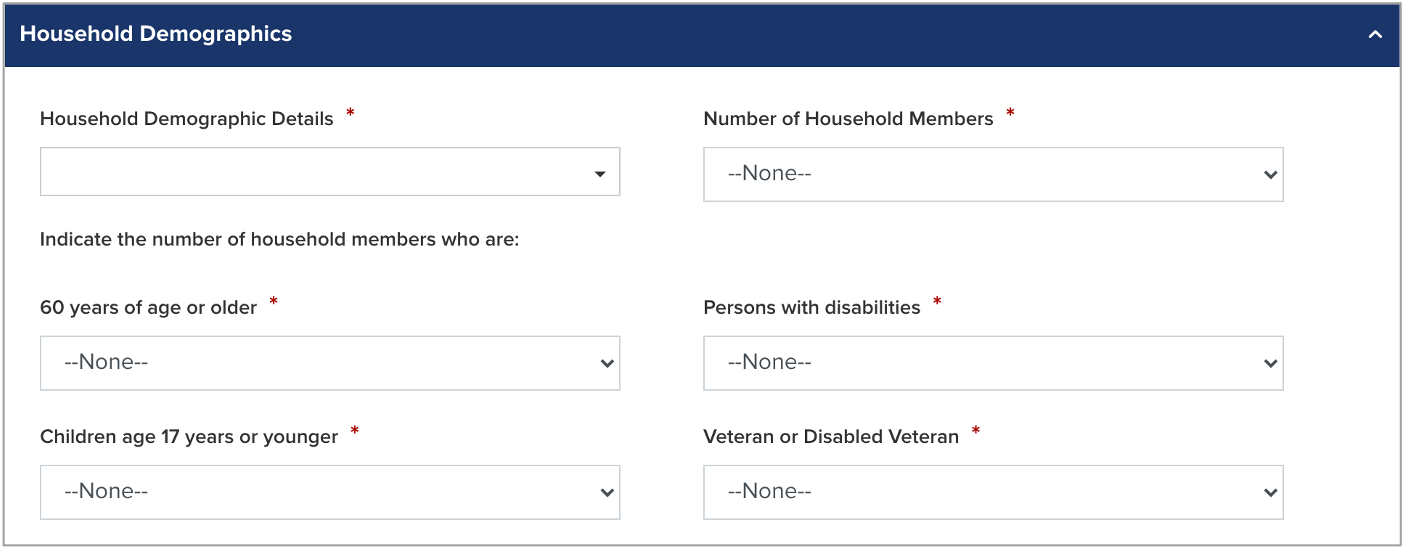
Complete the Household Demographics Section:
Complete the Household Demographics Details field, selecting all options that apply for all members of the household.
Document how many members of the household are:
- 60 years of age or older
- Children (age 17 years or younger)
- Persons with Disabilities
- Veterans or Disabled Veterans
Save & Continue:
To advance to the next step, click Continue at the bottom of the page.
It is recommended that you click Save before clicking Continue.
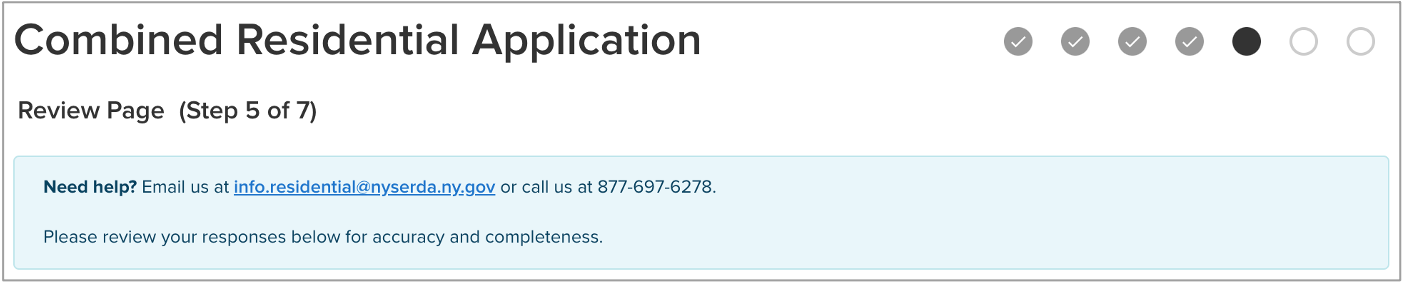
Review the Application:
Review each section of the Review Page for your application. If information on the application is incorrect, use the Previous button at the bottom of the page to return to previous steps (pages) and update the information as needed.
Section D: Energy Information:
For Section D: Energy Information, read through the disclaimer and check the I agree to the terms and conditions stated above box.

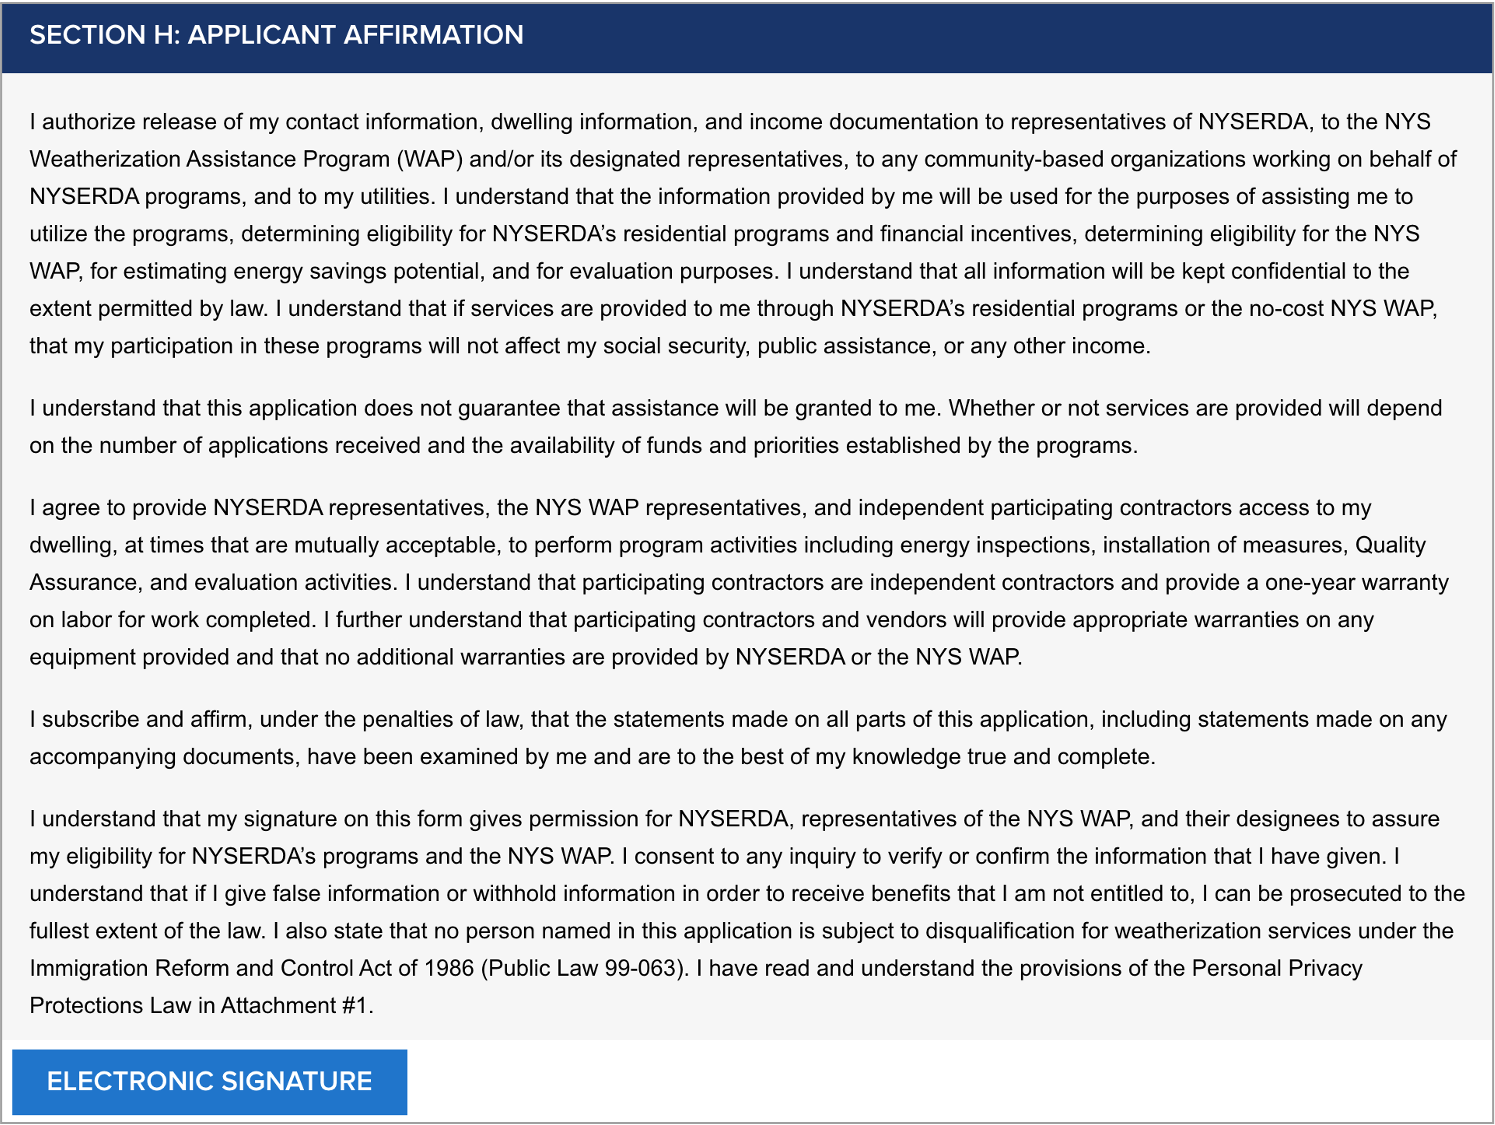
Section H: Applicant Information:
After reviewing the complete application, scroll to Section H: Application Information,
Read through the disclaimer, then click the Electronic Signature button.
You will be directed to electronically sign the application through DocuSign. When the page loads, check the agreement box and click Continue at the top of the page.
screenshot
Then, scroll to the bottom of the application and click the Sign option next to the Applicant Signature field.
In the modal window that appears, click Adopt and Sign to electronically sign the application. Your Name, Initials will pre-populate and a, and signature example will already be completed for you.
screenshot
Your signature example will now appear on the signature line for the application. Click Finish to return to the application.
Print & Continue:
If you'd like a copy of the application, click Print.
- Applicants who prefer to
To advance to the next step, click Continue at the bottom of the page.

Review the Required Documents section:
The Required Documents section will outline any documents that are required as part of you application.
If your application requires multiple documents, each will be listed as a separate line item. Click the Choose File button to the right of each requested required document to locate and upload the file from your computer.
If you Electronically Signed the application in a previous step, there is no need to upload a signed application. However, if you chose to sign the application manually, after printing it out, you will be required to upload a signed copy of the application to this section.

Complete the Other Documents section:
If there are any additional supporting documents you'd like to include as part of the application, click the Add Another Document option to locate and upload a document or file from your computer.
Continue adding additional documents or files as needed.

Save & Continue:
To advance to the next step, click Continue at the bottom of the page.
It is recommended that you click Save before clicking Continue.
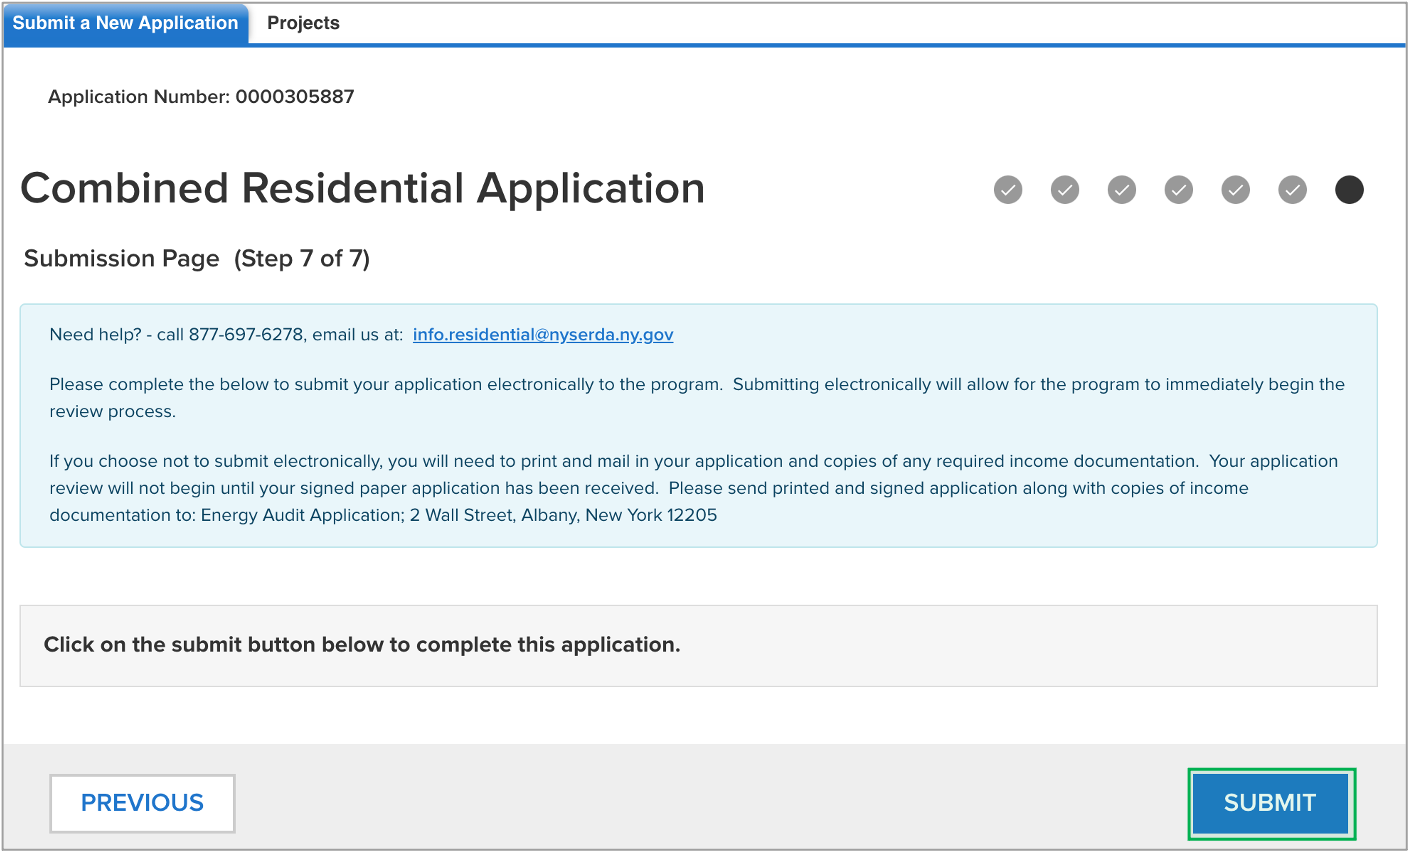
Submit the Application:
On the last page of the application, click the Submit button.
When your application has been successfully submitted, the page will reload and display Application Status: Your application has been submitted successfully.
screenshot