
Keeper Security: "Create New" Button
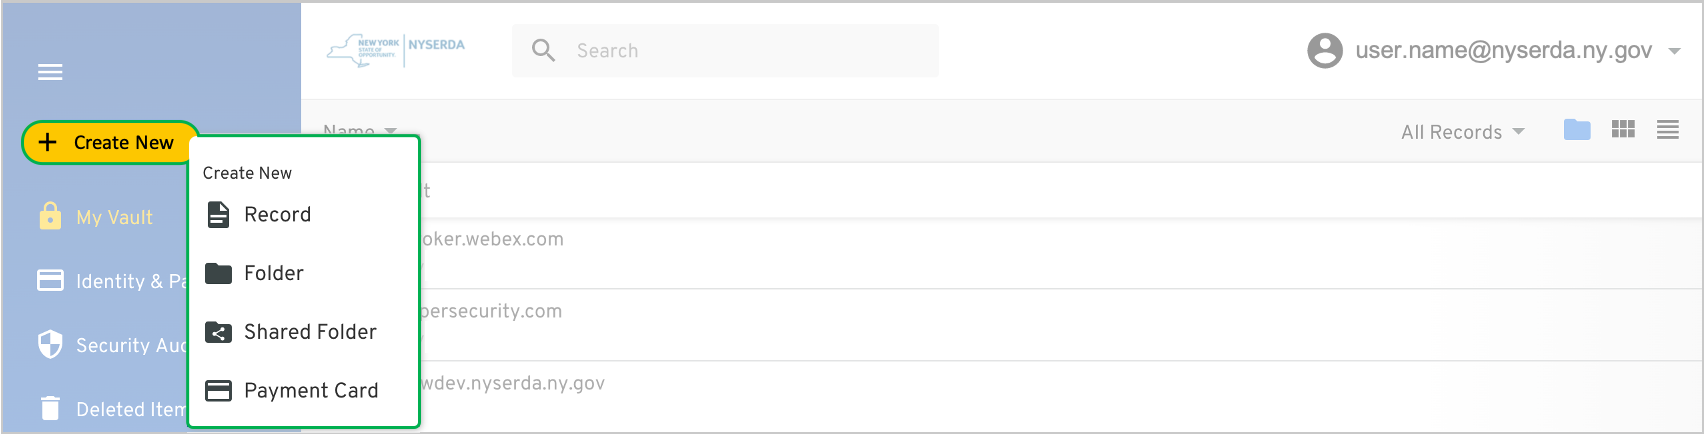
Create New Record
To create a new Record, click the Create New button, then click the Record option in the drop down. This will open a new window.
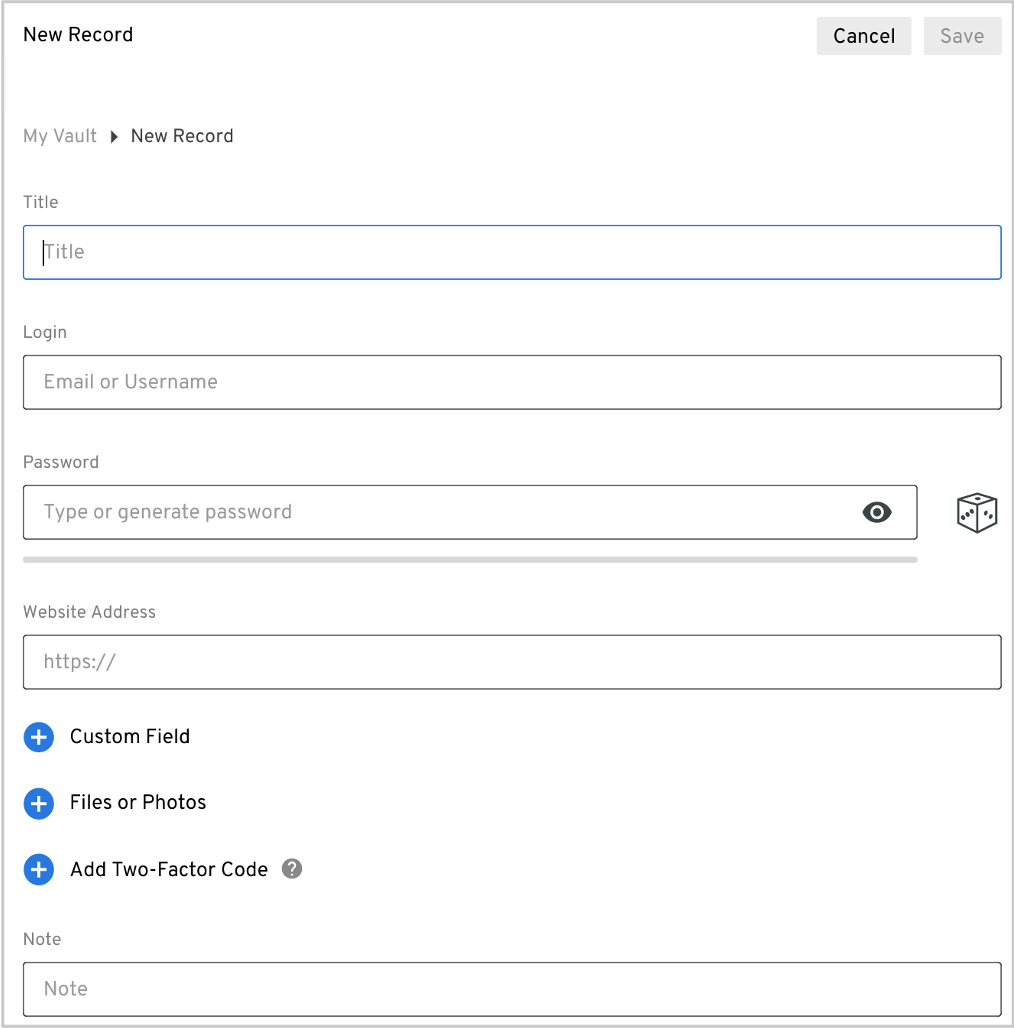
Then complete each of the following fields using the guidance below.
| Field Title | Description |
|---|---|
| Title | Enter in a title for the record as you want it to appear in your Vault. Adding a unique title will make searching for records easier within Keeper Security. |
| Login | Add the Username associated with the Website Address. |
| Password | Add the password associated with the Website Address. If you do not currently have a password setup for the Website Address, you can have Keeper Security generate one for you by clicking on the Dice icon to the right of the field. When the Dice icon is pressed, additional generate password options appear below this field to select:
|
| Website Address | Copy and Paste the Website Address Login Page URL into this field. Be sure you input the Login Page URL otherwise Keeper Security will not be able to auto input your Username and Password and submit your credentials. |
| Customer Field | This is an optional field. It can be used to input additional Login Field information on the Website Login Page Address. This field is only useful if the Login Page of the Website requires more than a Username and Password to access. |
| Files or Photos | This is an optional field. This option allows you to upload a file or photo to the Record. |
| Note | This is an optional field. Enter any relevant notes, if applicable, that relate to the Website Address. |

When you have completed the form, click the Save button in the upper right hand corner. Your new Record can now be accessed from your Vault.
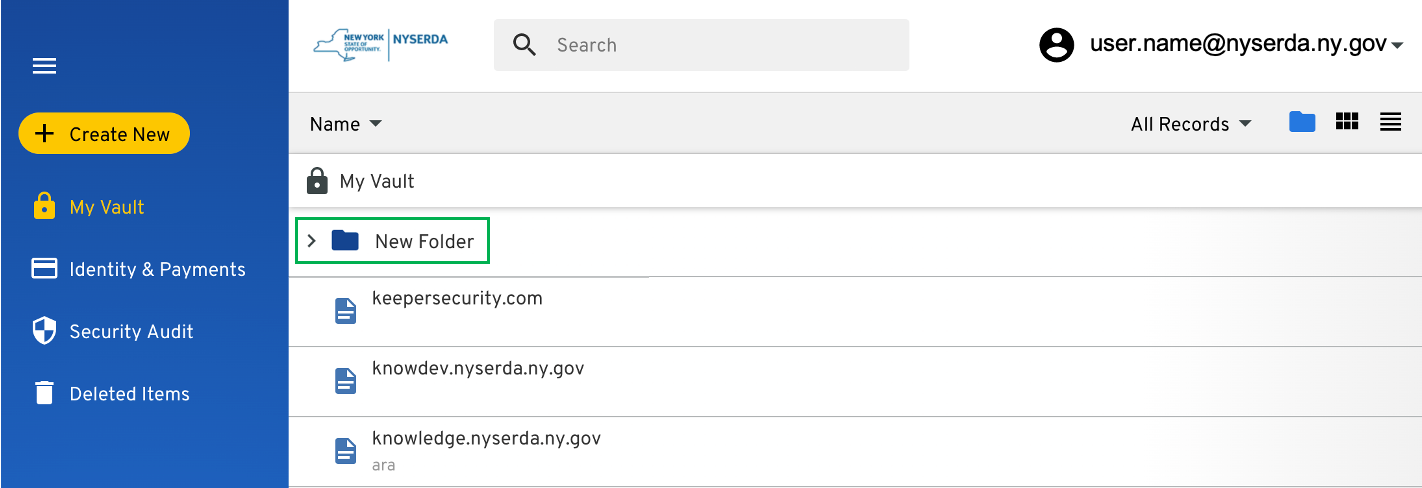
Create New Folder
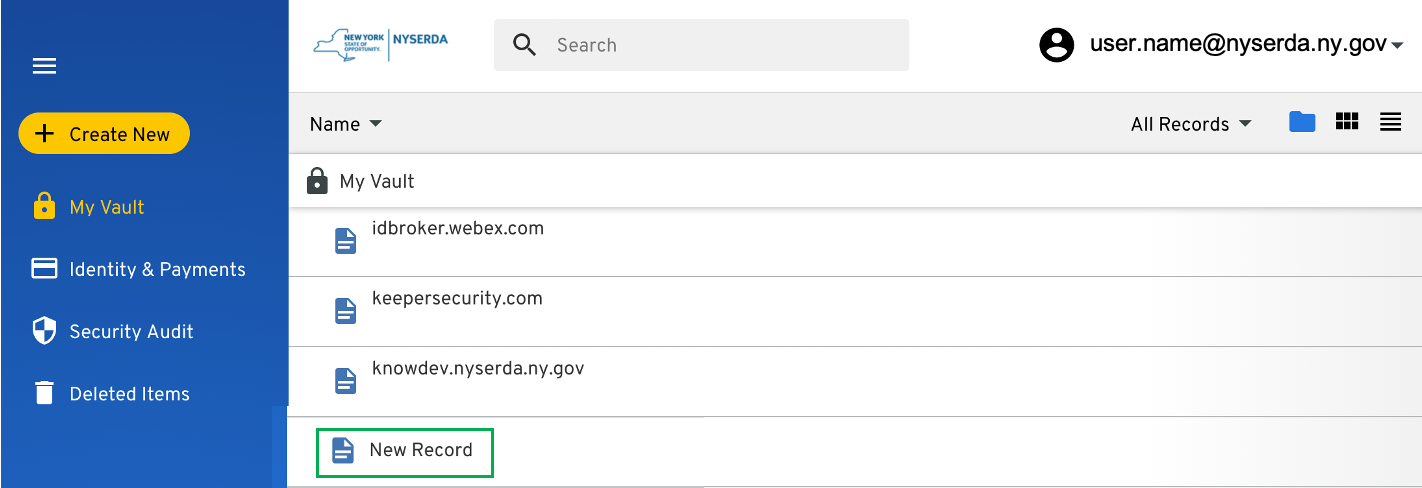
To create a new Folder in your, click the Create New button, then click the Folder option in the drop down. This will open a new window.
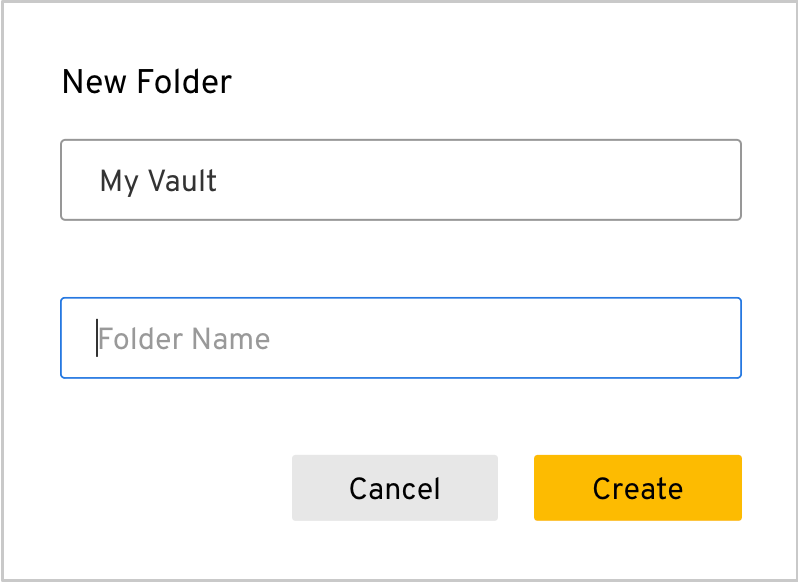
When the New Folder window opens, type the name in the Folder Name field and click Create . You new Folder will now appear at the top of your Vault, listed alphabetically with any other Folders.
To move existing Records to a Folder, either Click and drag a Record over the Folder:
Or, Click on the Folder until the Right-Hand control pane opens and add the Record to the Folder:
Create New Shared Folder
To create a new Shared Folder, click the Create New button, then click the Shared Folder option in the drop down. This will open a new window.
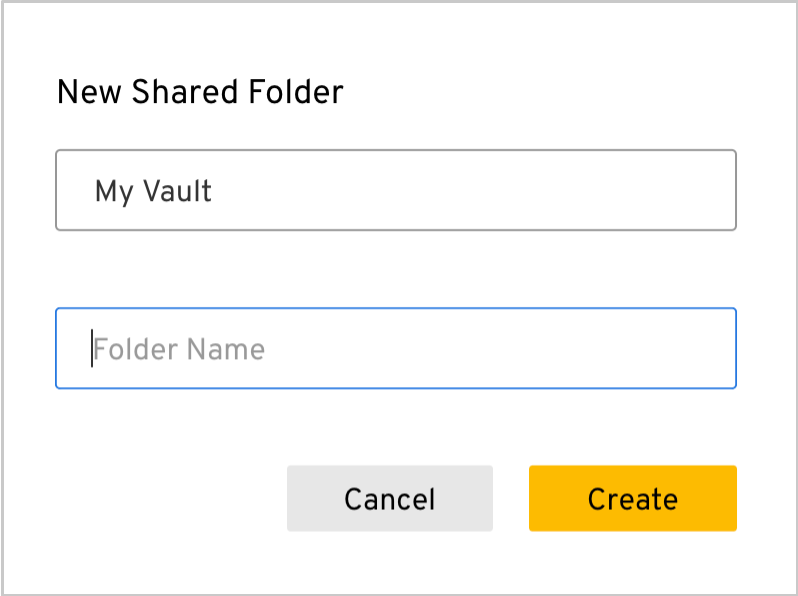
When the New Folder window opens, type the name in the Folder Name field and click Create. You new Shared Folder will now appear at the top of your Vault, listed alphabetically with any other Folders.

Add Records to the SharedFolder just as you would a Folder as shown in the Create New Record section on this page.
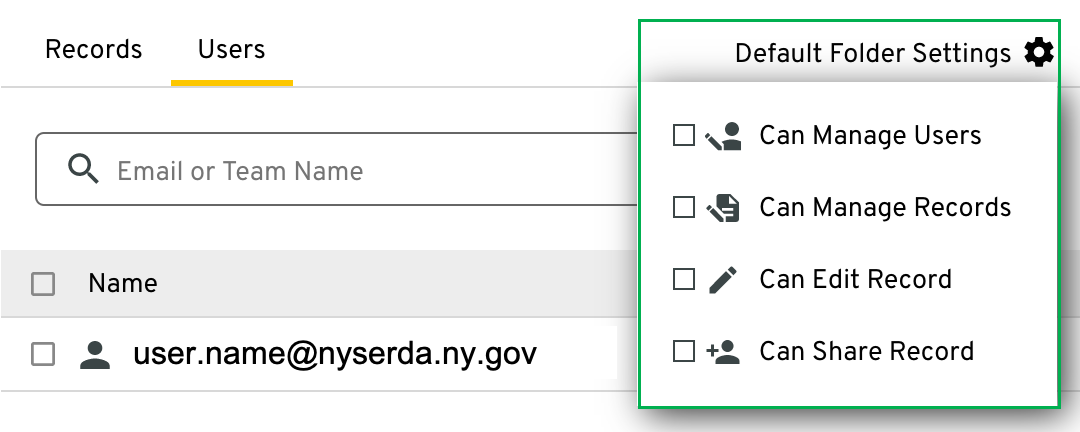
To manage the default Permissions for the Shared Folder, click on the Shared Folder to open the control pane, then click Default Folder Settings option and check the box for how you would prefer permissions to be automatically set for added Users or Teams.
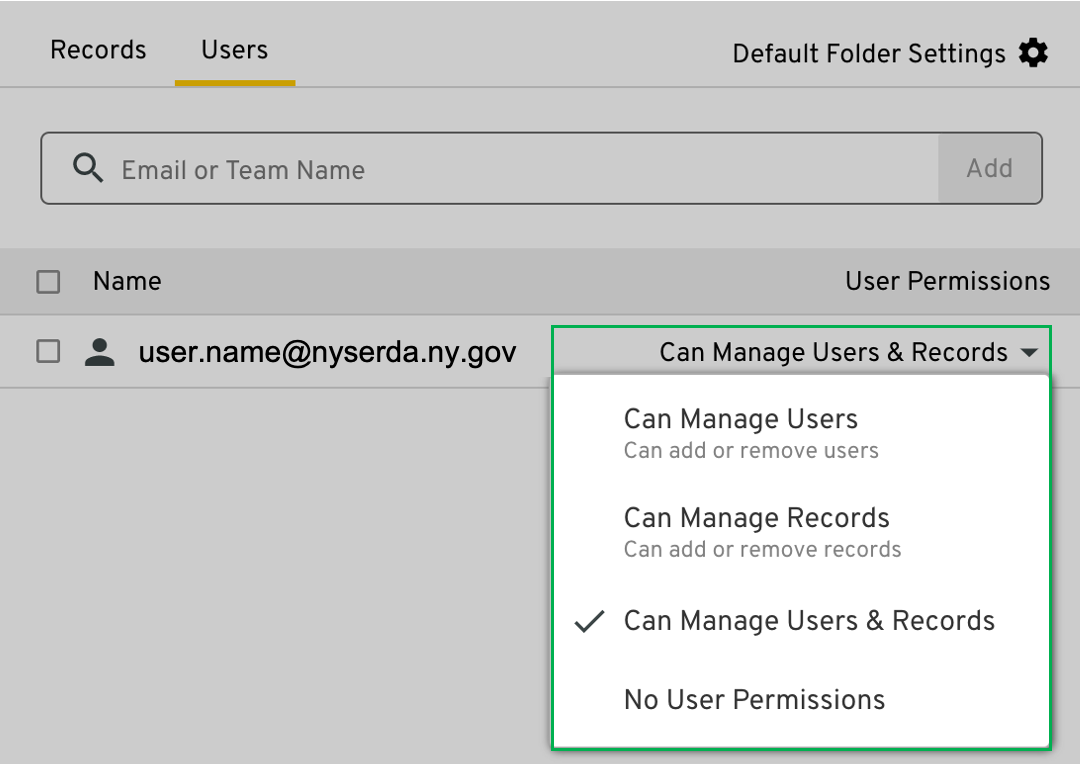
To add Users or Teams to the Shared Folder, click on the Shared Folder, click Edit, then click the Users tab and use the Email or Team Name field to add users or teams. Teams must be set up with IT before you are able to add a Team, and Users can only be added if they have an active Keeper Security license.
To manage permissions for specific Users or Teams already added to the Shared Folder, click on the Shared Folder, click Edit, then click the Users tab. Locate the correct User or Team record then click the permission drop-down to the right of the User or Team name. Finally, select the option best suited for the User or Team.
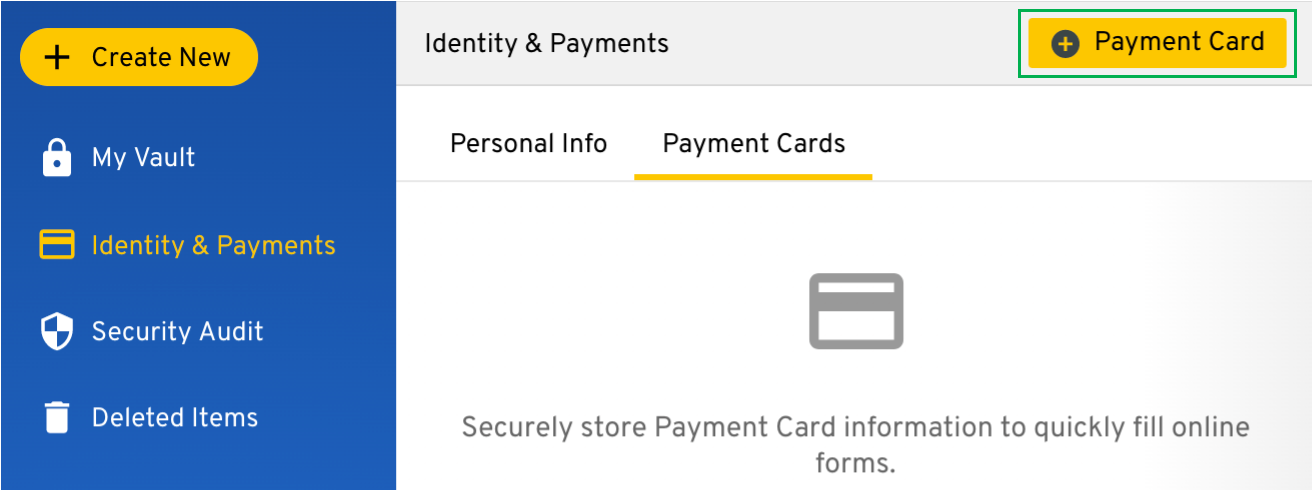
Create New Payment Card
Creating new Payment Information can be achieved either by clicking the Create New button and selecting Payment Card (as shown in the image at the top of this page) or by accessing the Identity & Payments option and clicking the button
A new window will open for you to input the details of your Payment Card. Complete all fields. Be sure to toggle the Default option if the card information you are entering should be treated as your primary online payment method.
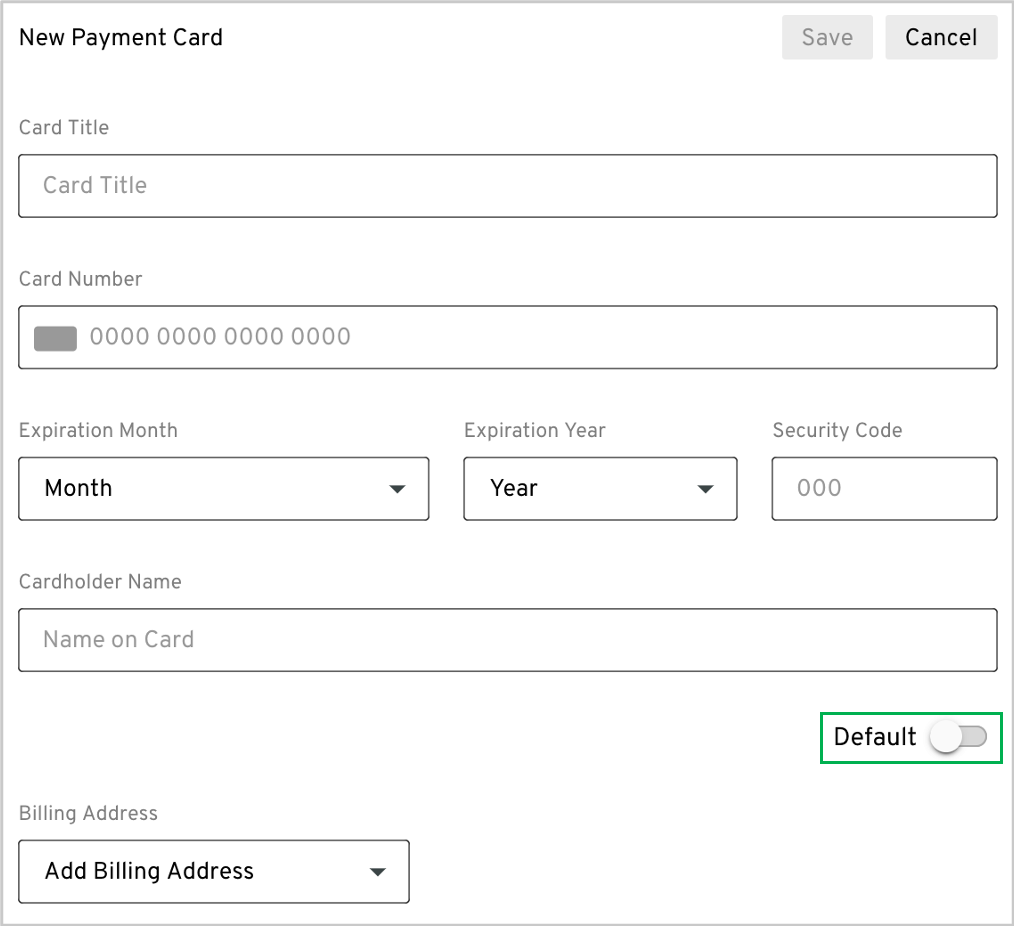
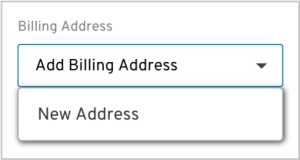
When adding an address to the Payment Card, click on the Add Billing Address drop-down and select the appropriate option. Addresses stored for any other Payment Card information will be accessible from this drop-down. If this is your first Payment Card, click on the New Address option and complete all fields.
Overview
Content Tools