
NY Home Energy Portal: Appliance Vendors User Guide
Logging Into NYHEP
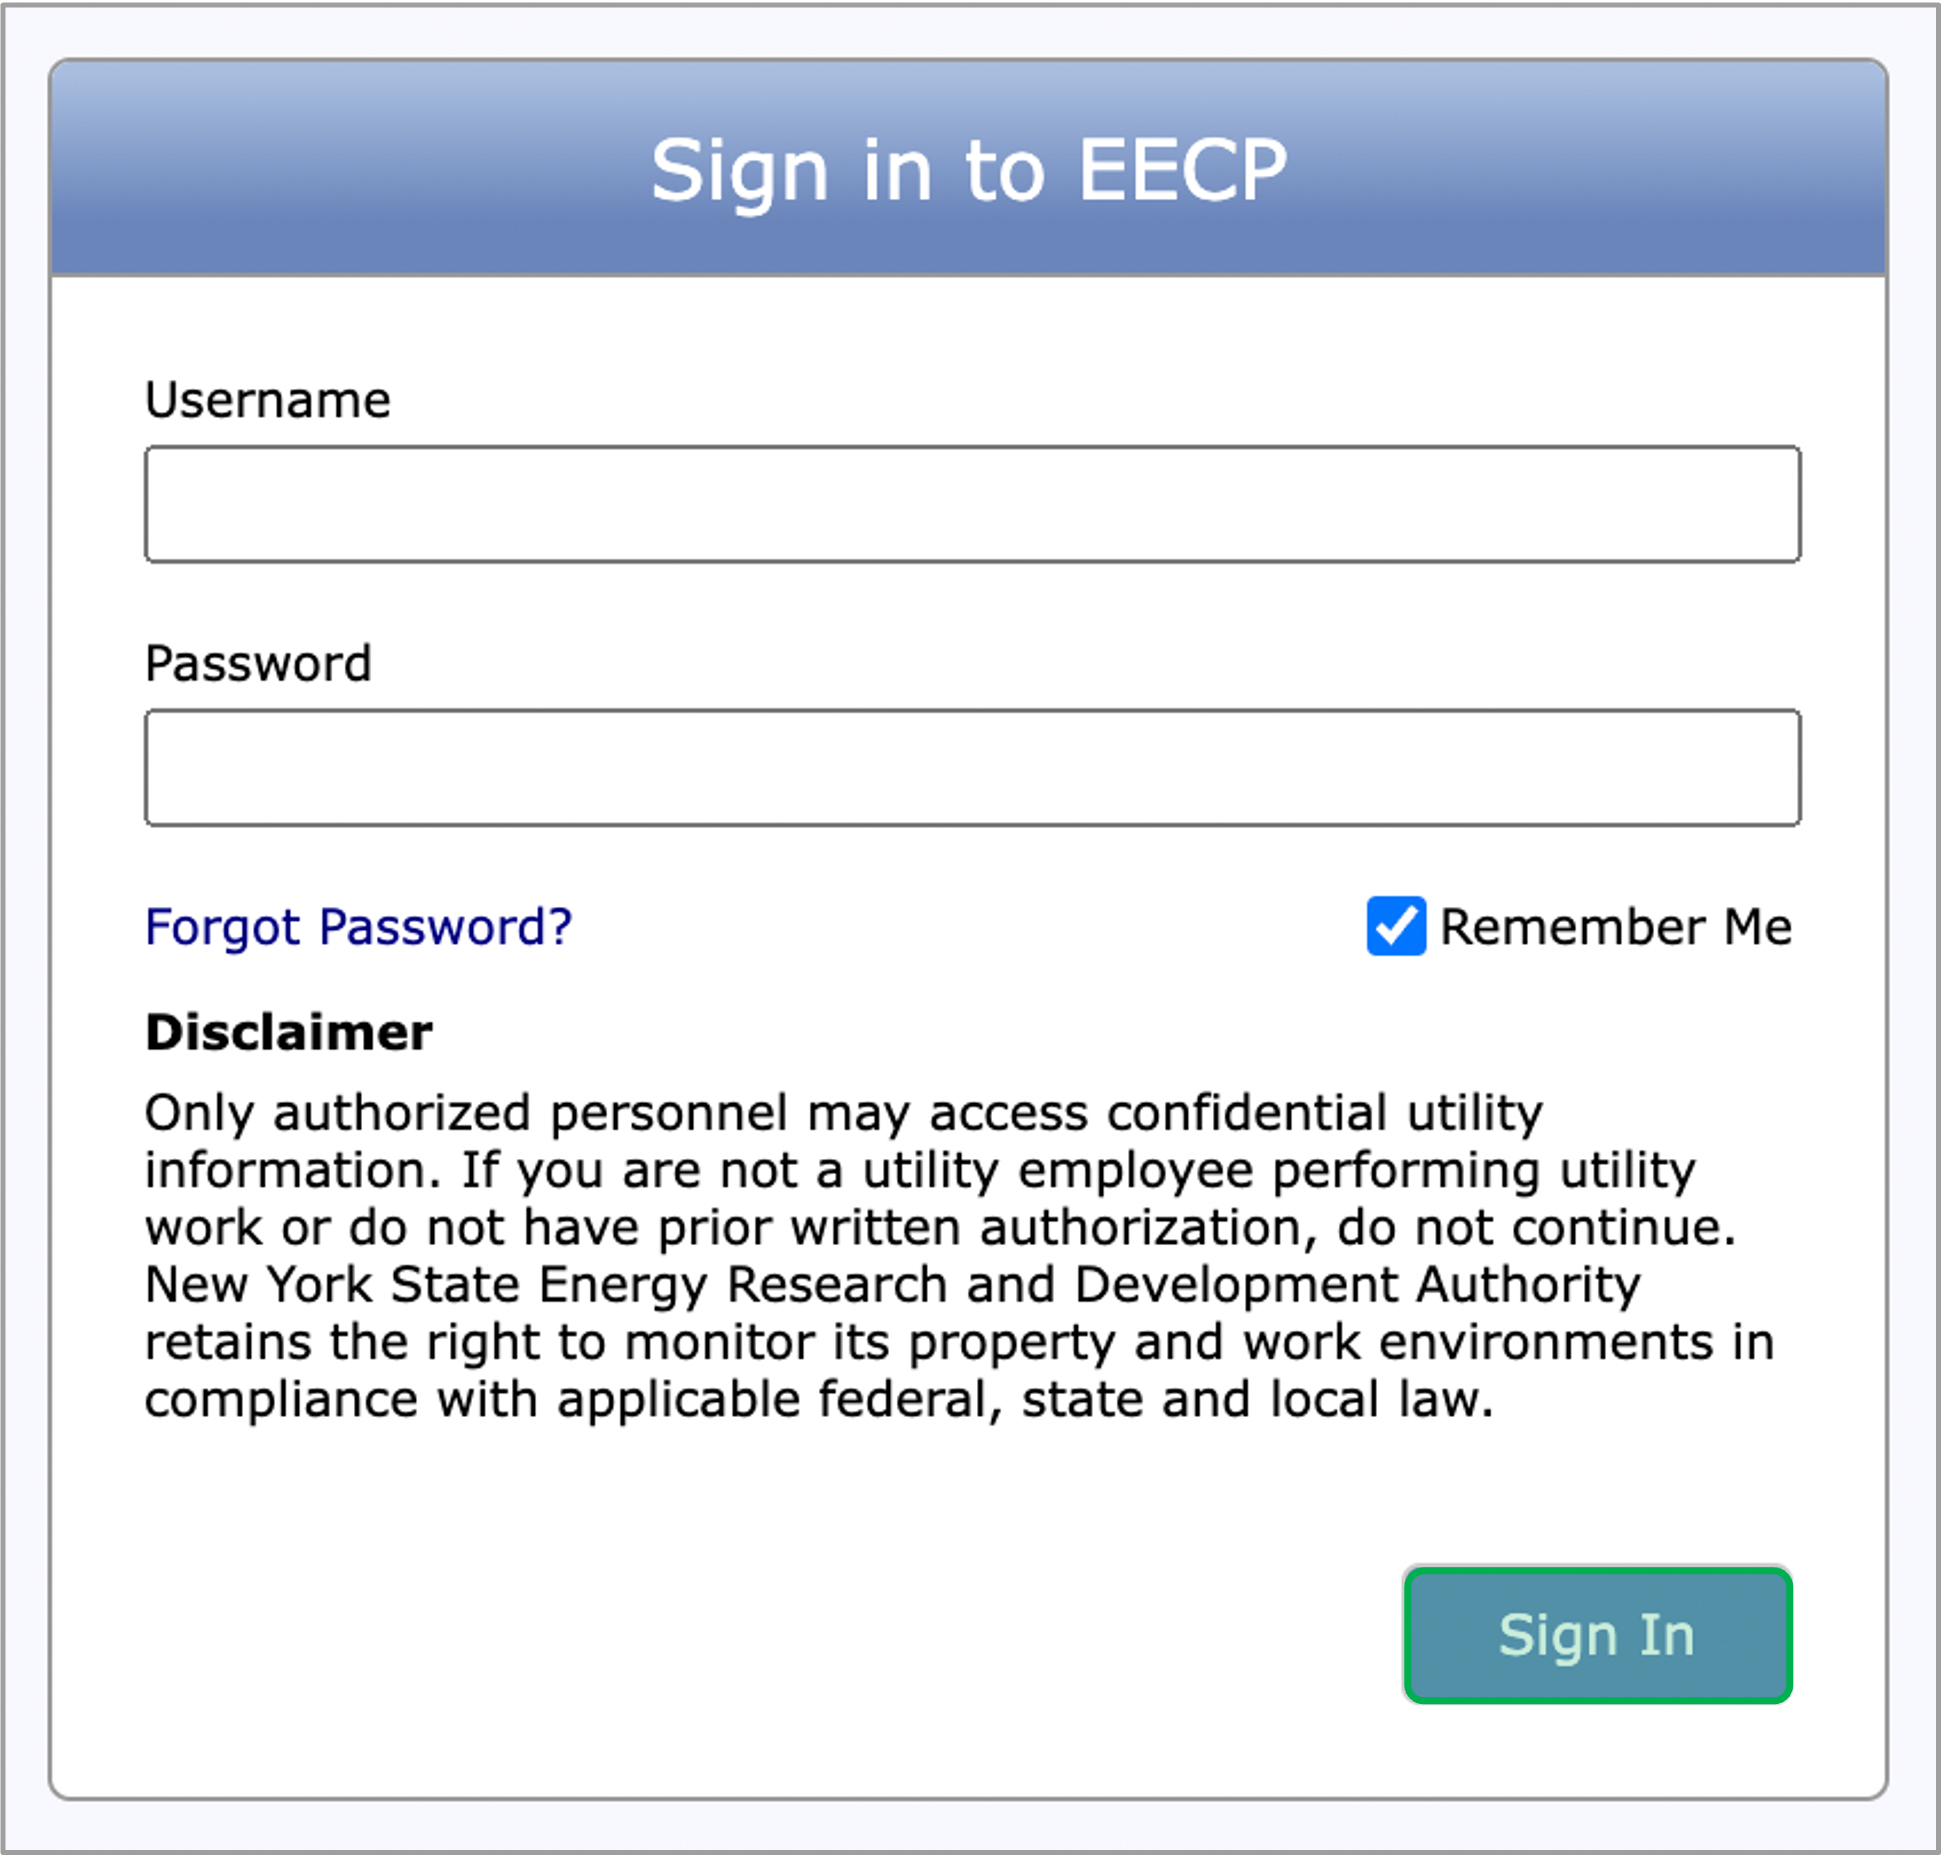
Access the NYHEP and type in your Username and Password. When finished, click the Sign In button to log in.
Forgot Password
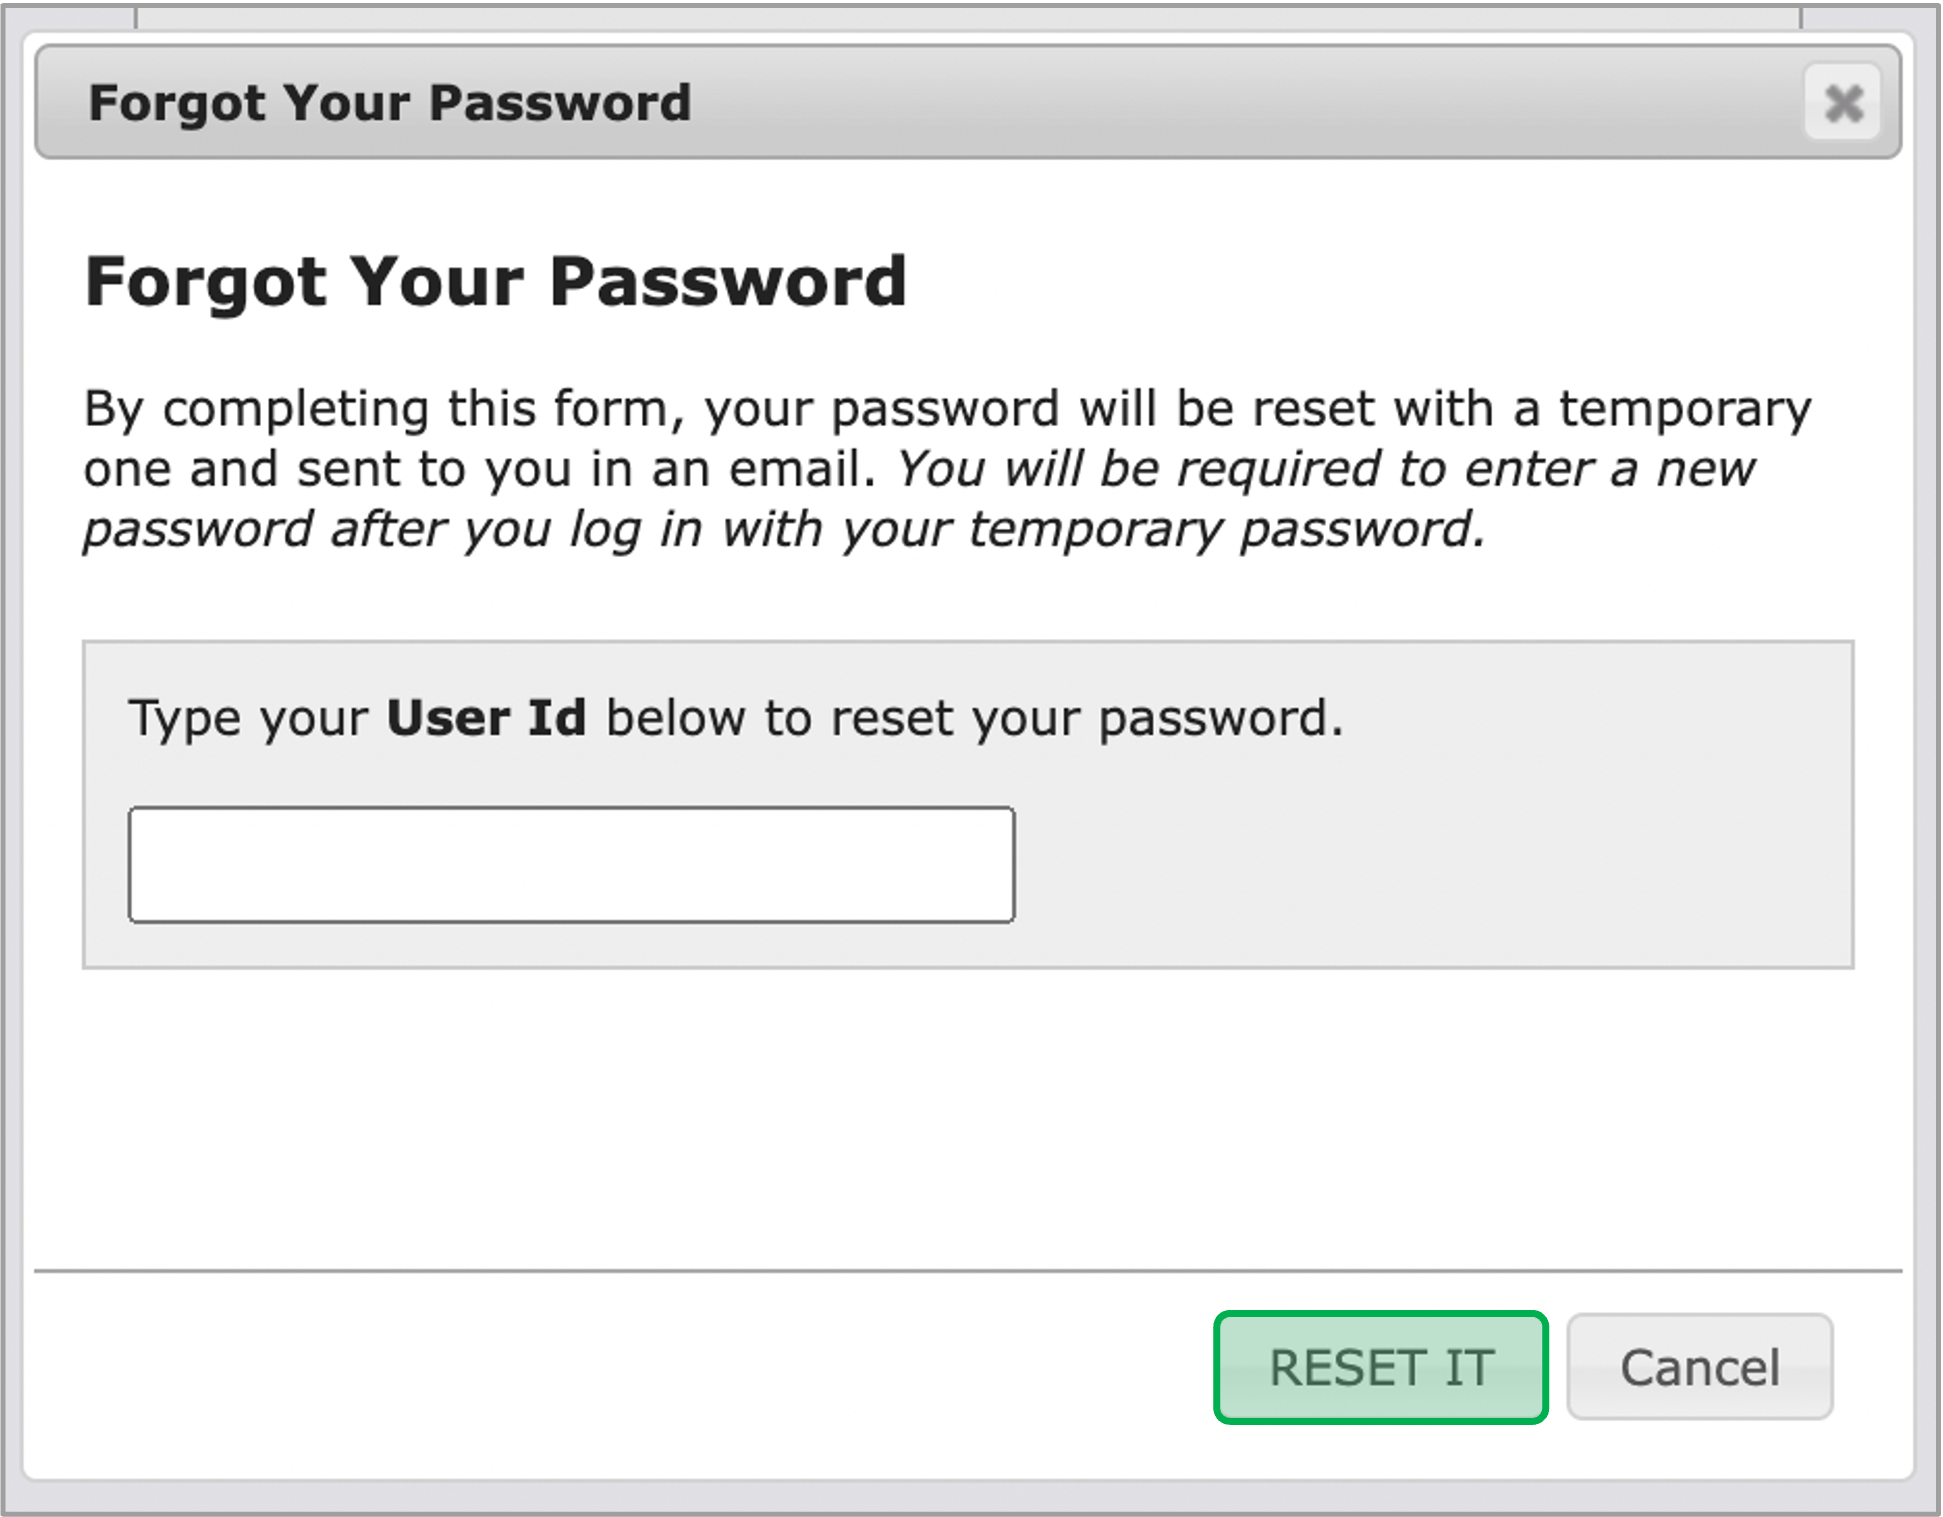
If the vendors forget their password, click the Forgot Password? link on the login page. Type in the User ID then click the Reset It button, users will then receive an email notification with a link and instructions to reset the password.
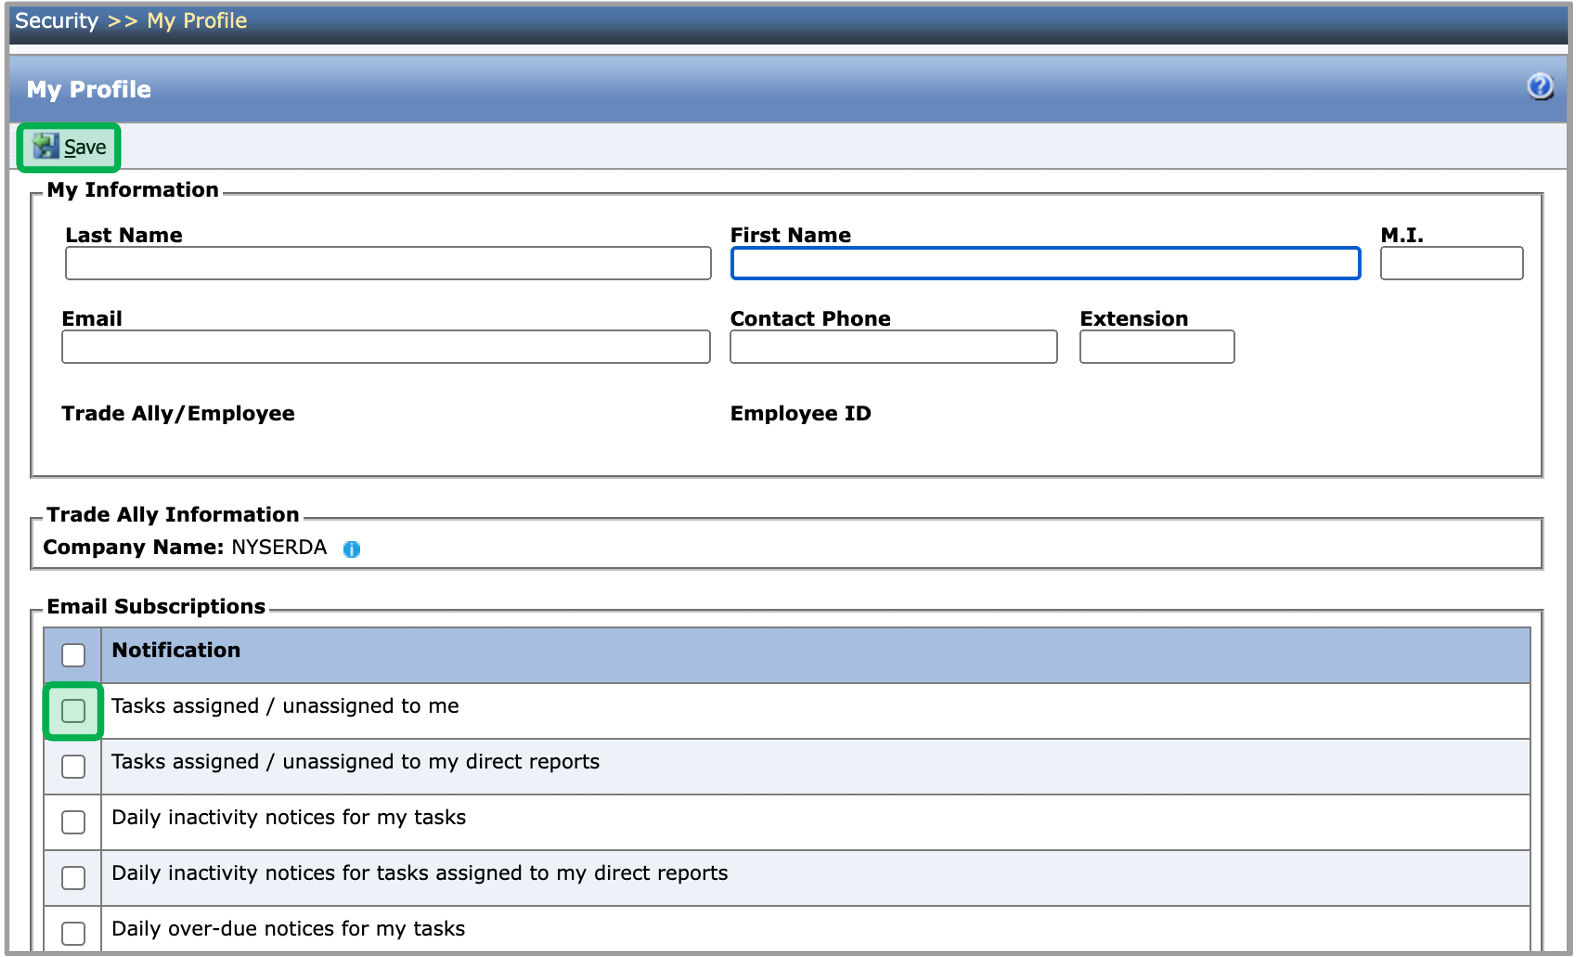
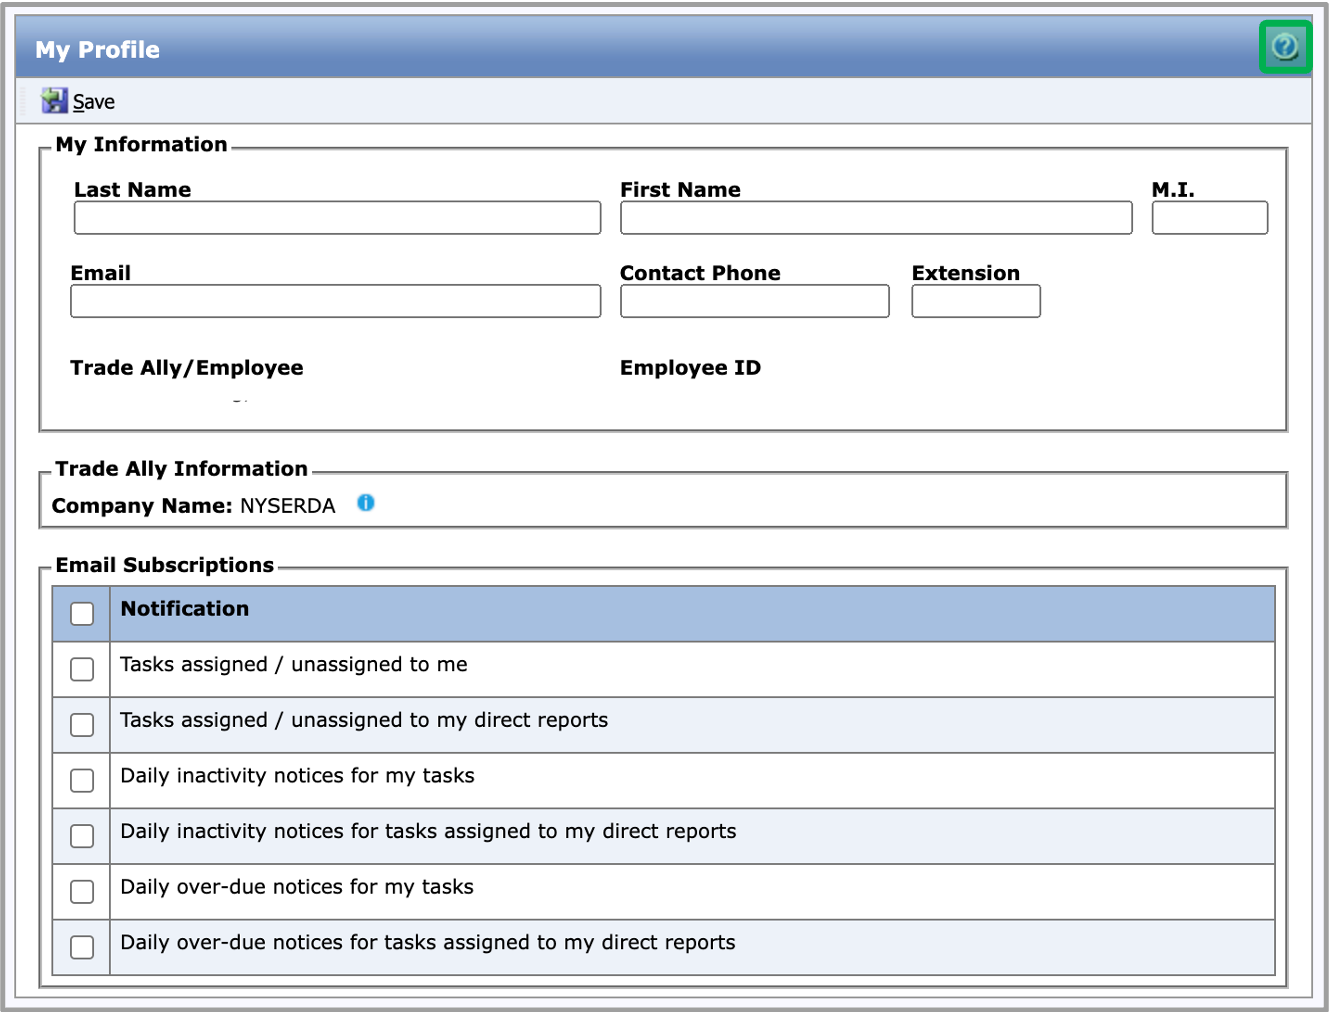
The My Profile tab can be accessed under the Security tab on the top right of your New York Home Energy Portal (NYHEP).
My Information
This tab allows vendors to update the following:
- Name
- Email Address
- Phone number
Email Subscription
The vendors can subscribe and un-subscribe to an email by clicking on the check box, it will automatically activate the subscribtion.
Save Changes
Click the Save button to save any changes/updates made under your profile.
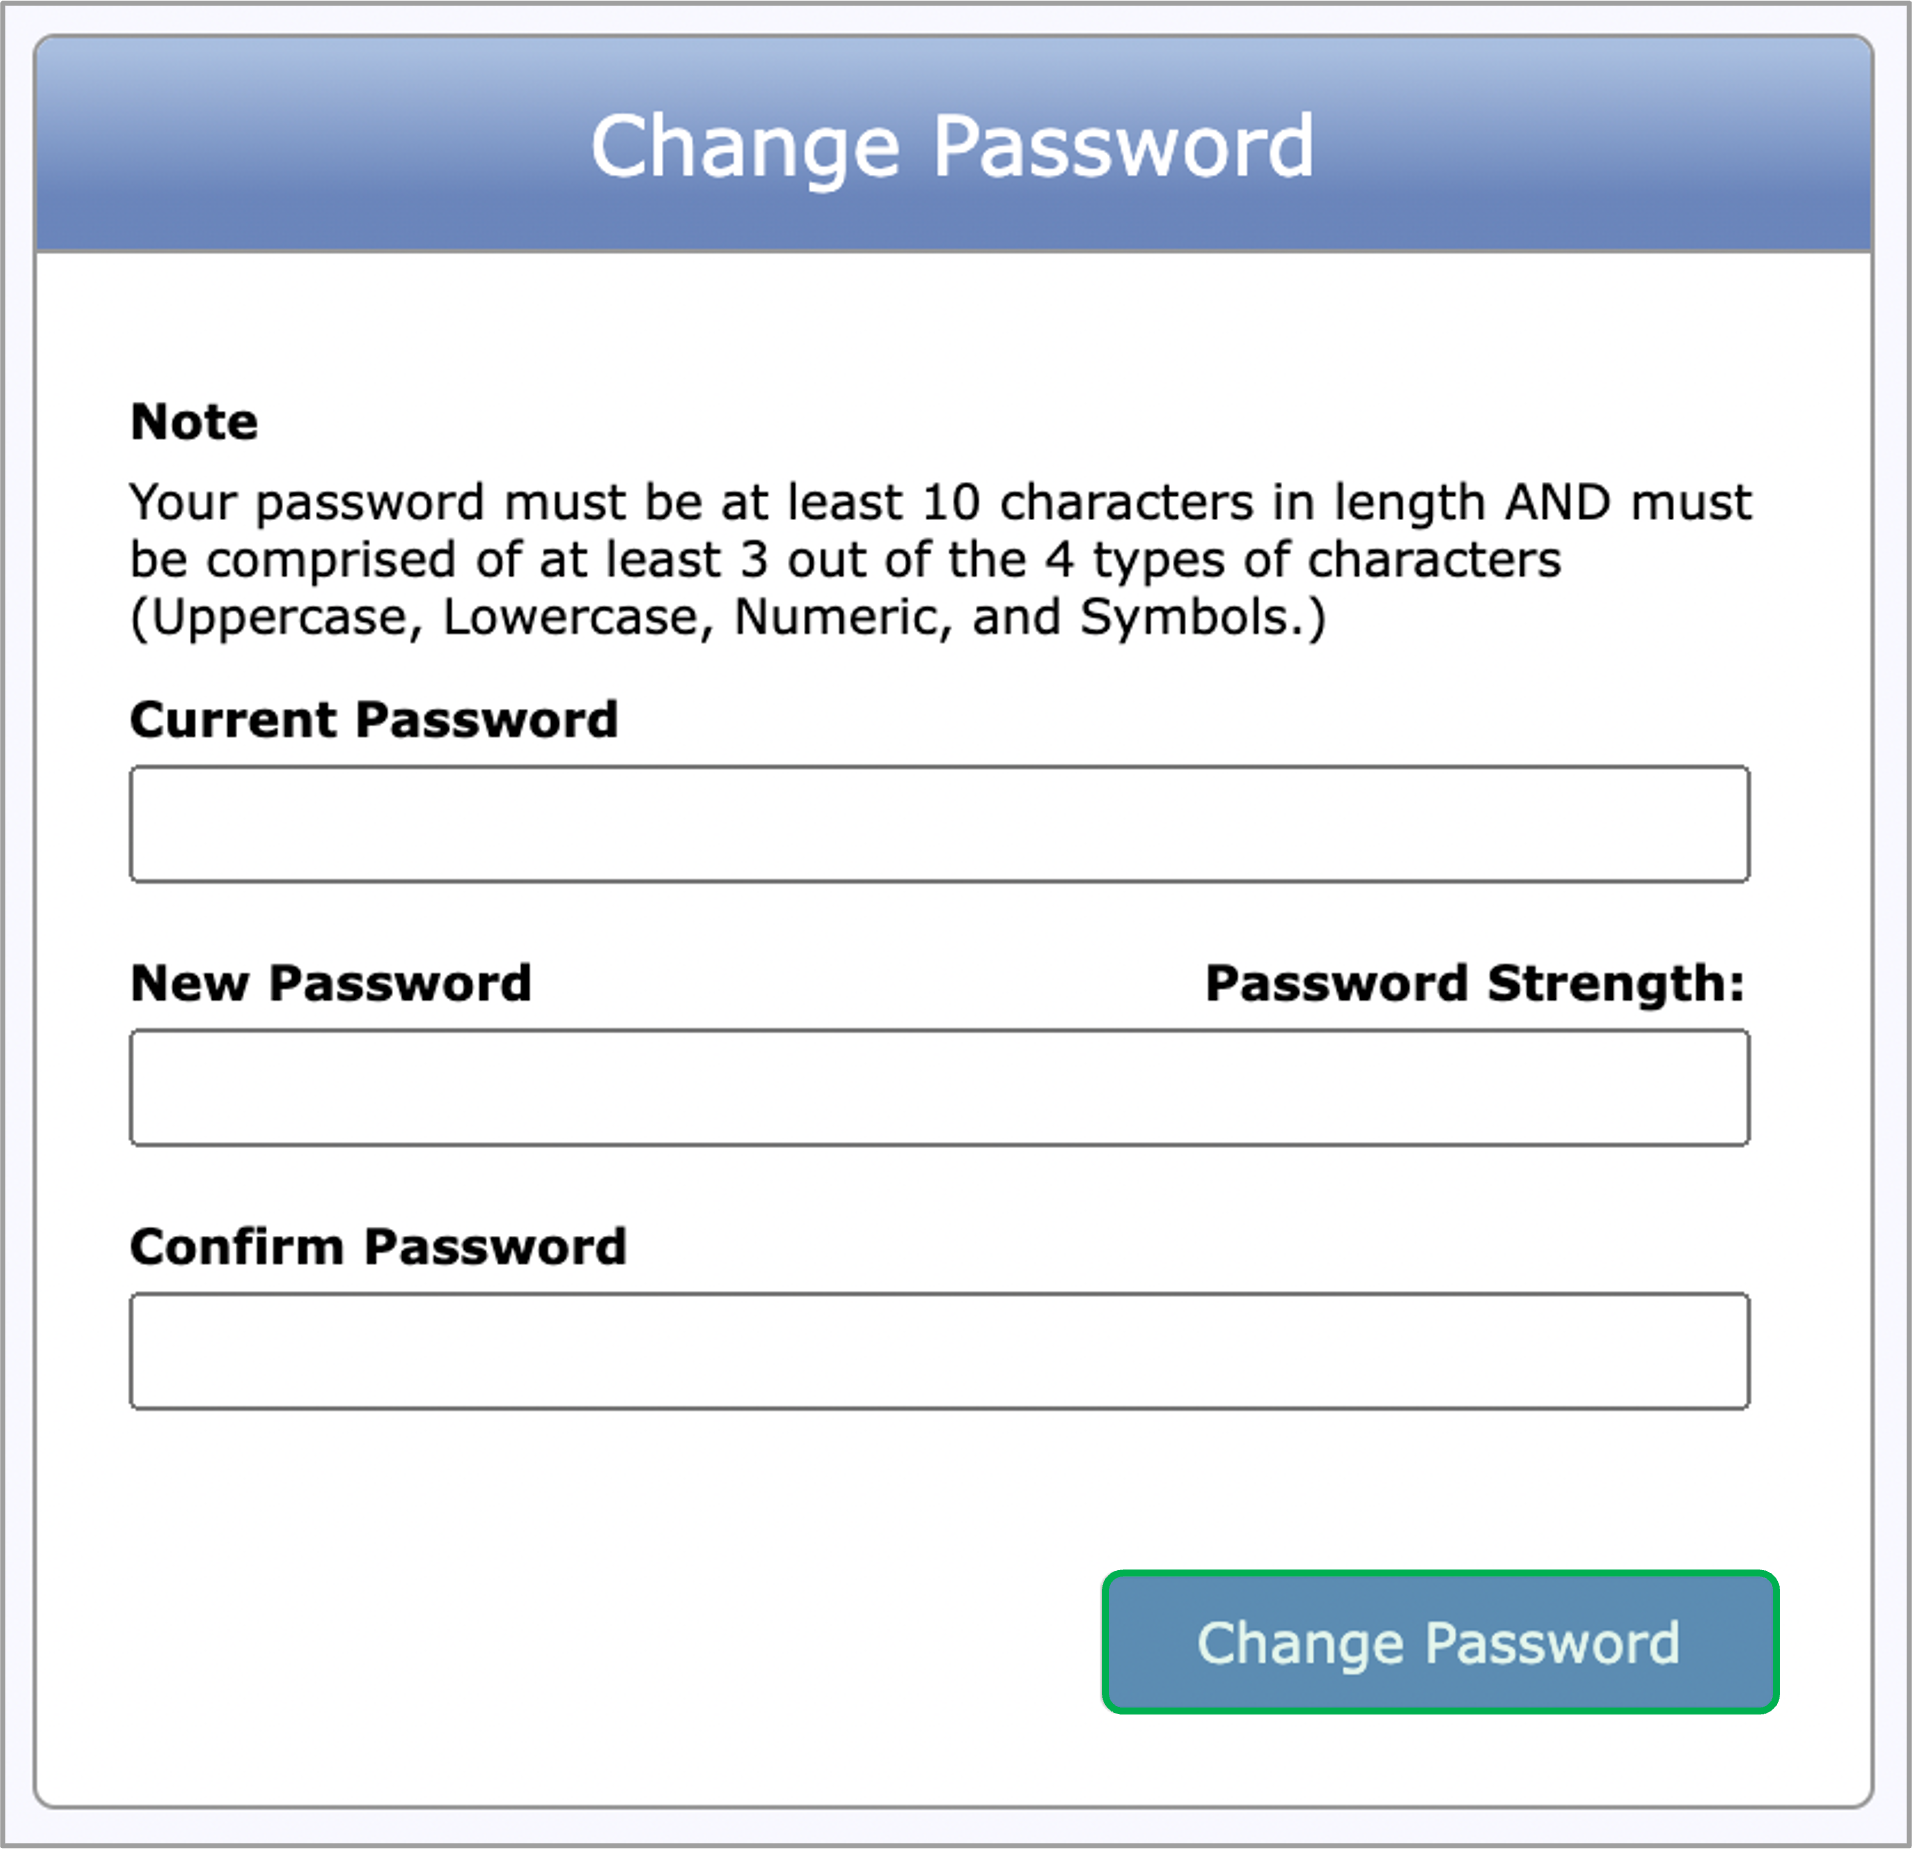
The Change Password tab can be accessed under the Security tab on the top right of your New York Home Energy Portal (NYHEP).
Change Password
This tab allows vendors to update their password. Enter in your previous password followed by the new password. When ready, click Change Password.
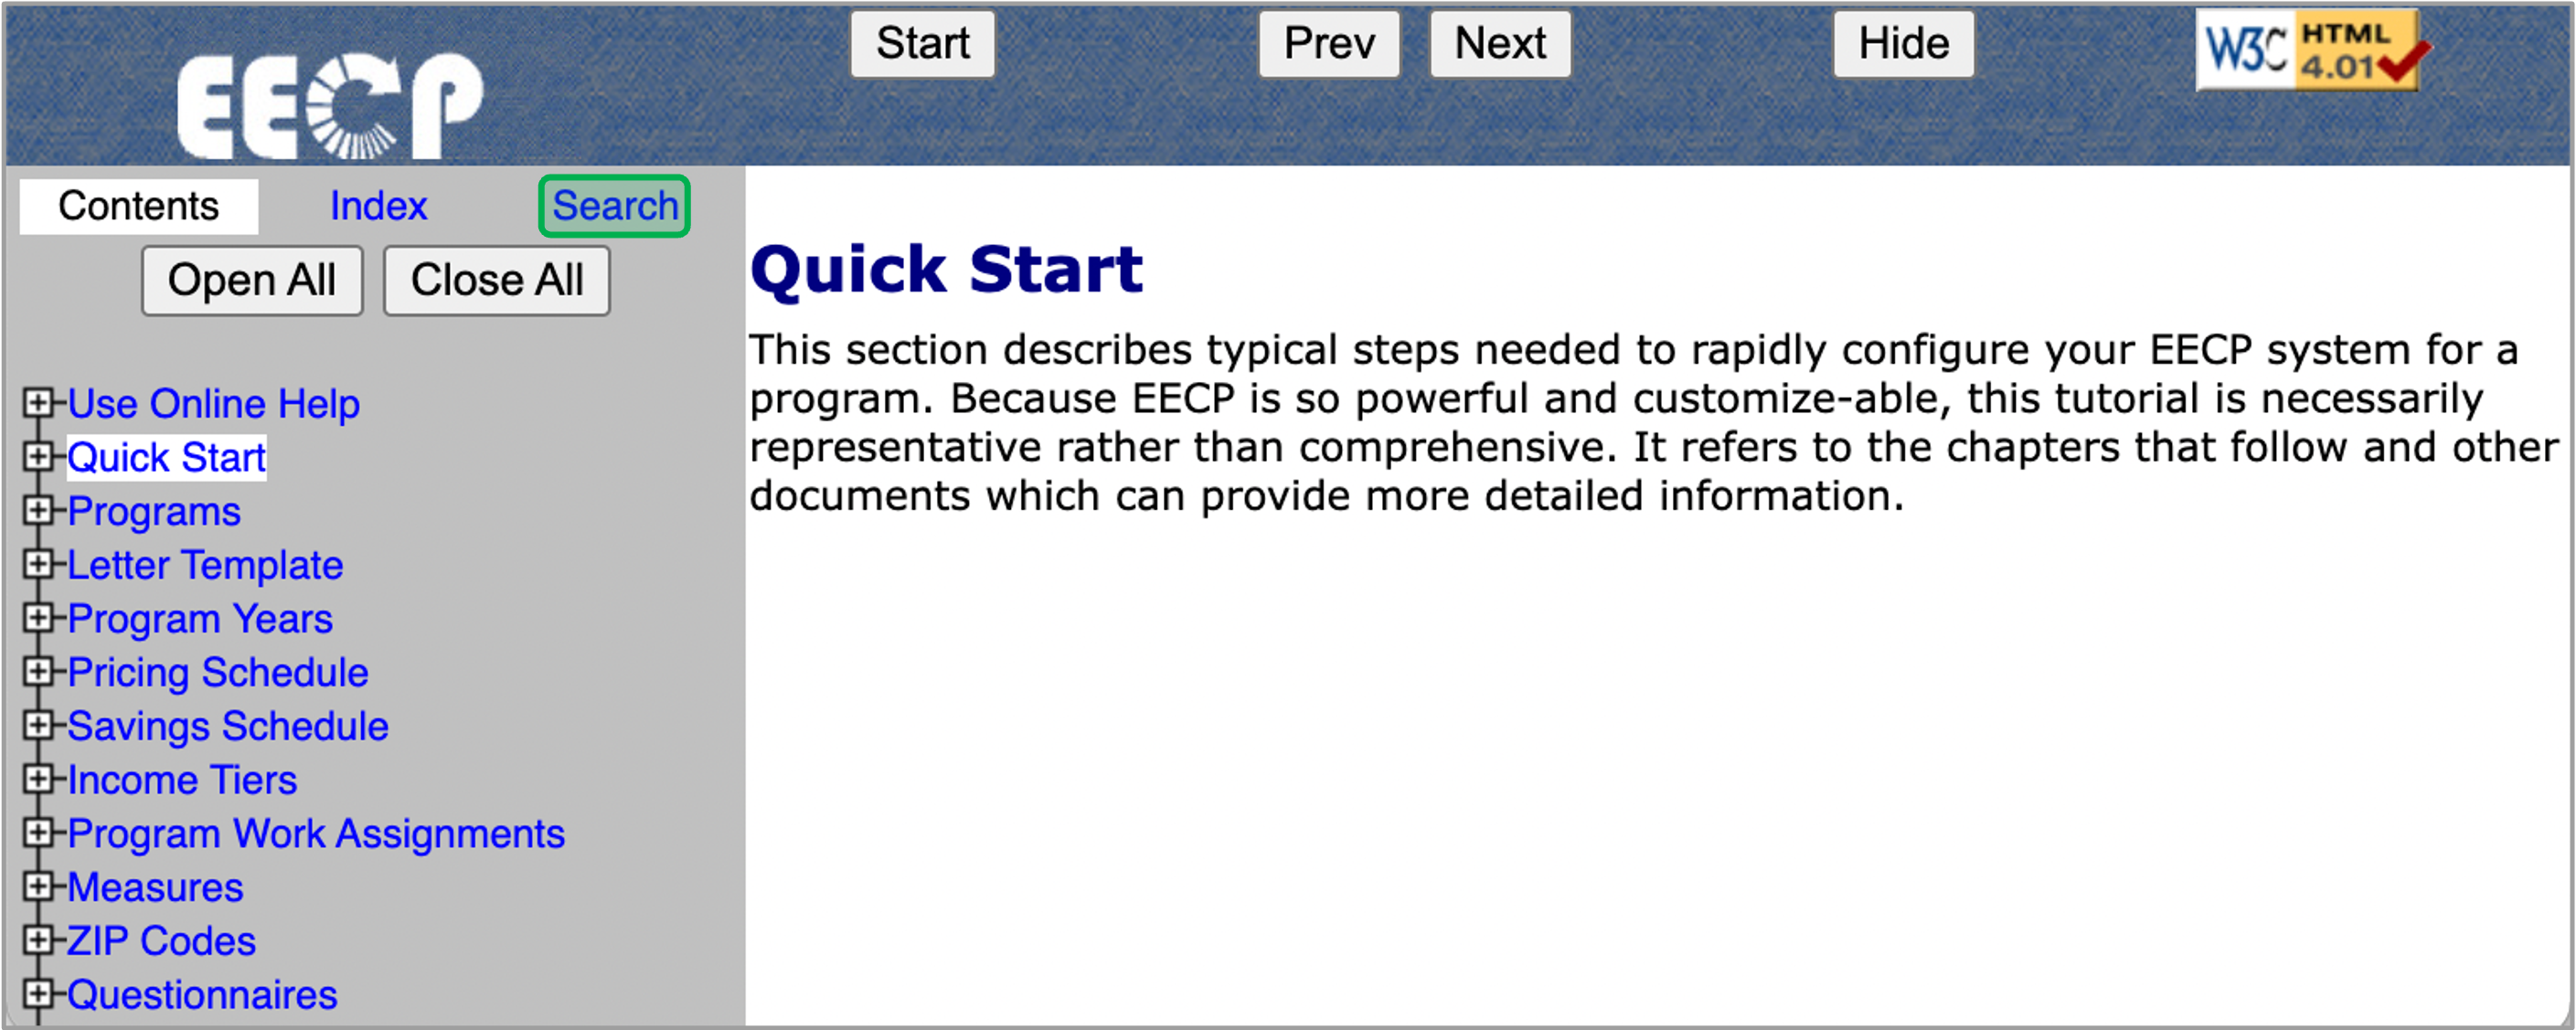
Help Icon
The Help Icon can be access on the top right side of most tabs that you are in.
Online Help
Use the expandable tabs from the left hand page tree to locate the additional guidance you are looking for.
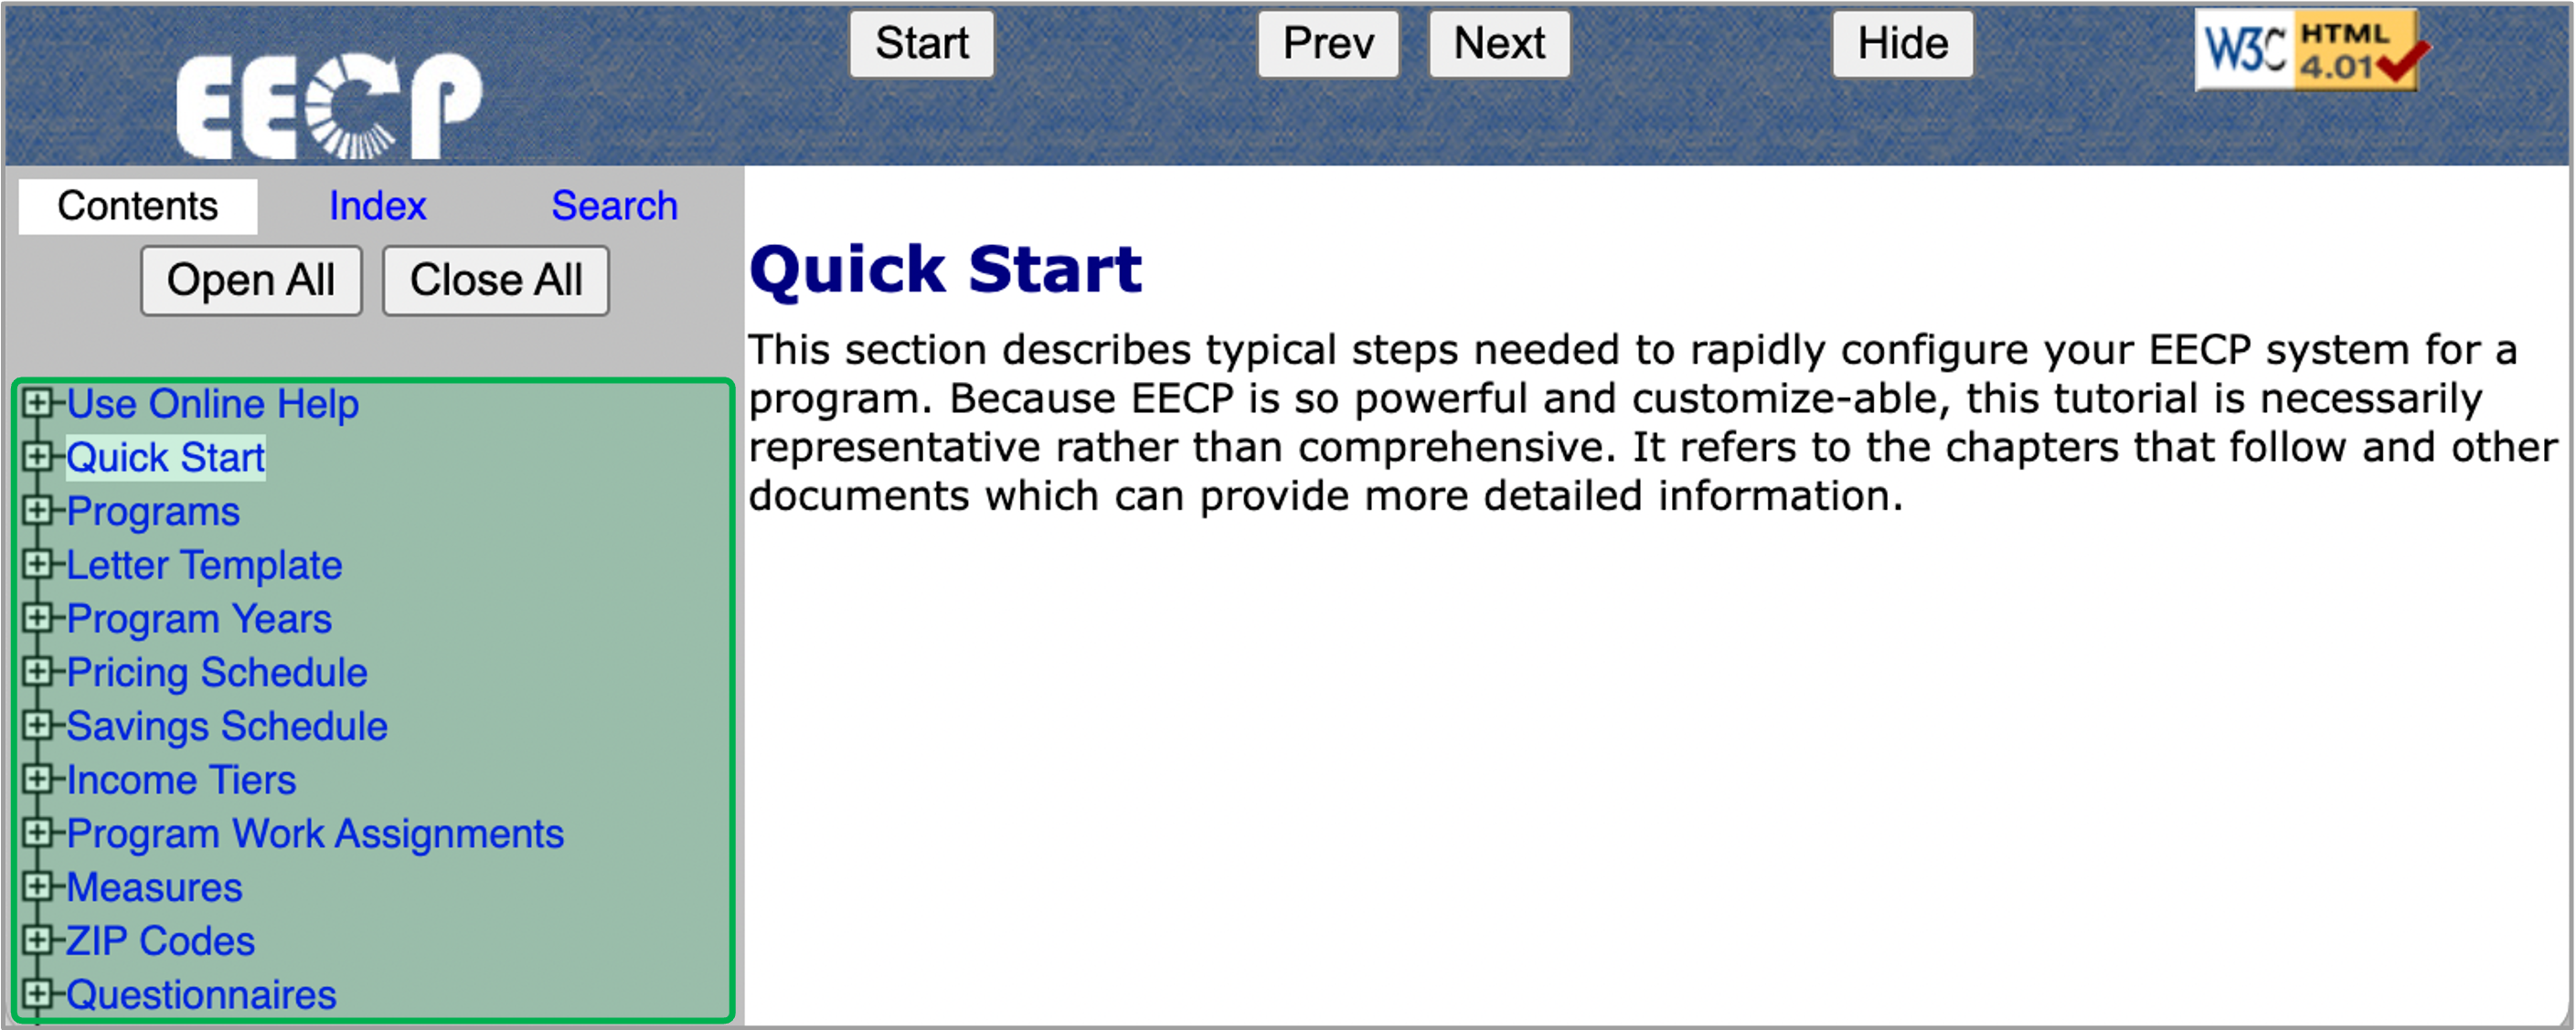
Search
The Search option can be used to search for specific words or phrases.
The instruction below provides guidance on how to add notes within Enrollments and Customer Records.
Notes added to an enrollment can be accessed during any other workflow step for the same enrollment and are accessible to anyone with access to the specific enrollment.
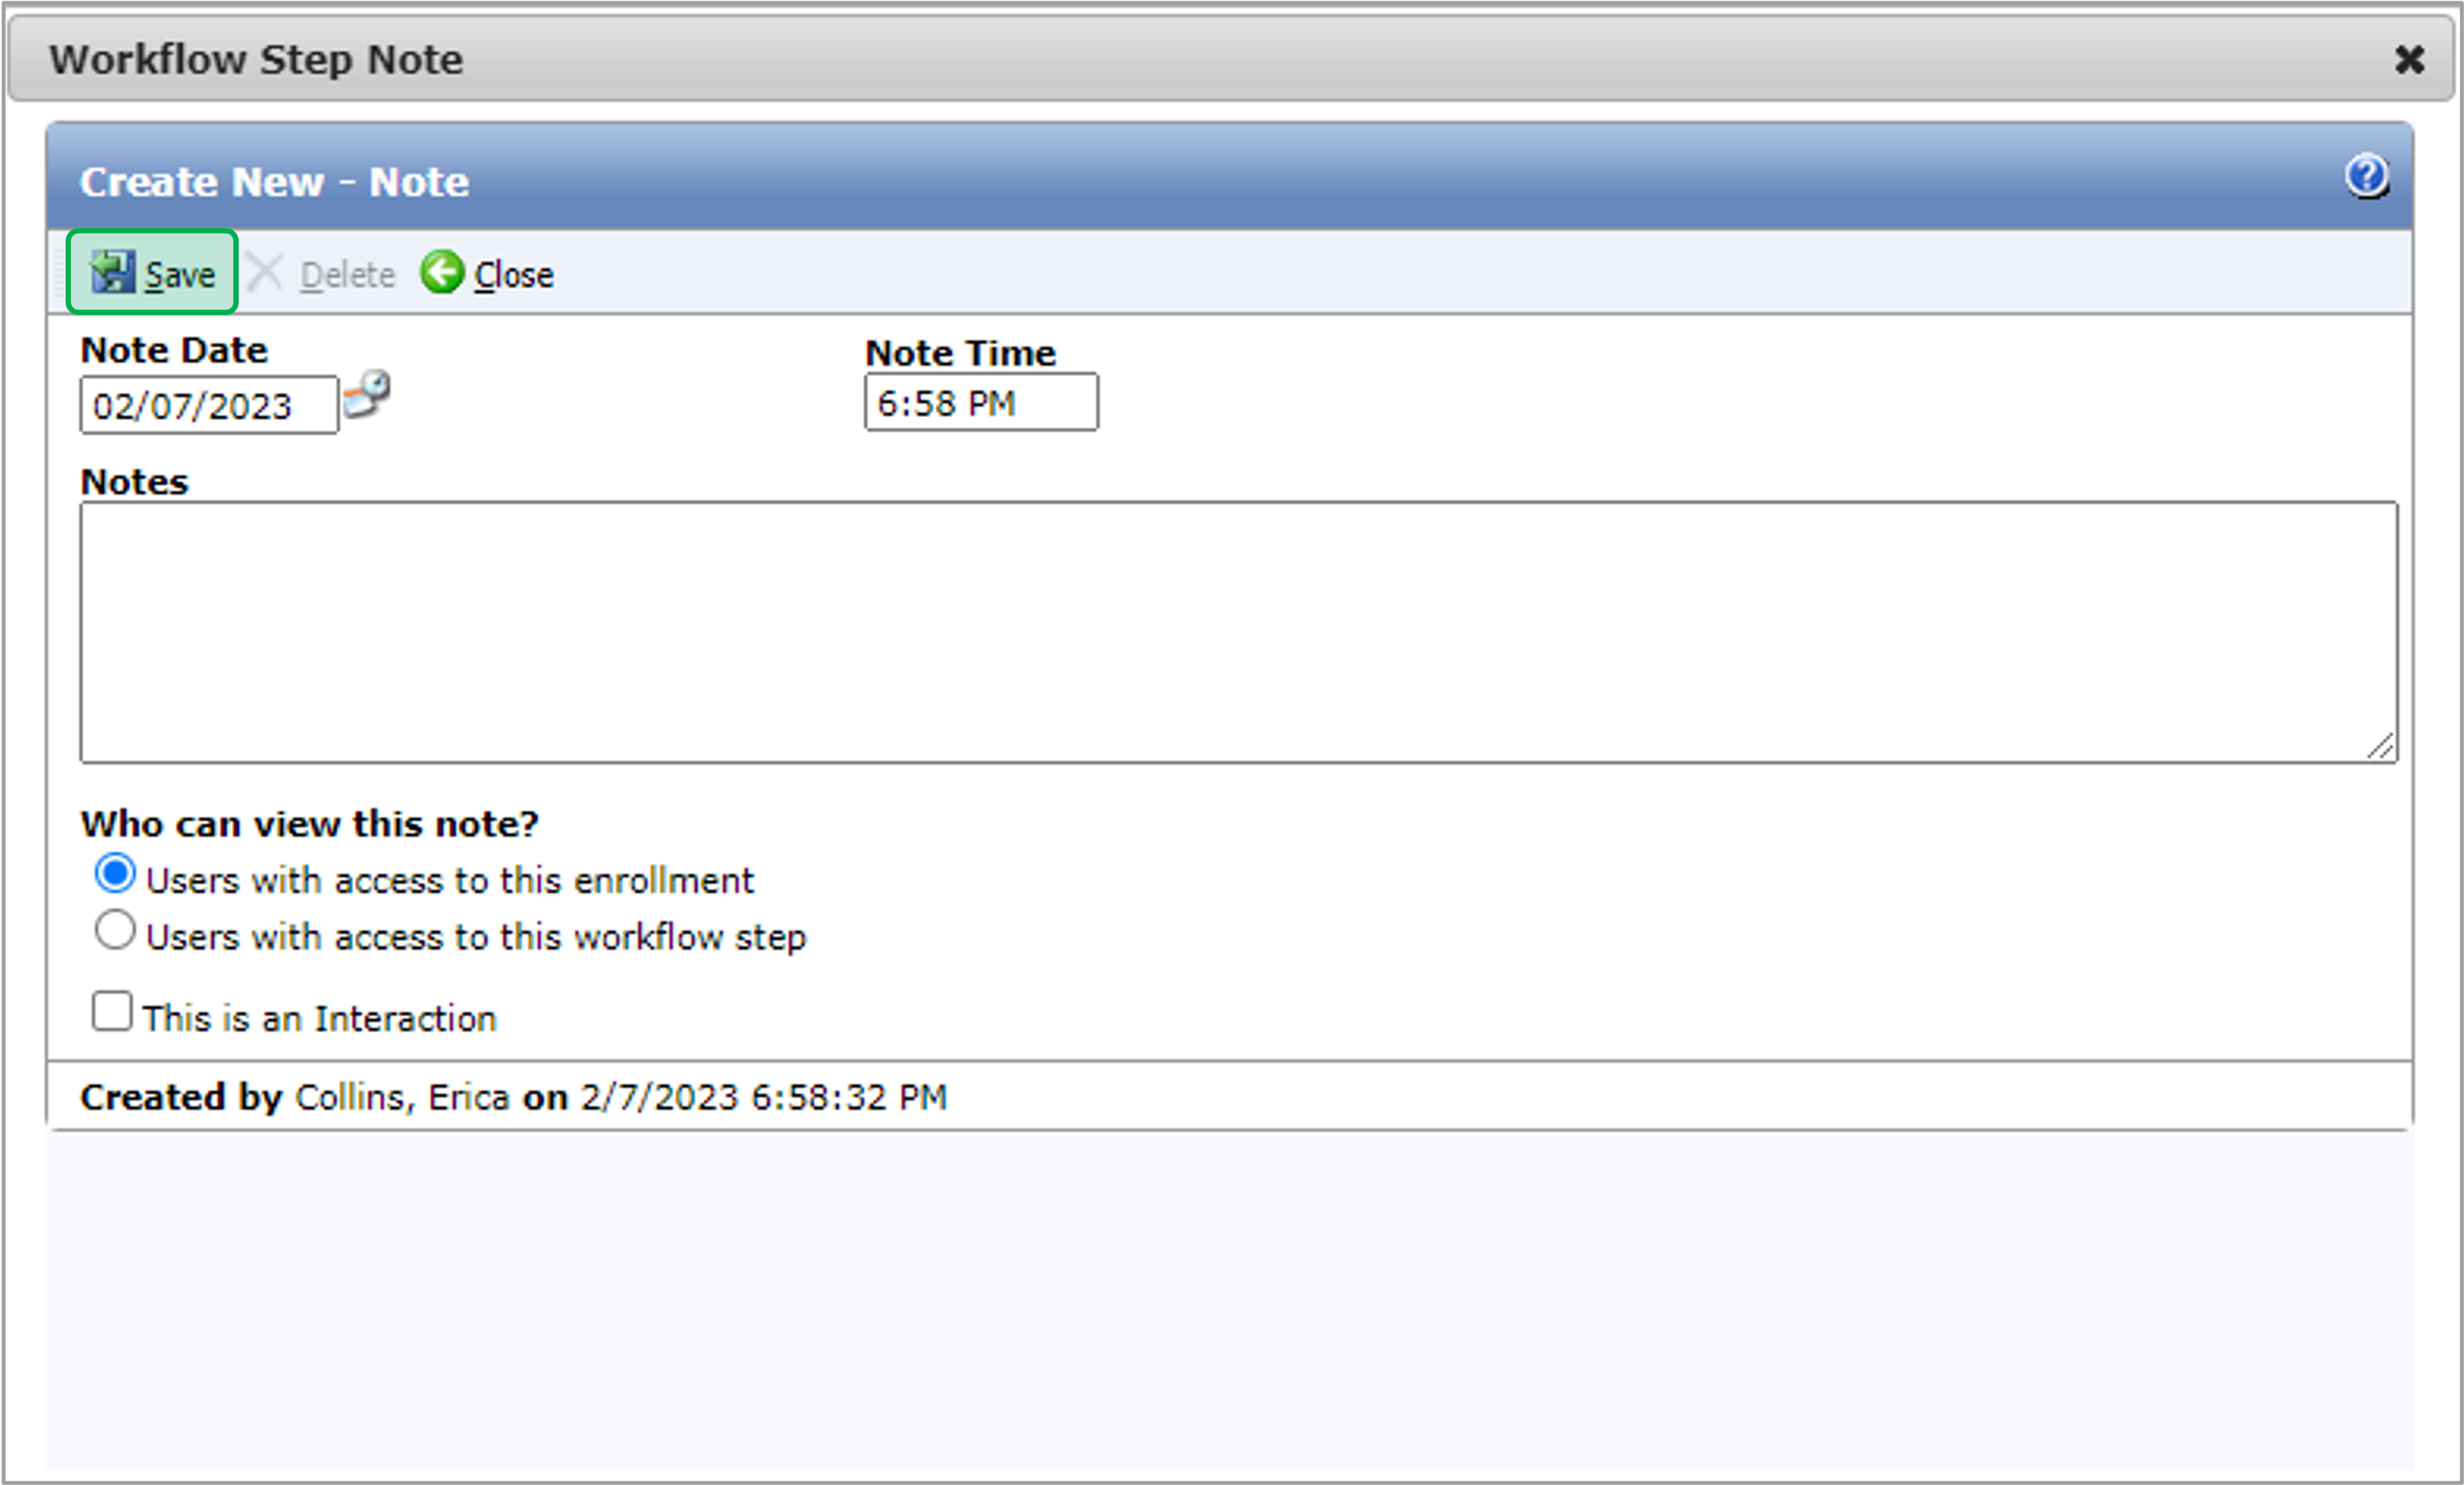
To add a new note, access the Note tab and click the New Note button. A new Note dialog will open.
Notes can be added to any Record or Enrollment in the NY HEP where a Note tab is present.
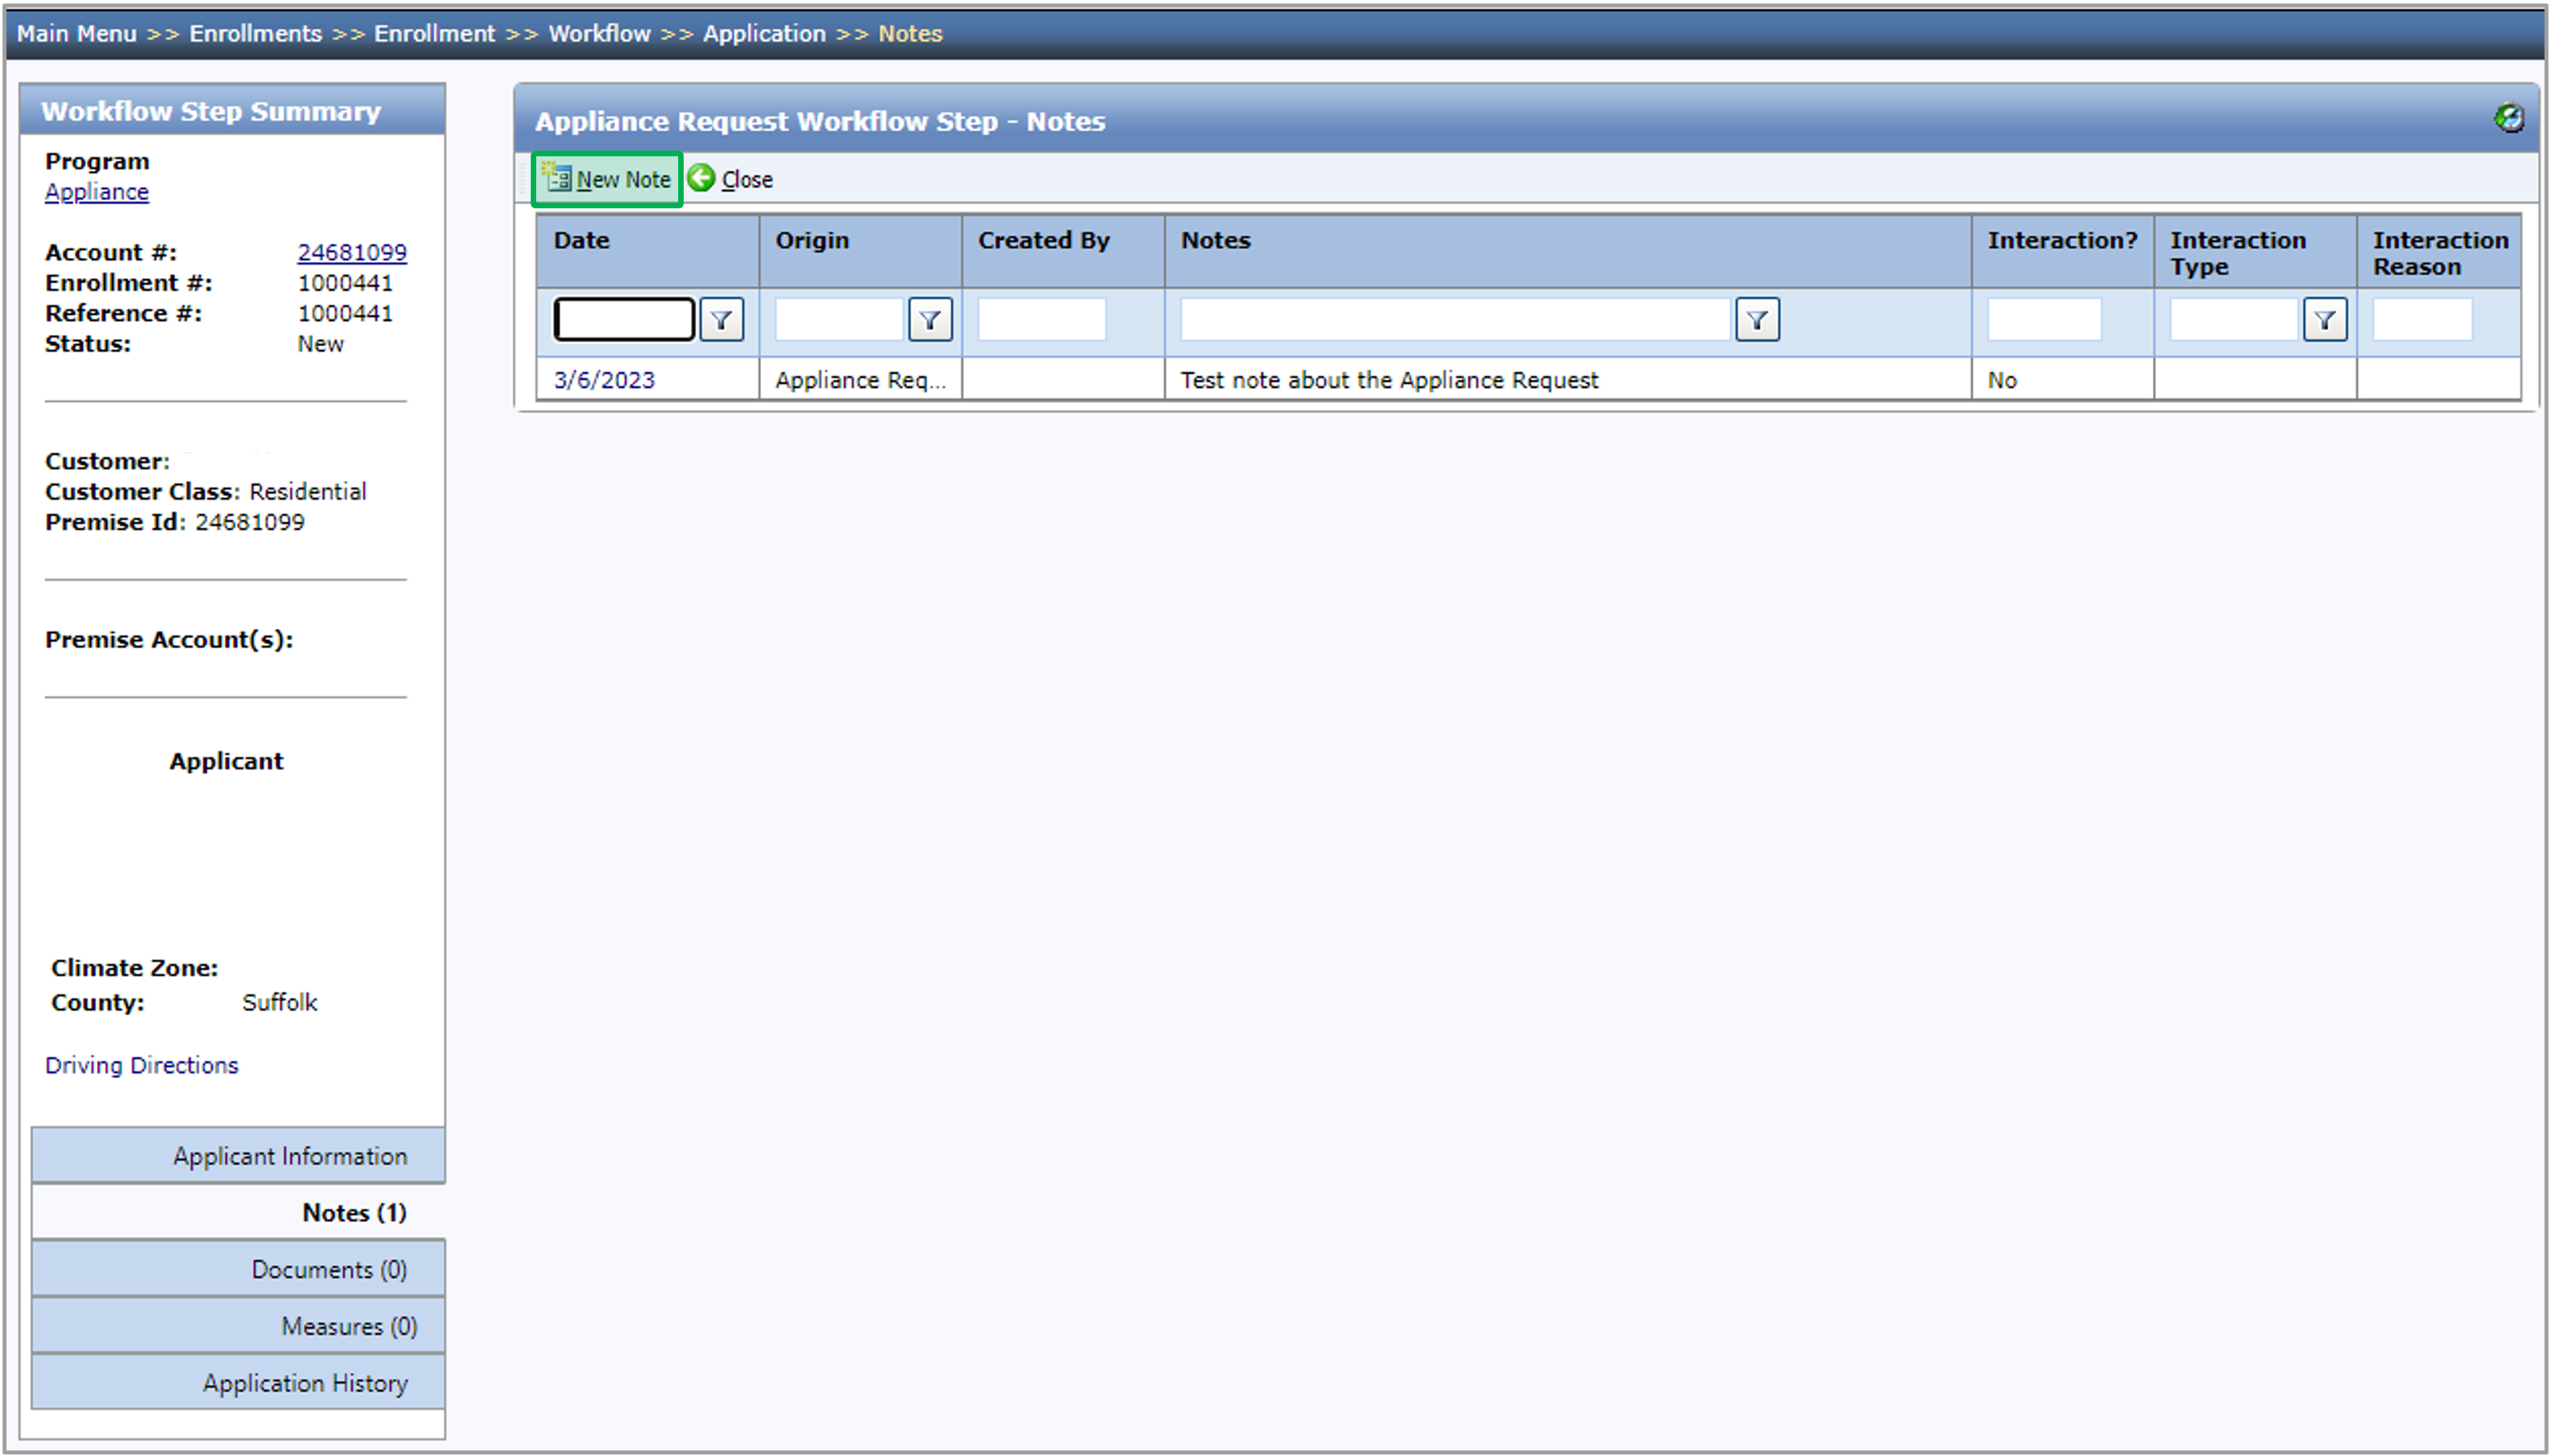
Fill in the Notes field.
The Note Date and Note Time fields will automatically populate with the current date and time. Vendors can change these fields if needed. The system will still document the actual date and time the note was created as well.

The Who can view this note? field will default to Users with access to this enrollment.
If the This is an Interaction checkbox is checked, a drop-down will appear allowing vendors to add this note to one of the available reports.
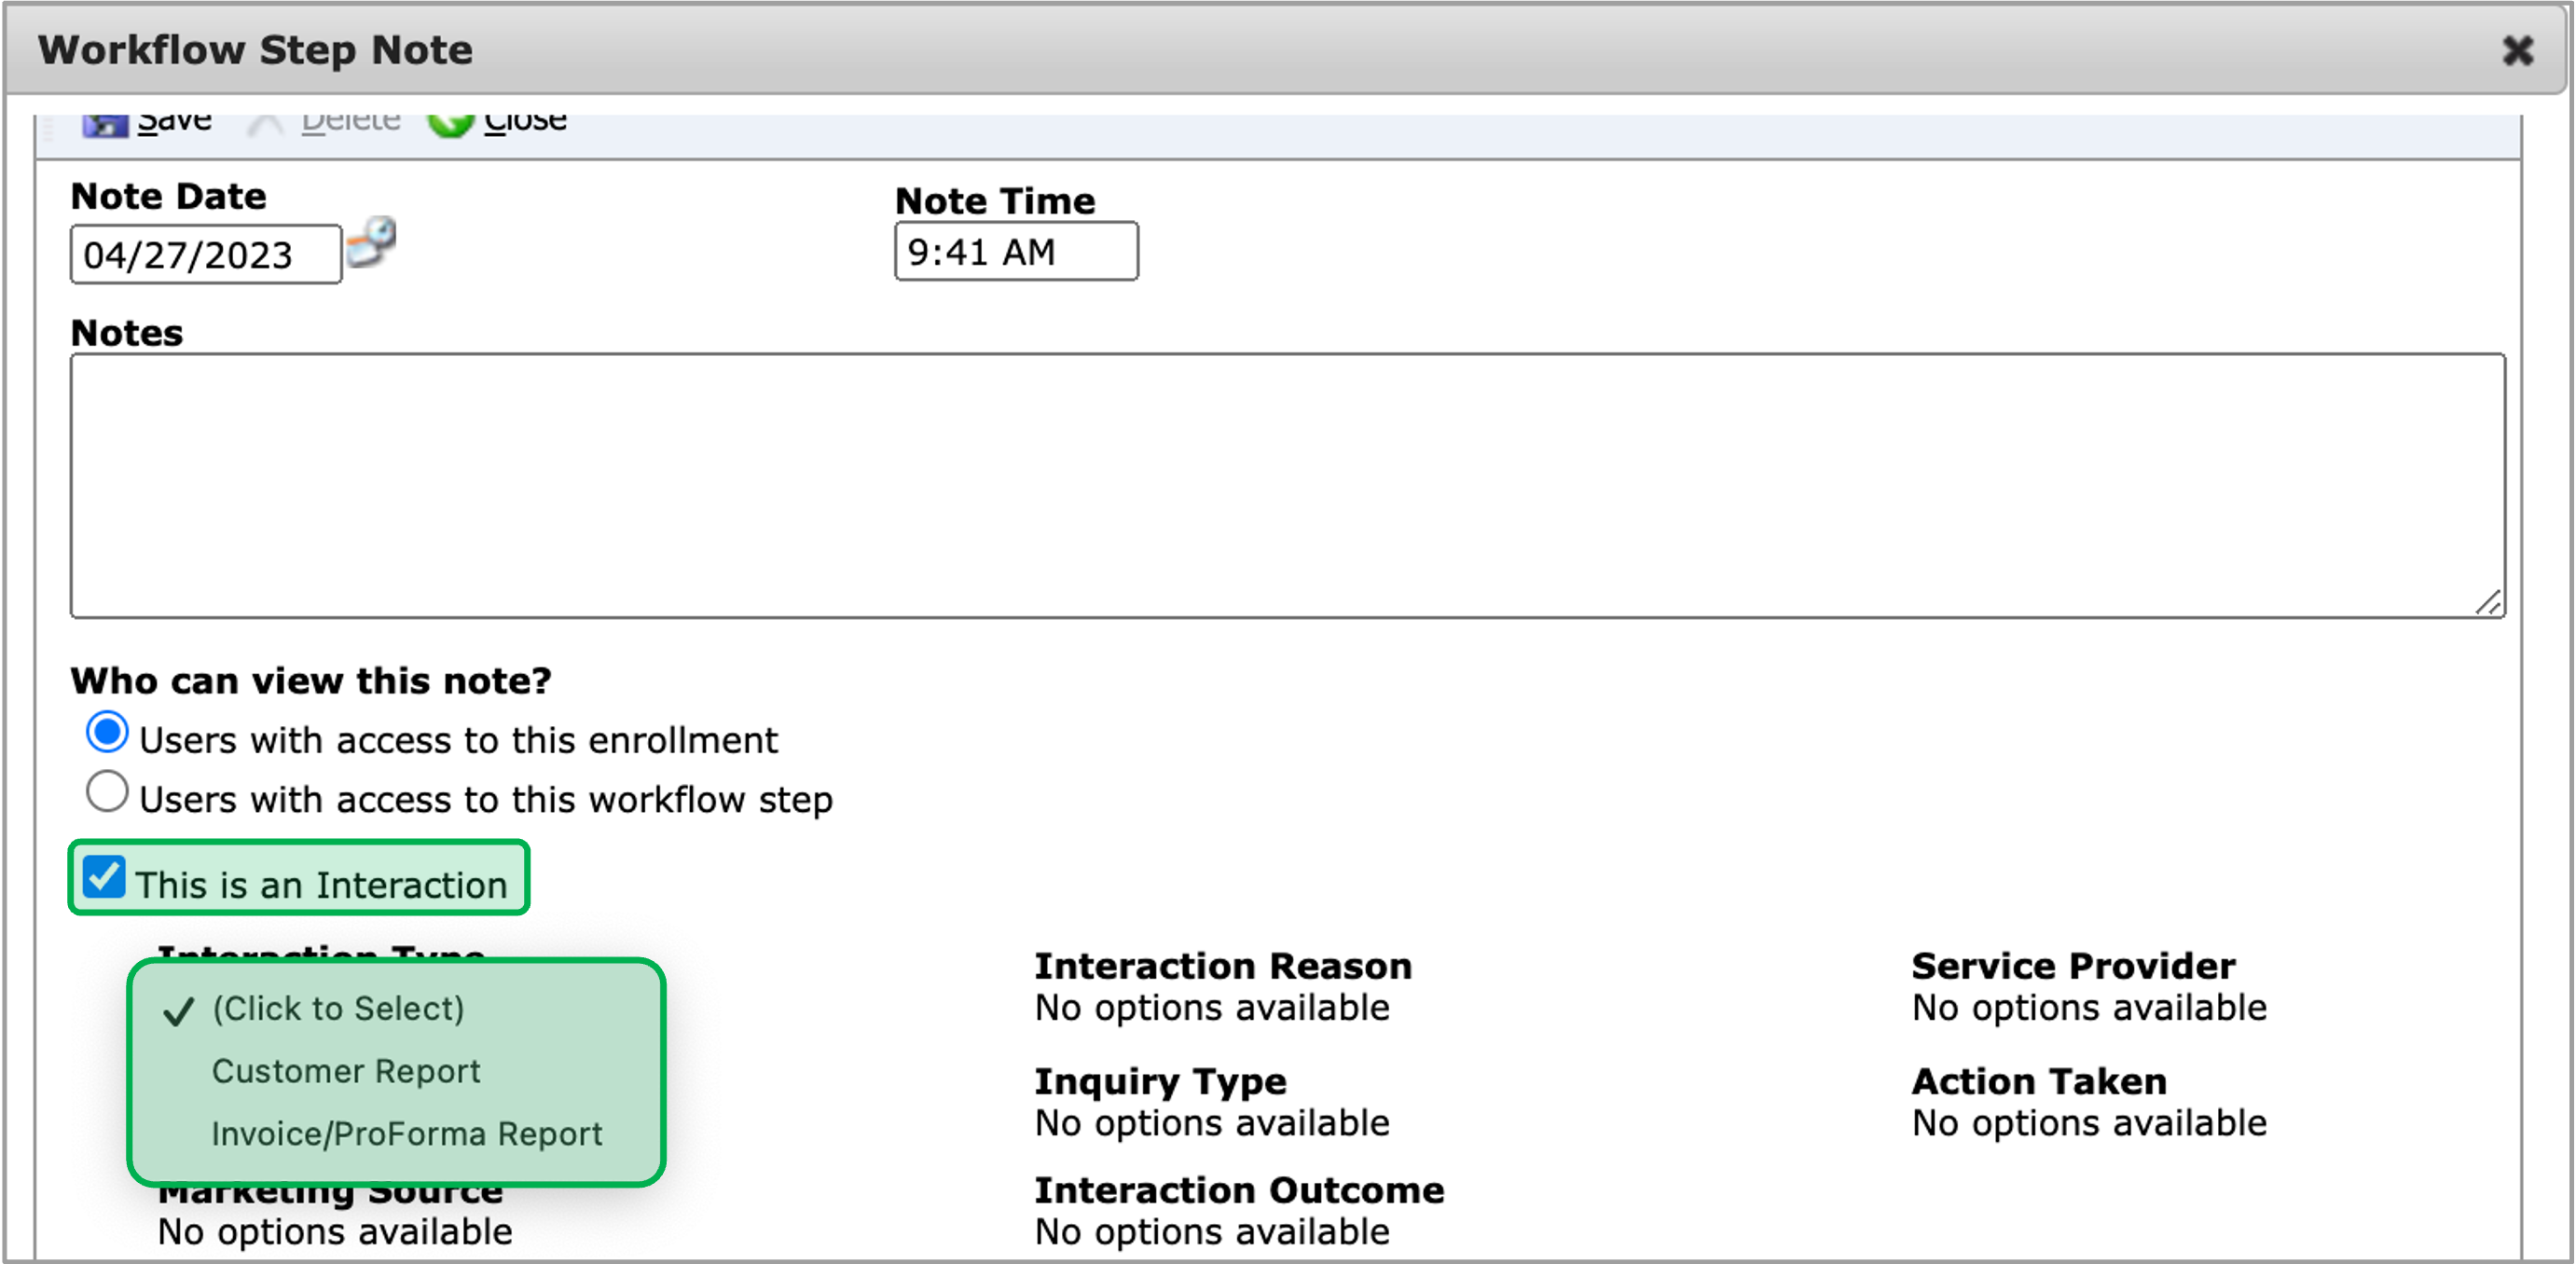
Click Save to save the new Note.
Once a note is saved, vendors cannot edit or delete it. Be sure to review the note carefully before clicking save.
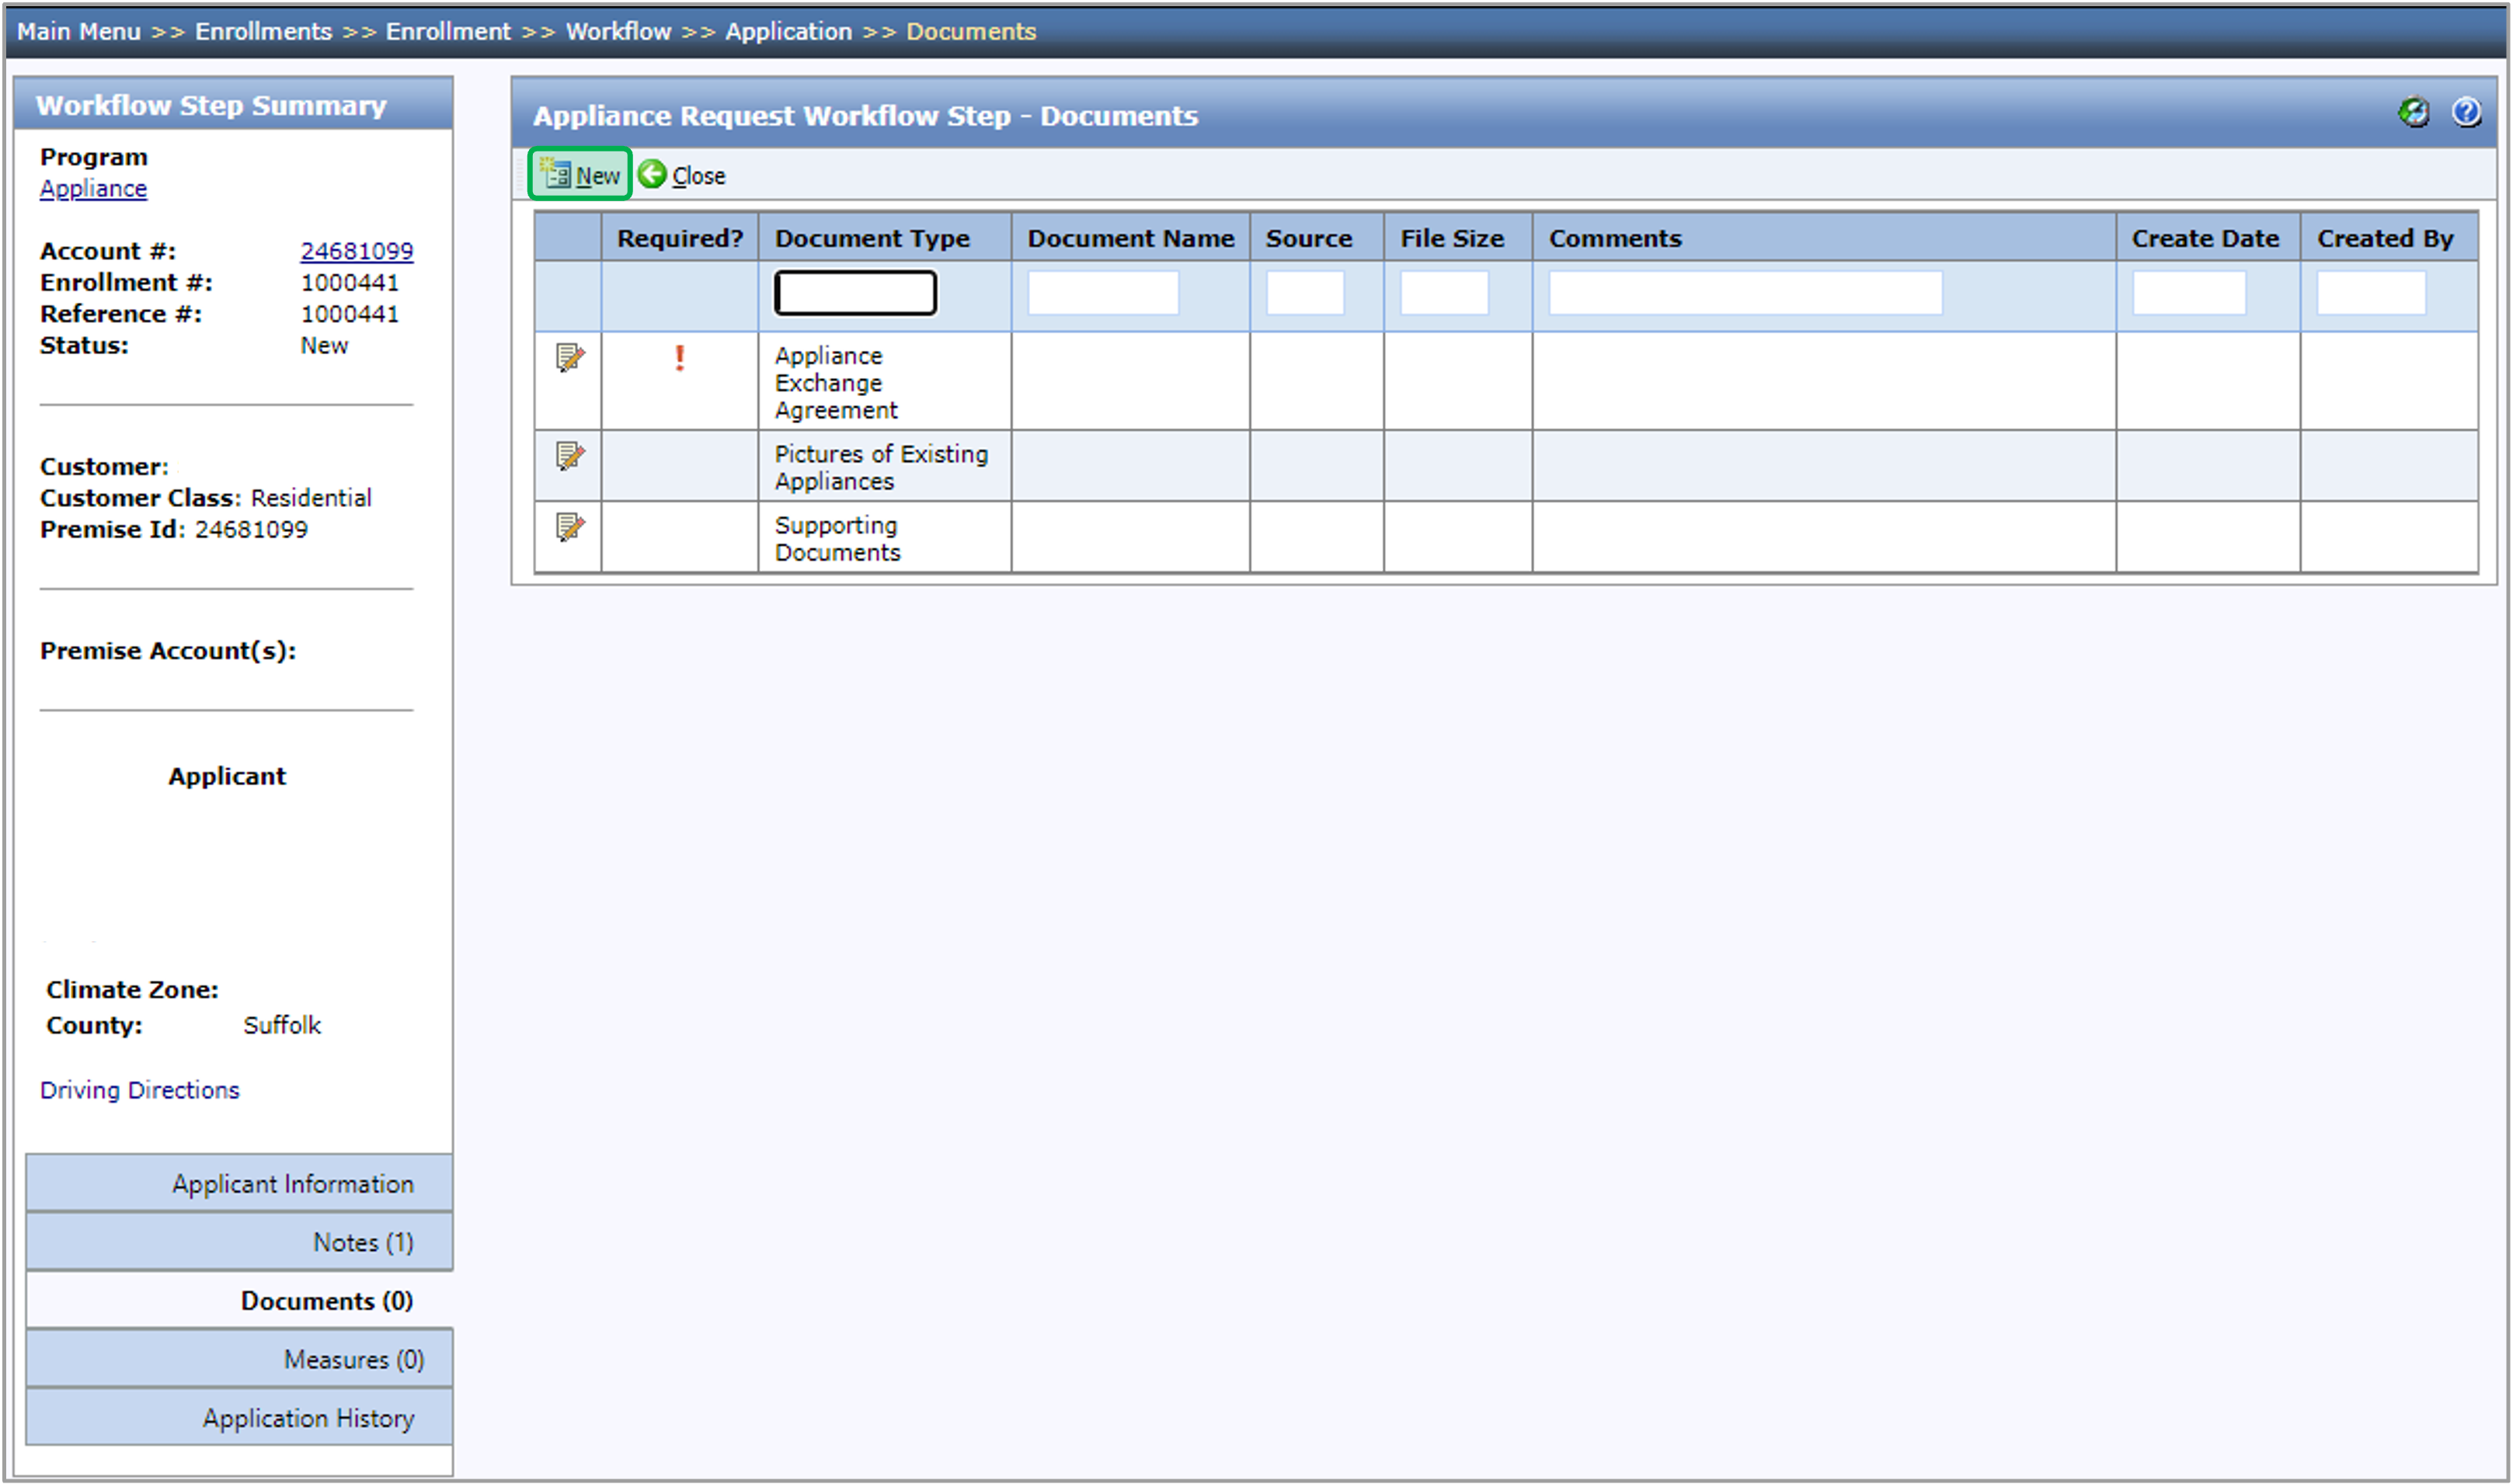
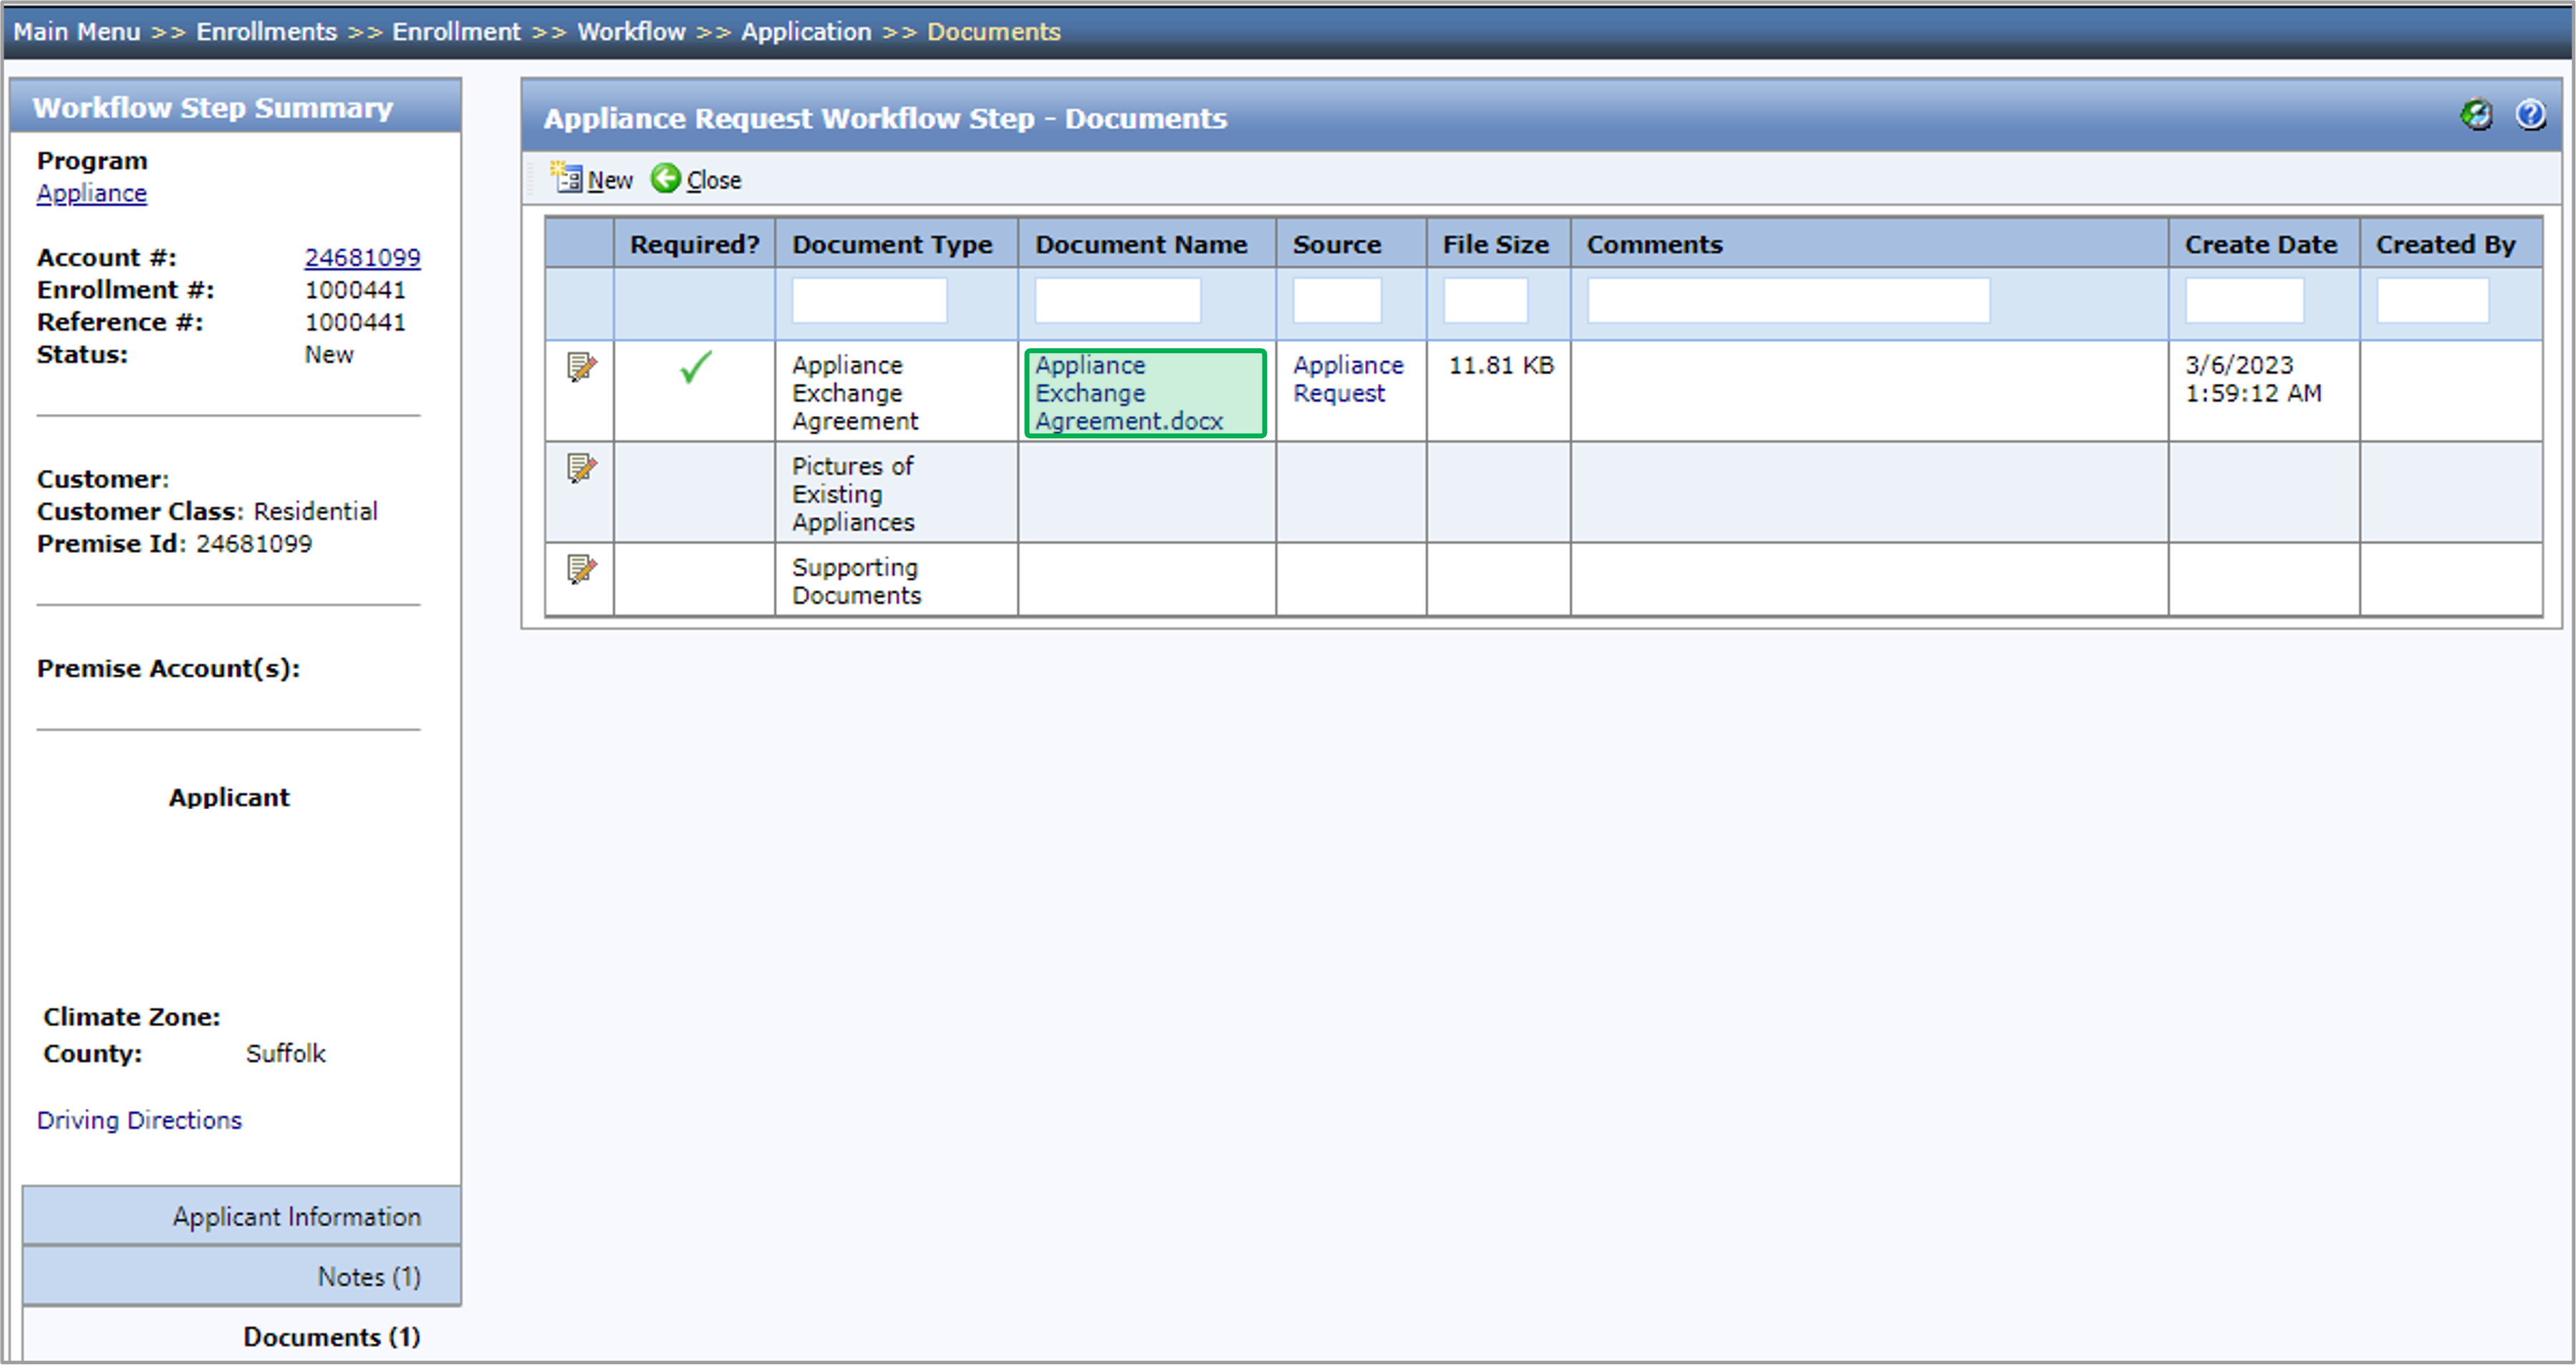
The instruction below provides guidances on how to upload document(s) within an enrollment. A red exclamation mark will be displayed under the Required column indicating the document type being a Required Document.
Multiple documents can be uploaded at the same time:
PC Users: CTRL + Click
Mac Users: Command + Click
To upload a Document, access the enrollment's Documents tab during any step.
Click the New button for the Document dialog will open.
Click Browse to select a file to upload.
Multiple documents can be uploaded at the same time.
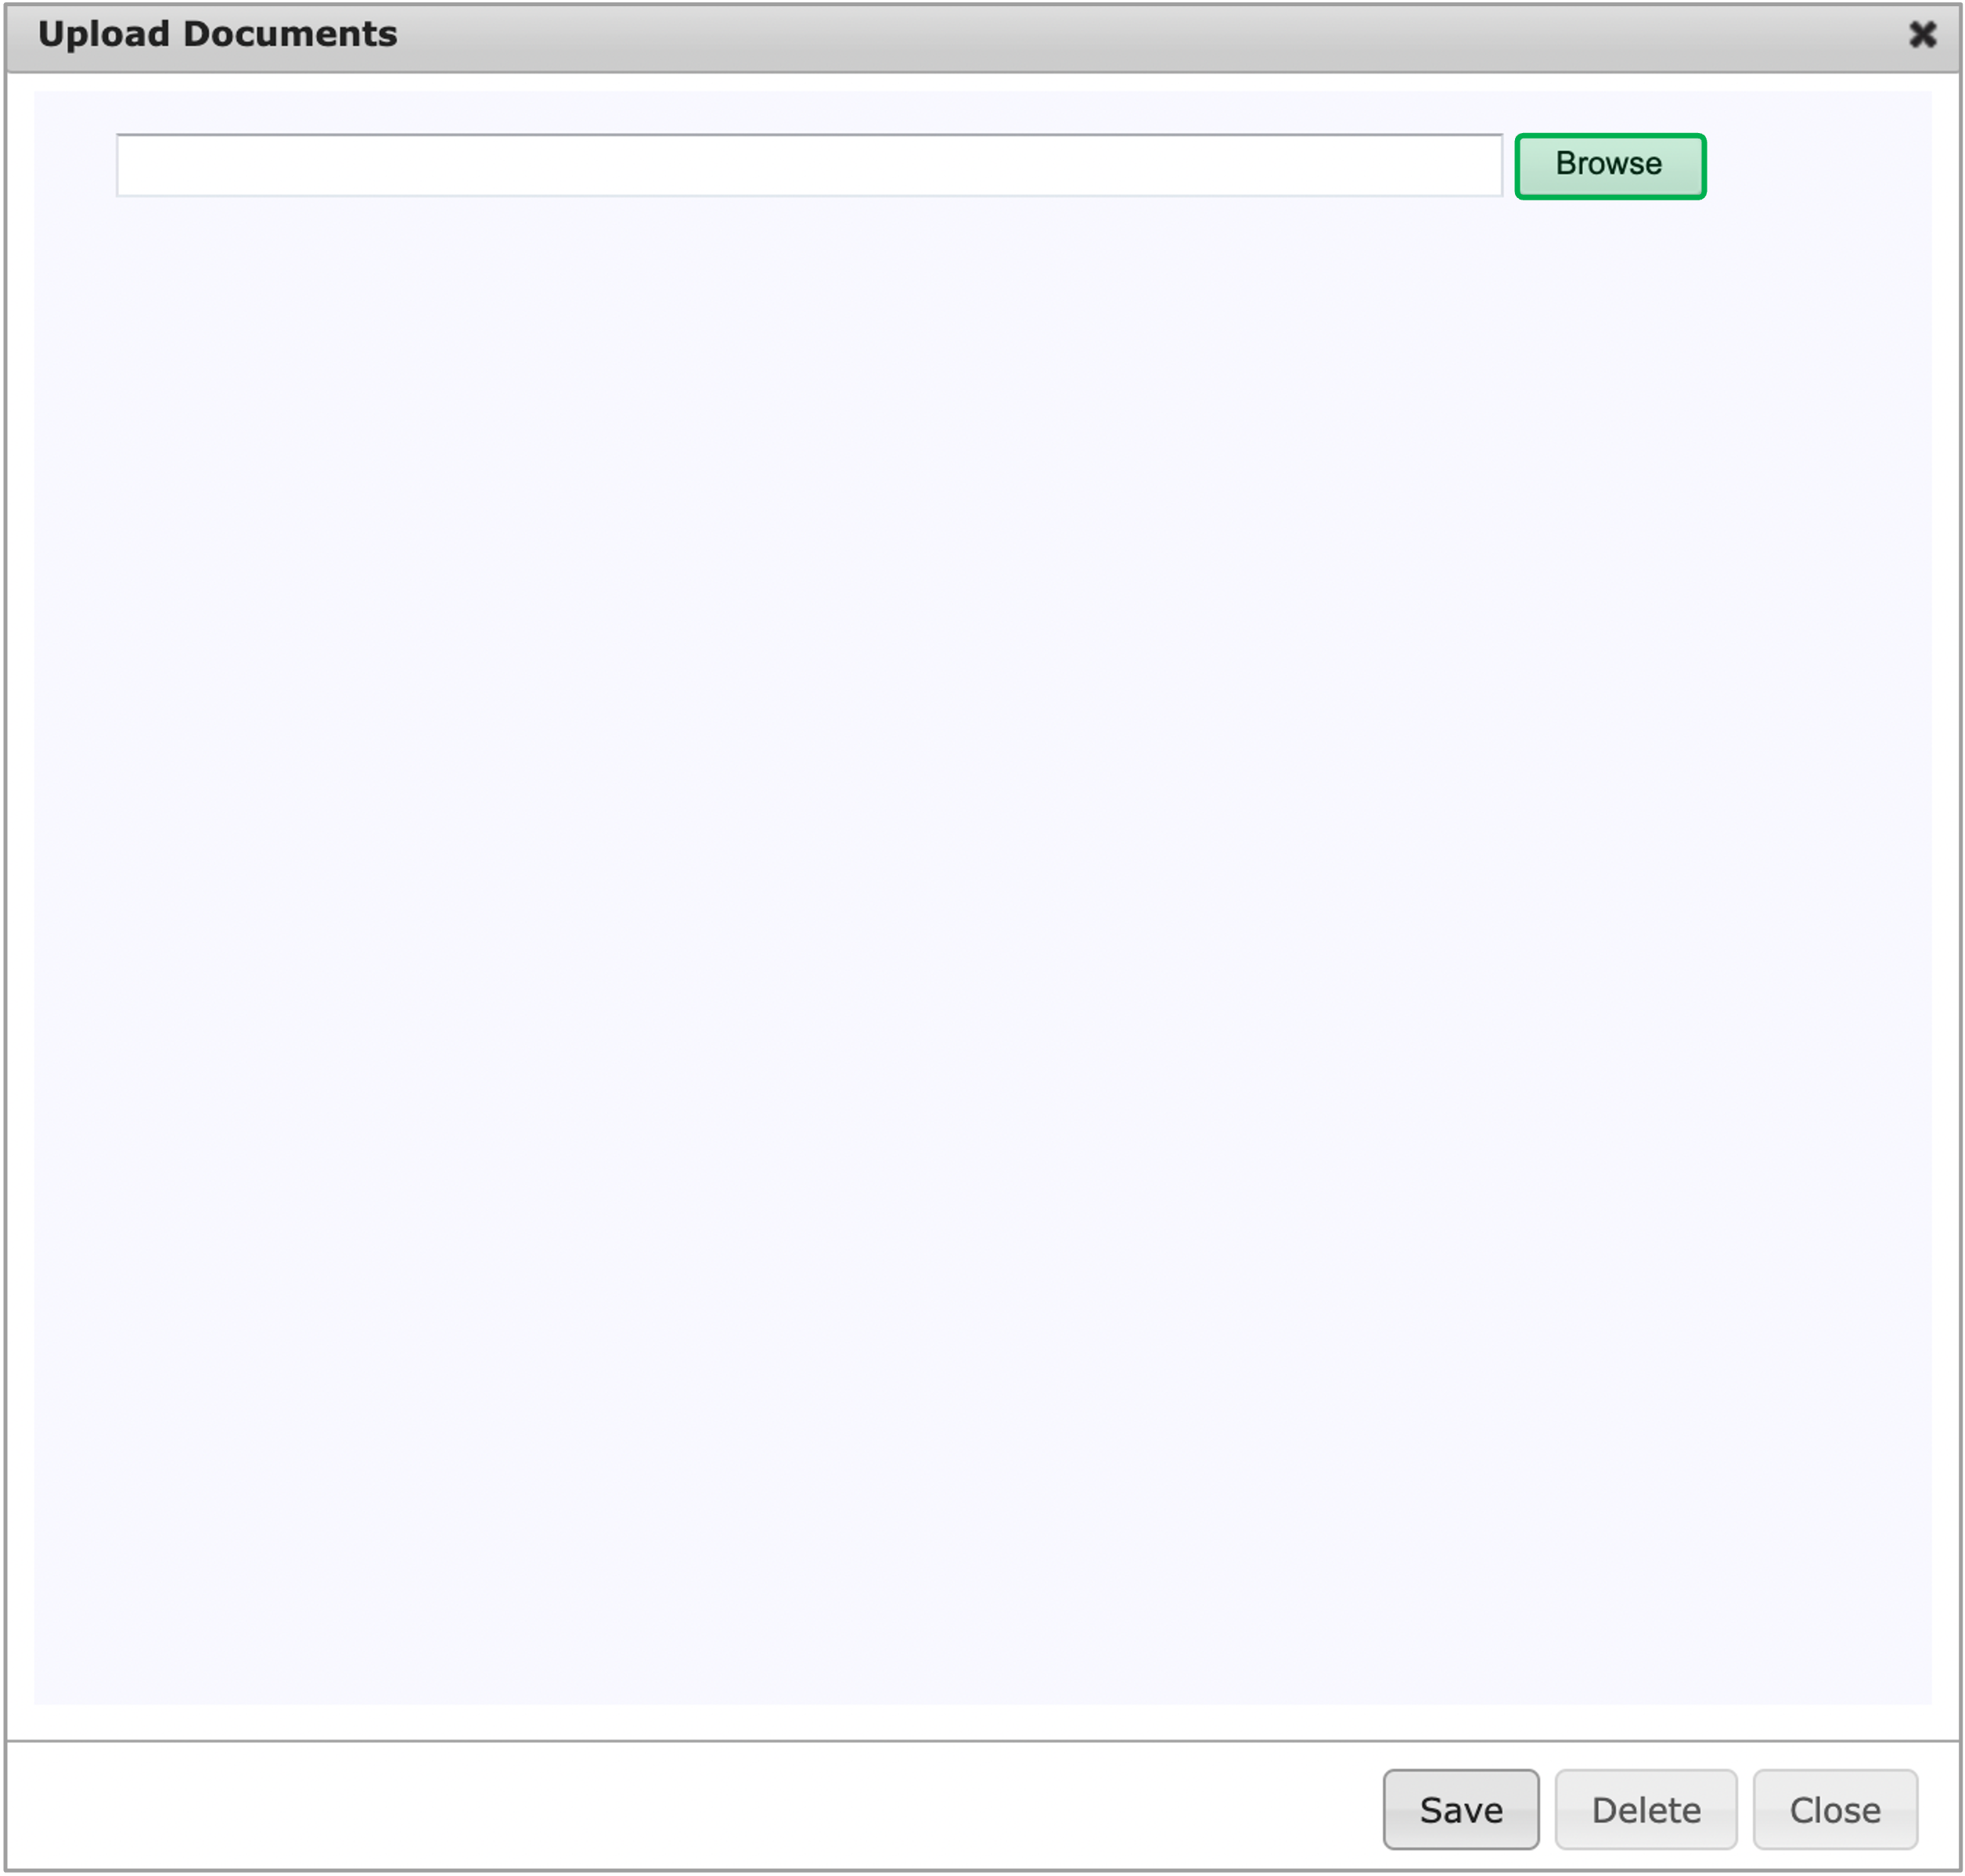
After the file is uploaded for the Document Type, click Save and then click Close to upload the file and close the dialog.
After you’ve selected a file, you can remove it by clicking the x Remove button.
This is your last opportunity to click Remove to not upload a specific document. Once Save is clicked, the document becomes a public record and it cannot be edited, deleted, or otherwise overwritten. If the wrong document is uploaded, you will need to upload the correct document and use the Comments fields to let both CLEAResult and NYSERDA know which is the correct document to review.

To download and view an uploaded document, click the Document Name Hyperlink.
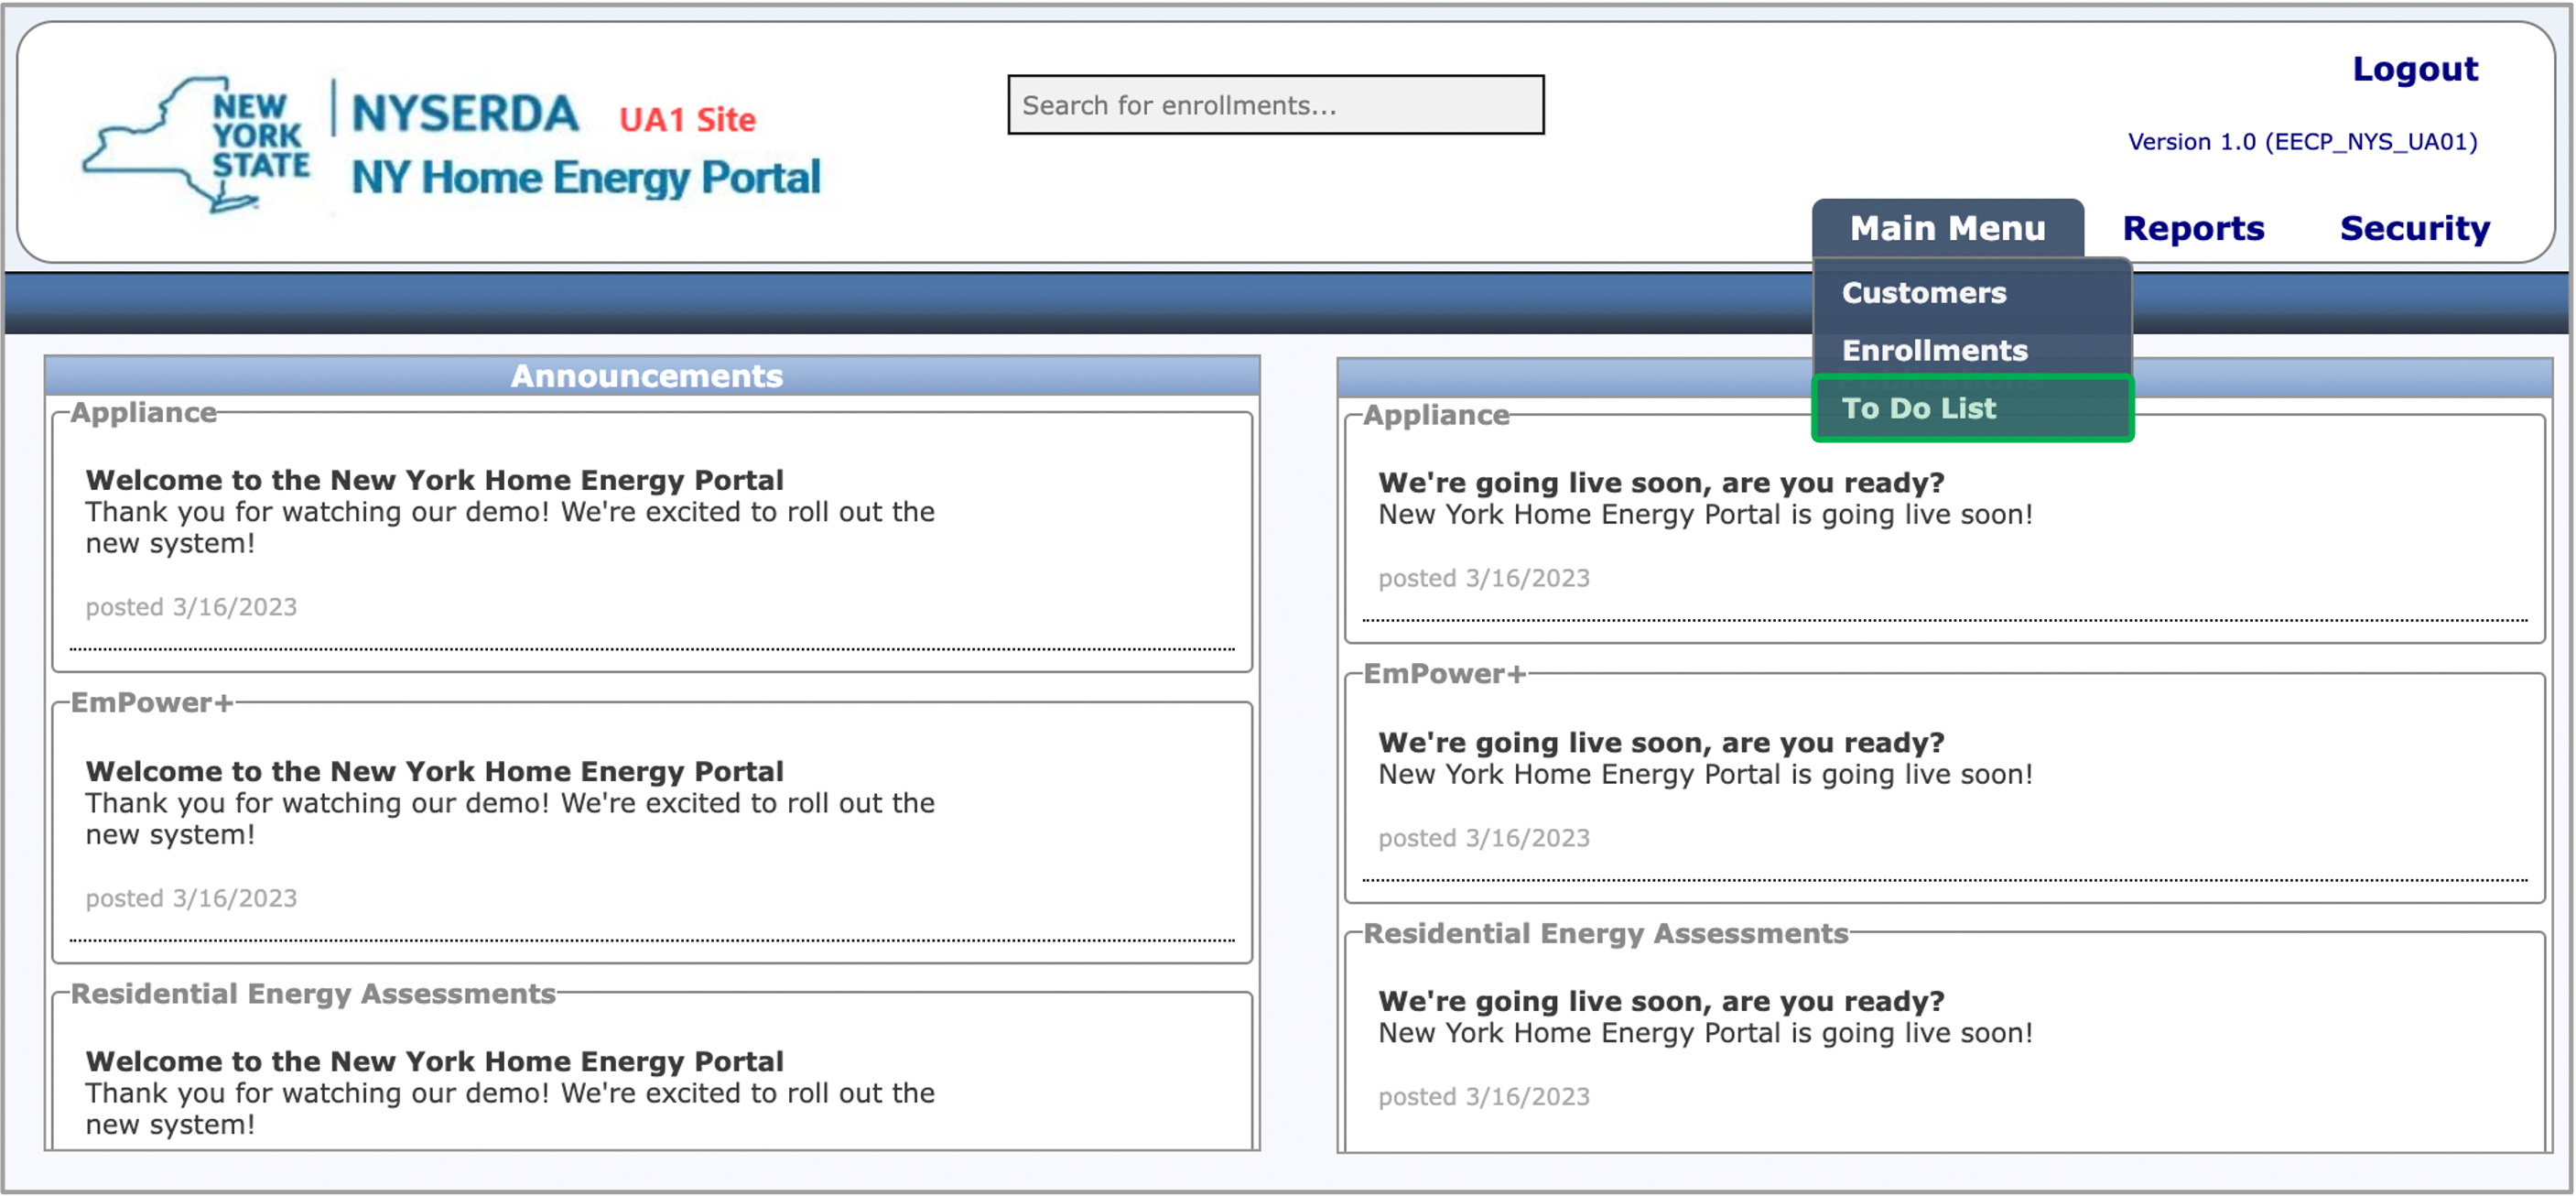
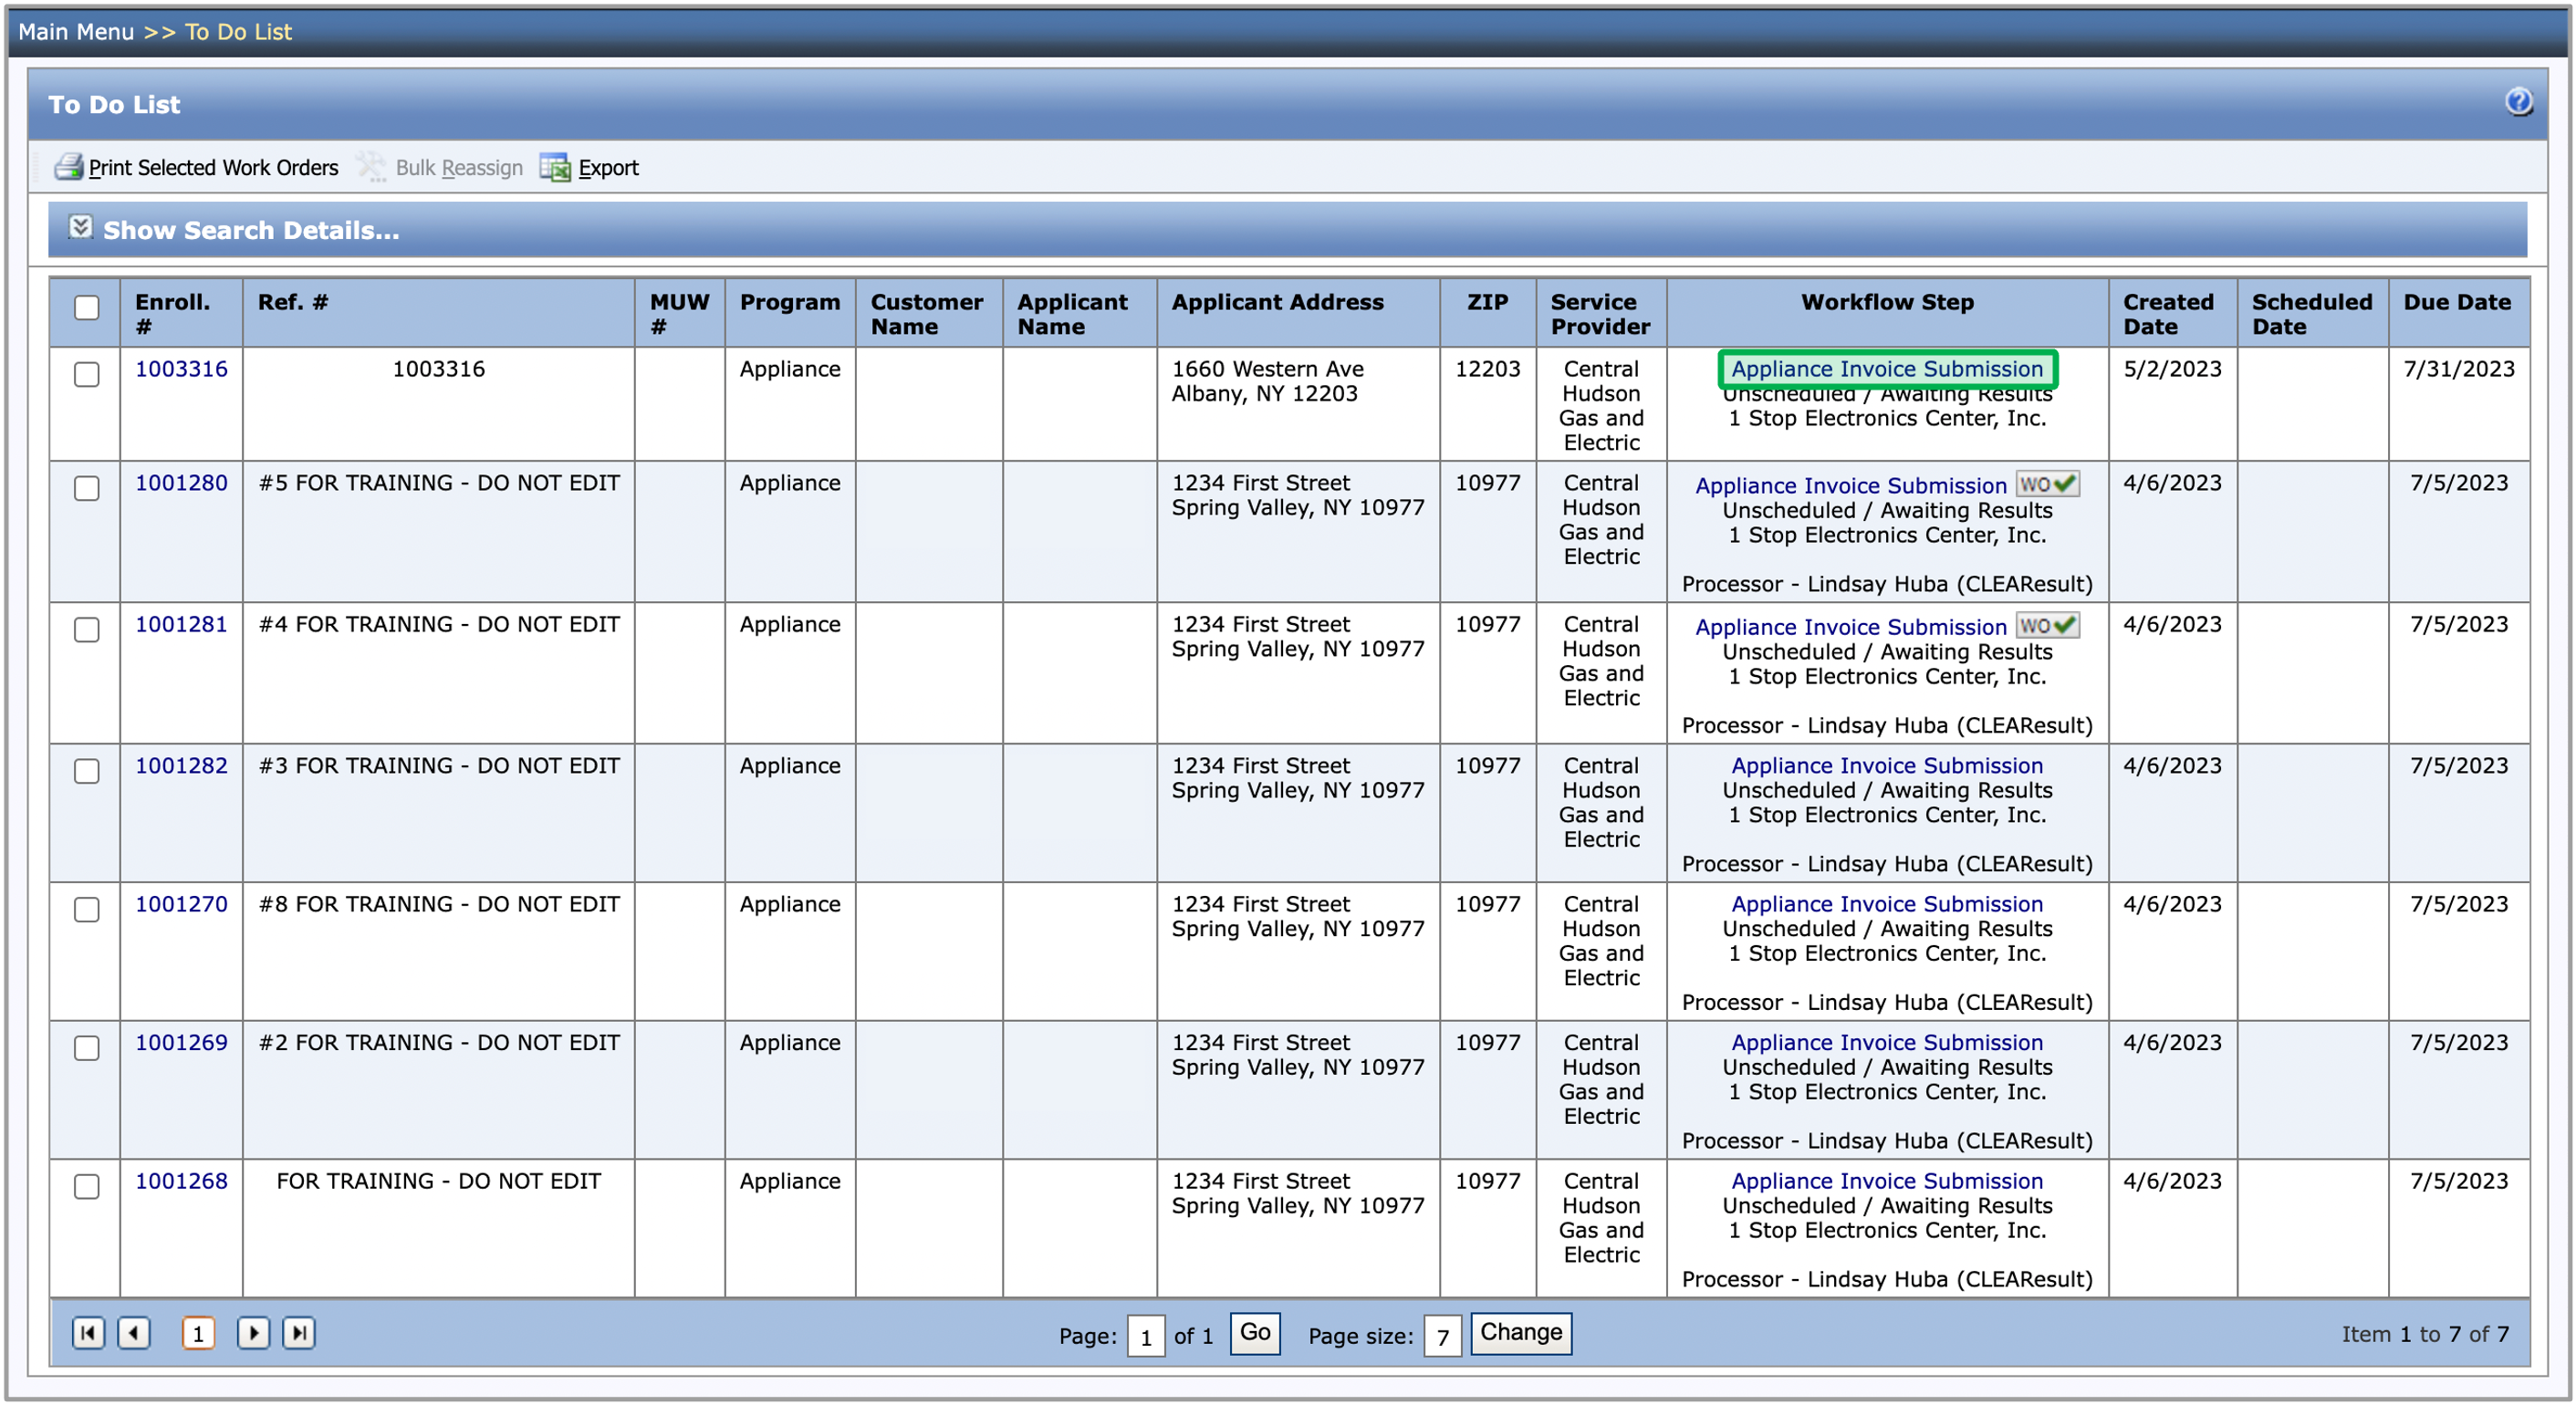
The instruction below provides guidances on how to access and use the To Do List to locate Appliance Enrollments specifically at the Appliance Invoice Submission Workflow Step.
Access the To Do List from the Main Menu. The To Do list will automatically search for and show any enrollments assigned specifically to you.
The filters on the To Do List can be used to search for and locate specific enrollments. Click on the Workflow Step drop-down menu and select Appliance Invoice Submission.
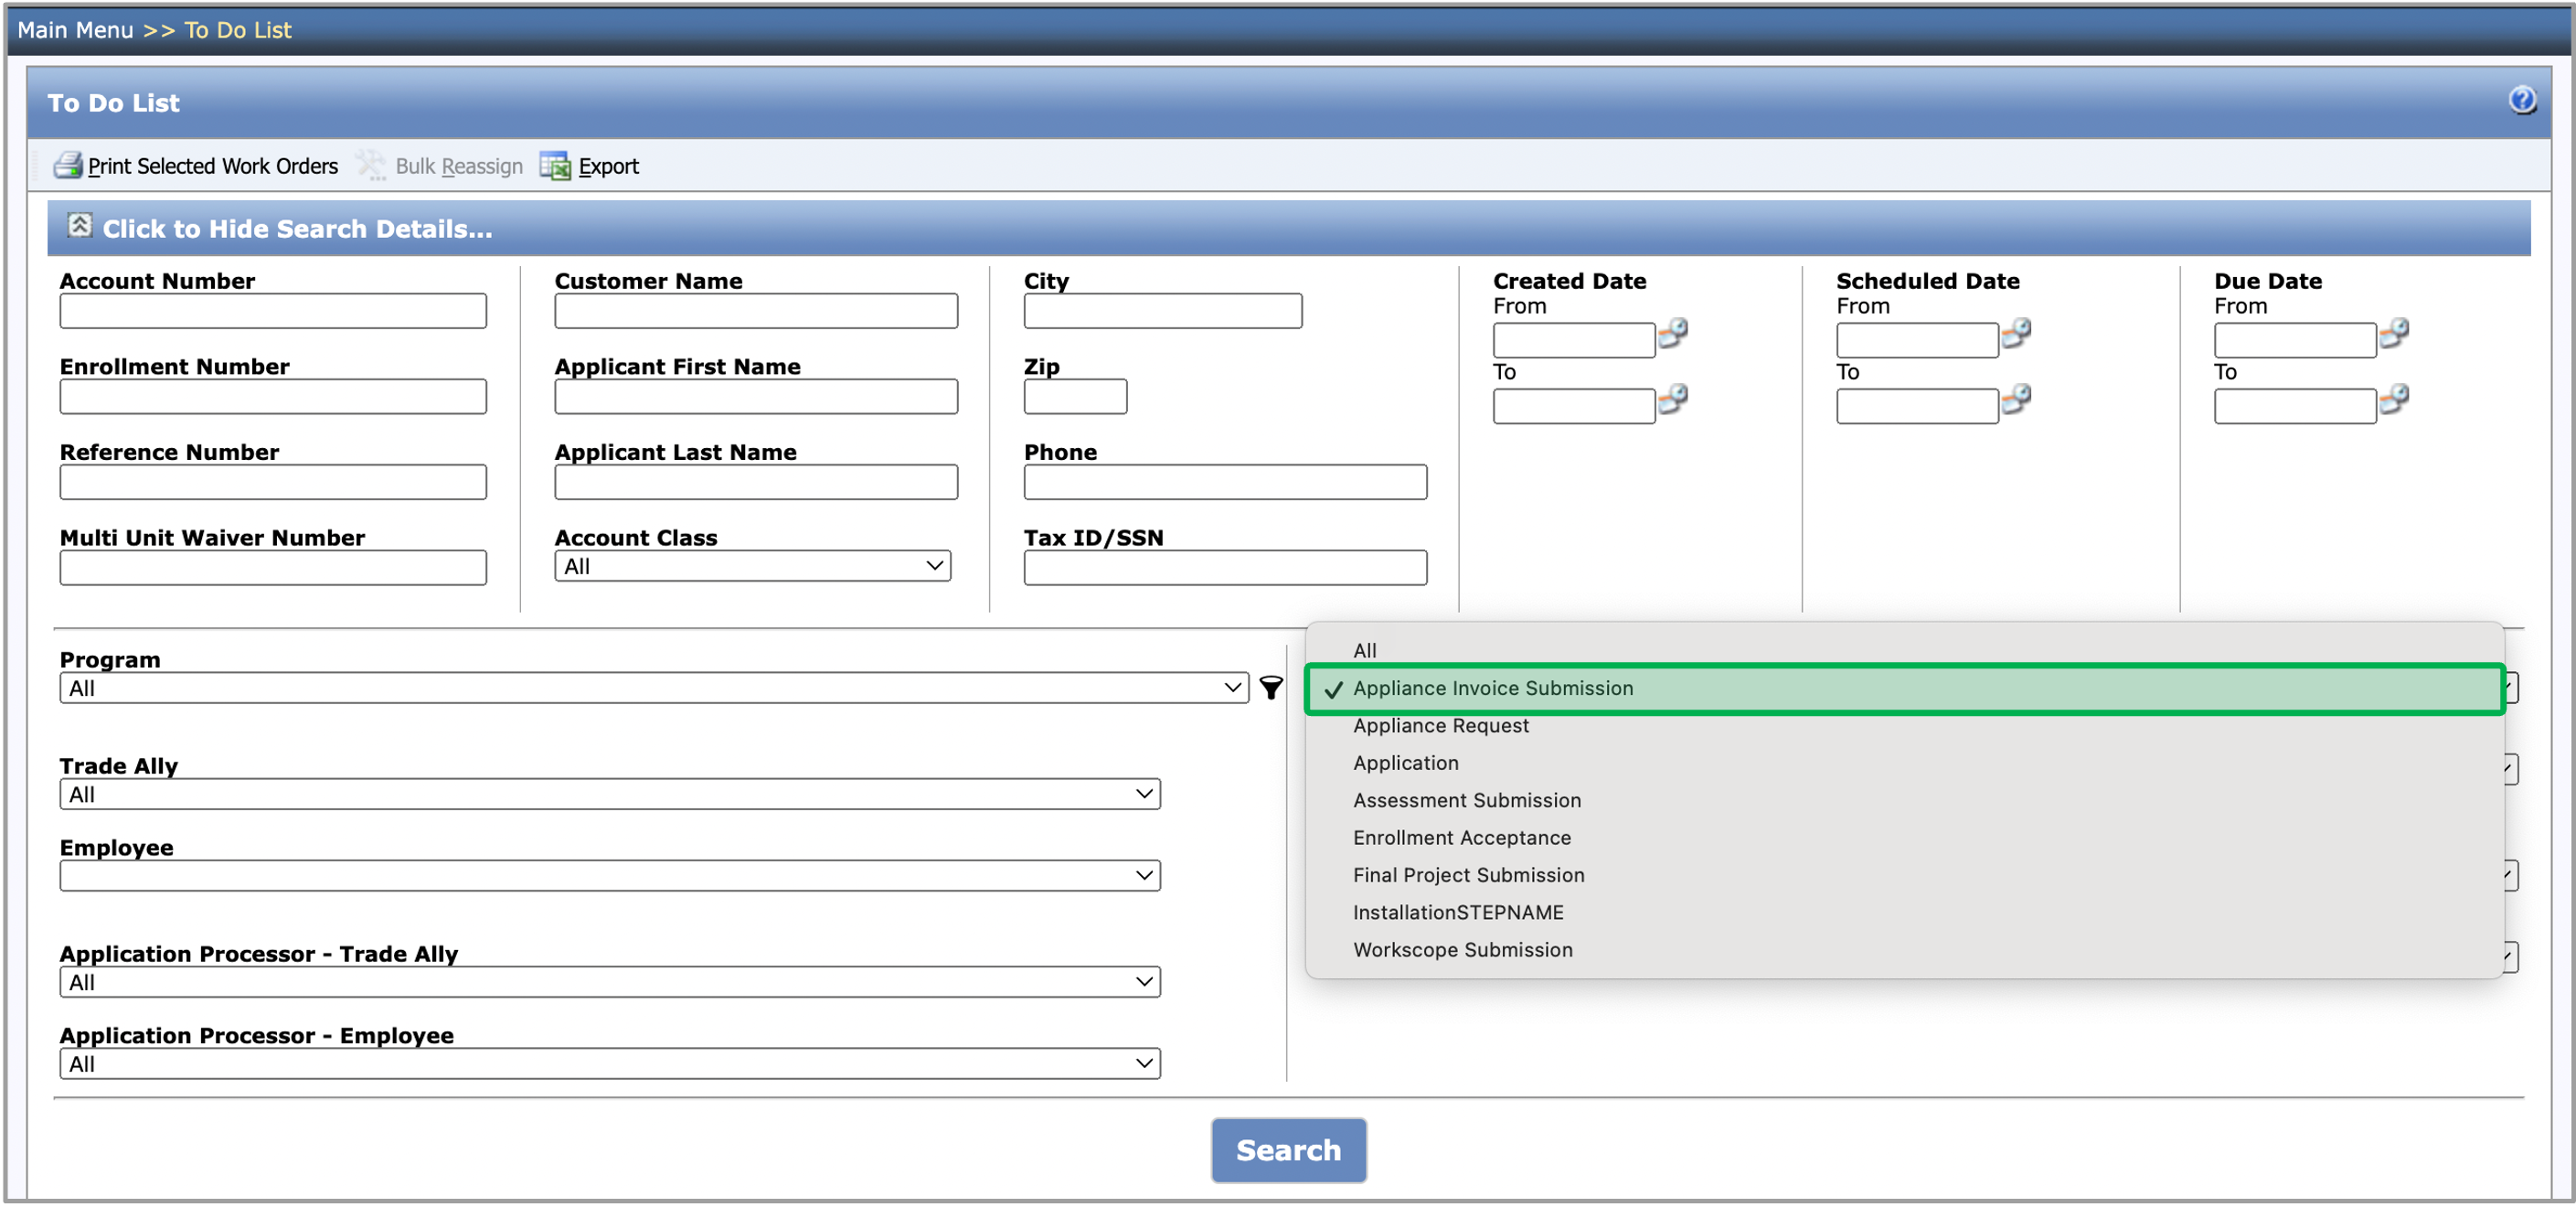
Once all the filters are applied, proceed by clicking on the Search button.
To access the Appliance Workflow step, click on the Appliance Invoice Submission hyperlink. The page will redirect to the workflow step.
The instruction below provides guidances on the Appliance Invoice Submission process. Appliance Invoice Submission
On the Appliance Workflow step page, the vendors can assign/change the employee under the Employee drop-down, if there is a different employee who will be performing the work.
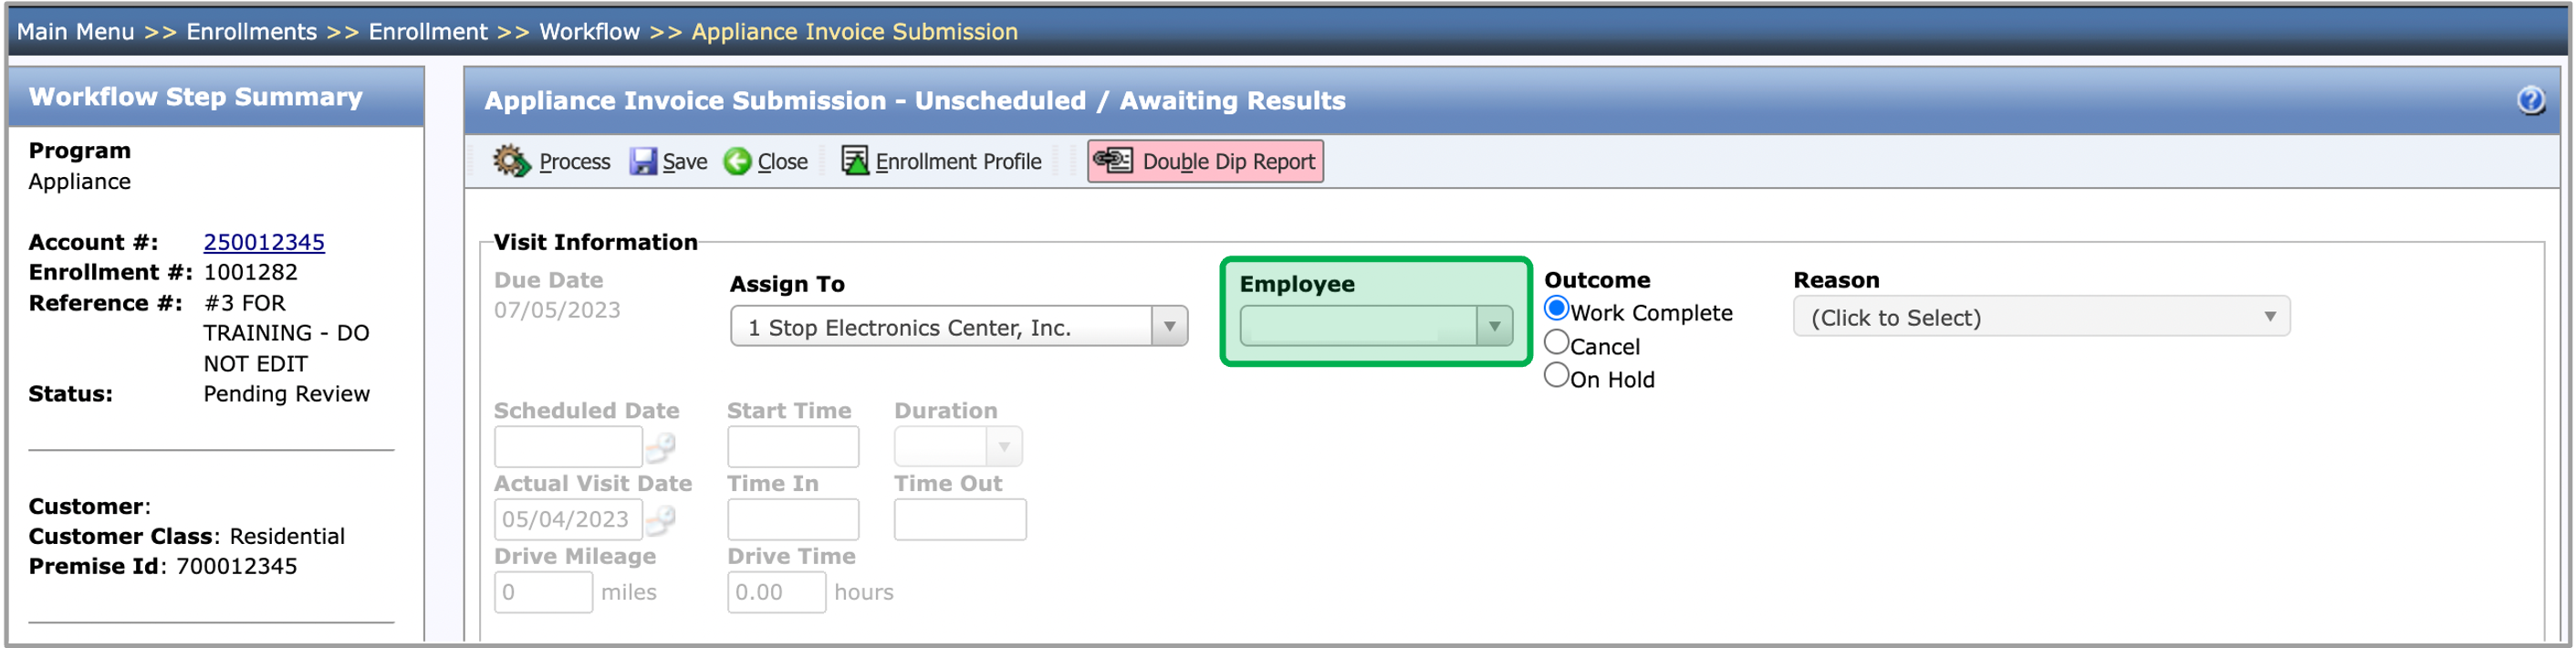
The vendors can determine if the work is Complete, Canceled, or On Hold under the Outcome section.
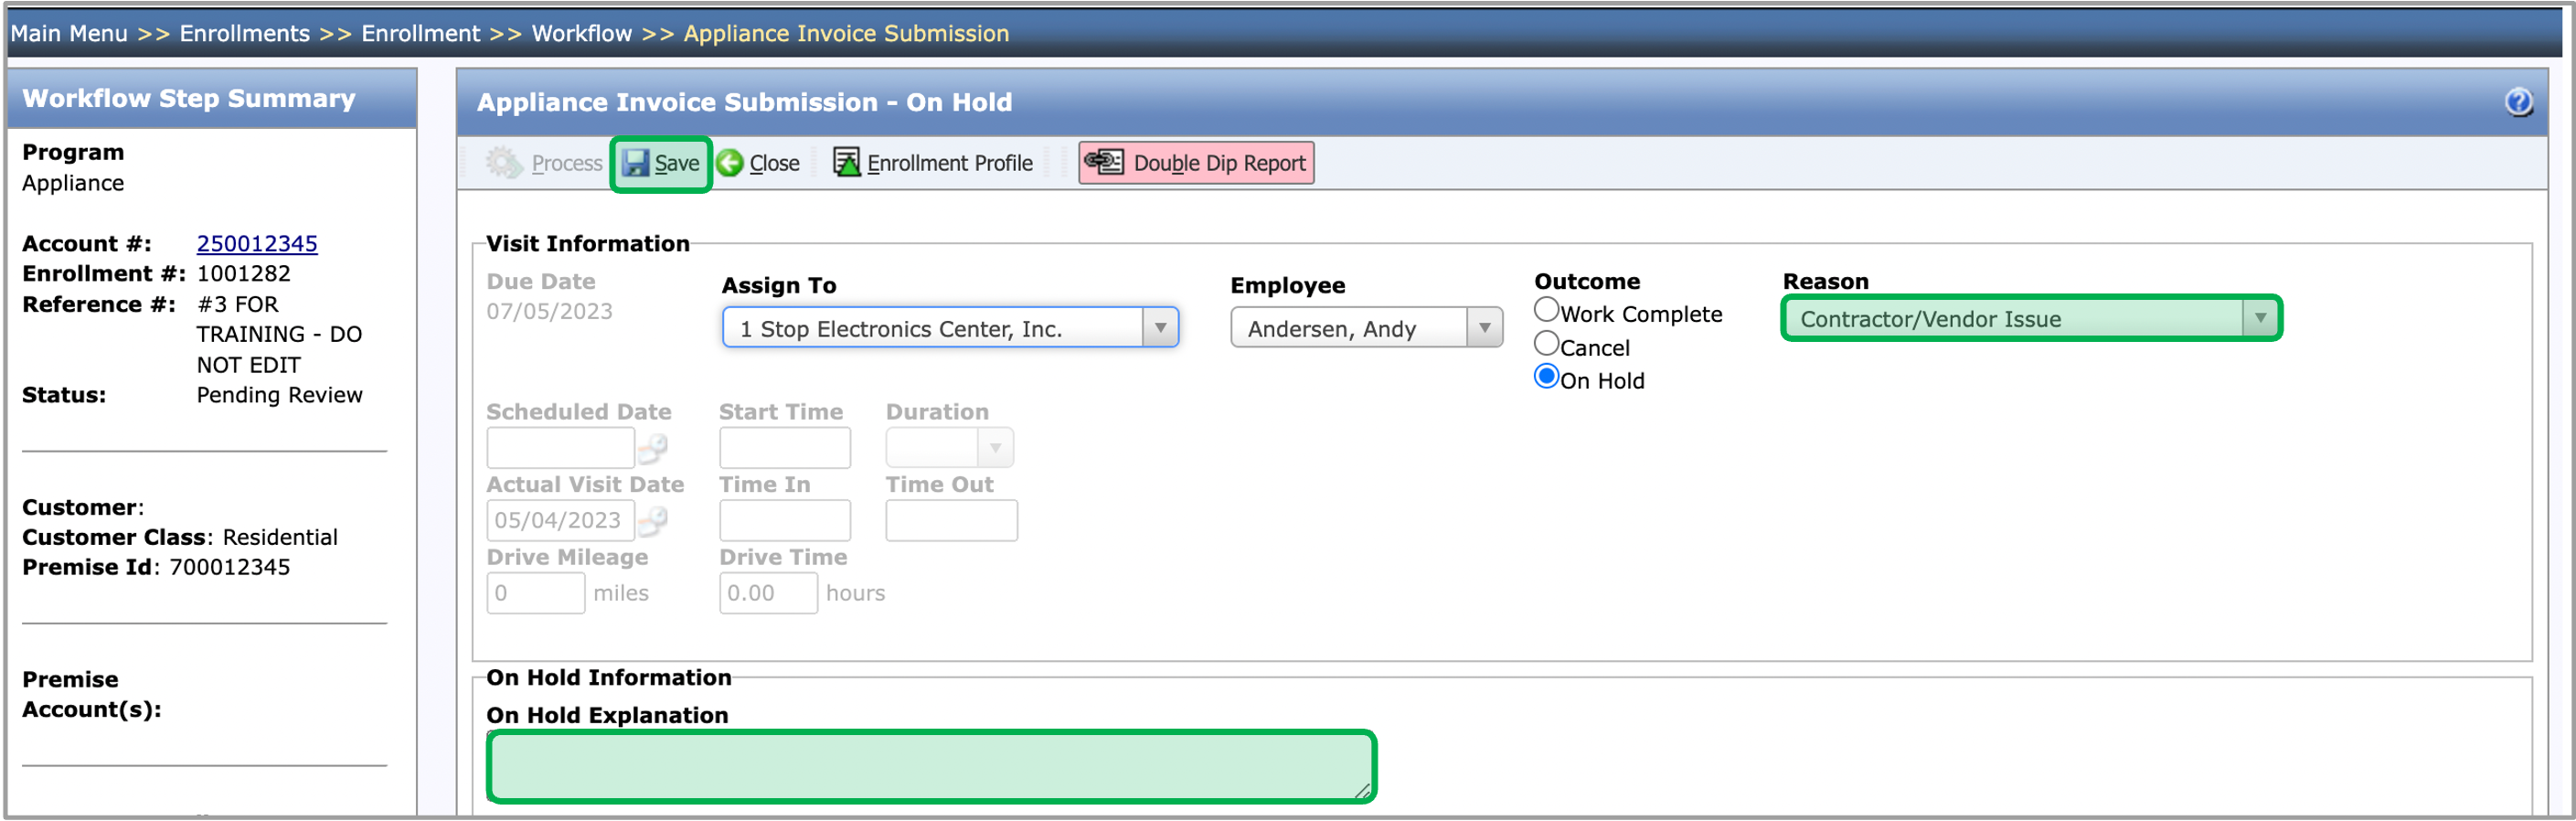
If On Hold is selected from the Outcome, you will be required to select a Reason. Once Save is clicked, a fields will appear in the On Hold Information section to document the reason for the hold. Enrollments on hold cannot be processed until the hold is removed.
If Cancel is selected from the Outcome, you will be required to select a Reason and add a Note in the Notes tab. Once a note is added, click Save and then the Process button for the enrollment to be send back to ClearResults to assign a new Appliance Vendor.
Review the Add Notes section above for guidance on how to add a note in the Notes tab.
Review the Upload Documents section above for guidance on how to upload required documents in the Documents tab.
Once all of the documents and notes are added, return to the Workflow Step Detail tab and locate the Attestation section to confirm...