Participating Contractors: REA Enrollments
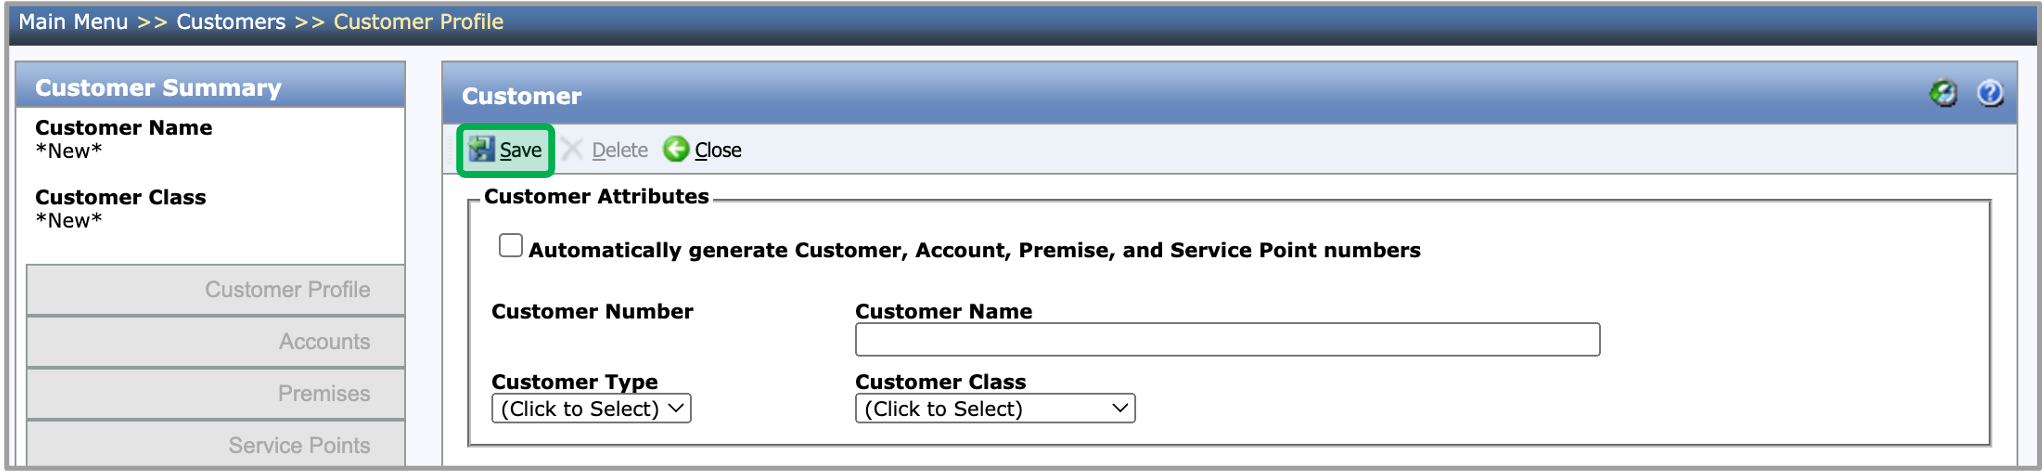
Navigate to Main Menu and select the Customers tab. Then click the New button for the New Customer page to open.

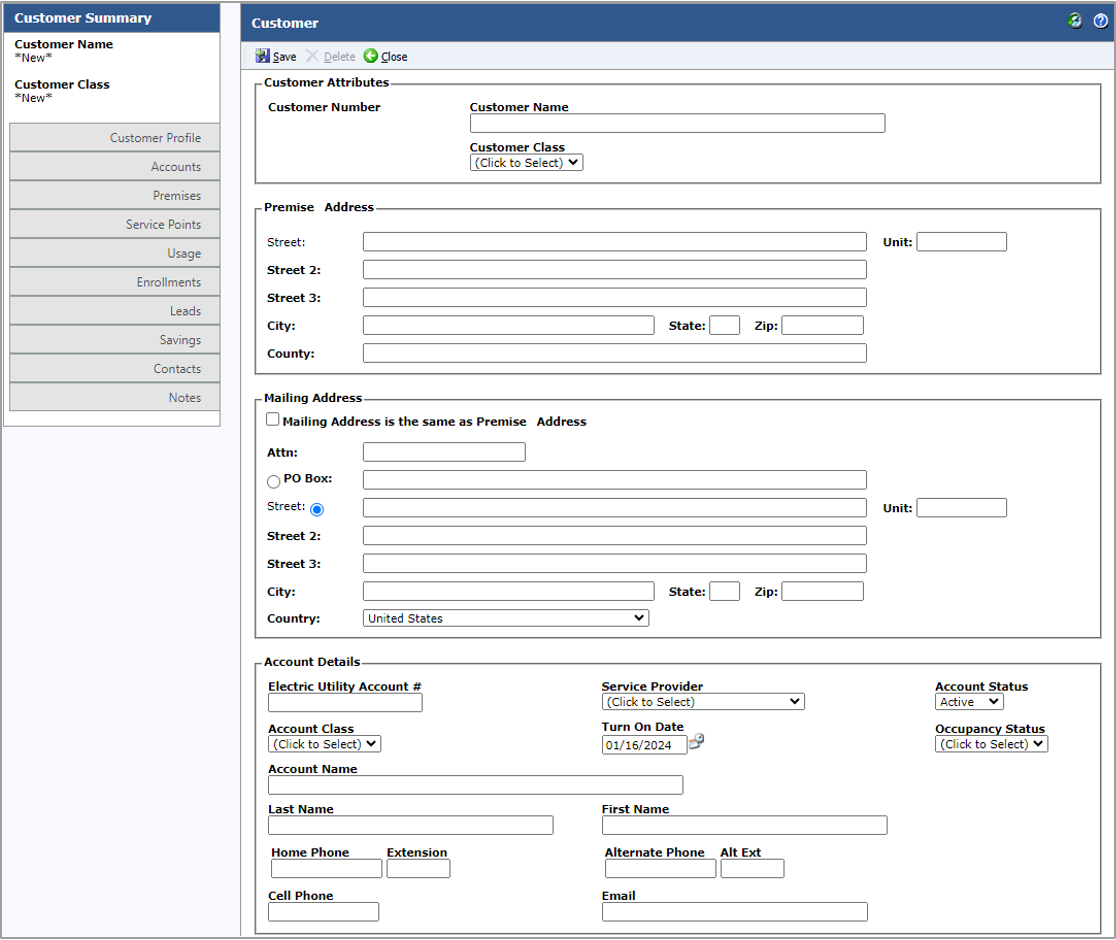
Complete all of the required fields listed below:
- Customer Name
- Customer Class
- Mailing Address
- Account Details
Vendor Premise ID
When finished, click the Save button.
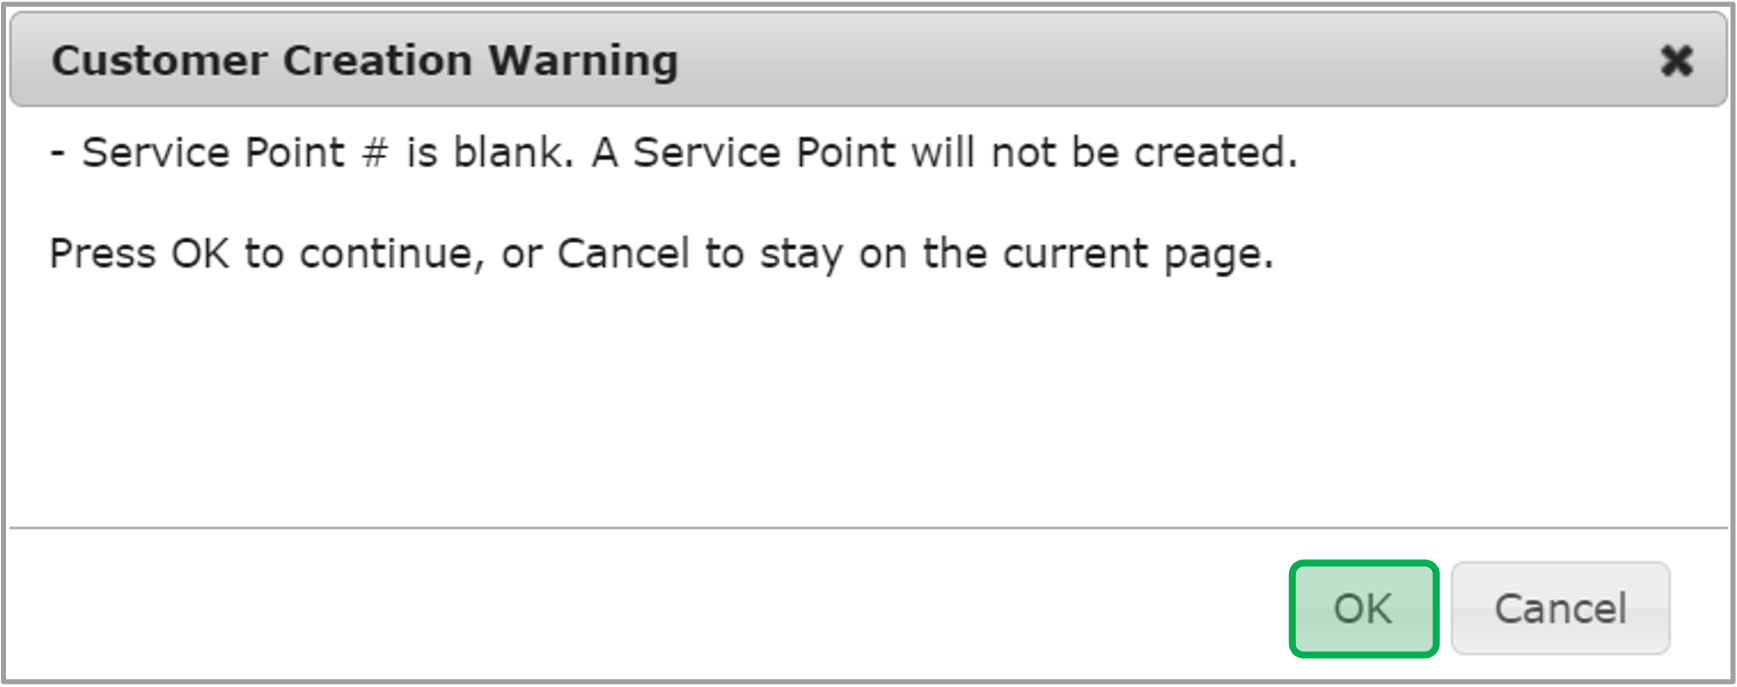
A warning will be displayed, press OK to continue. After that, the system will create a Customer, Account, and Premise.
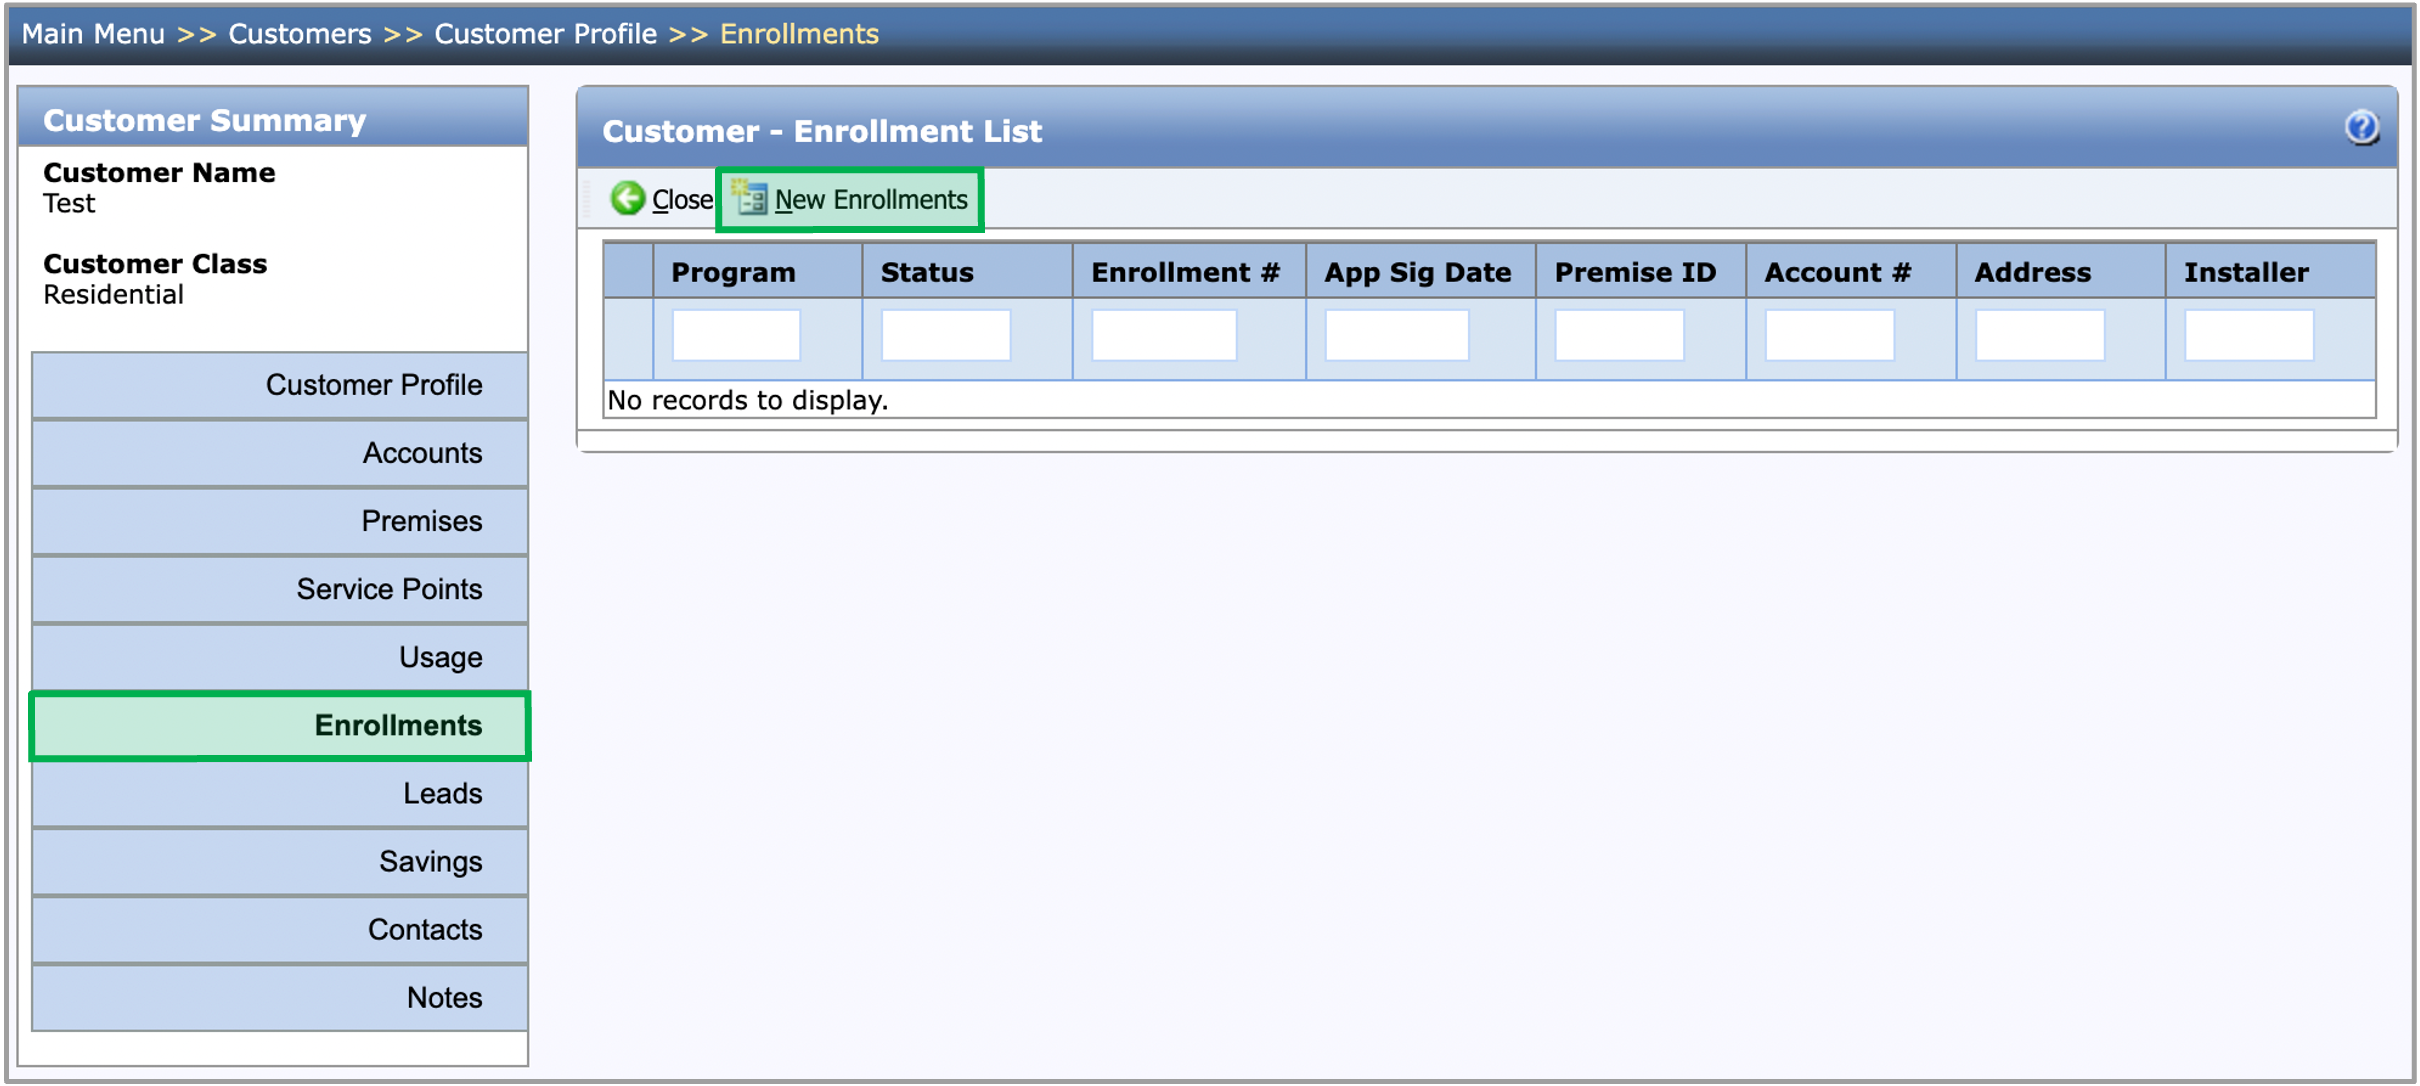
Navigate to Main Menu and select the Customers tab. Then type in your customer account number in the Search Bar to access the Customer Profile.

Within your Customer Profile, click the Enrollments Tab then click the New Enrollments button.
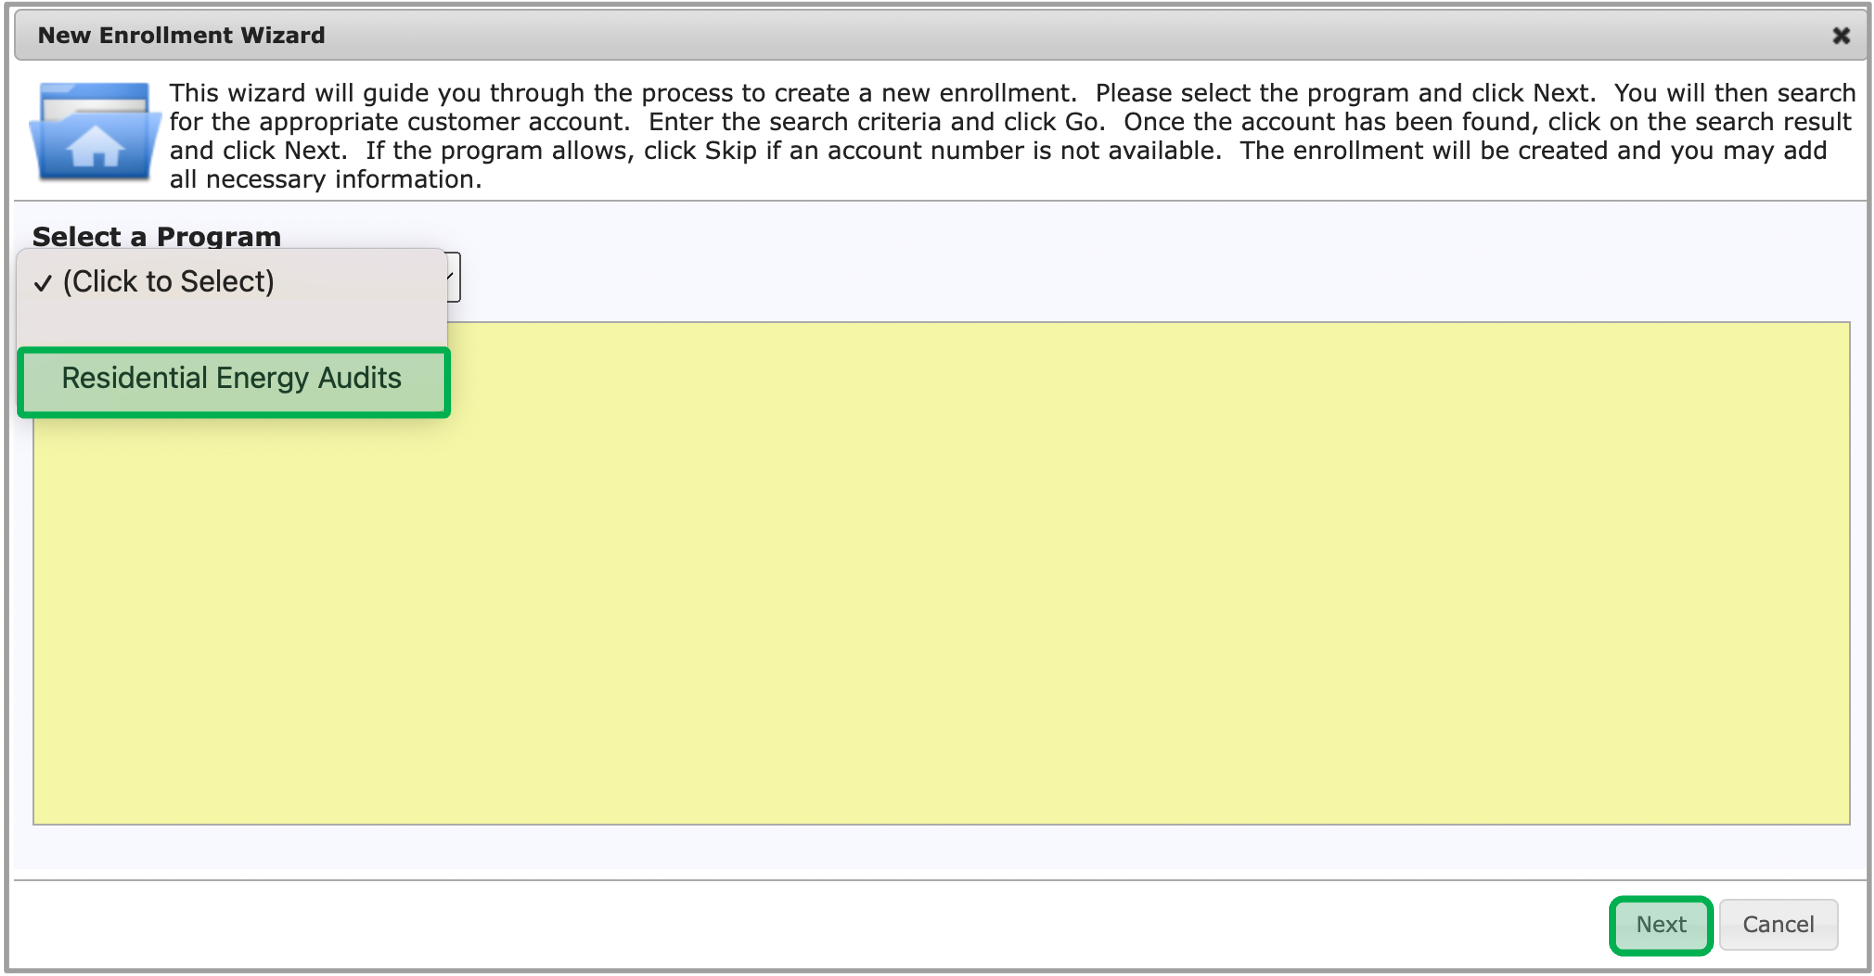
The New Enrollment Wizard window will open, select the Residential Energy Audits option in the dropdown. Then click Next.
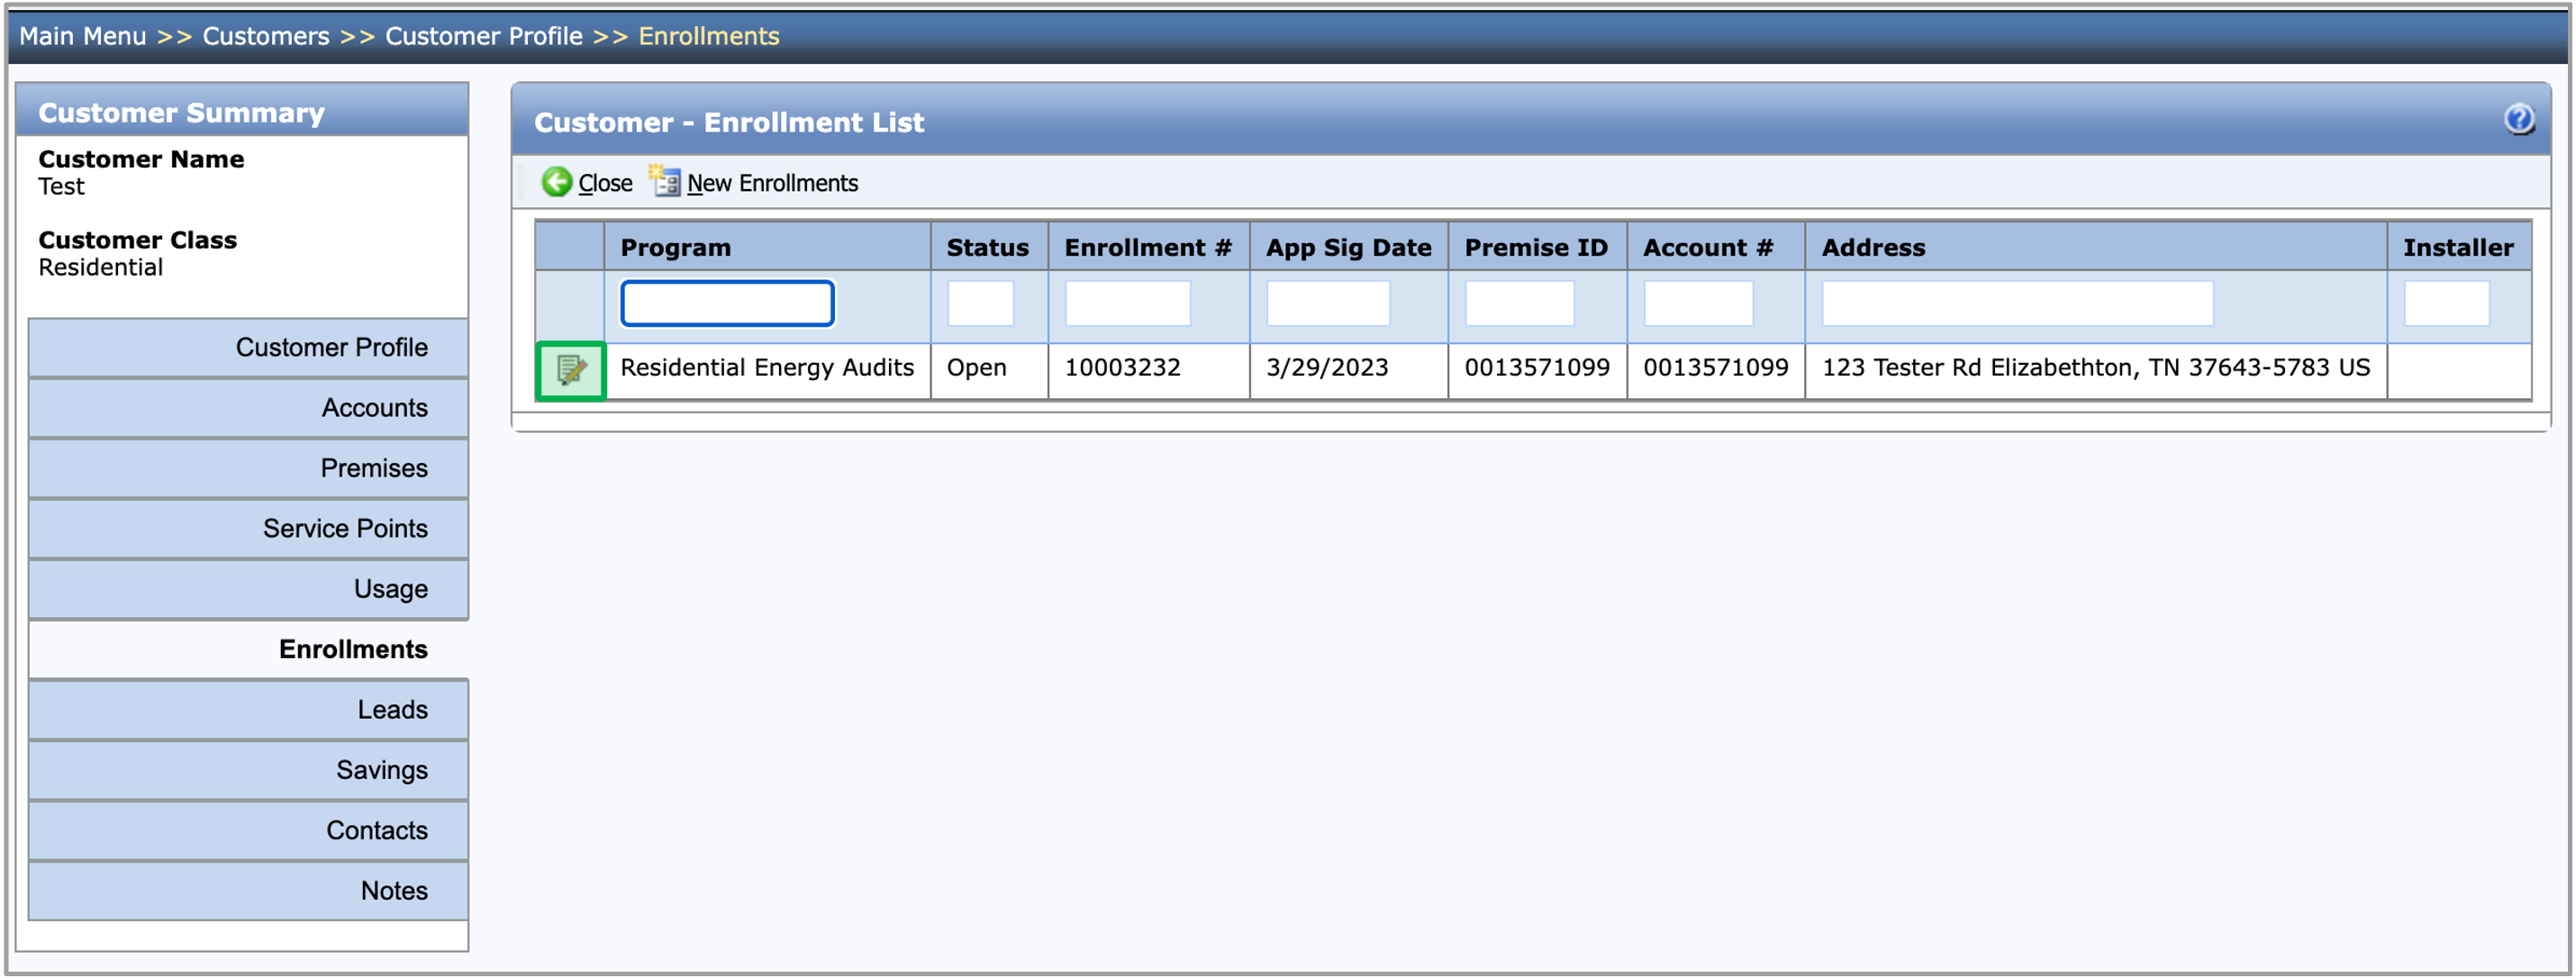
The system will create a new Residential Energy Audits Enrollment. The new enrollment will be listed in the table on the Customer - Enrollment List page. To open the enrollment, click on the Edit Icon next to the Program Name.
After the new enrollment is created, the user will be directed to the enrollment’s Assessment Submission step. The Customer Information, Installation Address, Applicant Information, and Mailing Address will be prepopulated from the Account and Premise record that were selected in the New Enrollment Wizard.
Navigate to Main Menu and select the Enrollments tab. Then click the New button for the New Enrollment Wizard window to open.

Select the Residential Energy Audits option in the dropdown. Then click Next.
The New Enrollment Wizard will present a Customer Search tool that allows Contractors to:
- Search for customers by Customer Name, Account Number, or Premise Address.
- Enter the search criteria and click the Go button or Enter on your keyboard to execute the search.
- Select the customer you want to enroll in the program and click Next (or double click the customer) to create the new enrollment.

After the new enrollment is created, the user will be directed to the enrollment’s Assessment Submission step. The Customer Information, Installation Address, Applicant Information, and Mailing Address will be prepopulated from the Account and Premise record that were selected in the New Enrollment Wizard.
When a new Residential Energy Audits enrollment is created, it will contain an Assessment Submission step in the New status.
The first tab of the Assessment Submission step is the Applicant Information tab. This tab will be prepopulated with the information on the Customer/Account/Premise. If you need to change the Customer Information, Installation Address, or Mailing Address, you can make those changes on the Applicant Information tab, then click Save.
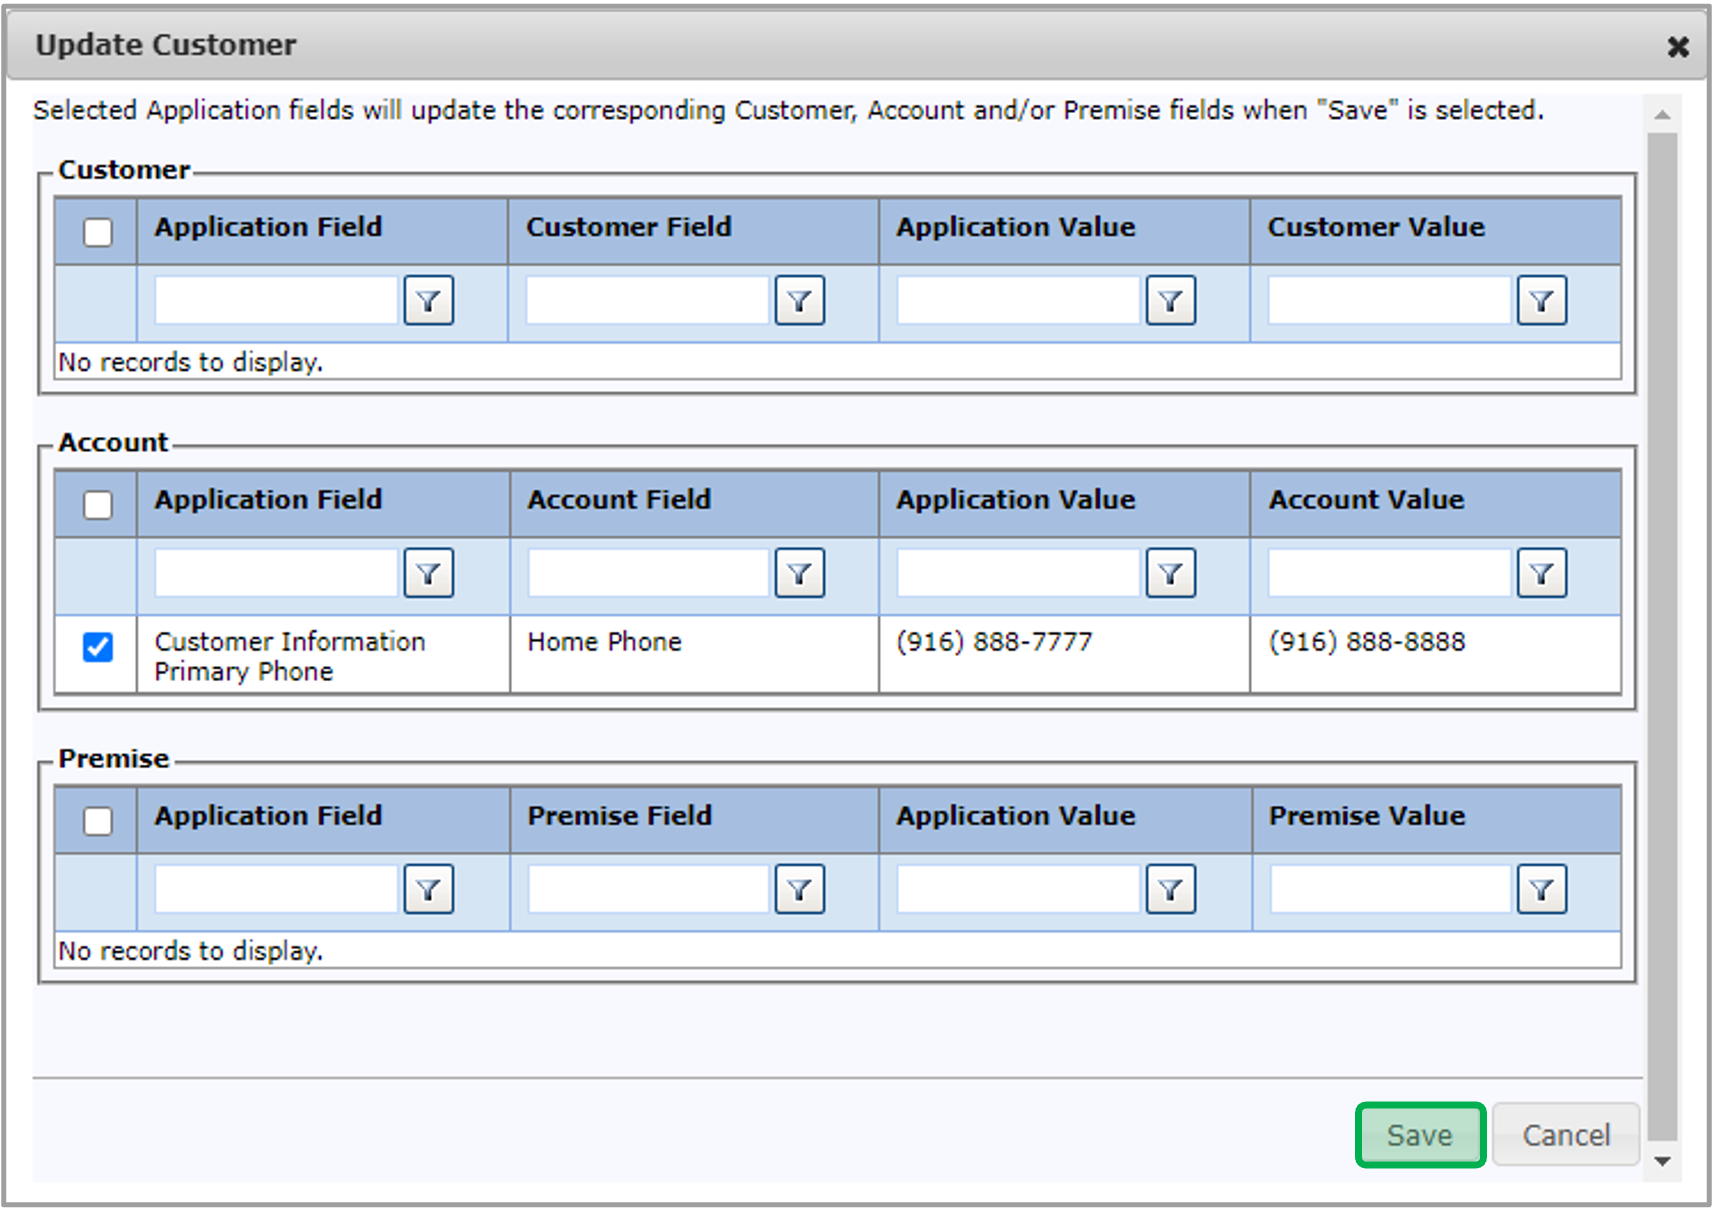
If the new value does not match the value that’s saved on the Customer/Account/Premise, an orange exclamation mark will be displayed next to it. If you hover over the exclamation mark, a tooltip will be displayed indicating that the values are different. You can click the Update Customer button to update the value that’s saved on the Customer/Account/Premise.
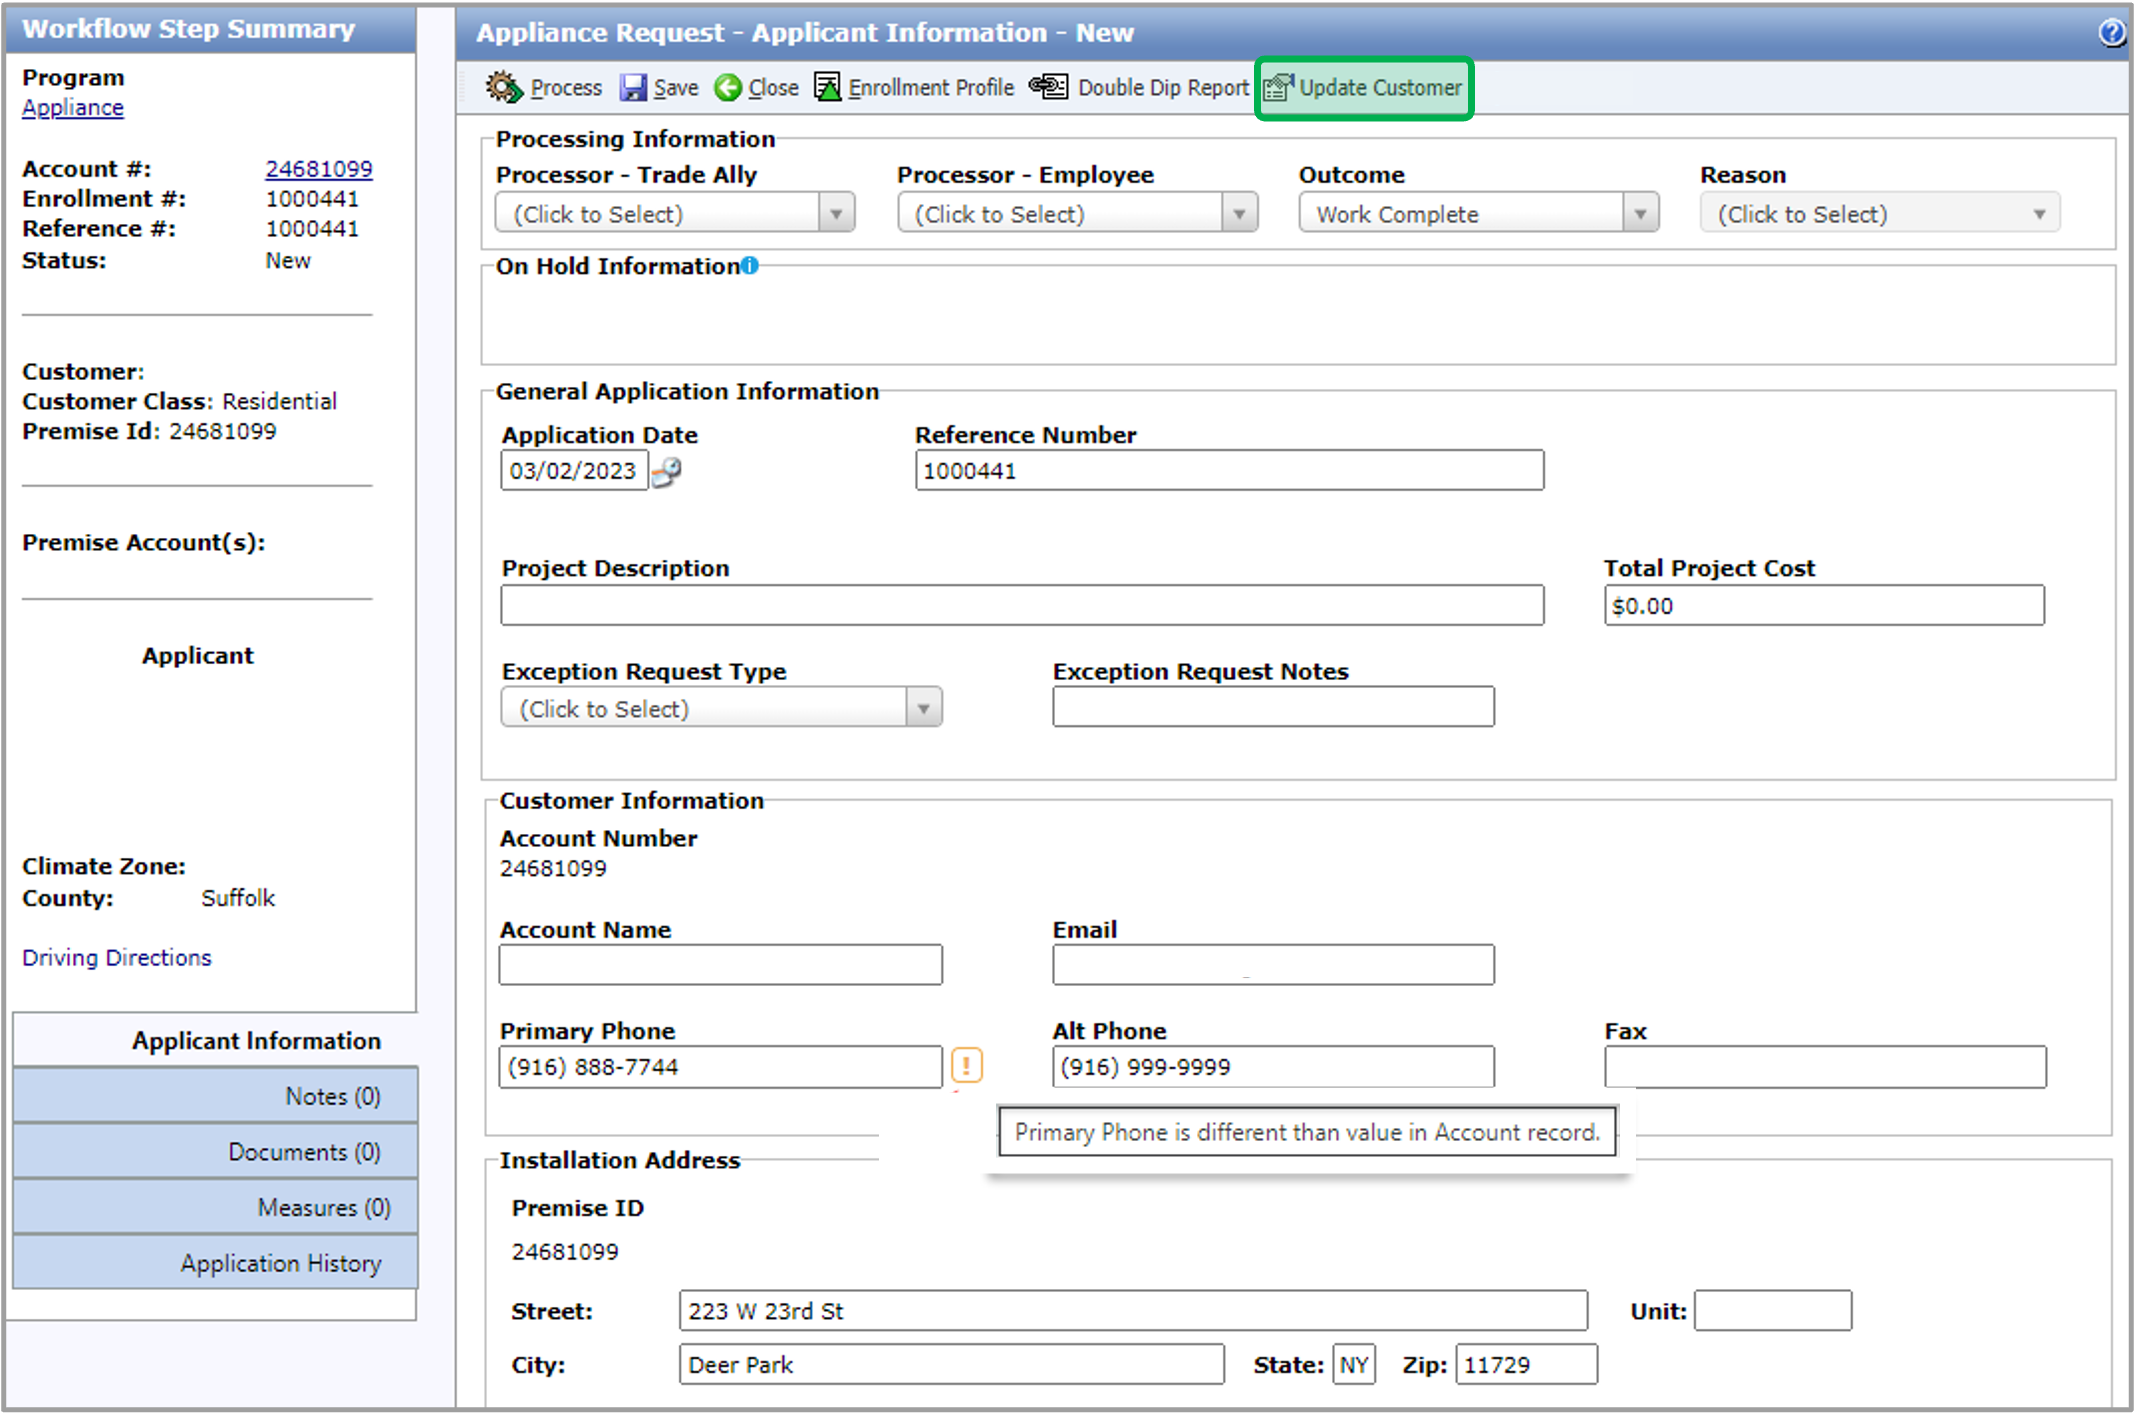
When you click the Update Customer button, the Update Customer dialog will open, displaying every value on the Assessment Submission step that is different than the value saved in the corresponding field on the Customer/Account/Premise. All these fields will be checked by default. When finished updating, click Save in the dialog. The system will update the checked Customer/Account/Premise fields for the values to match the Assessment Submission step.
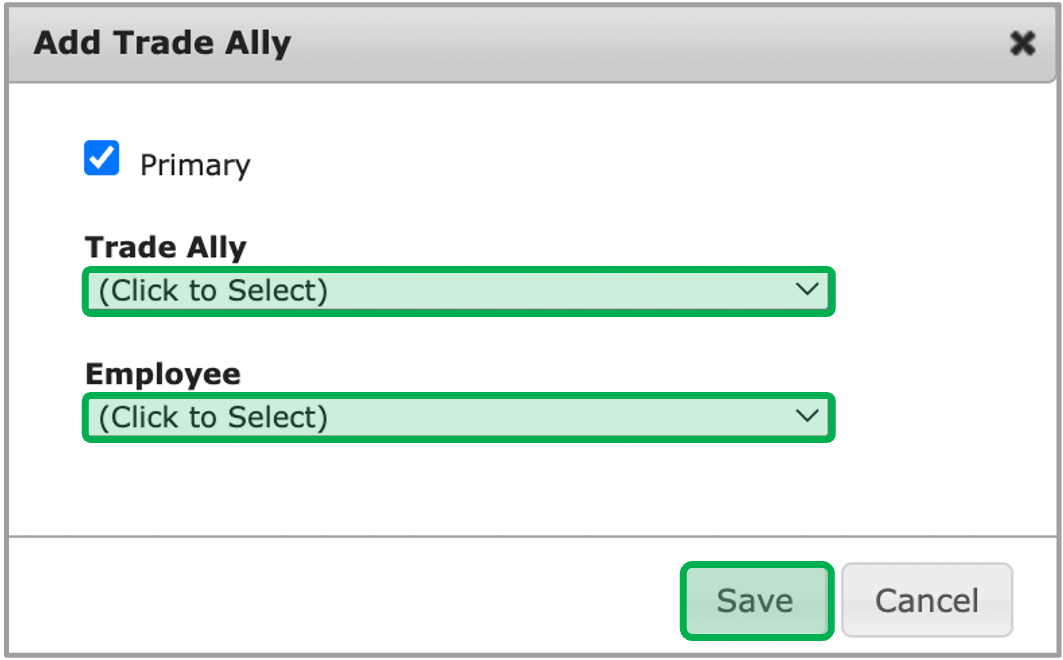
Back on the Applicant Information page, the Primary Trade Ally section on the Assessment Submission step will default to the Trade Ally and Employee associated with the user that created the enrollment. To change the Trade Ally to a Contractor/Vendor, click the Trade Ally Name Hyperlink.

After you click the Trade Ally Name hyperlink, the Add Trade Ally dialog will open. Select the correct Contractor/Vendor and Employee in the Trade Ally and Employee dropdowns, then click Save.