Page History
| Panel | ||||||
|---|---|---|---|---|---|---|
| ||||||
System Instructions |
| Panel | ||
|---|---|---|
| ||
IntroductionThe following sections will help you understand the process for Creating and Managing Program Partnerships in Salesforce.
| ||
| UI Tabs | ||
| UI Tab | title | |
Search for an Existing
Account or Create a New AccountSearch for an Existing Account or Create a New Account
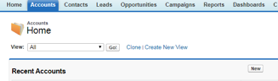
If the search results in zero matches, click the Accountstab and then click New.
| Expand | ||
|---|---|---|
| ||
|
Enter all available information on the Accounts tab then click Save.
| title | Establish a Program Partnership |
|---|
Establish a Program Partnership
On theAccount
tab, scroll to the Program Partnerships section and click New Program Partnership.expand
| ||
| ||
| ui- | ||
|---|---|---|
| ||
| Expand | ||
| ||
| Status | Indicates the status of the Account in relationship to the Program. Program Partnerships with a “Full”, “Provisional”, or “Probation” status can be displayed on the website. | |
| Website | The URL of the Account’s website. This can be displayed on the website. | |
| Areas of Expertise | Skillsets and technologies in which an Account specializes. Multiple Areas of Expertise may be selected and displayed on the website. | |
| Counties Served | The New York State Counties where the Account performs their business activities. Multiple Counties Served may be selected and displayed on the website. | |
| Do Not Display on Website | A checkbox which when selected, removes an Account from the website listing for only the applicable Program Partnership. |

| Expand | ||
|---|---|---|
| ||
To edit Counties Served, hover over the field and Double Click.
| Expand | ||
|---|---|---|
| ||
Scroll down past the counties until you reach the regions at the bottom of the list on the left and select desired region(s). Click OK.
| Expand | ||
|---|---|---|
| ||
Search for an Existing Account
| ui-steps | ||||||
|---|---|---|---|---|---|---|
| ||||||
|
Create a New Account
| UI Steps | ||||||||||
|---|---|---|---|---|---|---|---|---|---|---|
| ||||||||||
|
- If there are no existing accounts, click on the Accounts tab and then click New.
- Fill in the information given on the Consultant Information document provided by the Project Manager.
- After all pertinent information has been entered, save the entry and proceed by adding the Program Partnership title to the account.
- Within the account just created, scroll down to the Program Partnerships sections and click New Program Partnership.
- If the Consultant Info for Web has also been given, fill out the fields that correspond to the document. Connect the account to the desired Program Partnership by searching for Commercial Tenant below: Save the record and now the new Consultant will be connected to the appropriate Program Partnership and uploaded on the NYSERDA website.
Establish a Program Partnership
On the Account tab, scroll to the Program Partnerships section and click New Program Partnership.
- Search for the program name in the Program field; select the appropriate program and click Save.If the program name is not available, submit a Salesforce Jira Software Issue to request adding the program to the list.
- Save the record.
Updating Program Partnership Records
On the Program Partnership record the below fields impact what is displayed on NYSERDA’s Website. If you have not already established a website to display your Program Partnership data, a Salesforce Jira Software Issue must be Submitted to initiate the process.
Expand title information table Status Indicates the status of the Account in relationship to the Program. Program Partnerships with a “Full”, “Provisional”, or “Probation” status can be displayed on the website. Website The URL of the Account’s website. This can be displayed on the website. Areas of Expertise Skillsets and technologies in which an Account specializes. Multiple Areas of Expertise may be selected and displayed on the website. Counties Served The New York State Counties where the Account performs their business activities. Multiple Counties Served may be selected and displayed on the website. Do Not Display on Website A checkbox which when selected, removes an Account from the website listing for only the applicable Program Partnership. Select desired Area of Expertise from left and click right arrow to add; to remove an Area of Expertise, select from the field on left and click left arrow. When done click OK.
- To edit Counties Served, hover over the field and Double Click.
- Scroll down past the counties until you reach the regions at the bottom of the list on the left and select desired region(s). Click OK.
| HTML |
|---|
<style type="text/css"> .rwui_tabs .rwui_tab_content { padding-left: 0px; padding-right: 0px; } .rwui_tabs>.rwui_tabs_menu li a.rw_active { border-style: solid background-color: inherit; float: middle left; border: 1px #002D72; font-family: Arial, sans-serif; border-radius: 3px; outline: none; cursor: pointer; padding: 6px; transition: 0.3s; font-size: 14px; color: #777777; } !important; border-width: 1px !important; border-top-left-radius: 5px !important; border-top-right-radius: 5px; !important; font-size: 16px !important; border-color: #C5005C!important; background-color: #C5005C!important; color: #FFFFFF !important; font-weight: 600 !important; margin-bottom: -0.0625rem !important; z-index: 1 !important; } .rwui_tabs>.rwui_tabs_menu li a { padding: 5px !important; font-size: 16px !important; margin-right: 5px !important; background-color: #FFFFFF00 !important; color: #9AACC7 !important; margin-bottom: -0.0625rem !important; } .rwui_tabs_menu { border-bottom-width: 0px !important; border-bottom-style: overflow: hidden; none !important; border-bottom-color: 3px solid #1C49B0; background-color: white; border-radius: 3px; } #FFFFFF !important; } .rwui_tabs .rwui_tab_content { background: #FFFFFF !important; padding-left: 1px !important; } .rwui_tabs>tabs .rwui_tabs_menu li atab_content.rw_activehighlight { background-color: #FFFFFF !important; color: #F2A900; font-size: 24px; border-top: 0px; } } [data-macro-name="include"] { width: 99% !important; } .rwui_tabs>.rwui_tabs_menu li a:hover { background-color: #FFFFFF#C5005C!important; colorbackground: #002D72#F9E6EF!important; fontborder-sizecolor: 24px#C5005C!important; } .rwui_tabs>.rwui_tabs_menu li a.rw_active:hover { background-color: #FFFFFF; #C5005C!important; color: #F2A900; font-size: 24px; #FFFFFF !important; } .rwui_tabs .rwui_tabtabs_contentmenu { border-bottom: 2px solid background-color: #FFFFFF; padding-left: 8px; padding-top: 0px; } .rwui_tabs>.rwui_tabs_menu li a.rw_active.rw_highlight { background: #FFFFFF#C5005C!important; border-radius: 2px !important; } .rwui_button { background-color: #0073A4; } .rwui_button:hover { background-color: #002D72; } .rwui_tabsstep .rwui_tab_content.rw_highlight {item_number { color: #002D72 !important; background: #E5EAF1 #FFFFFF!important; } </style> |
Overview
Content Tools