Charge Ready User Guide
Completing your Participant Agreement is the first step you should take. While you can start a Project Application without a Participant Agreement, you cannot complete it until the Participant Agreement is completed and submitted.
The Participant Agreement contains five (5) separate pages. Review the information in the blue box at the top of the page. It provides high-level guidance and requirements that may be necessary for you to complete each page.
- Fields marked with a red asterisk ( * ) are required and must be completed before you can move on to the next page.
- Fields with thesymbol contain helpful field guidance and instructions that appear as tooltips when hovering your cursor over the symbol. The information in these tooltips is designed to help ensure that you are providing the correct information. Not all fields contain this symbol.
- Clicking Continue at the bottom of any page will save your progress (if all required fields have been completed) should you be unable to complete the agreement in one sitting.
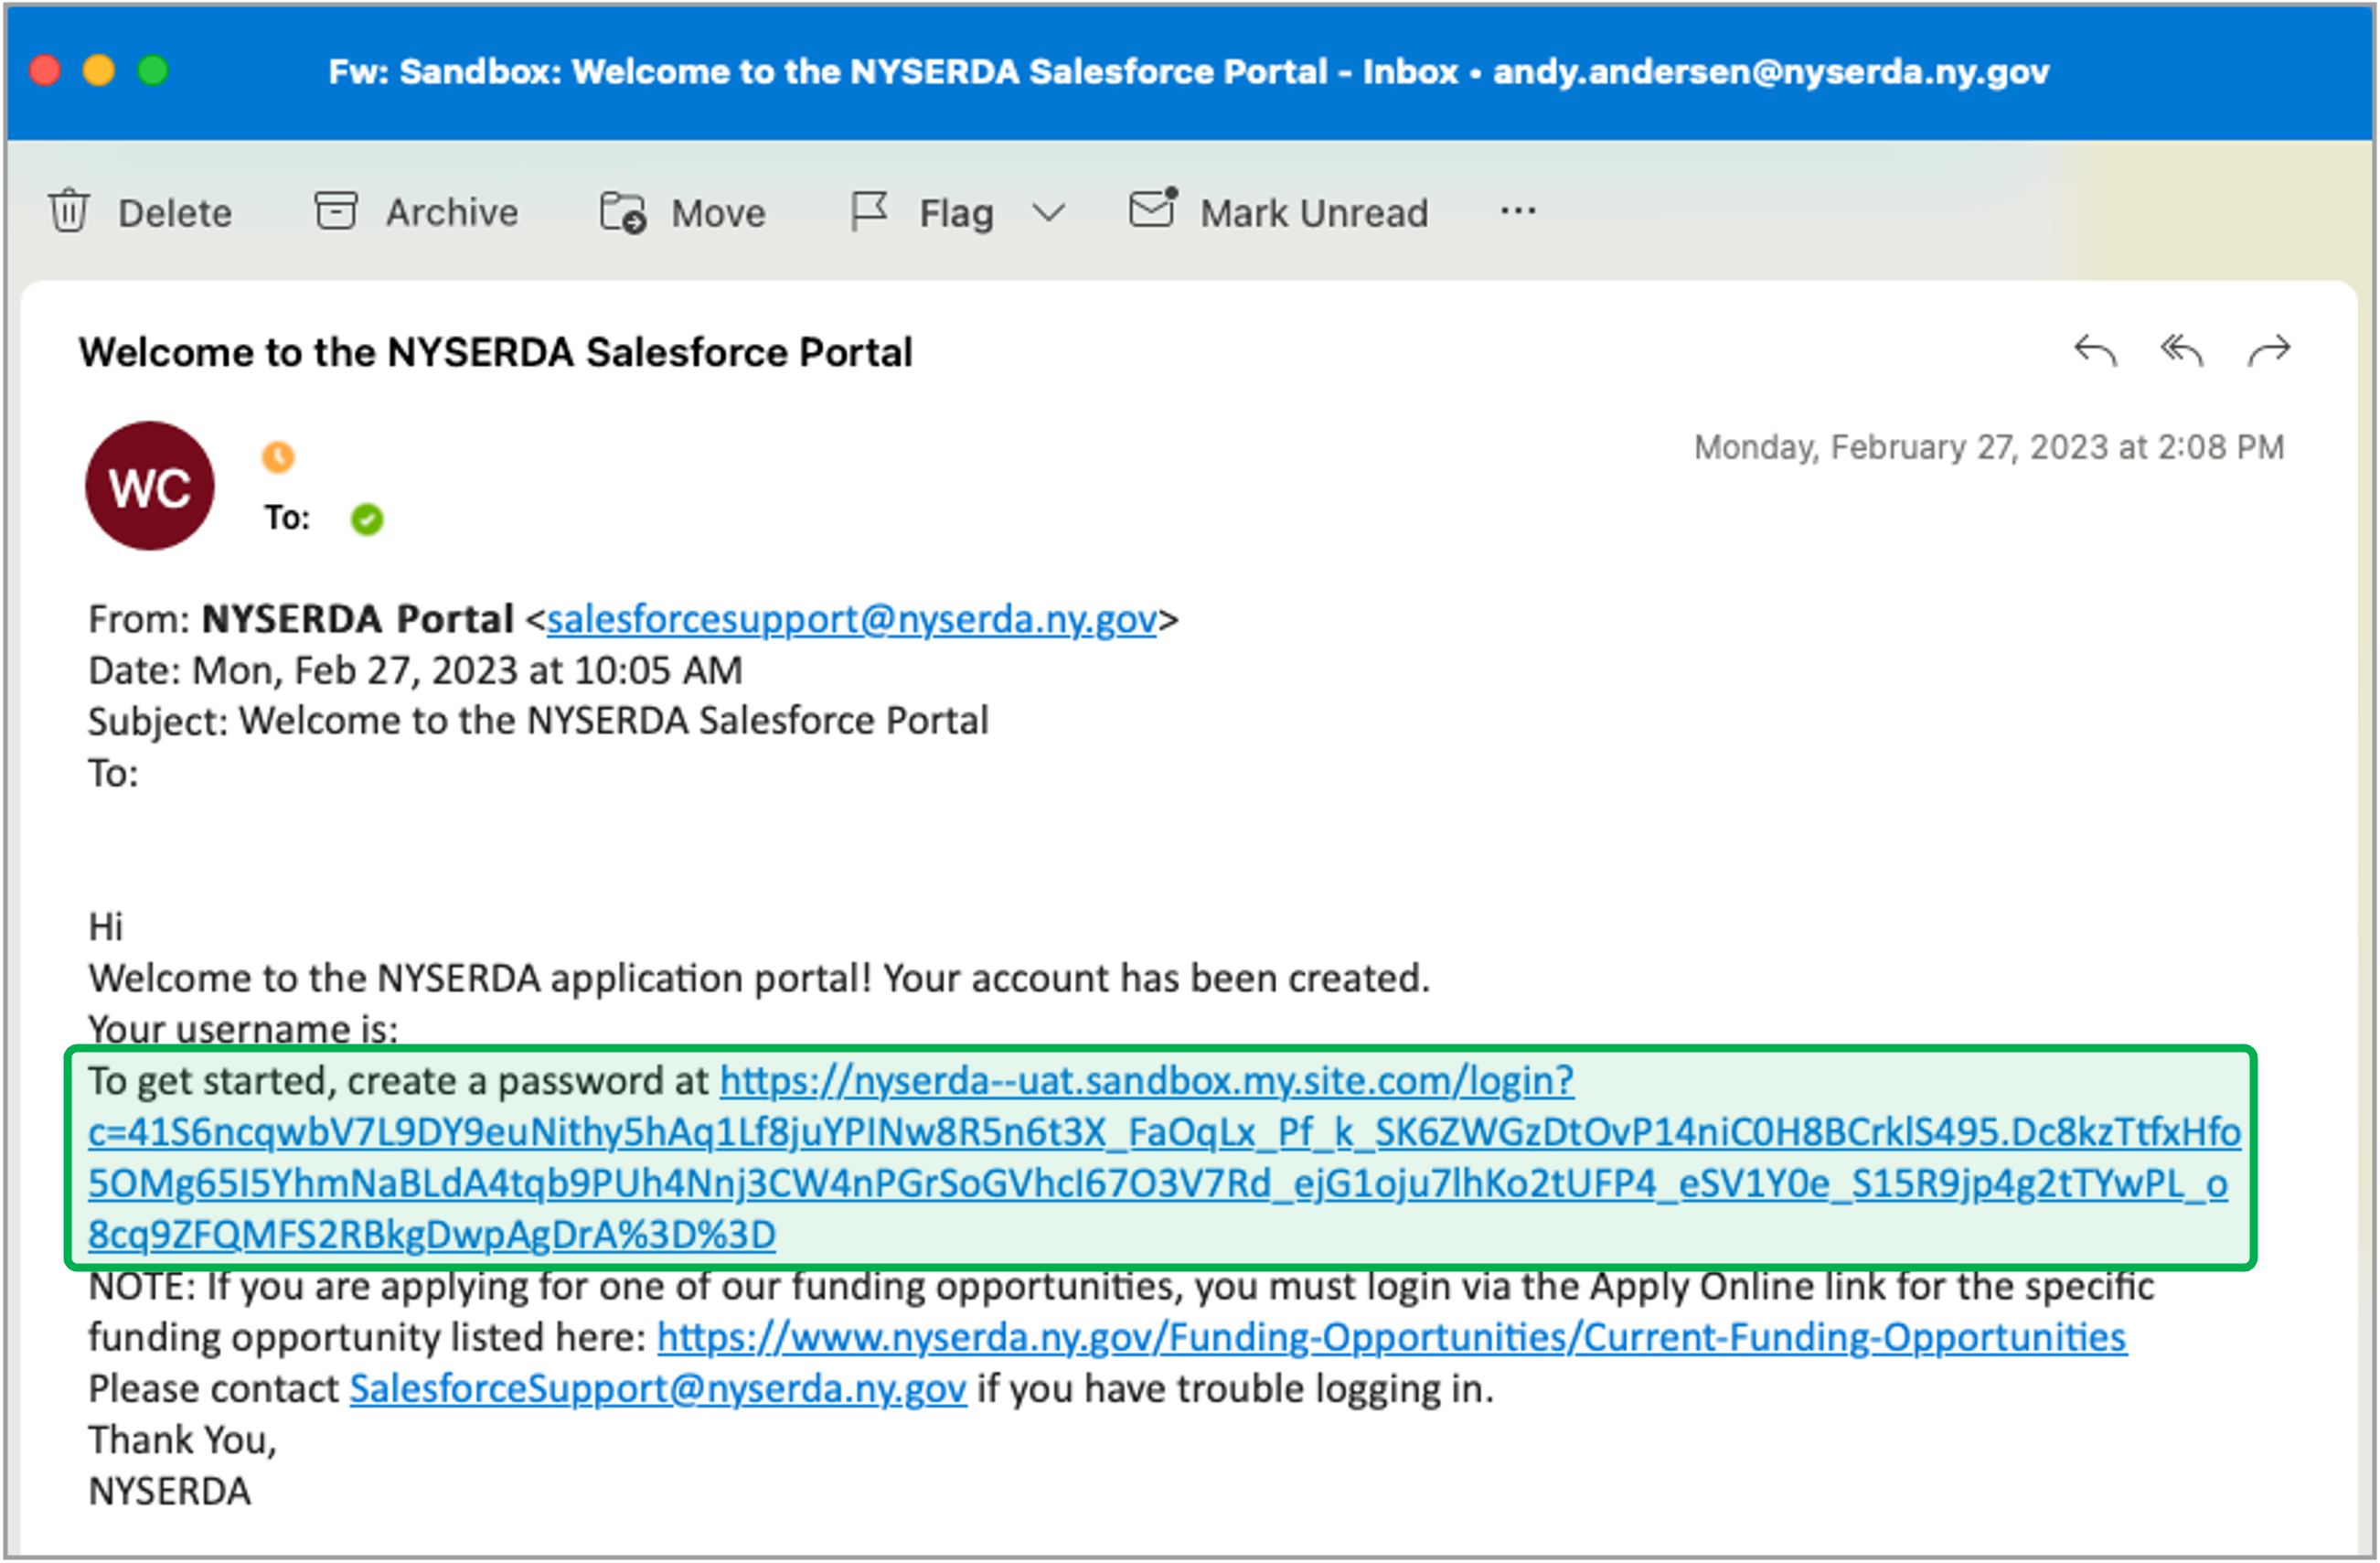
To complete and submit a Participant Agreement, log into the Salesforce Portal and follow the instructions below.
Access the Participant Agreement form
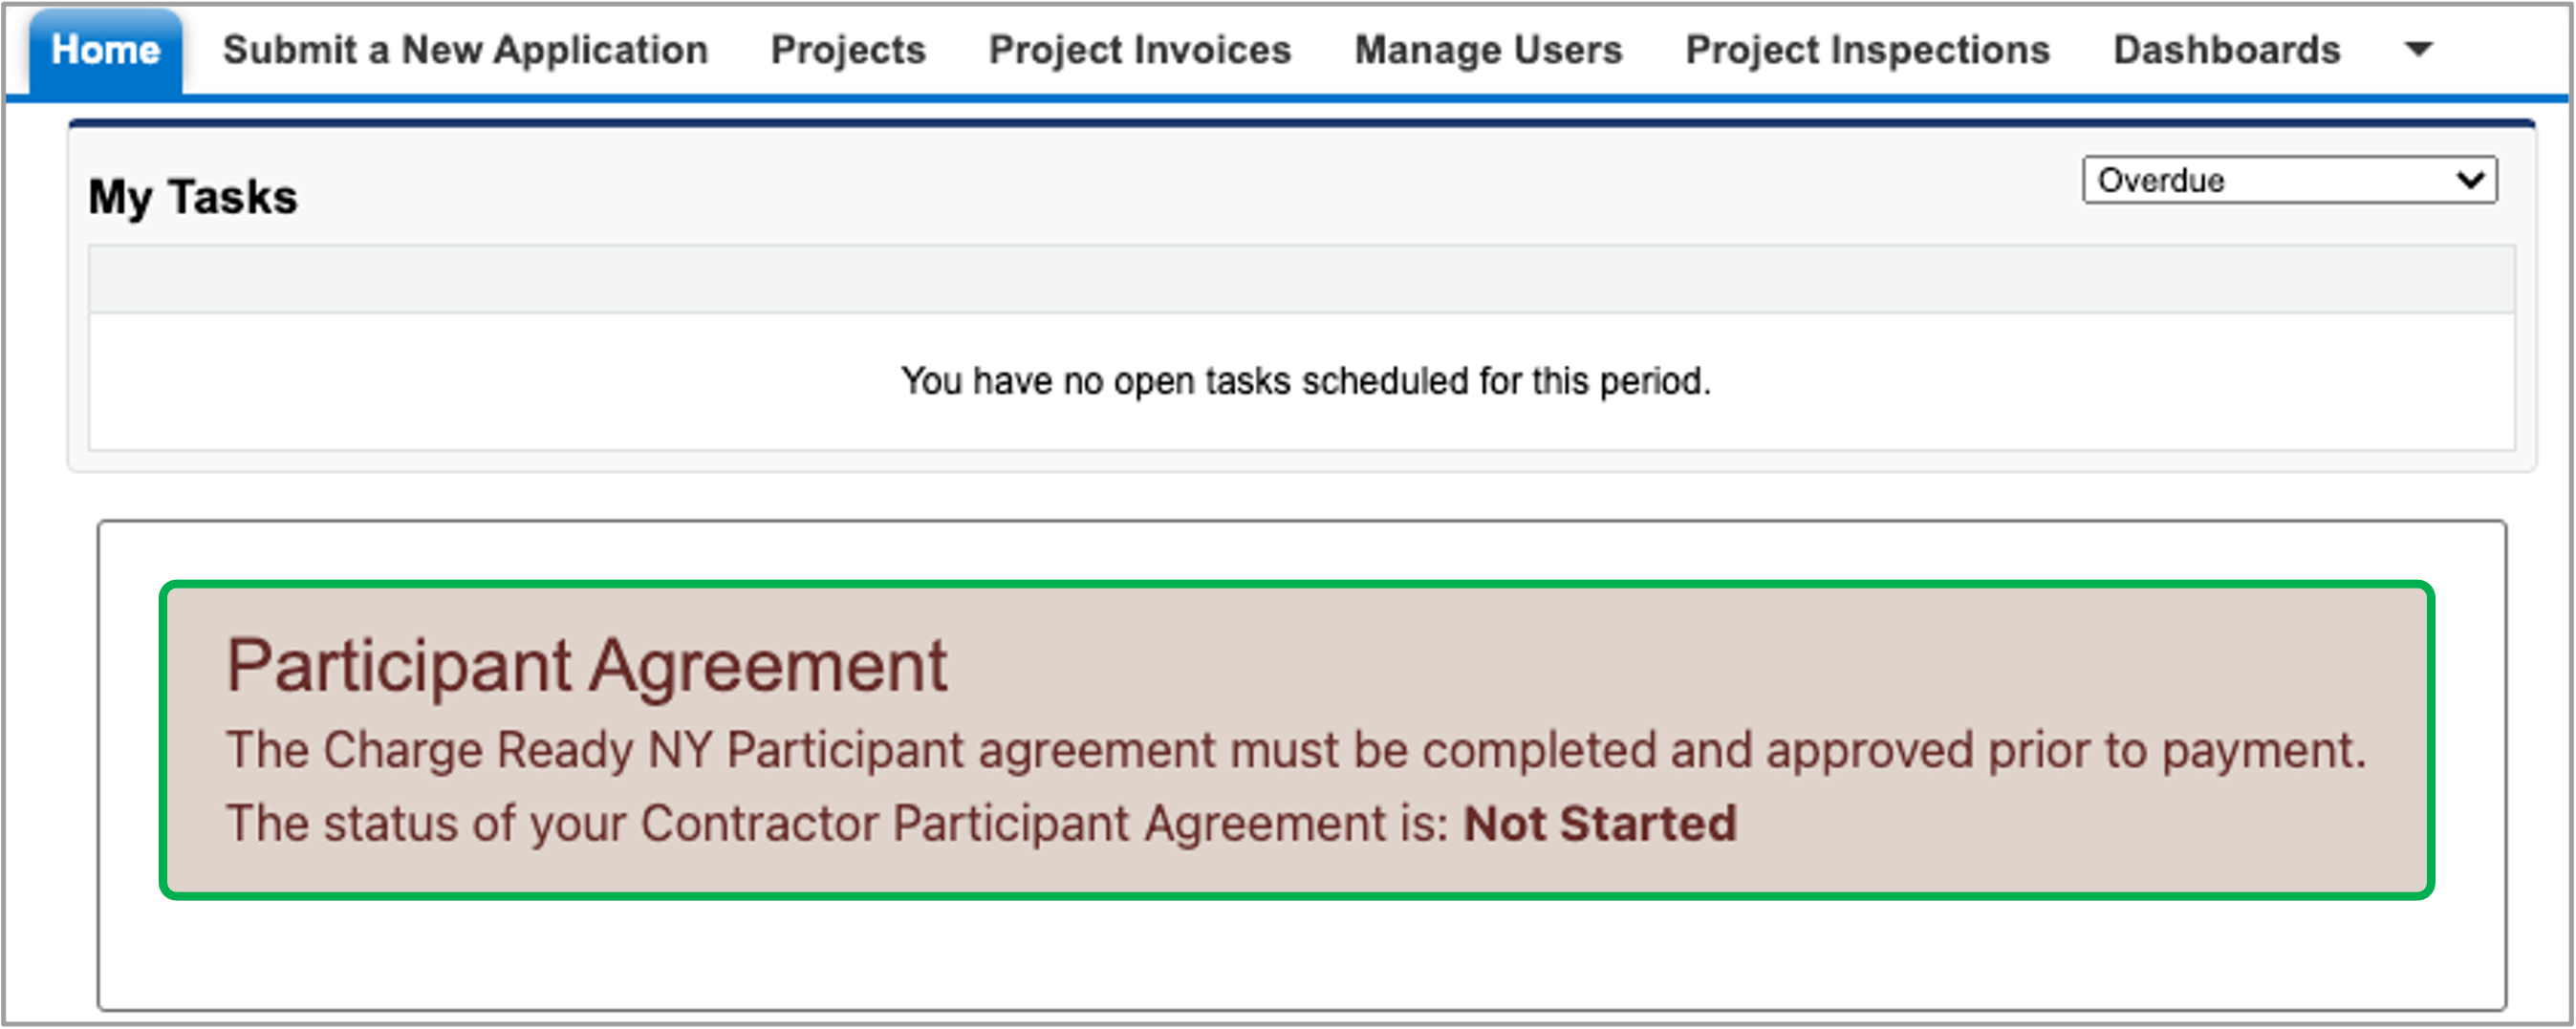
The form is accessed from the Salesforce Portal home page by clicking the Participant Agreement box. Note that the status of your participant agreement is visible in bold at the bottom of this box and will initially show as Not Started.
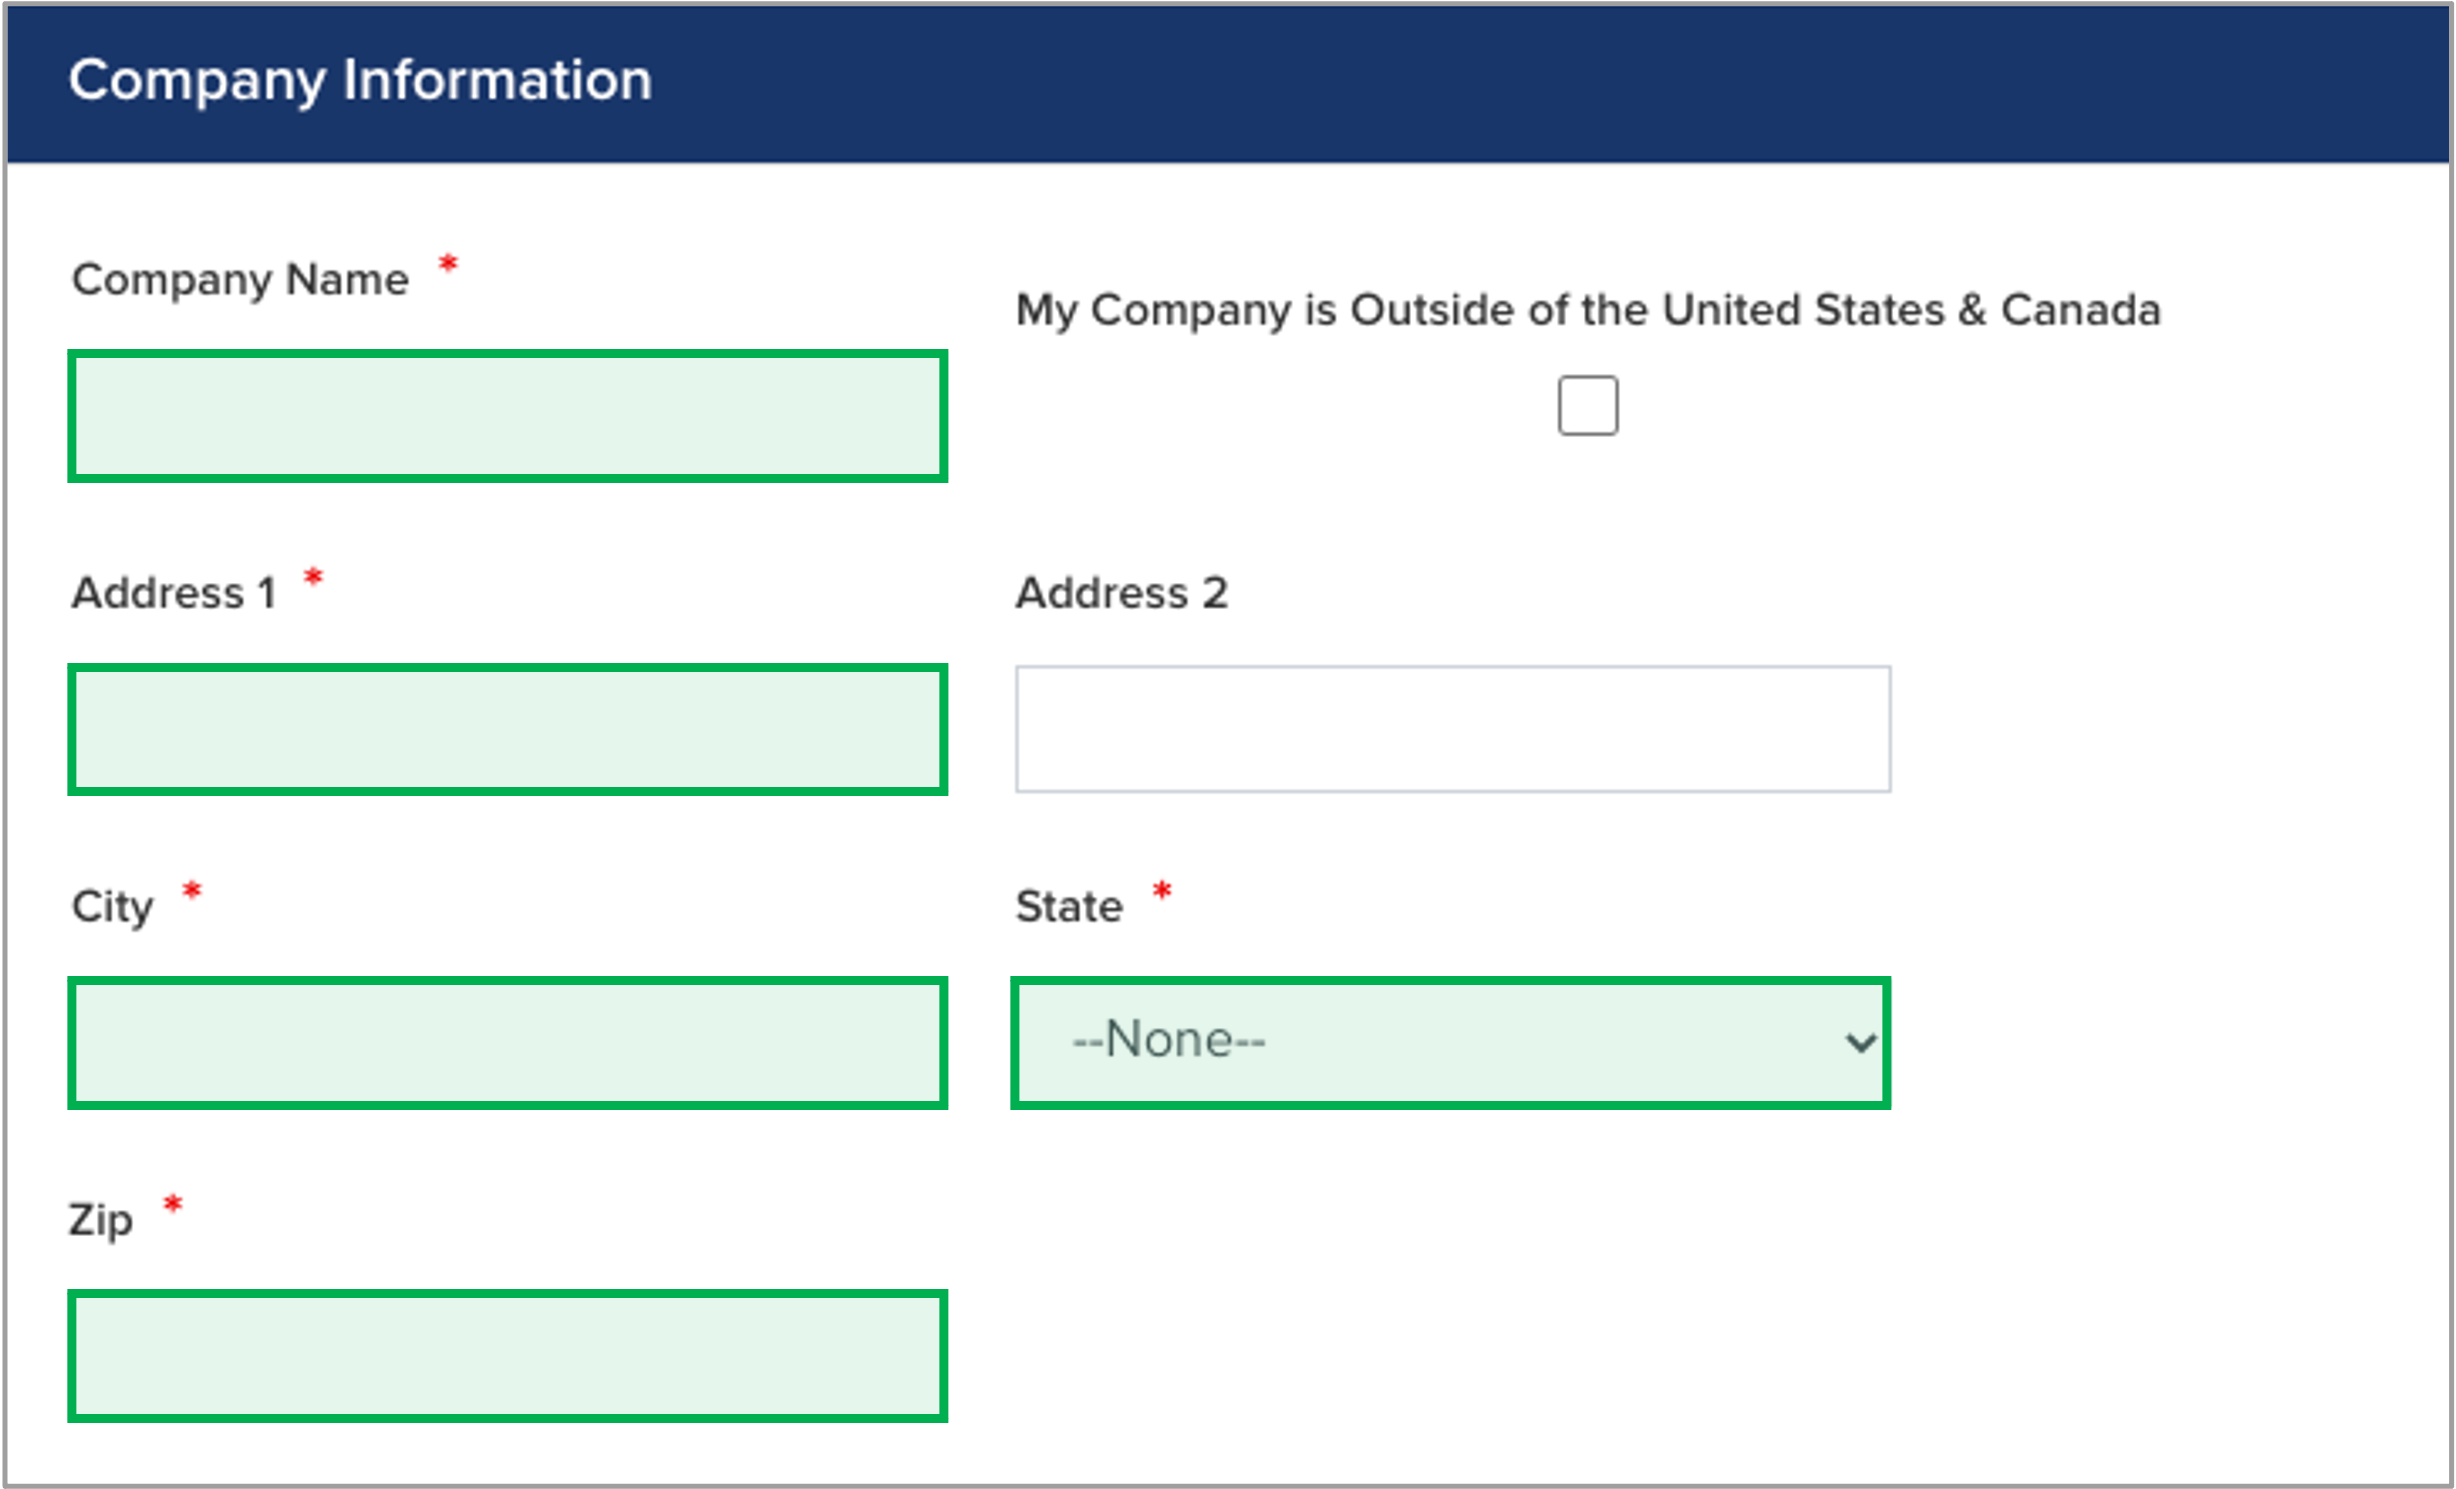
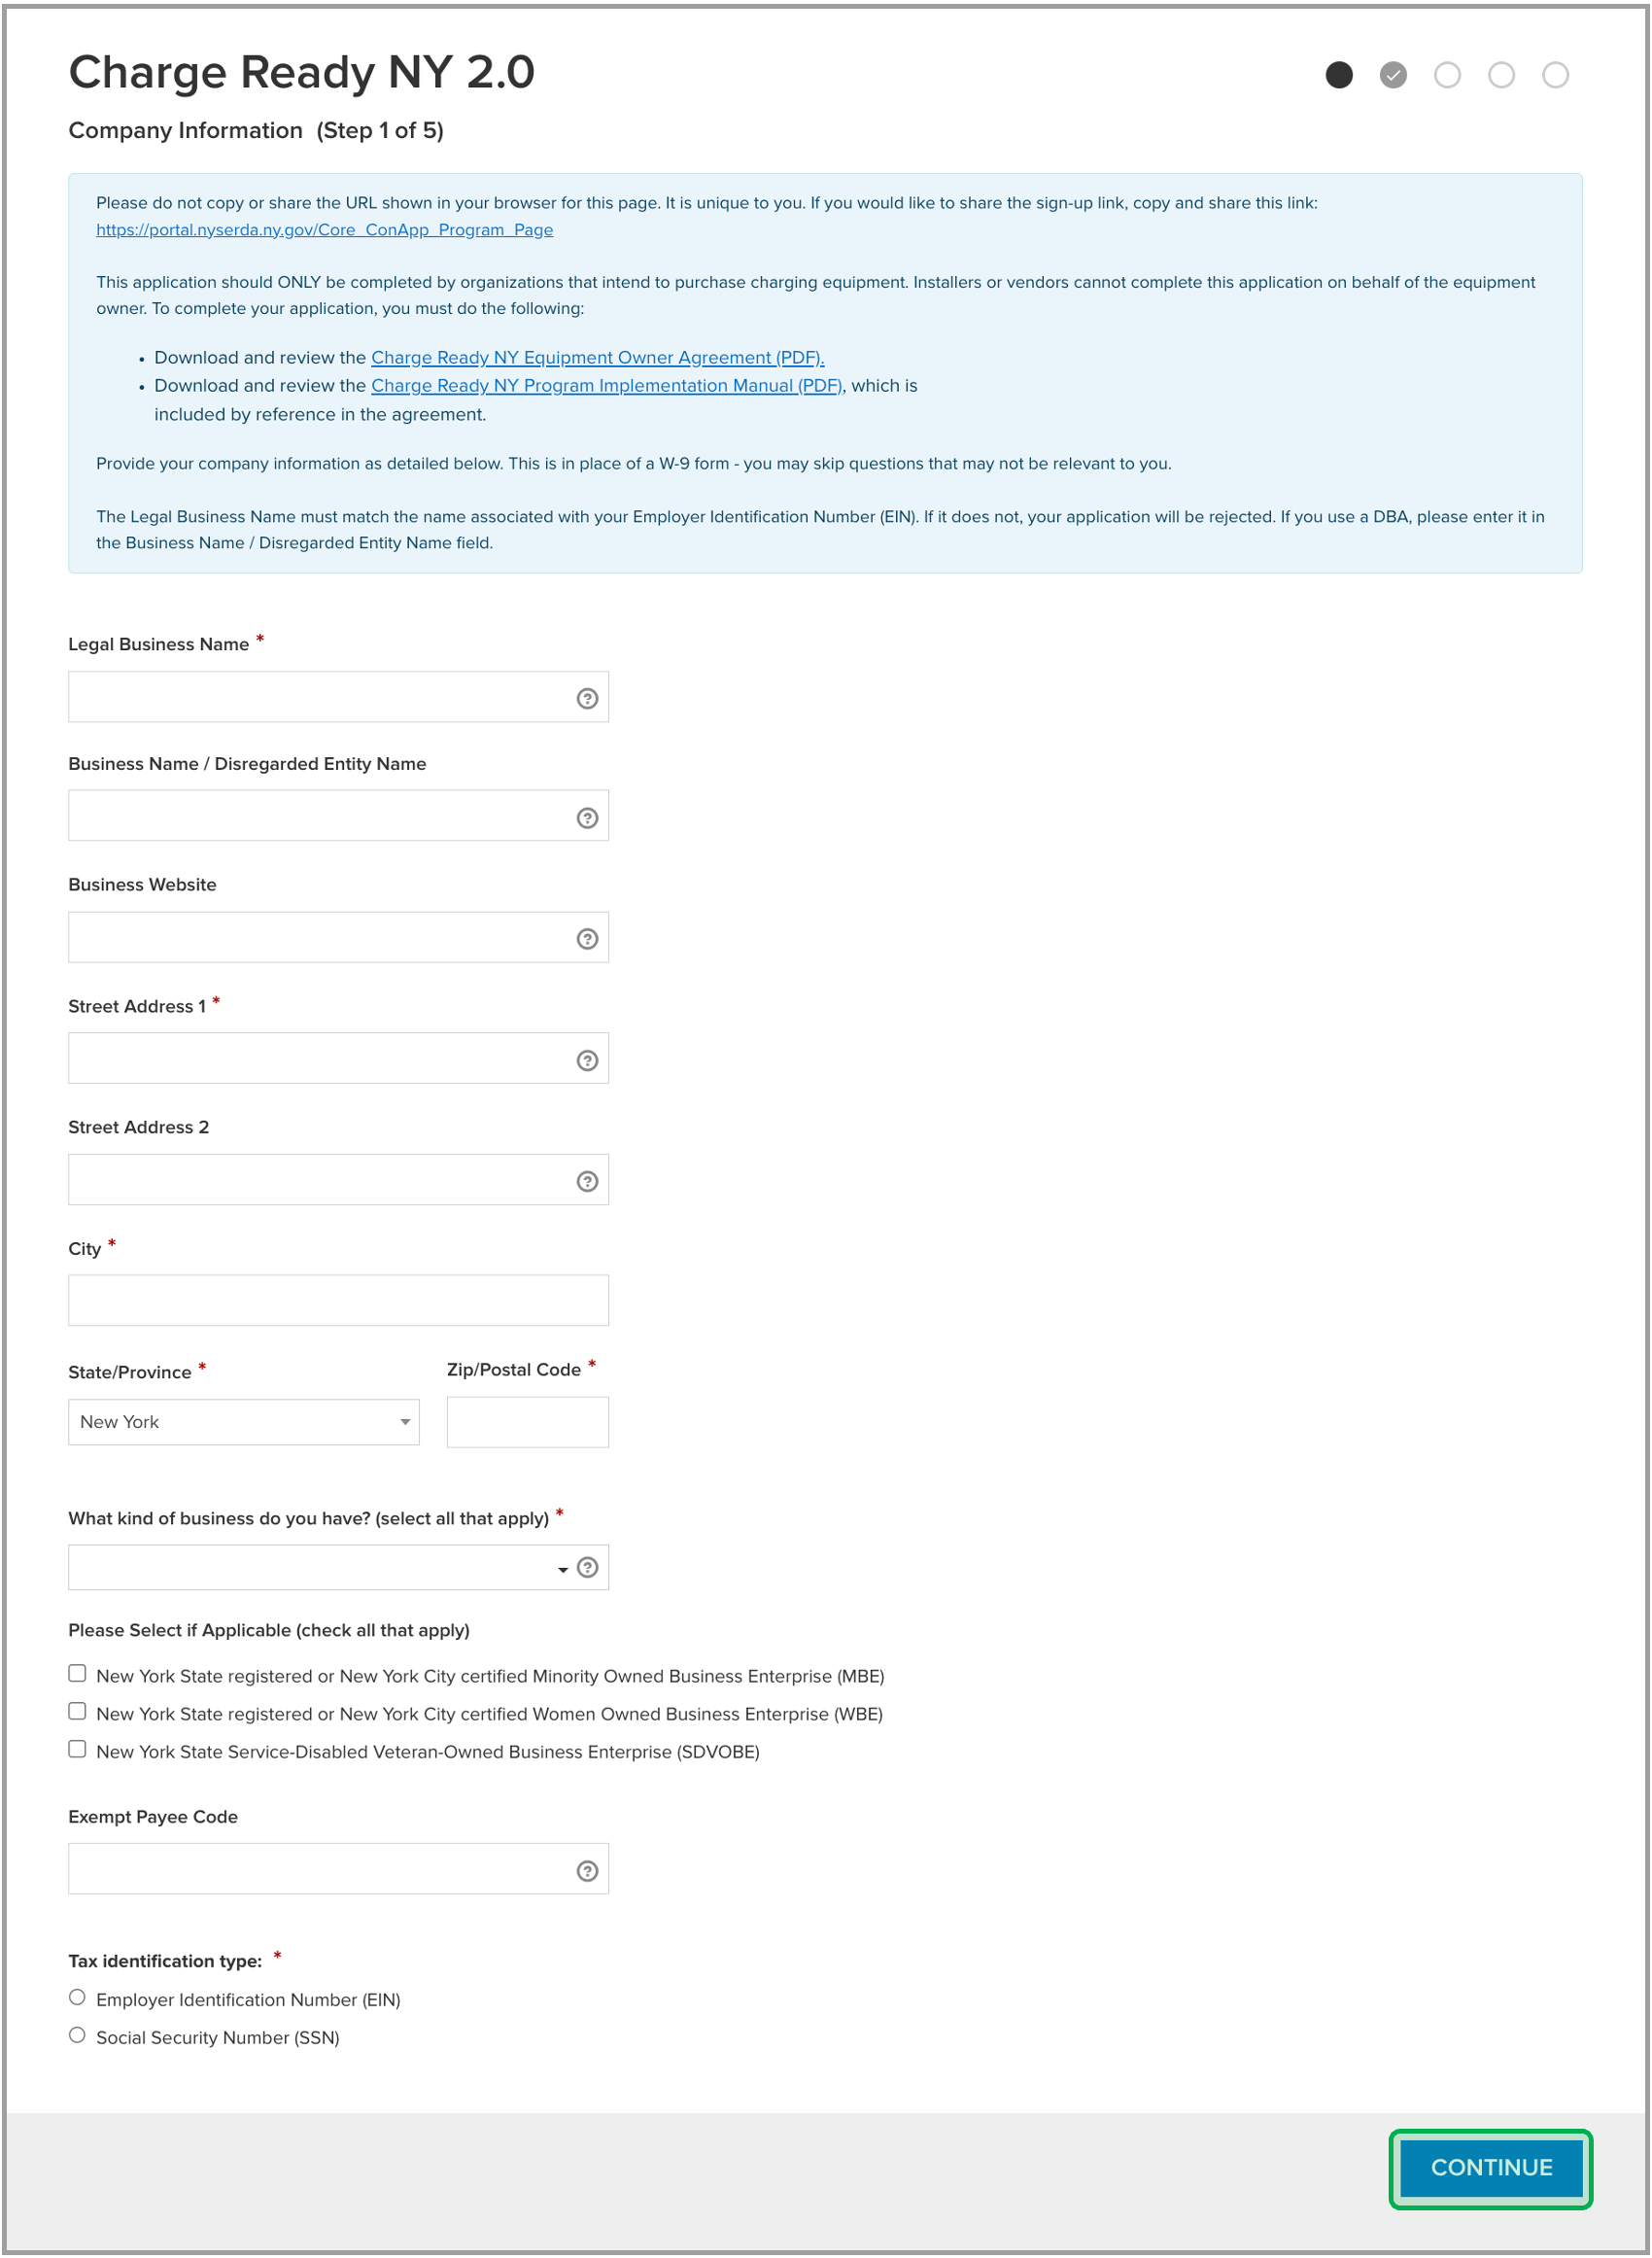
Complete the Company Information page
This page asks you to provide information specific to your company. Once the page is complete, click the Continue button.
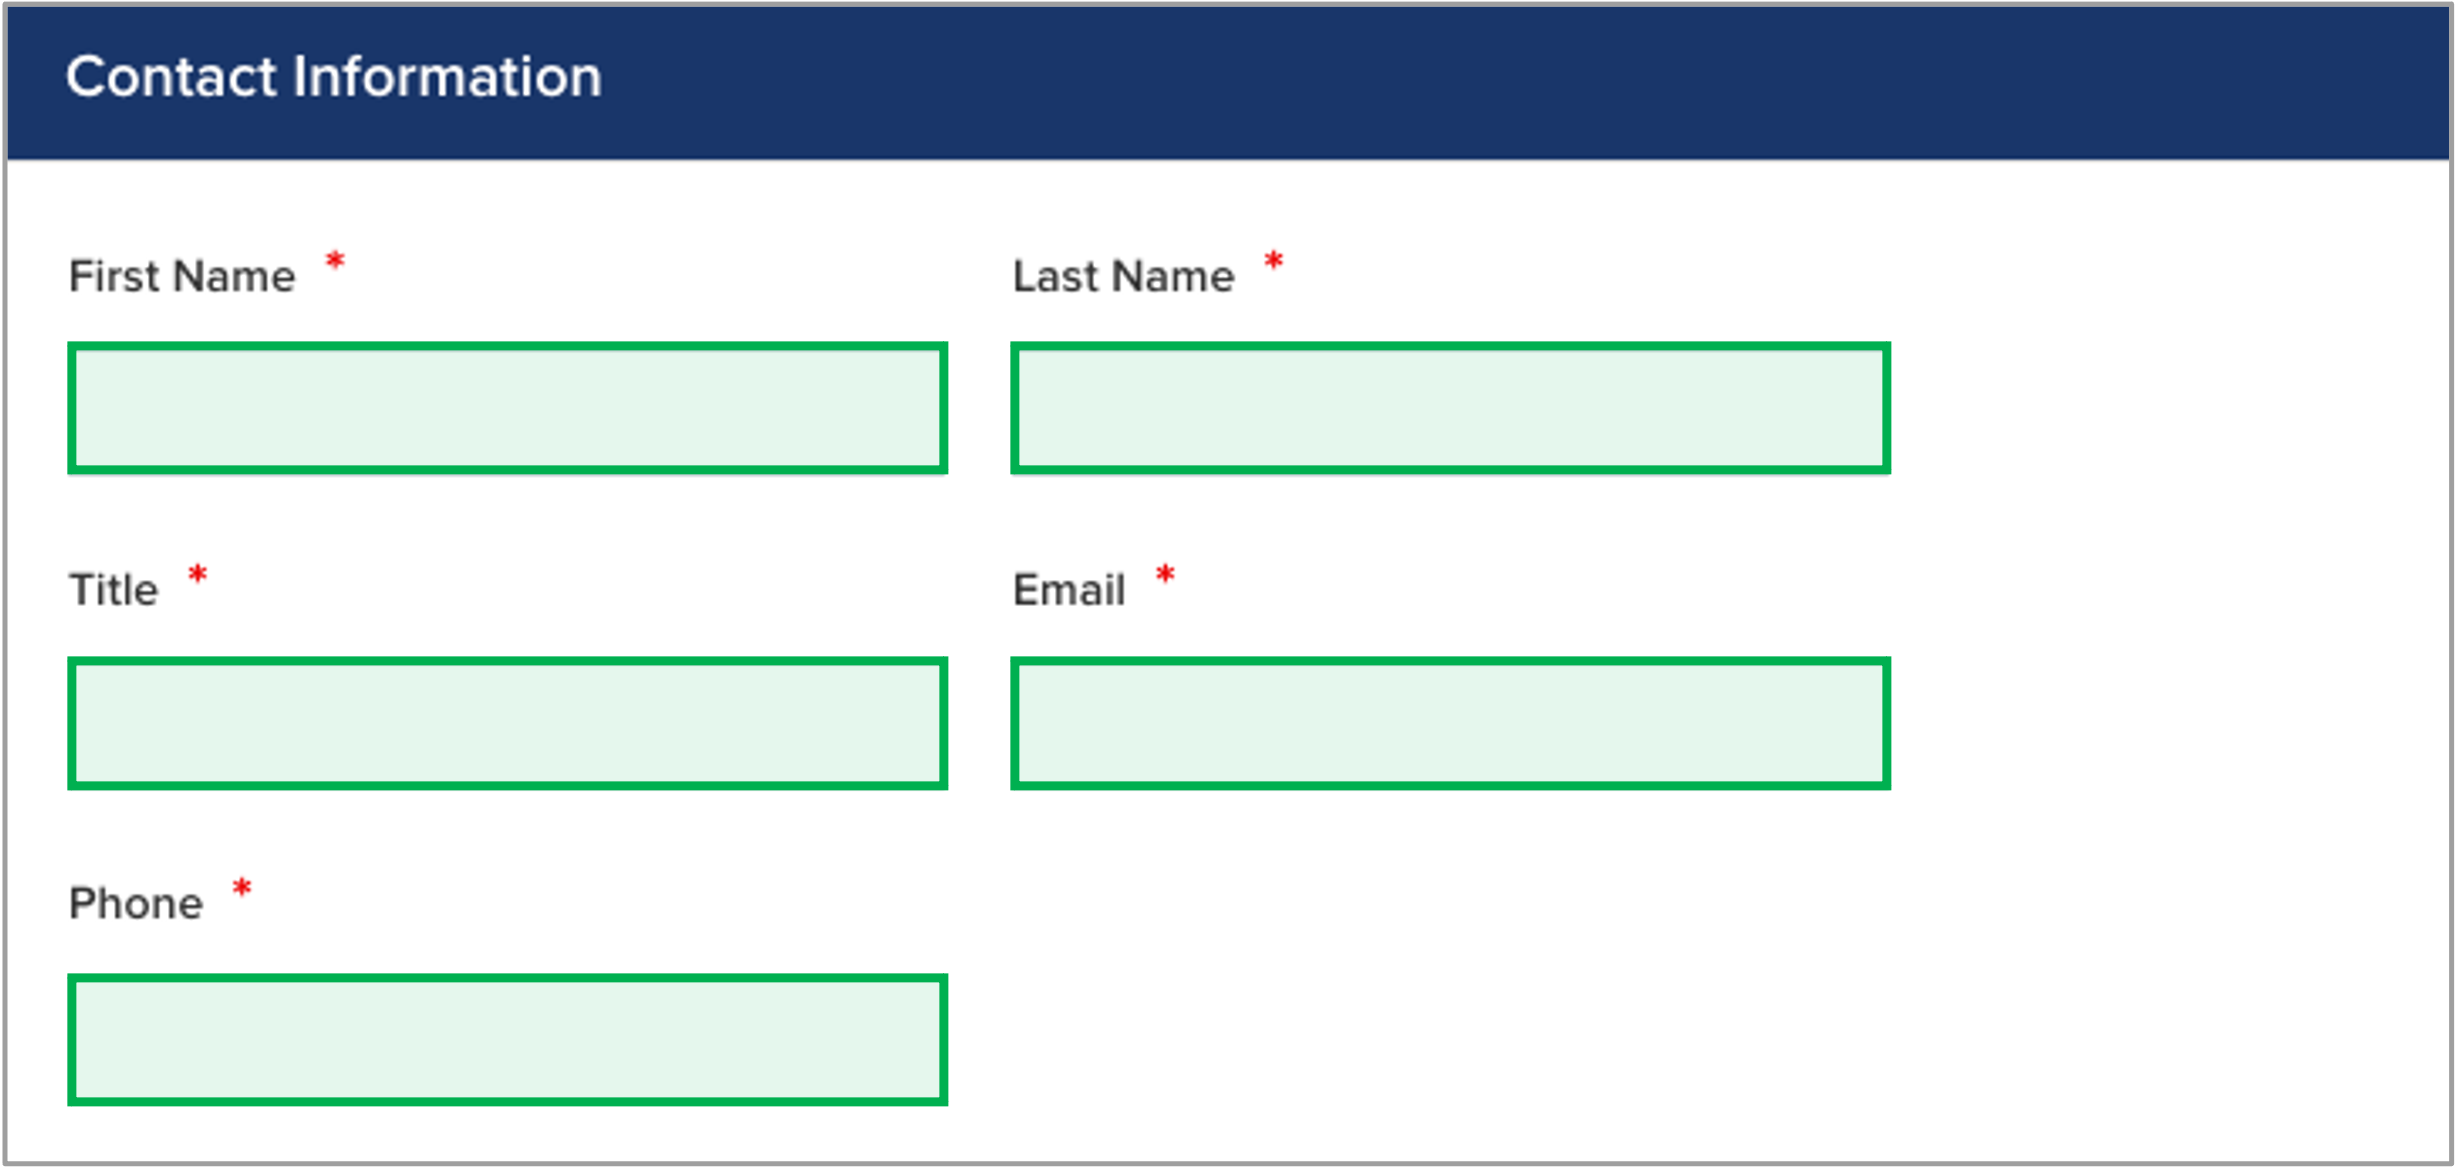
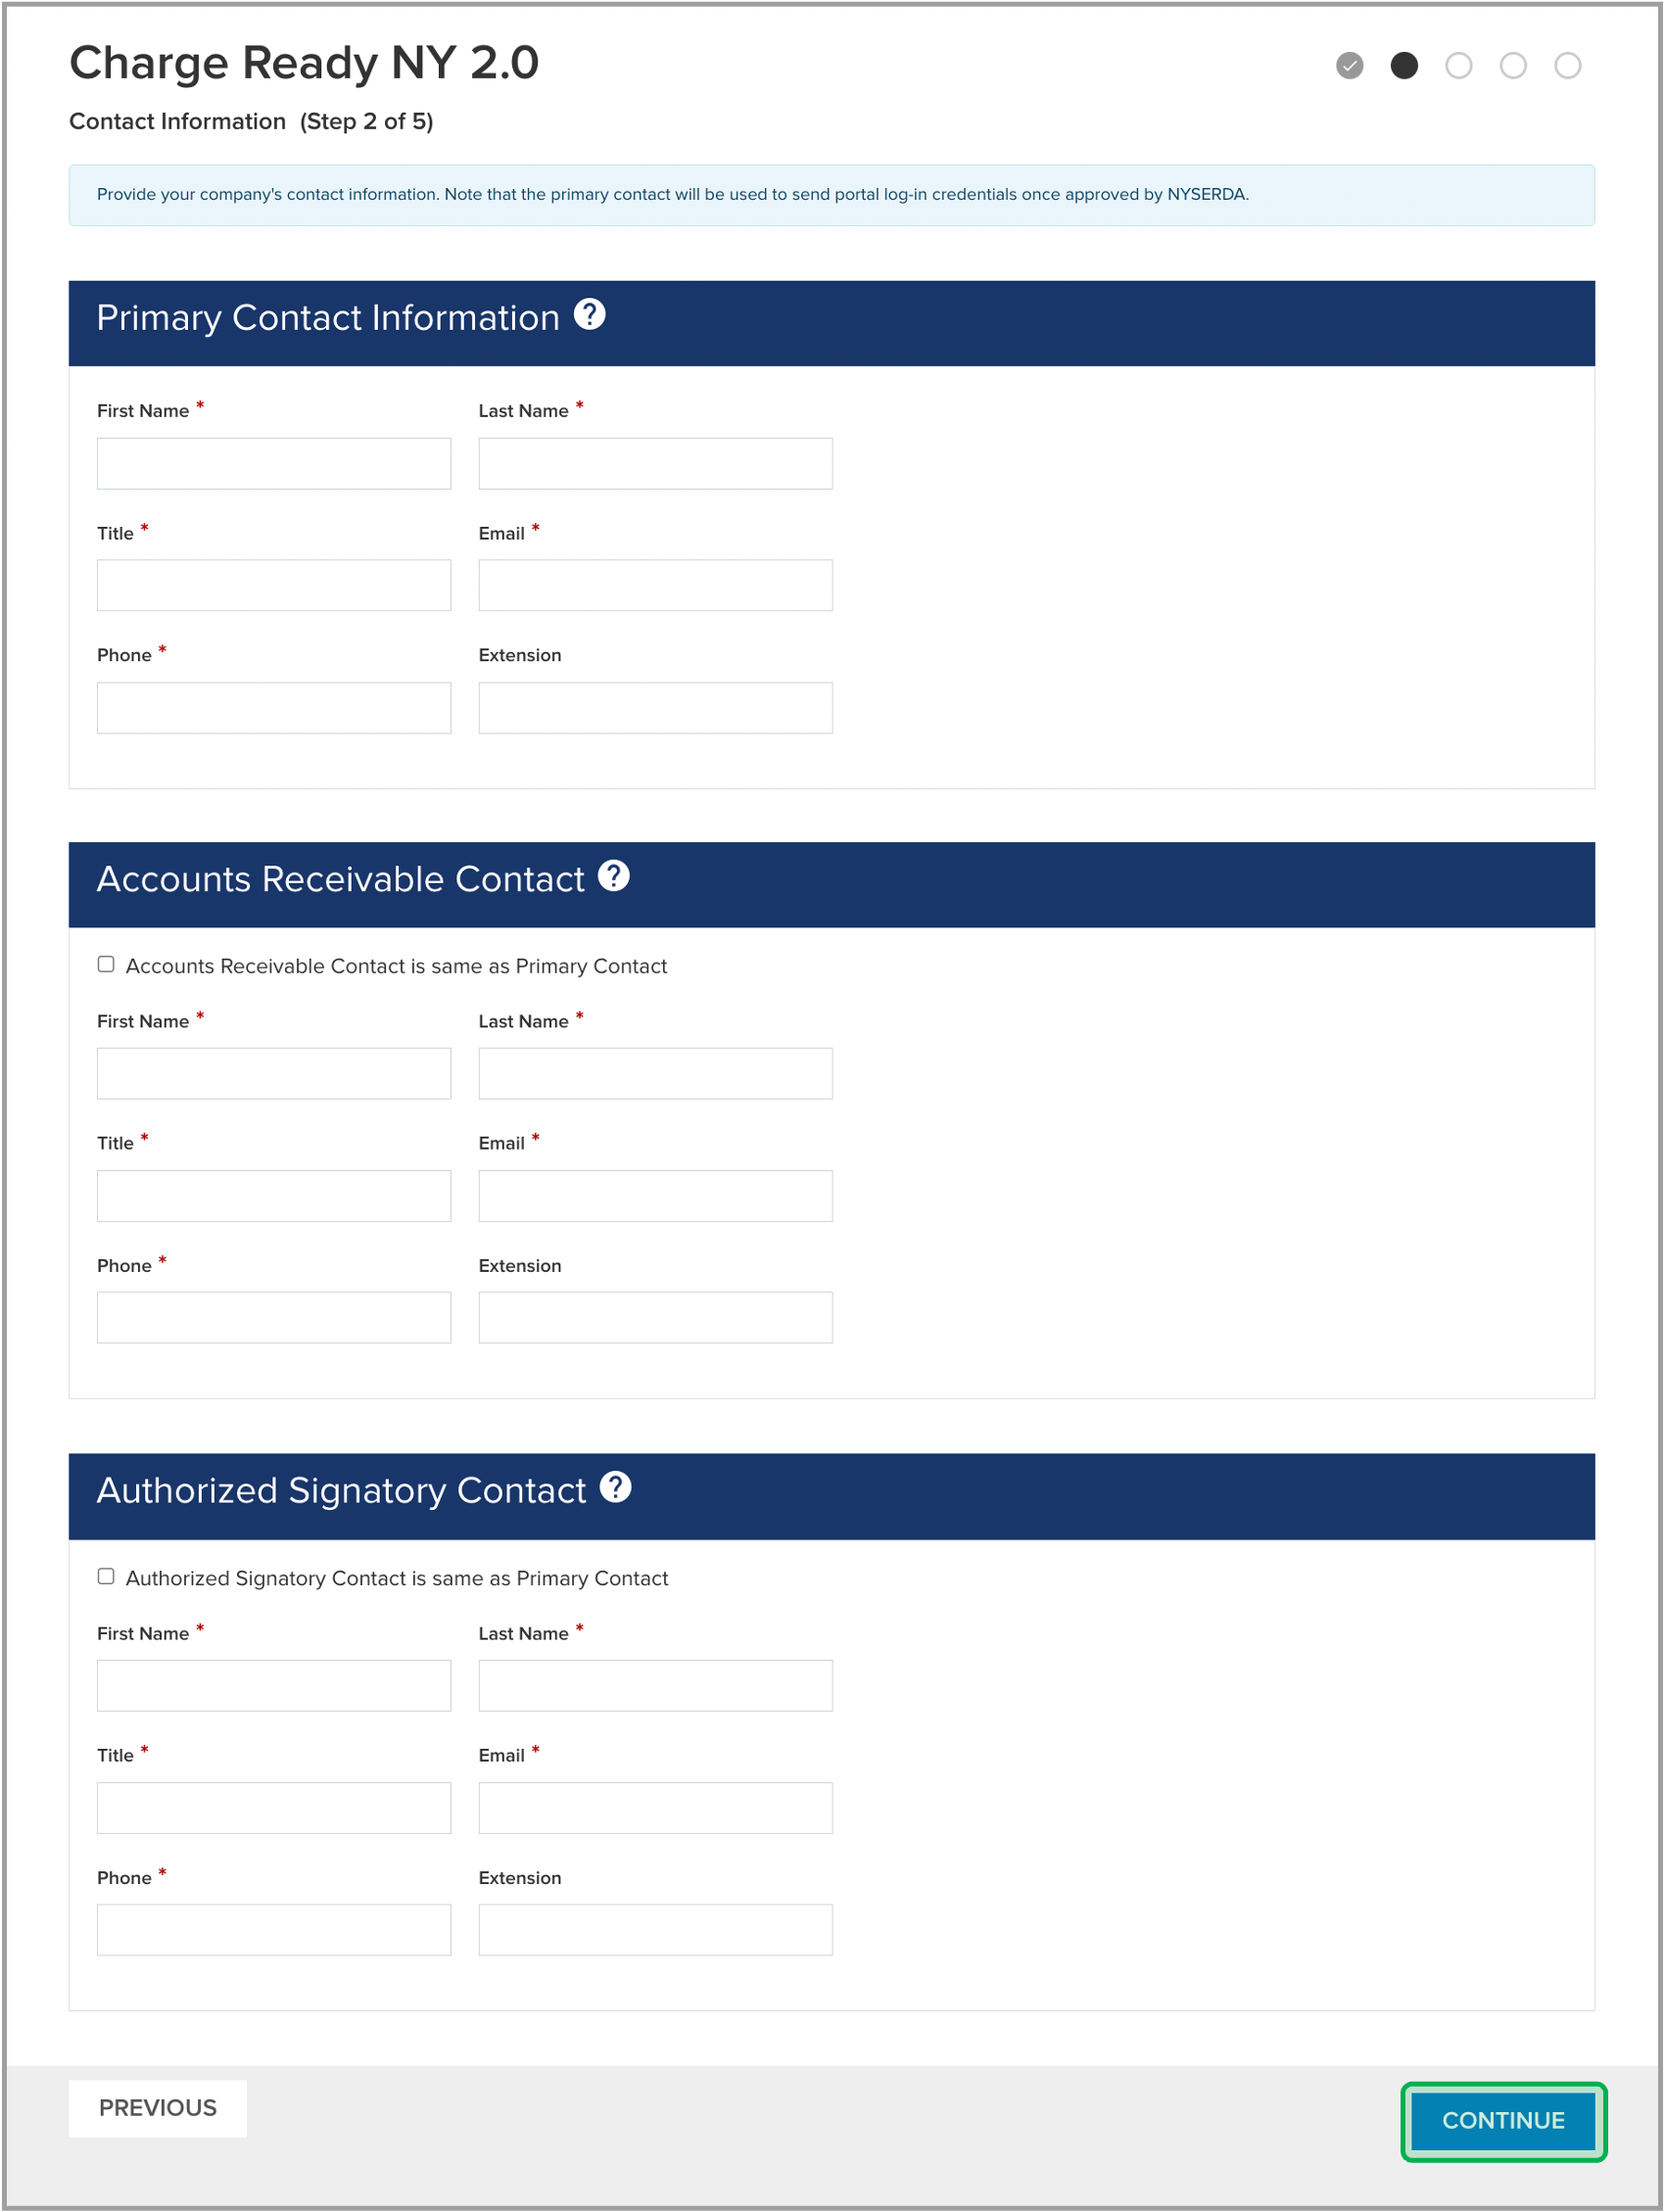
Complete the Contact Information page
This page asks you to provide information specific to your company. Once the page is complete, click the Continue button.
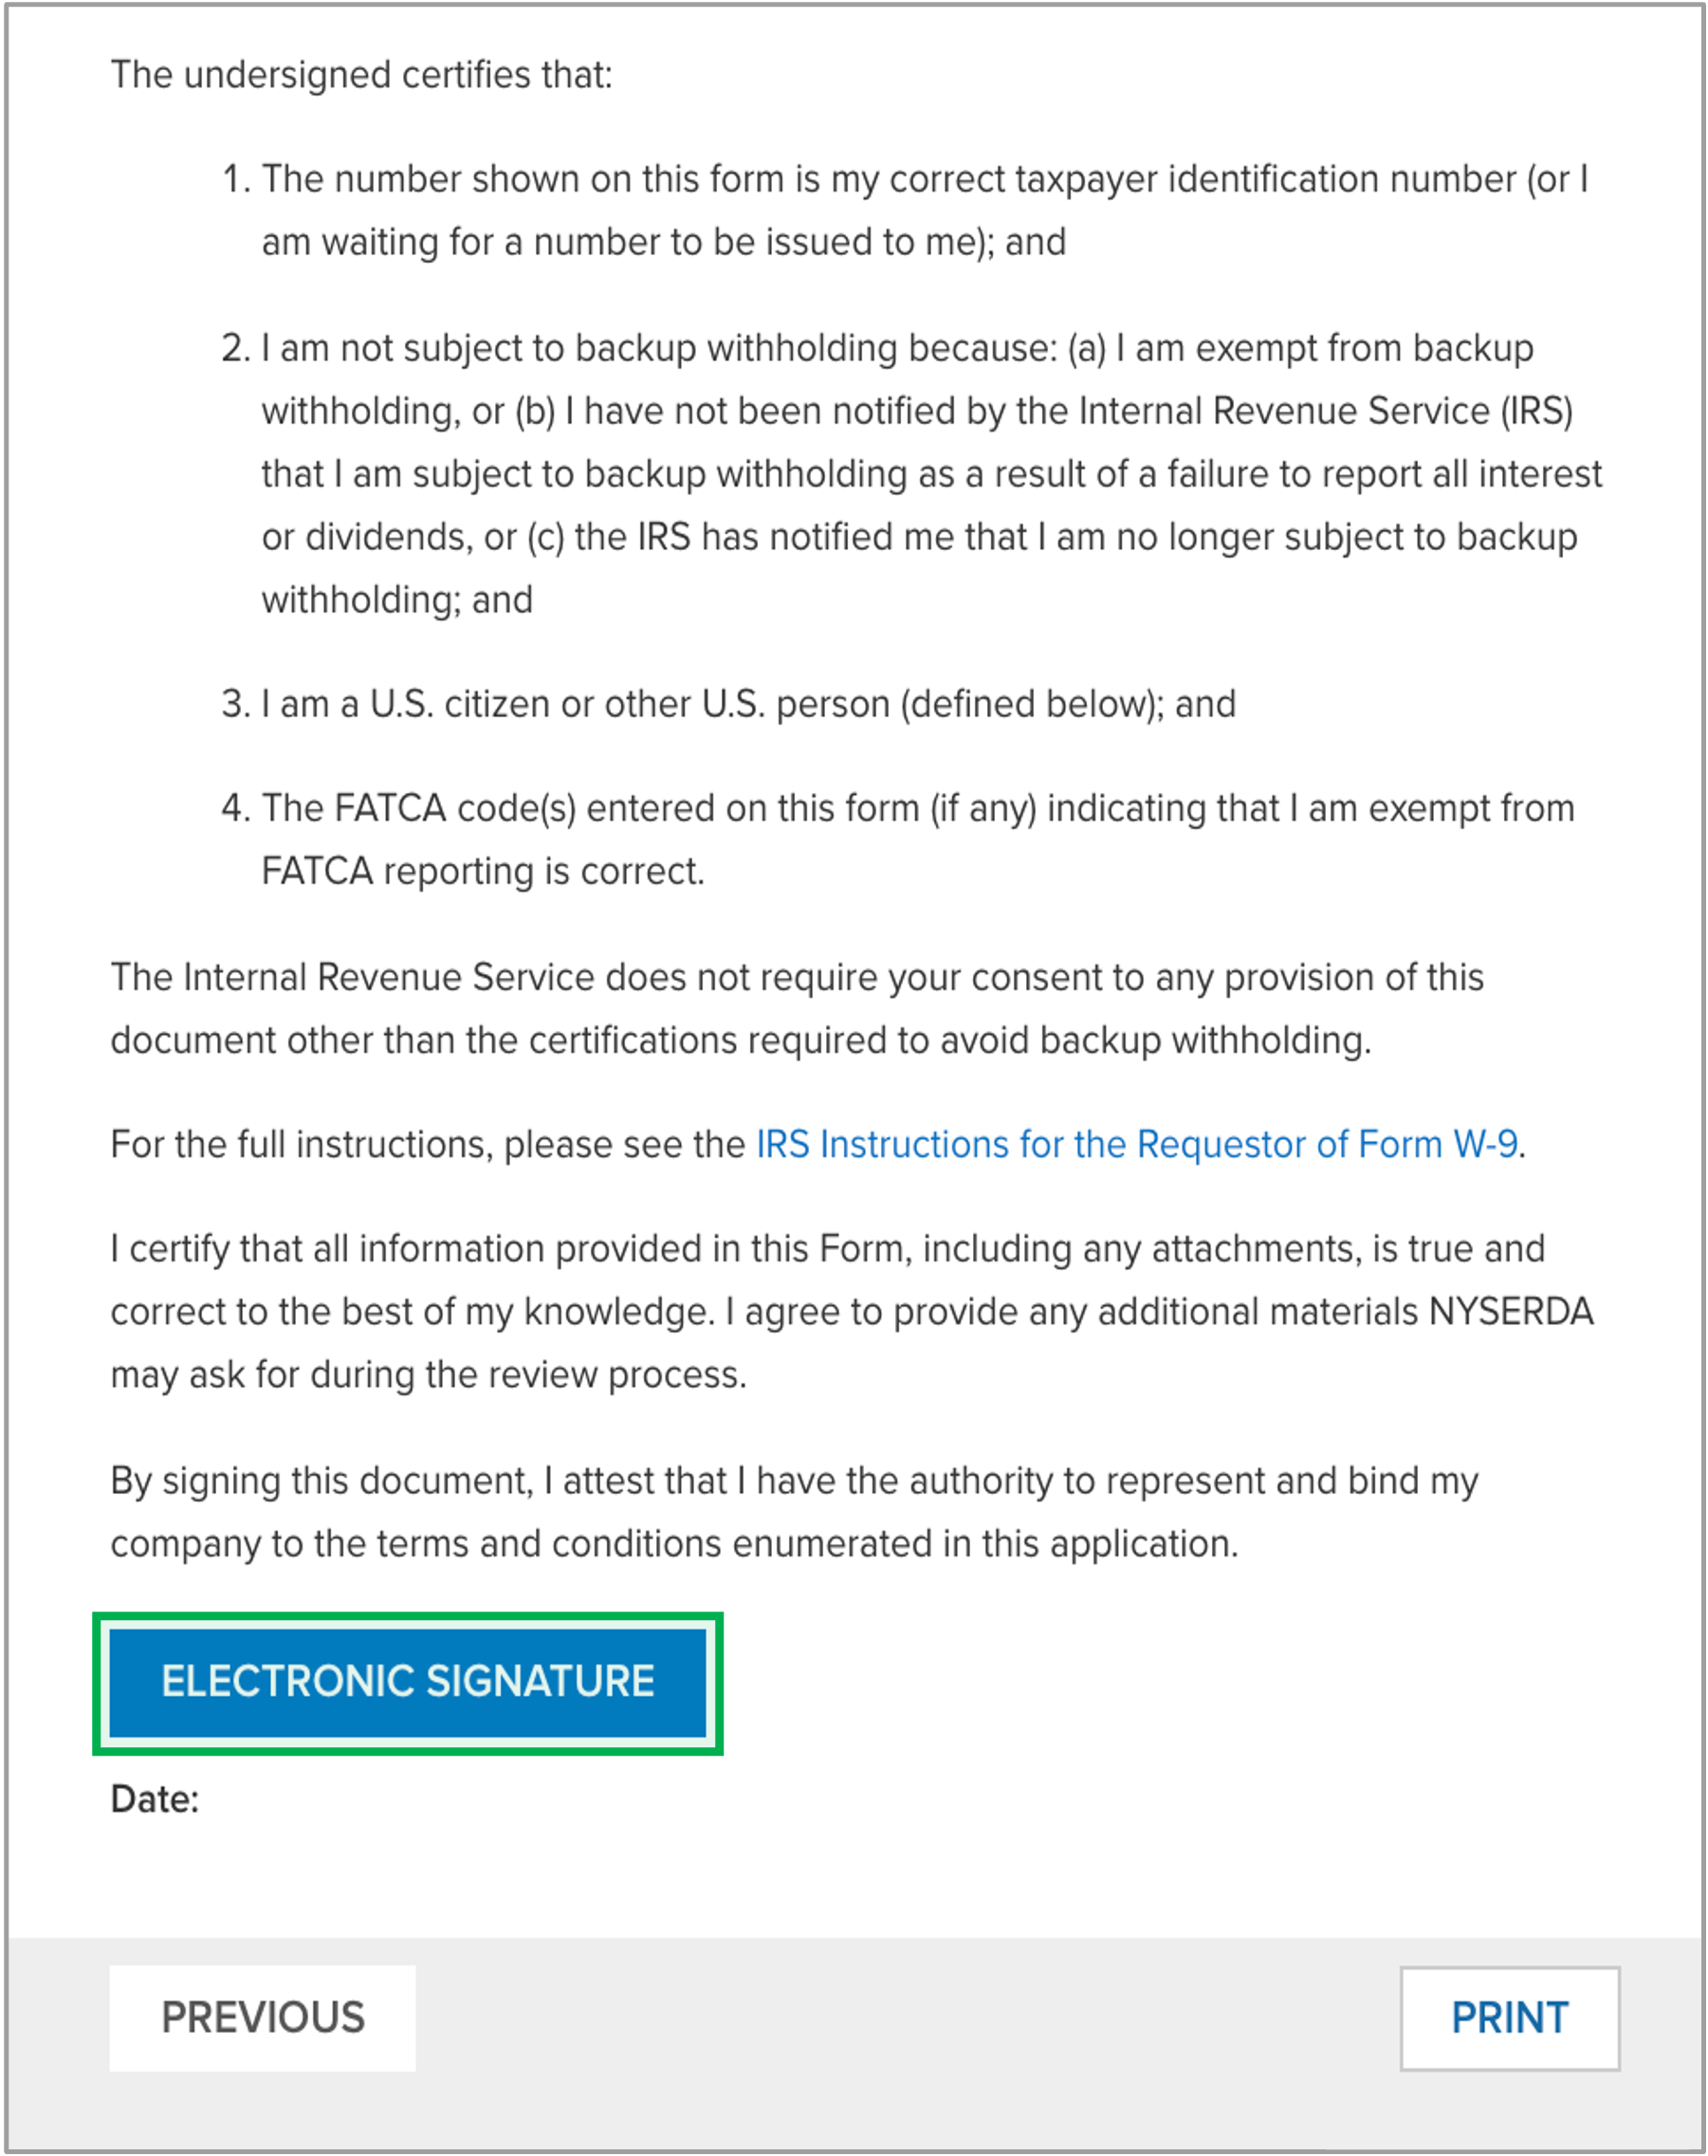
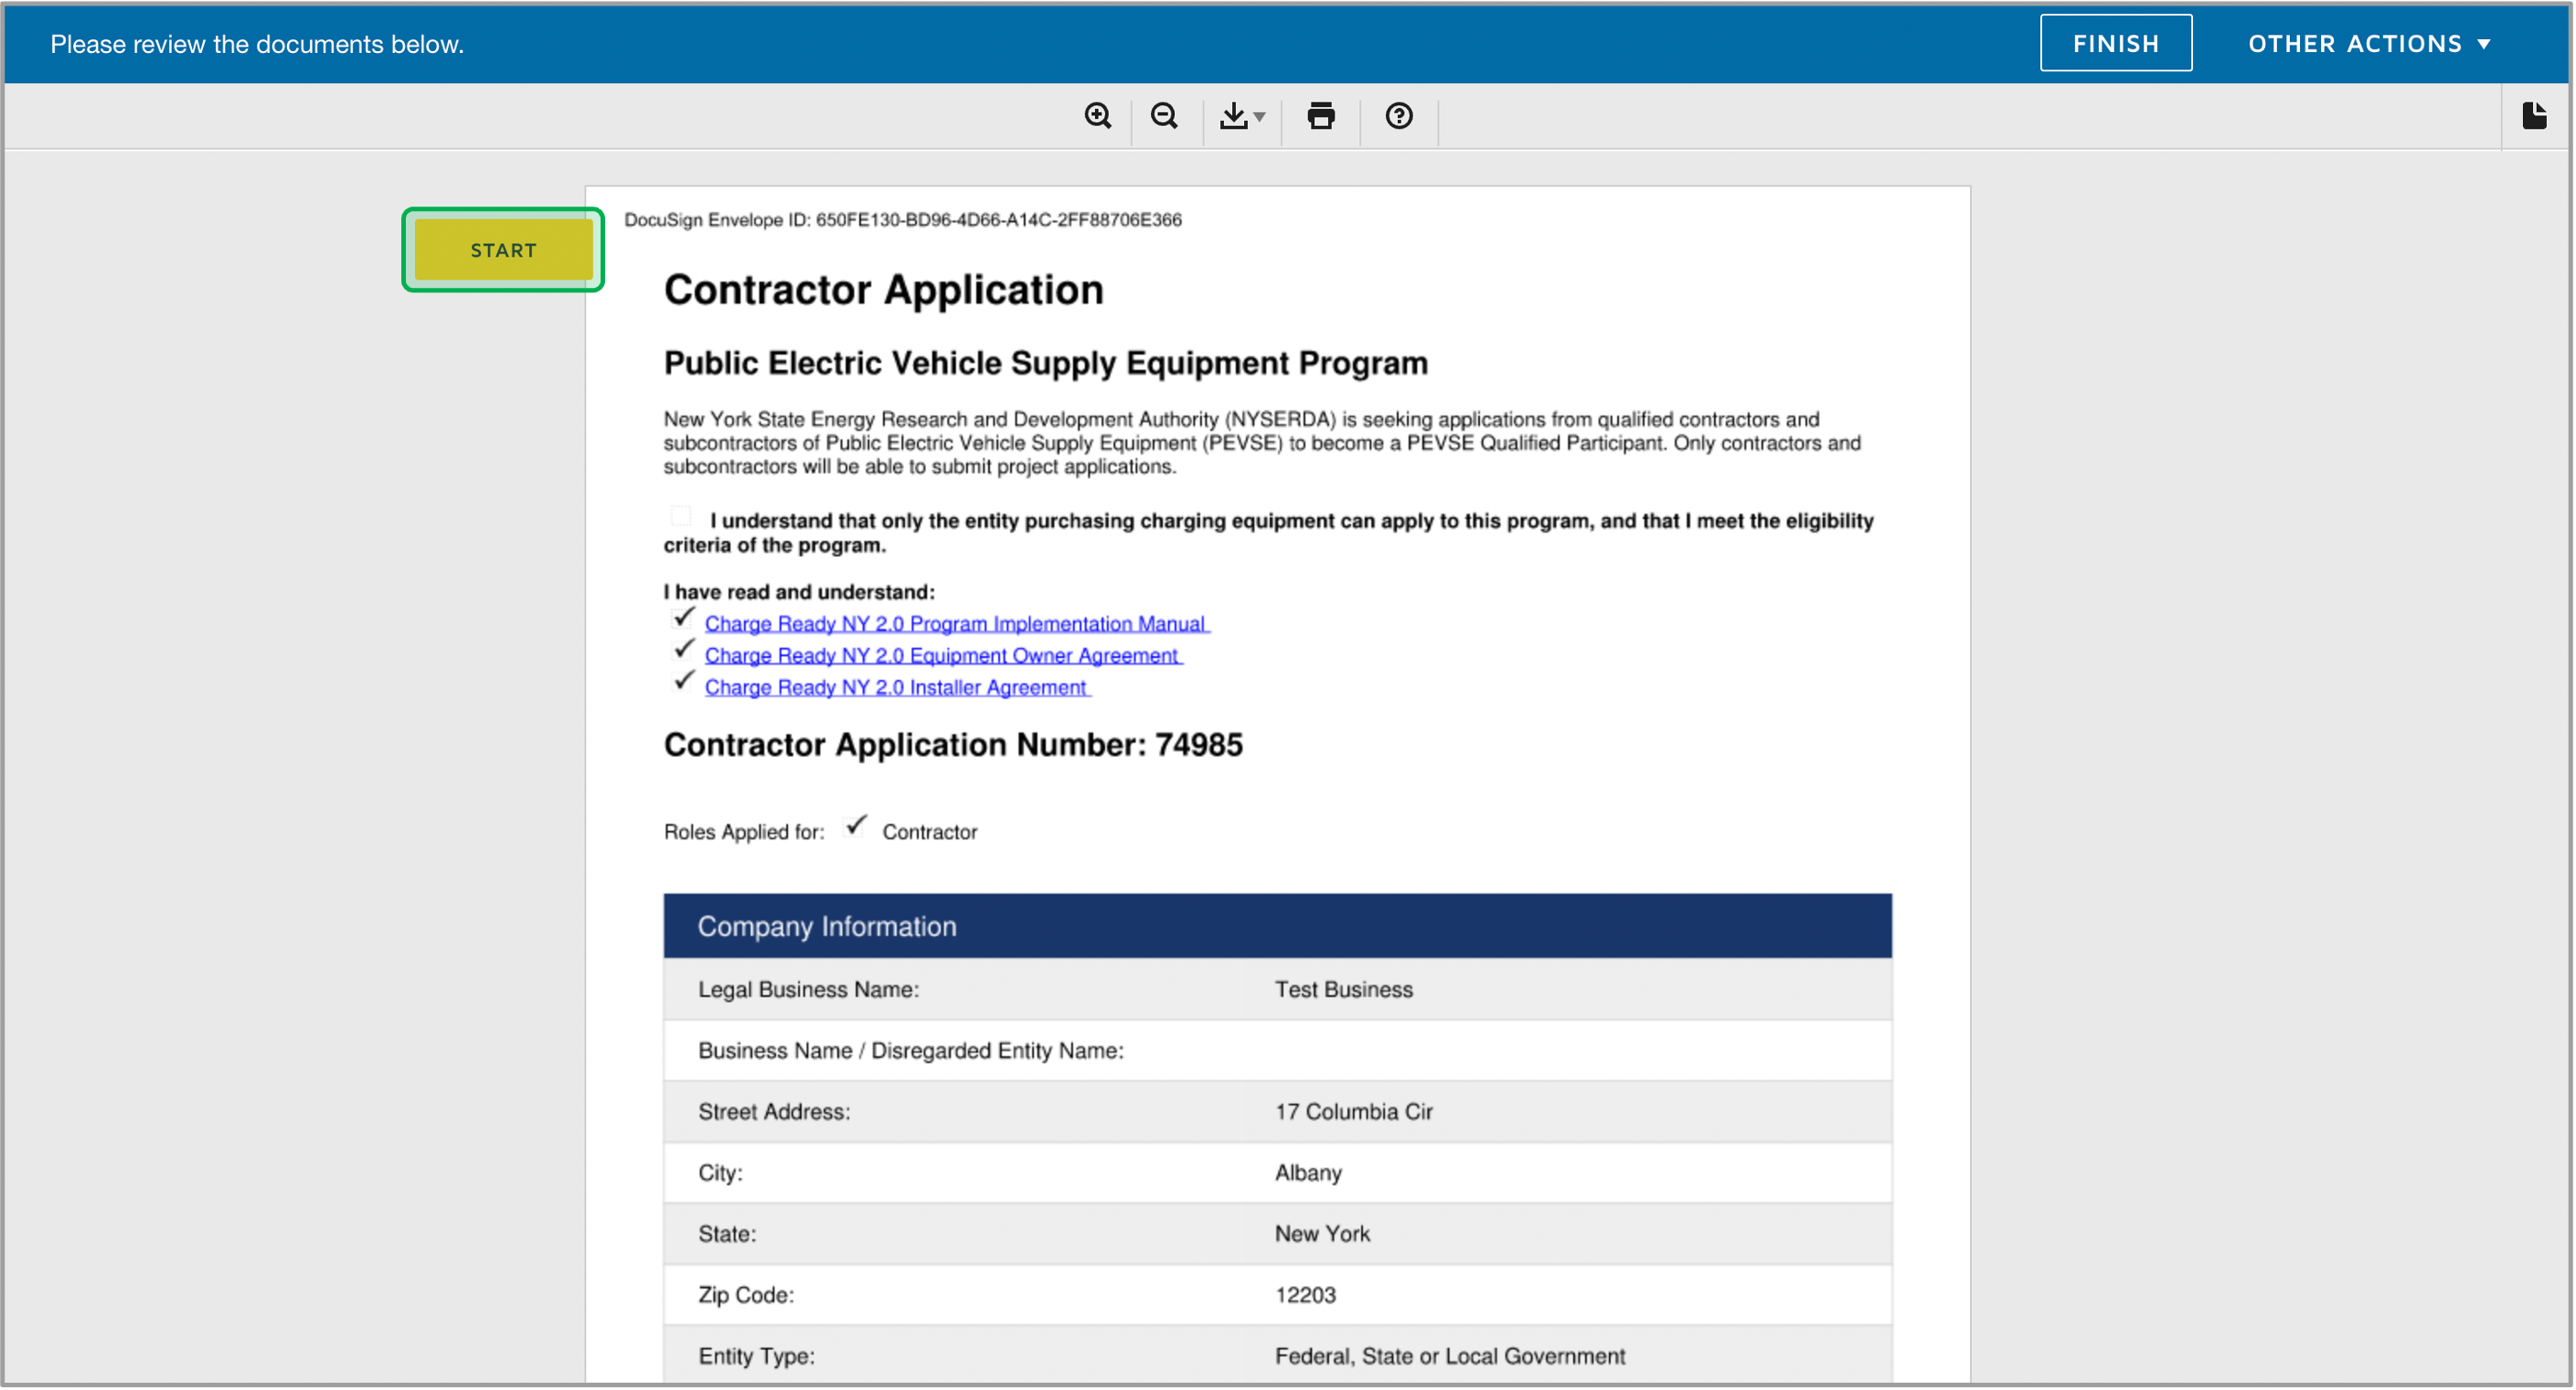
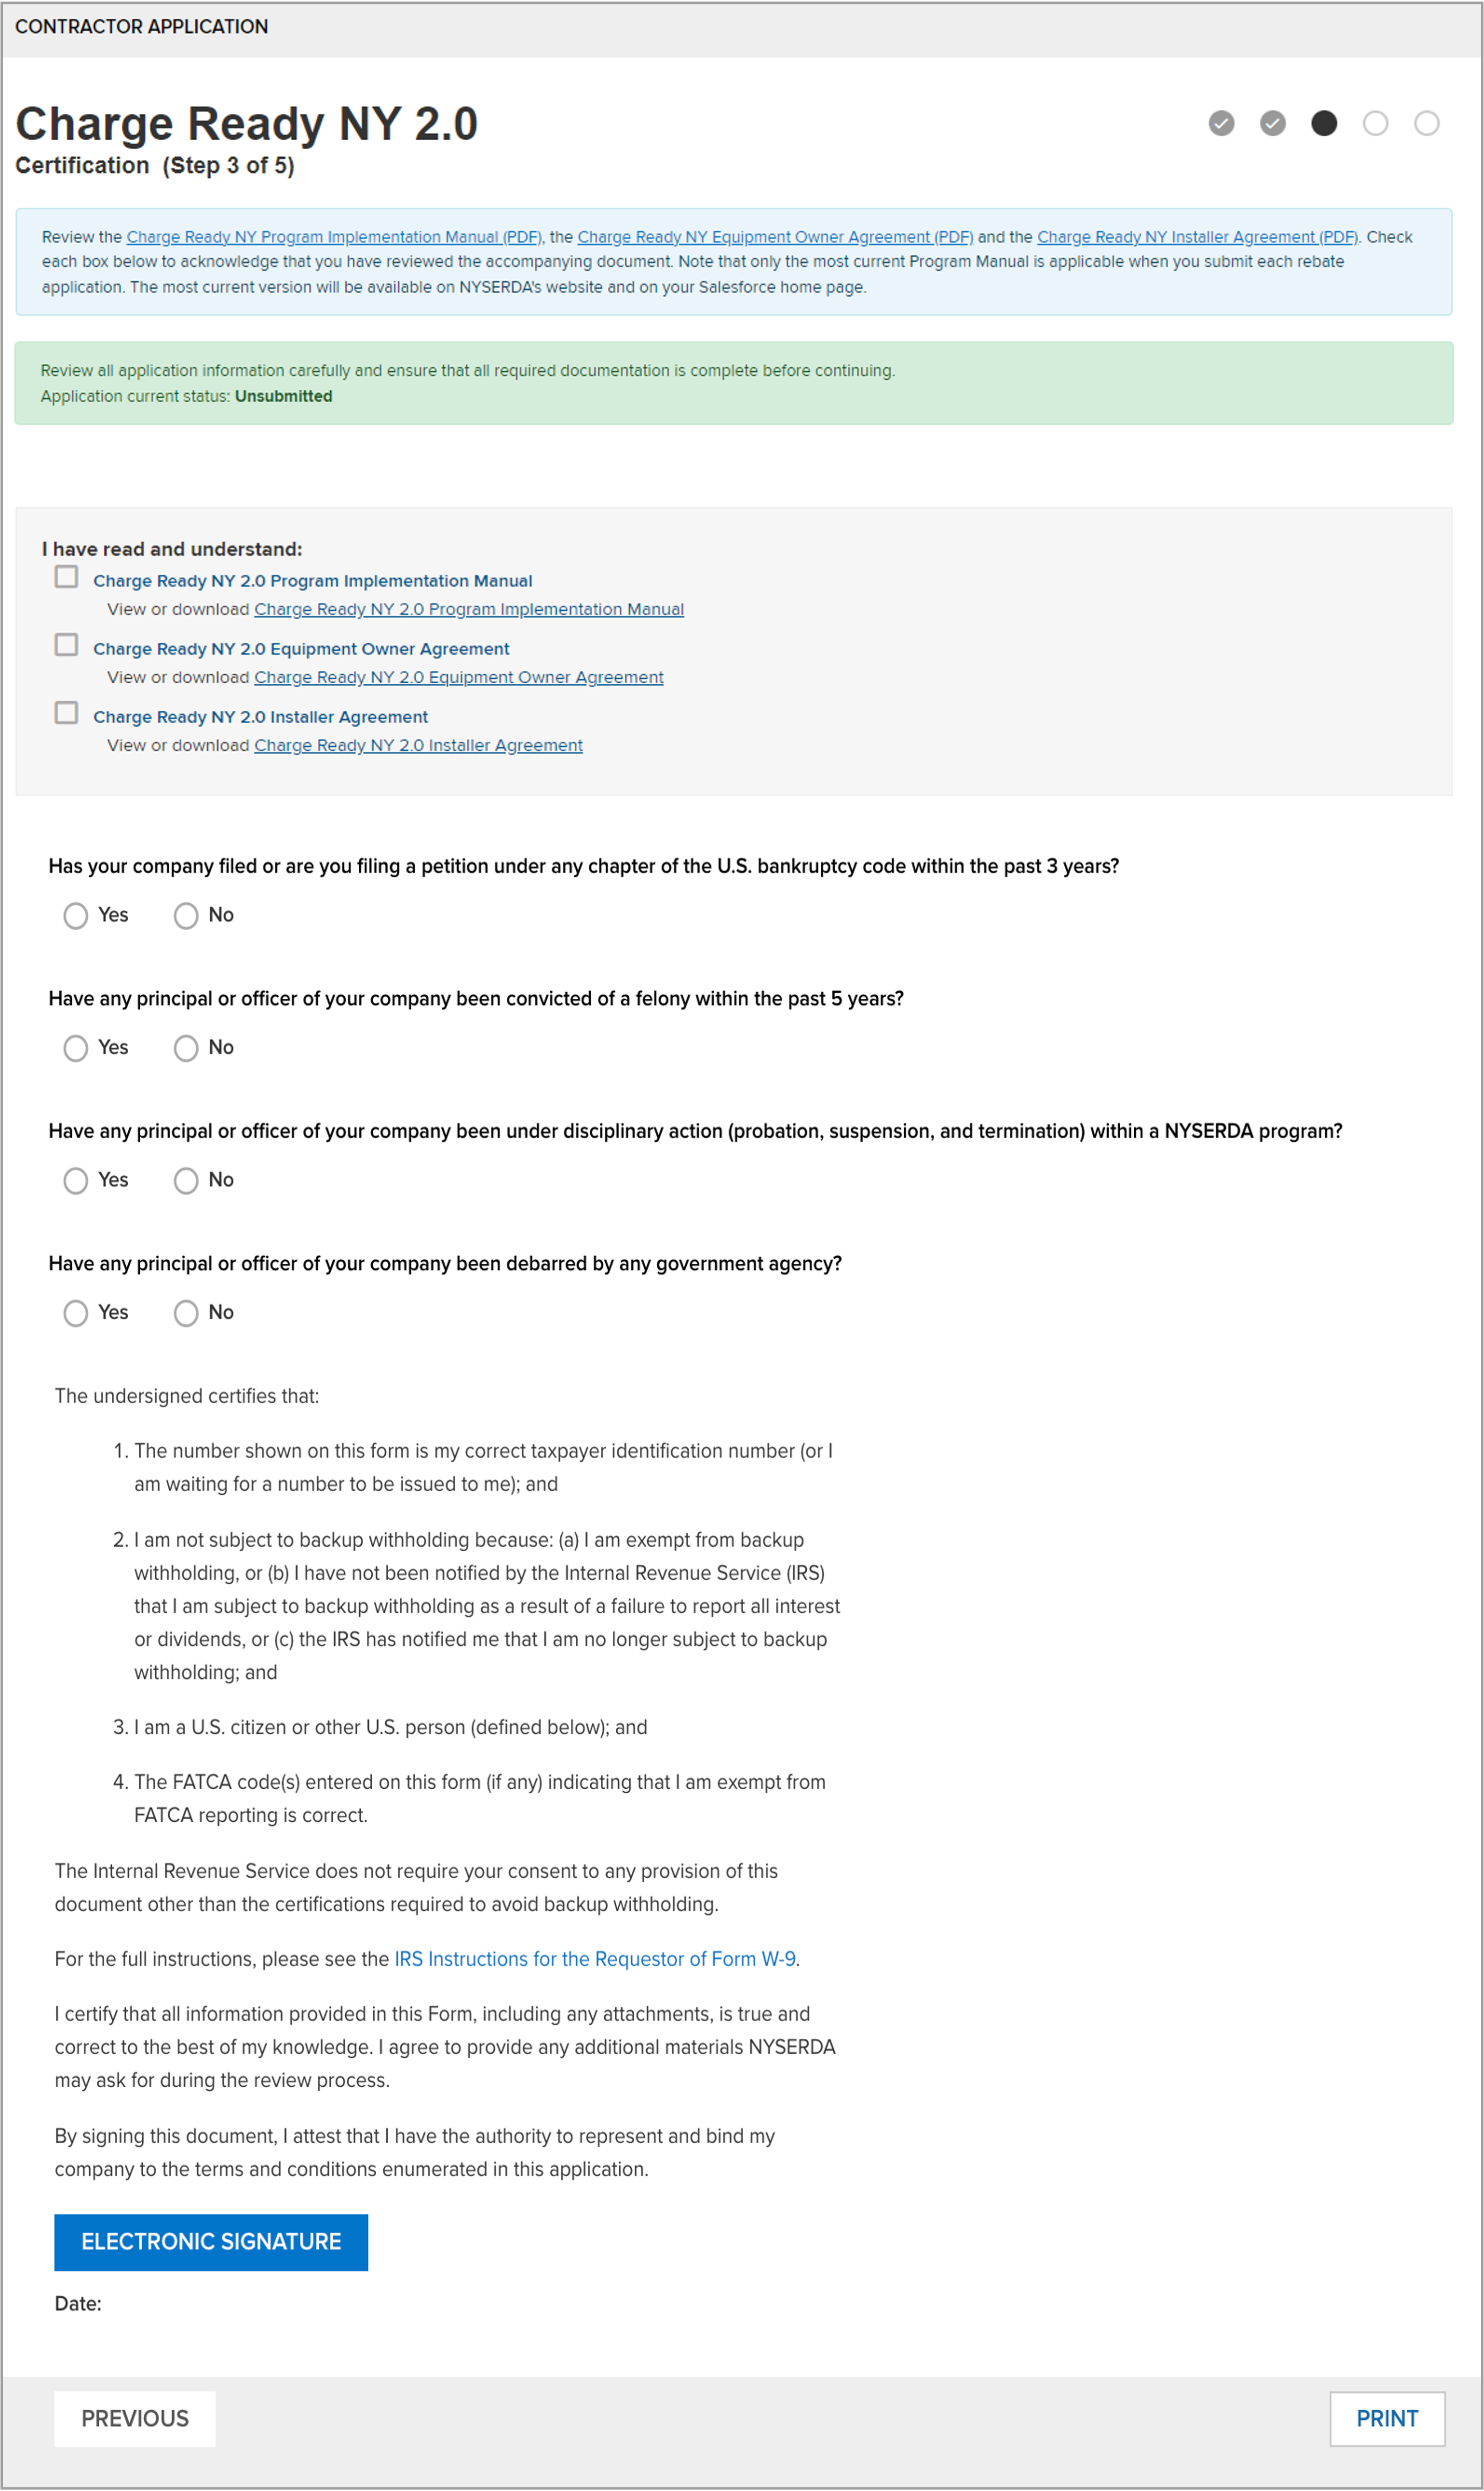
Complete the Certification page
This page asks you to review the Charge Ready NY Program Implementation Manual (PDF) and the Charge Ready NY Equipment Owner Agreement (PDF).
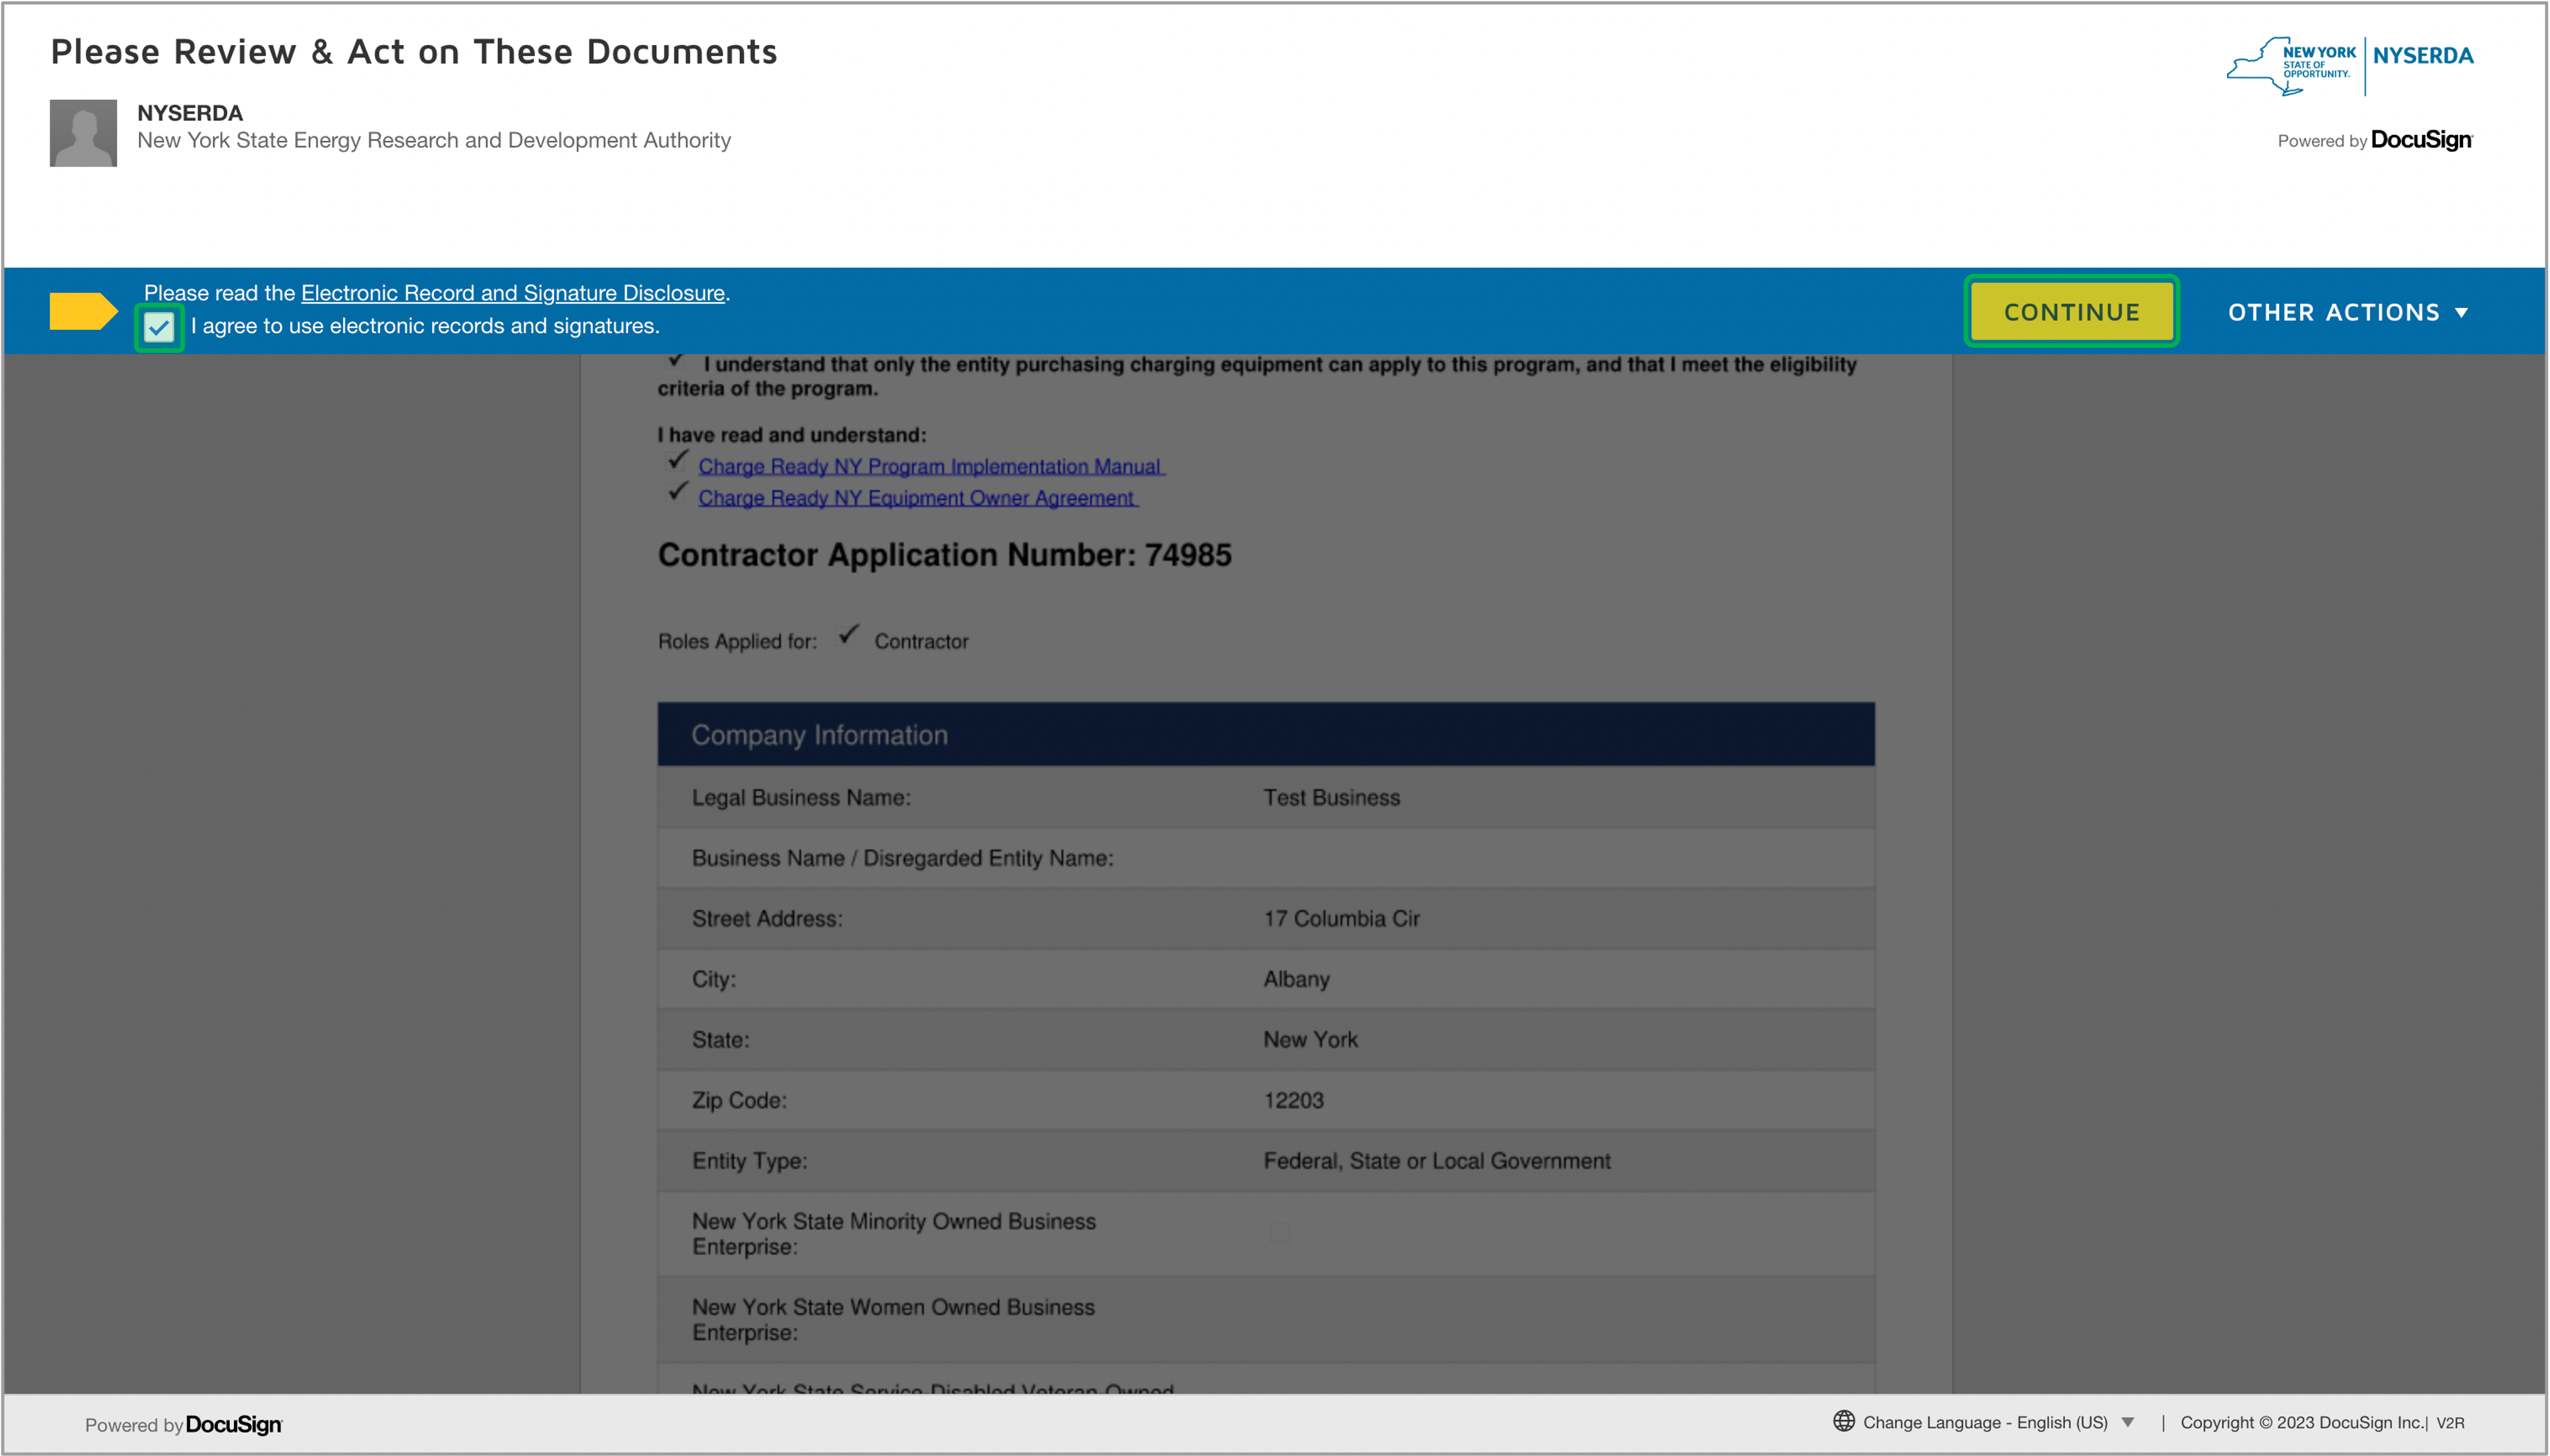
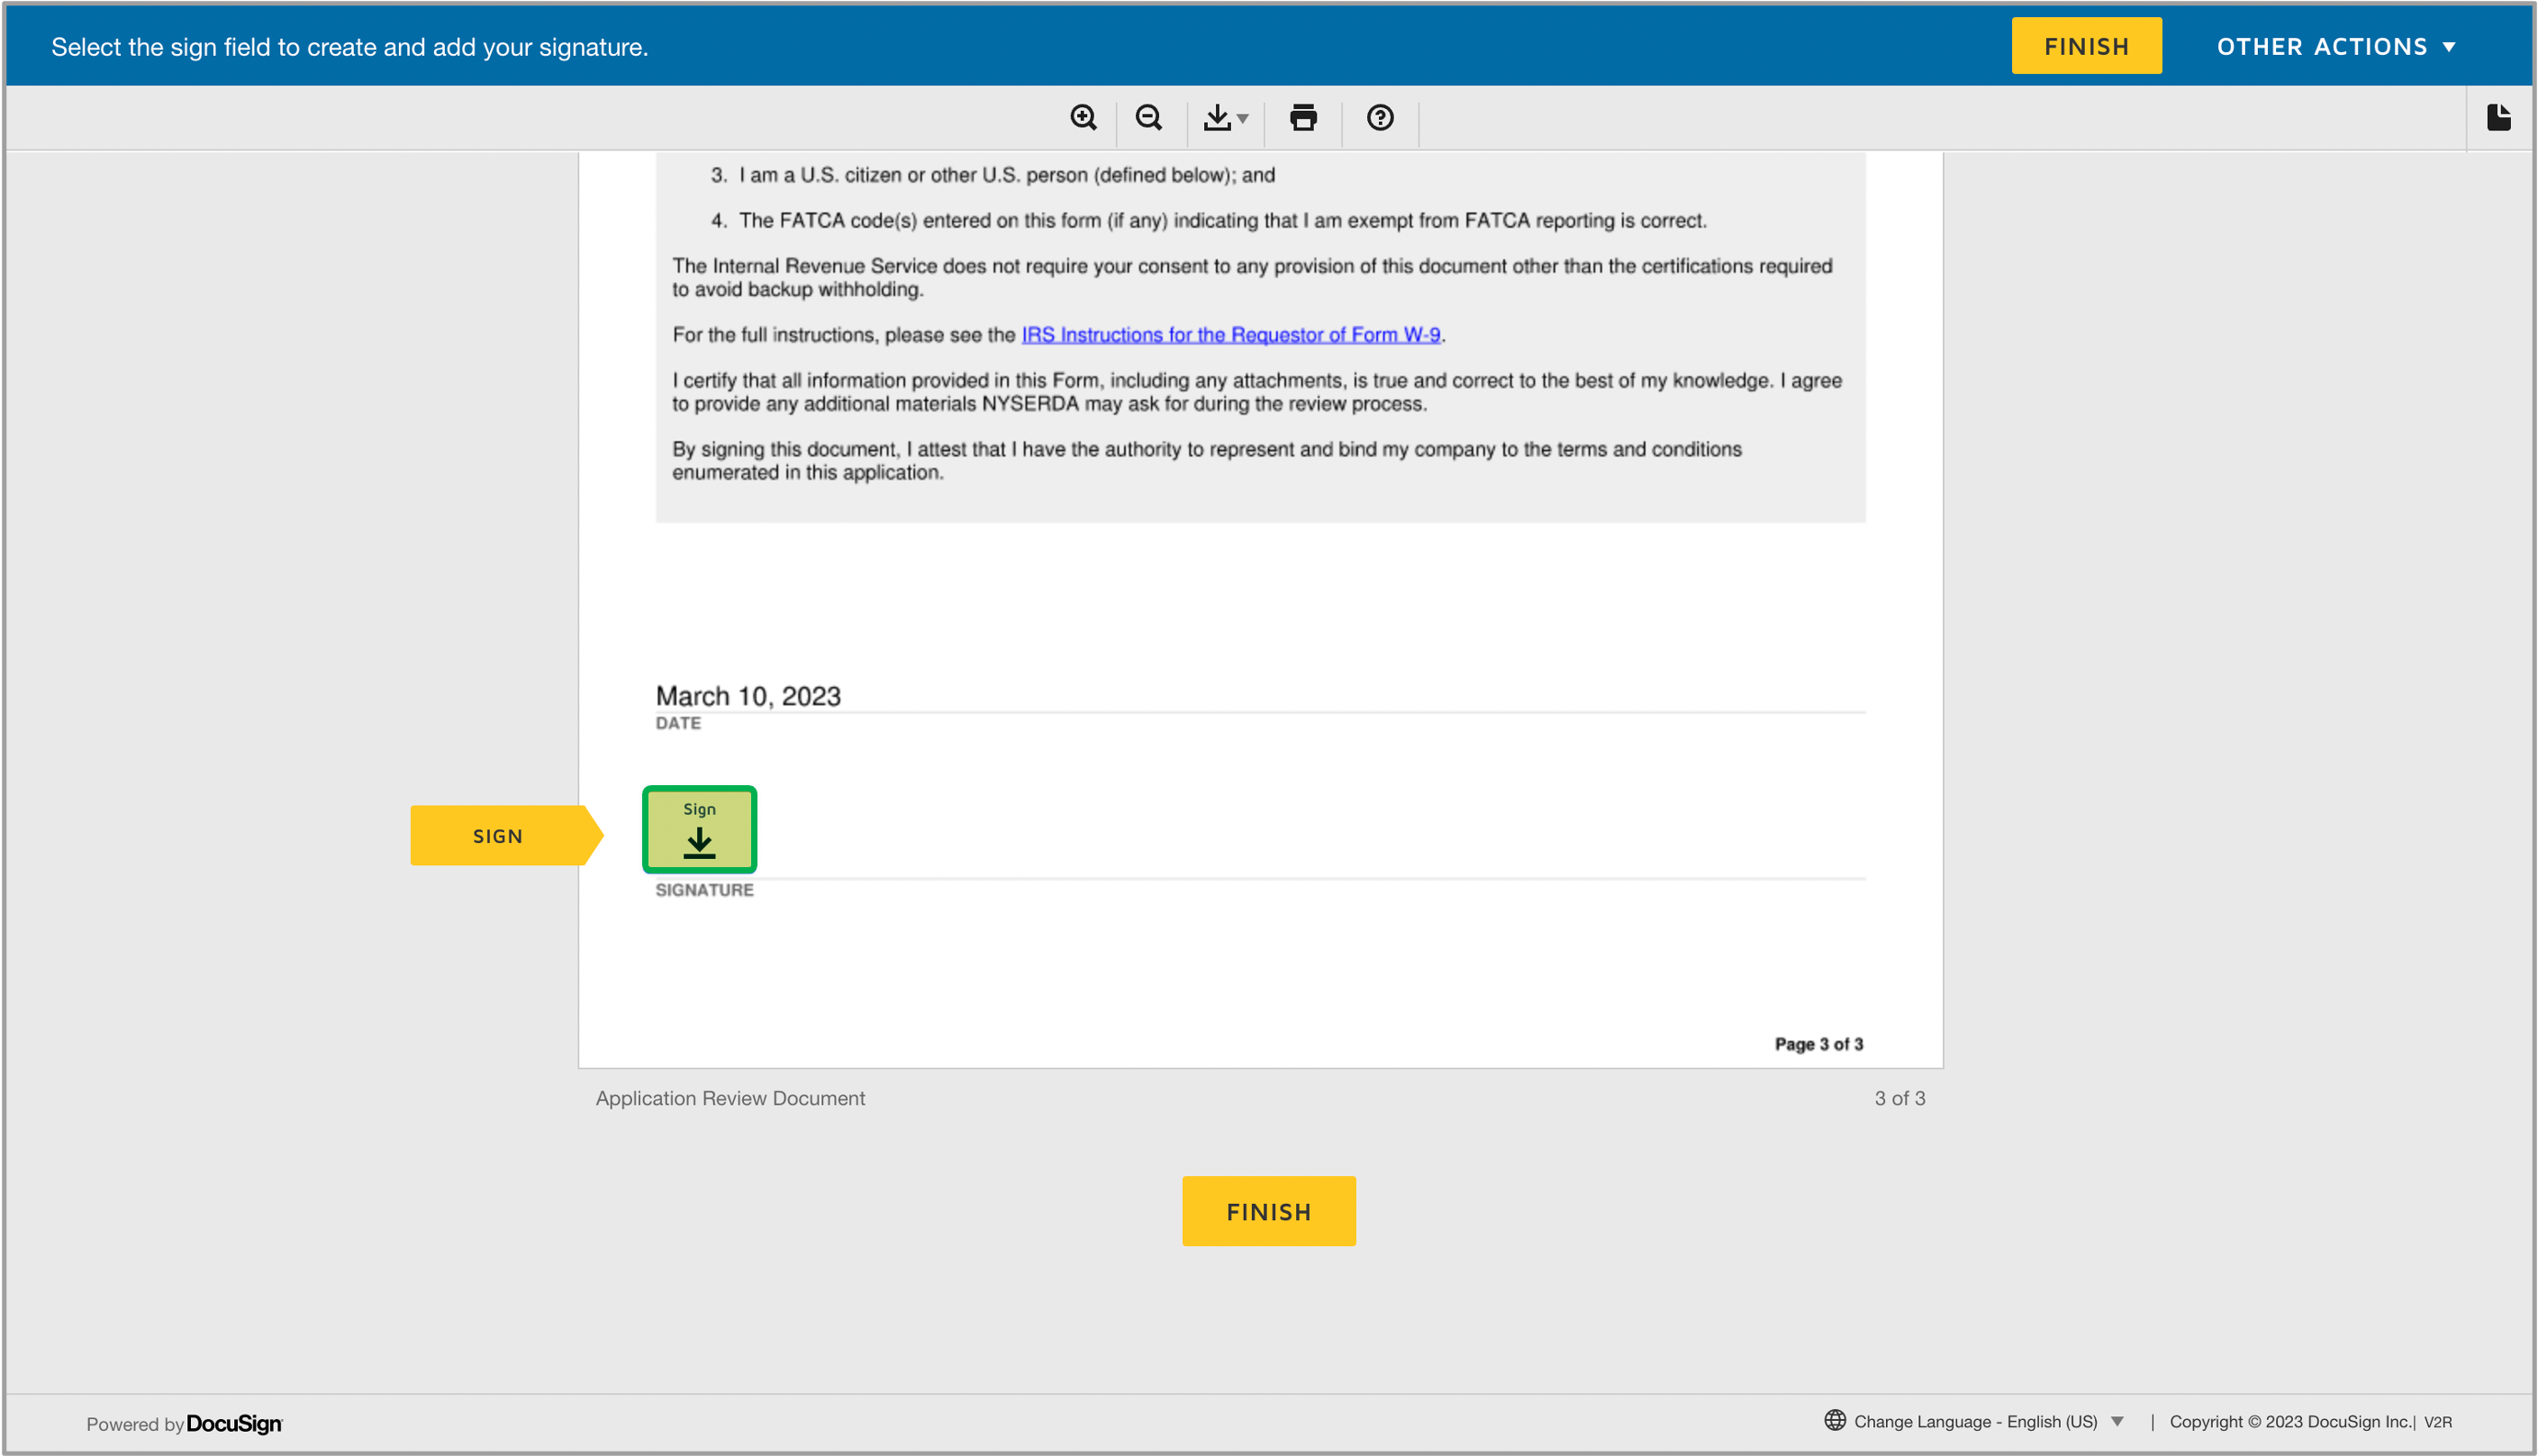
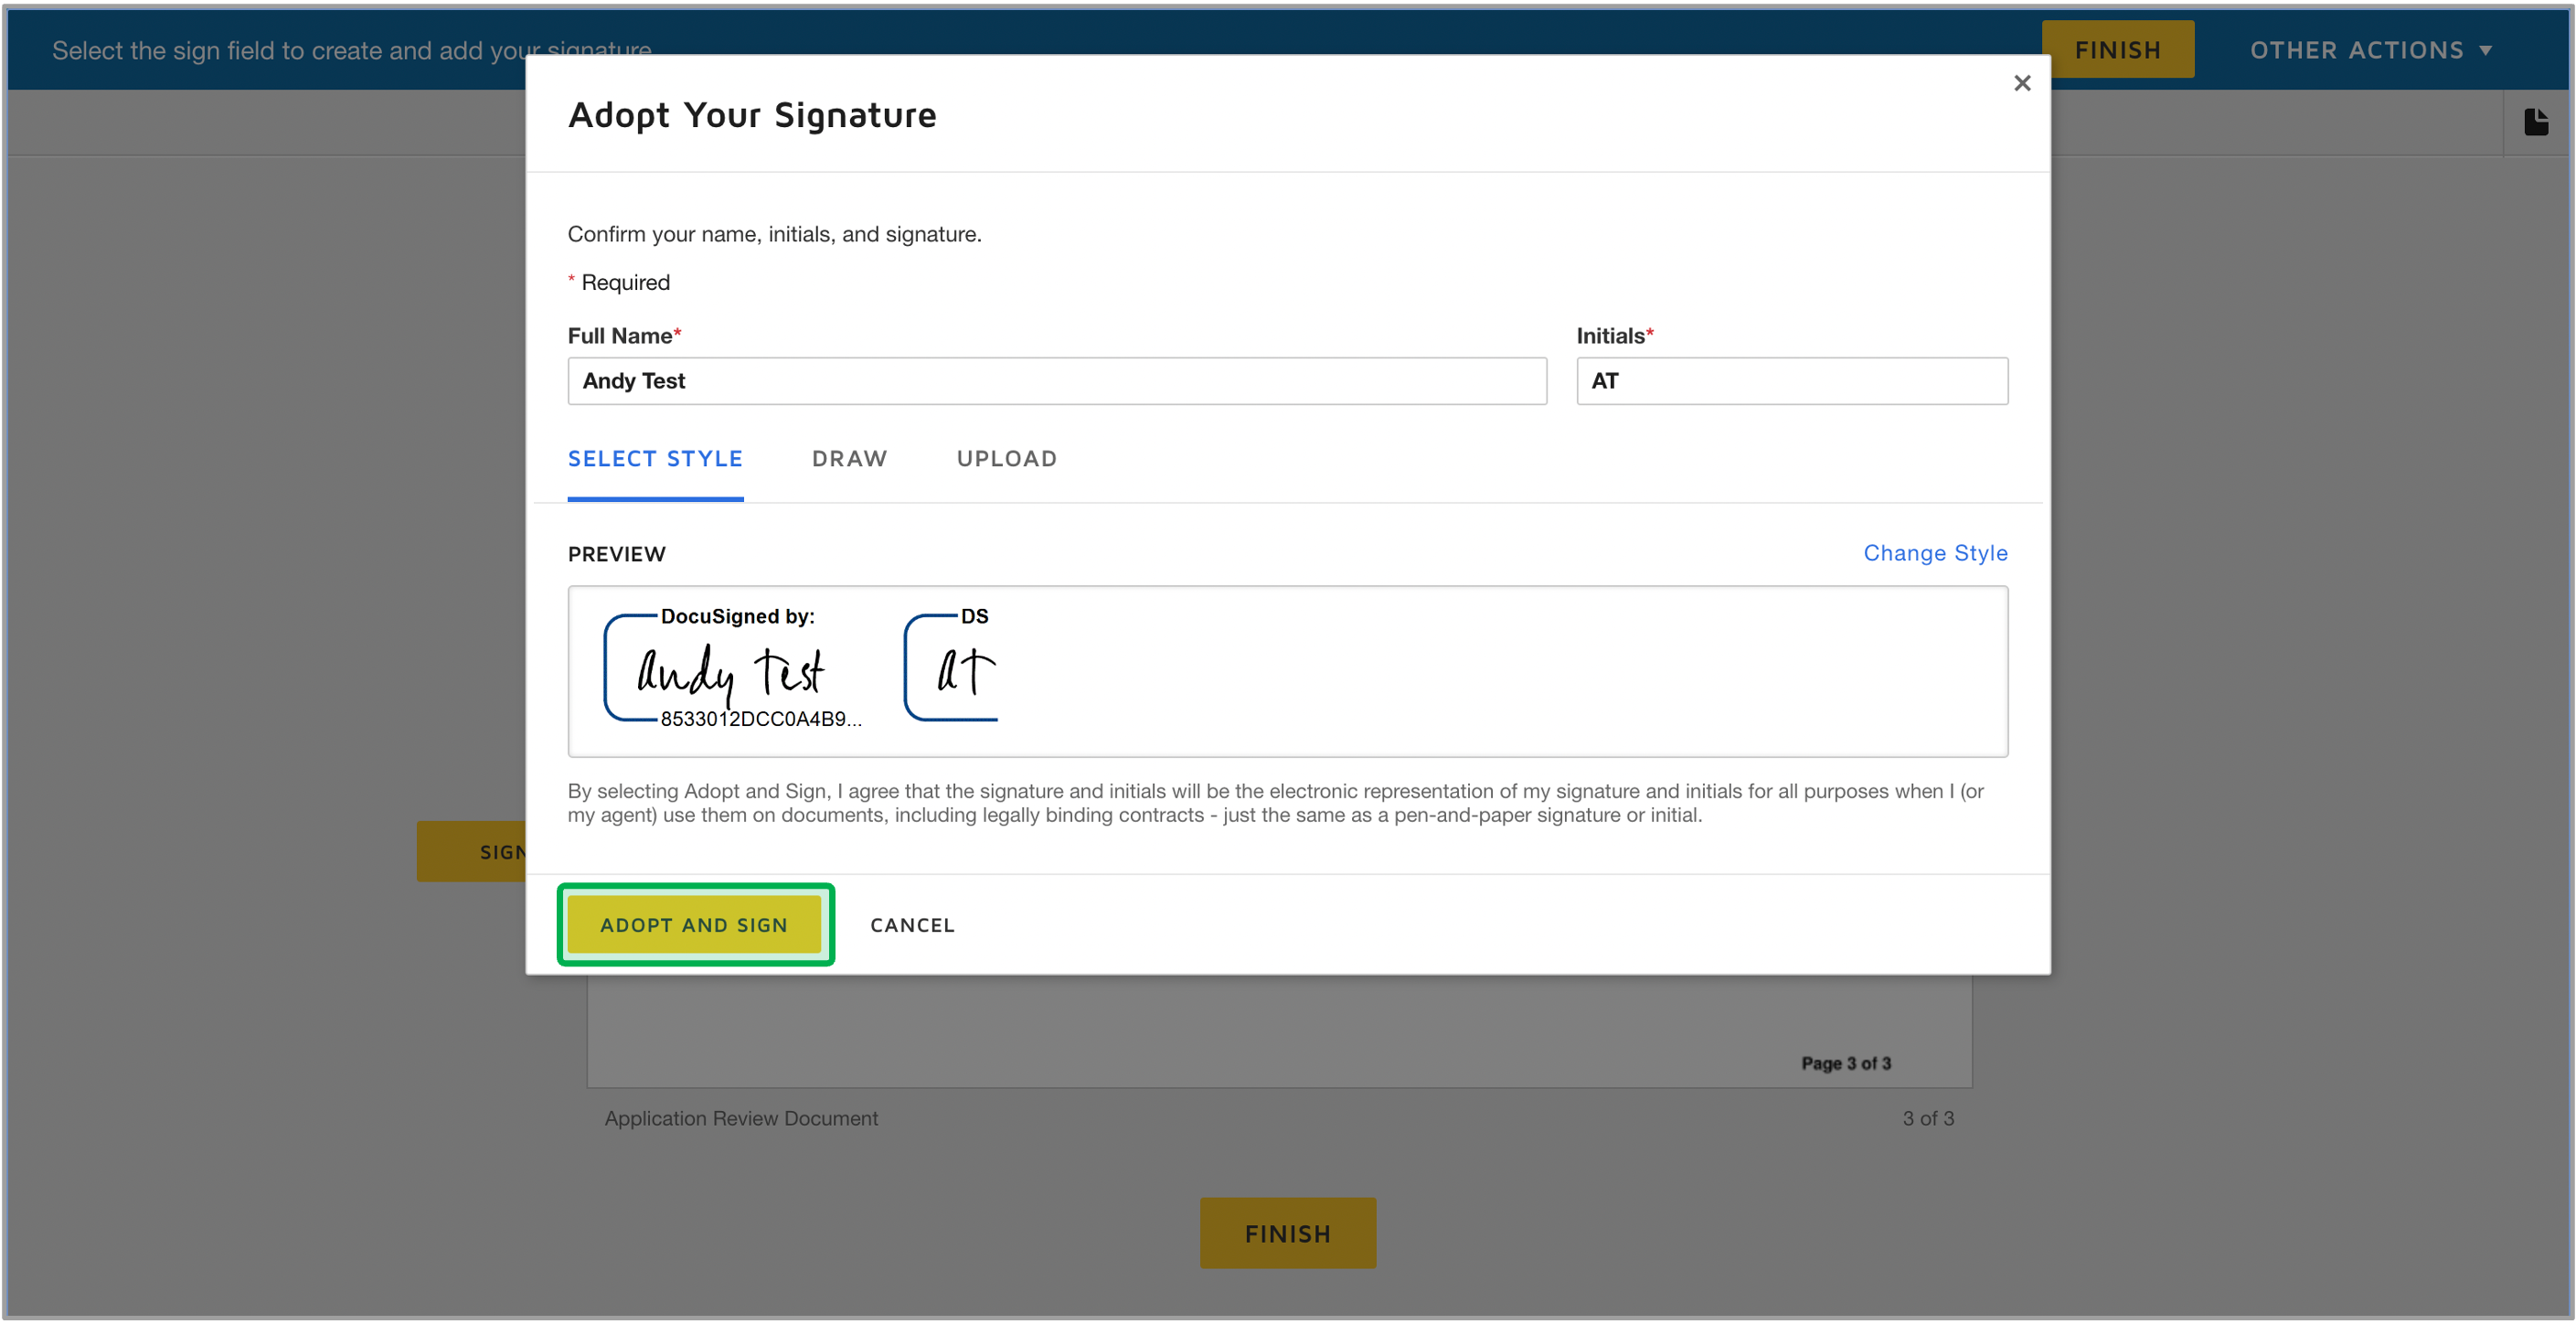
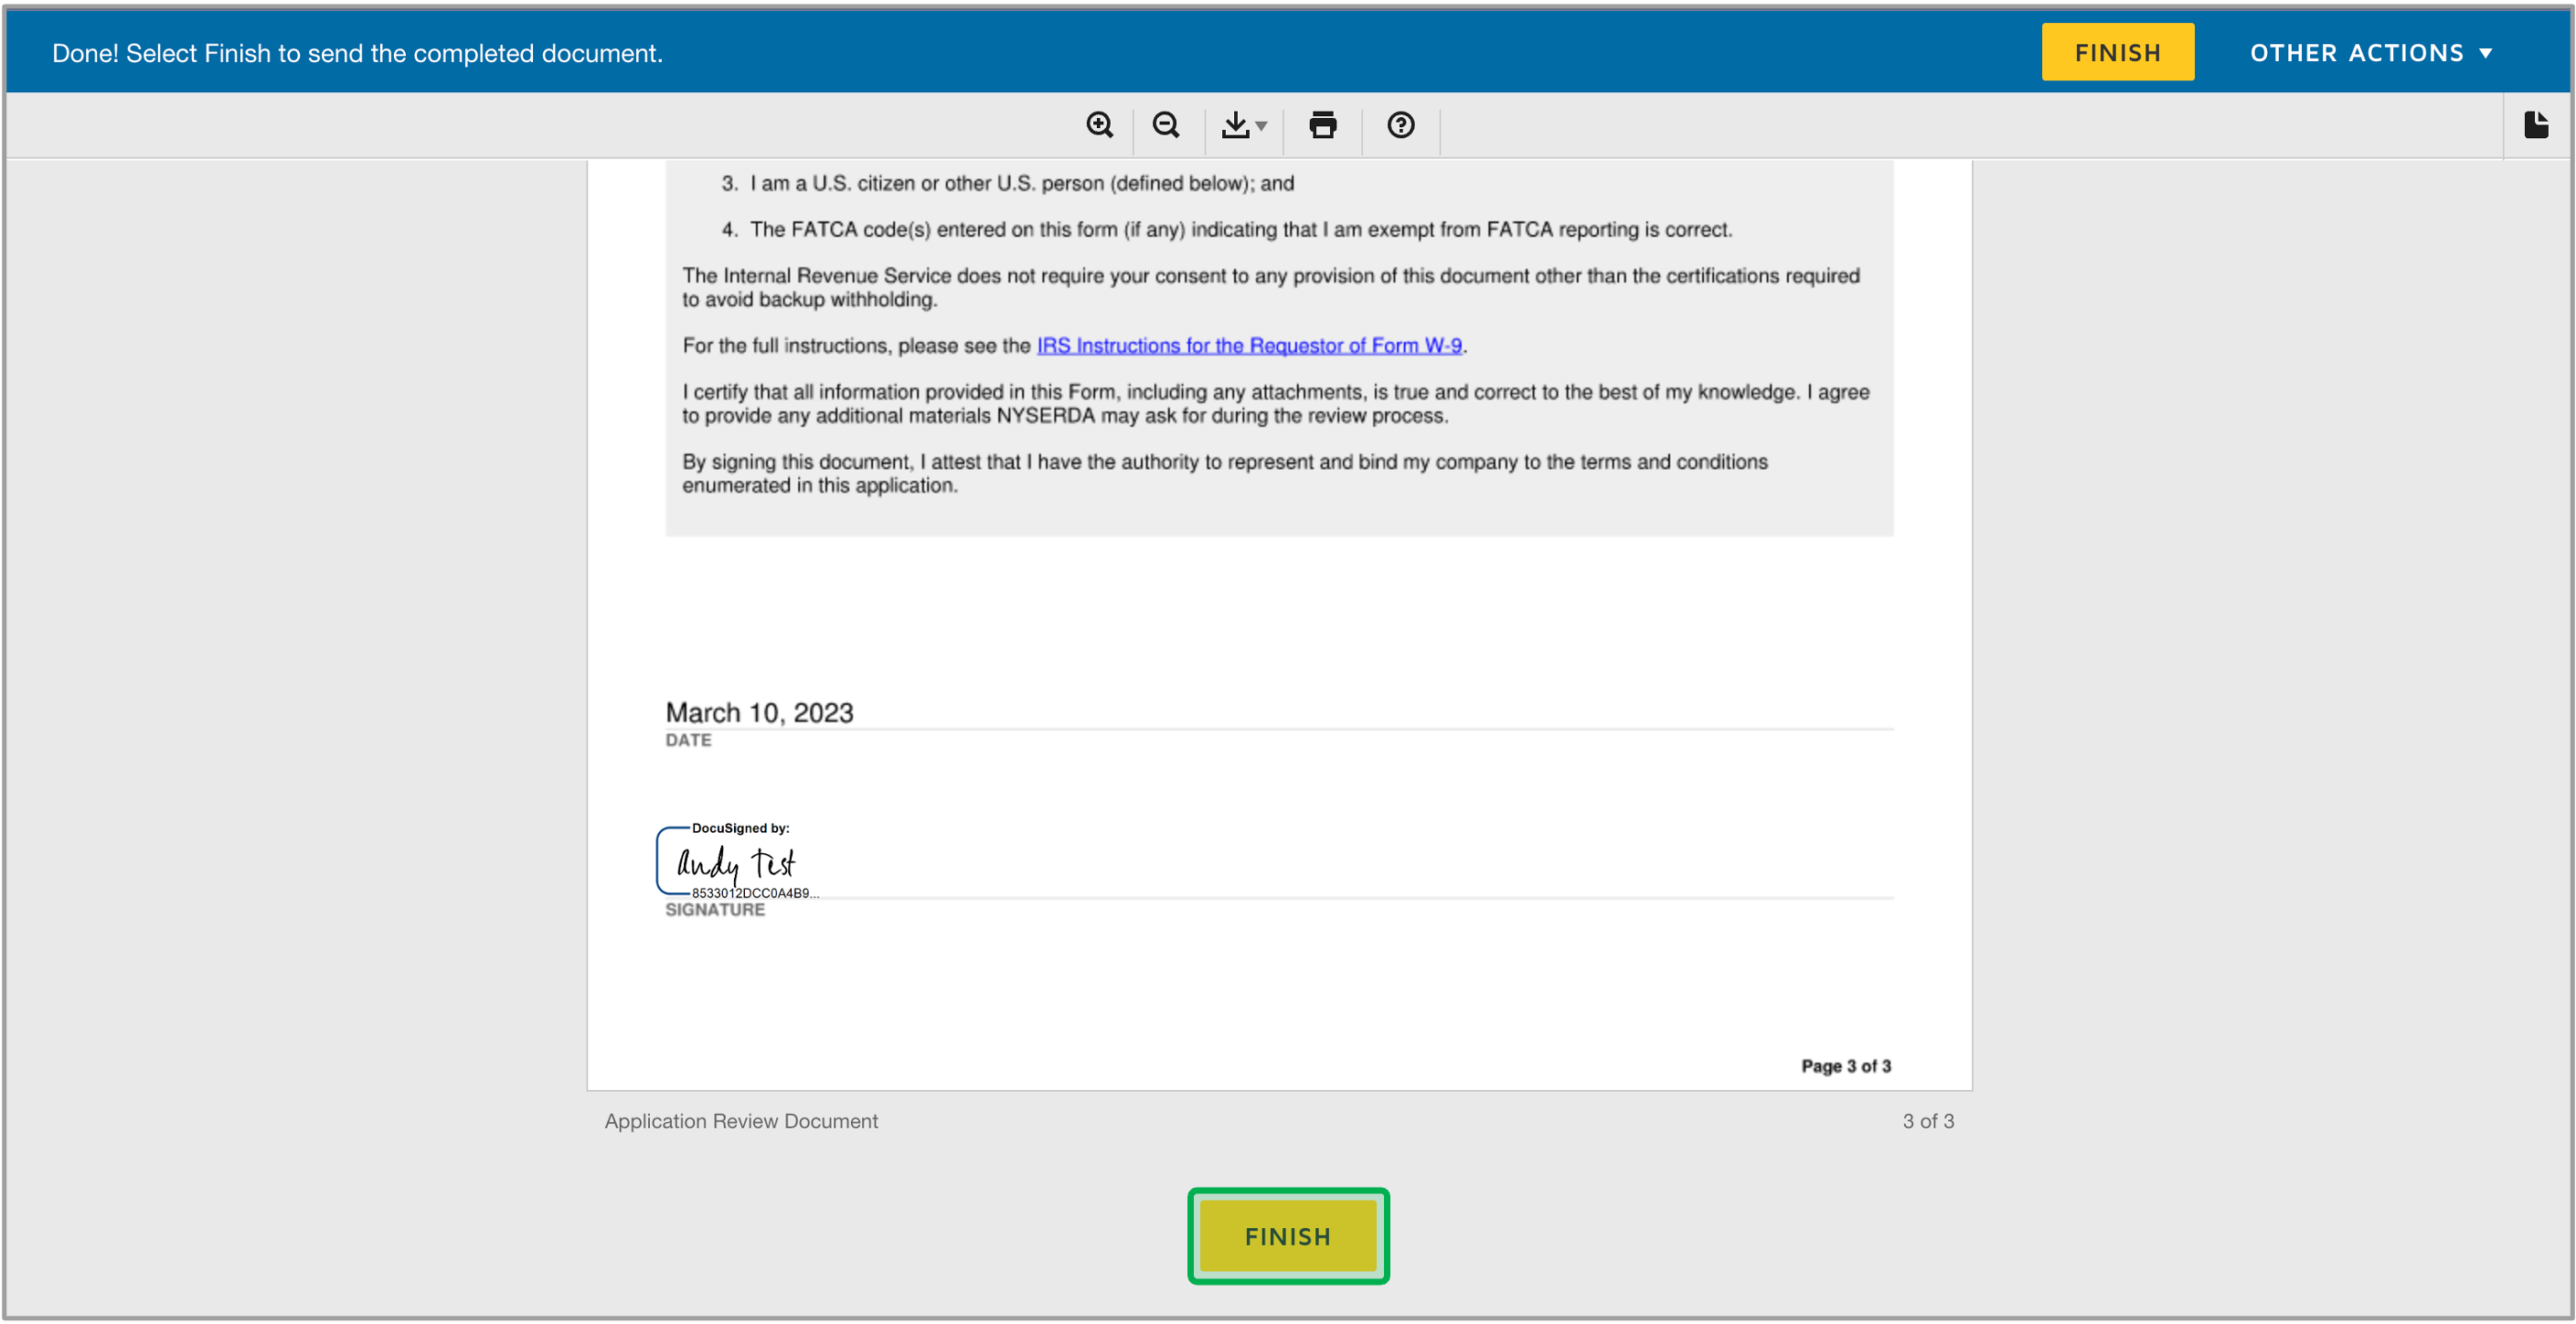
Questions on this page must be answered before you can sign the document with an Electronic Signature. Follow the Electronic Signature instruction below for more guidance). Once the document is signed, the Continue button will appear, click the Continue button.
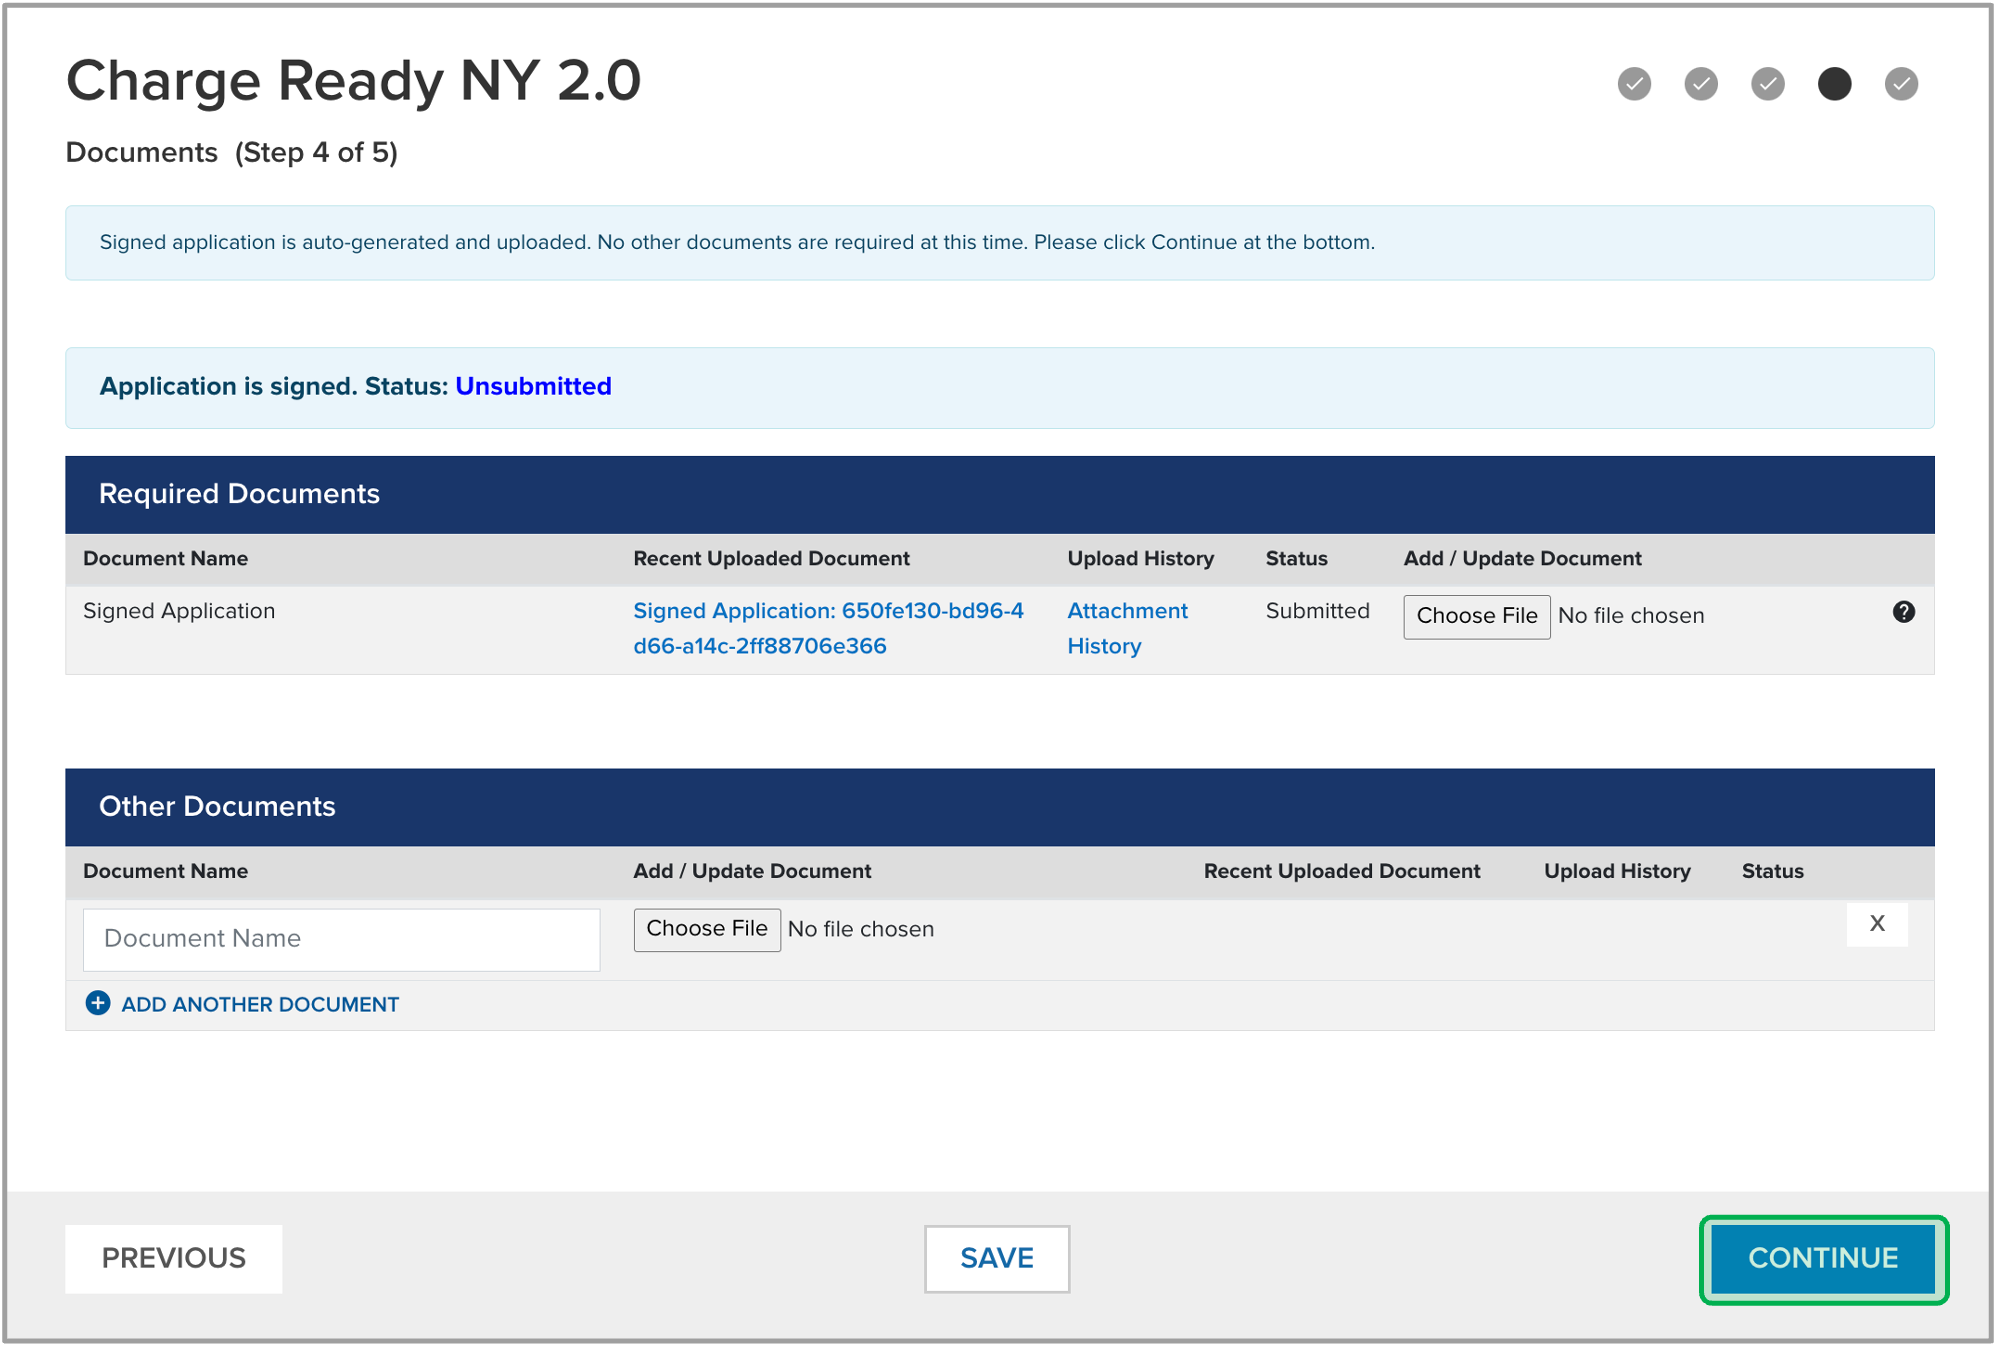
Documents Page
This page allows you to review your submitted application and its status.
Click Continue to move forward with the process.
Submission Confirmation Page
This page asks you to click the Submit button to complete this application.
Your application is not fully submitted until you click the Submit button and receive the green notification box confirming that your application has been successfully submitted.
Electronic Funds Transfer
If the Participant Agreement is approved, the applicant has the option to register for Electronic Funds Transfer.
The Authorized Signatory Contact (as listed on the Participant Agreement) should be the person filling out the form. A phone number should be included as NYSERDA will contact the applicant to fully verify their information.
Completing your Project Application is the second step you should take. While you can start a Project Application without a Participant Agreement, you cannot complete it until the Participant Agreement is completed and submitted.
The Project Application contains nine (9) separate pages. Review the information in the blue box at the top of the page. It provides high-level guidance and requirements that may be necessary for you to complete each page.
- Fields marked with a red asterisk ( * ) are required and must be completed before you can move on to the next page.
- Fields with thesymbol contain helpful field guidance and instructions that appear as tooltips when hovering your cursor over the symbol. The information in these tooltips is designed to help ensure that you are providing the correct information. Not all fields contain this symbol.
- Clicking Continue at the bottom of any page will save your progress (if all required fields have been completed) should you be unable to complete the agreement in one sitting.
To complete and submit a Project Application, log into the Salesforce Portal and follow the instructions below.
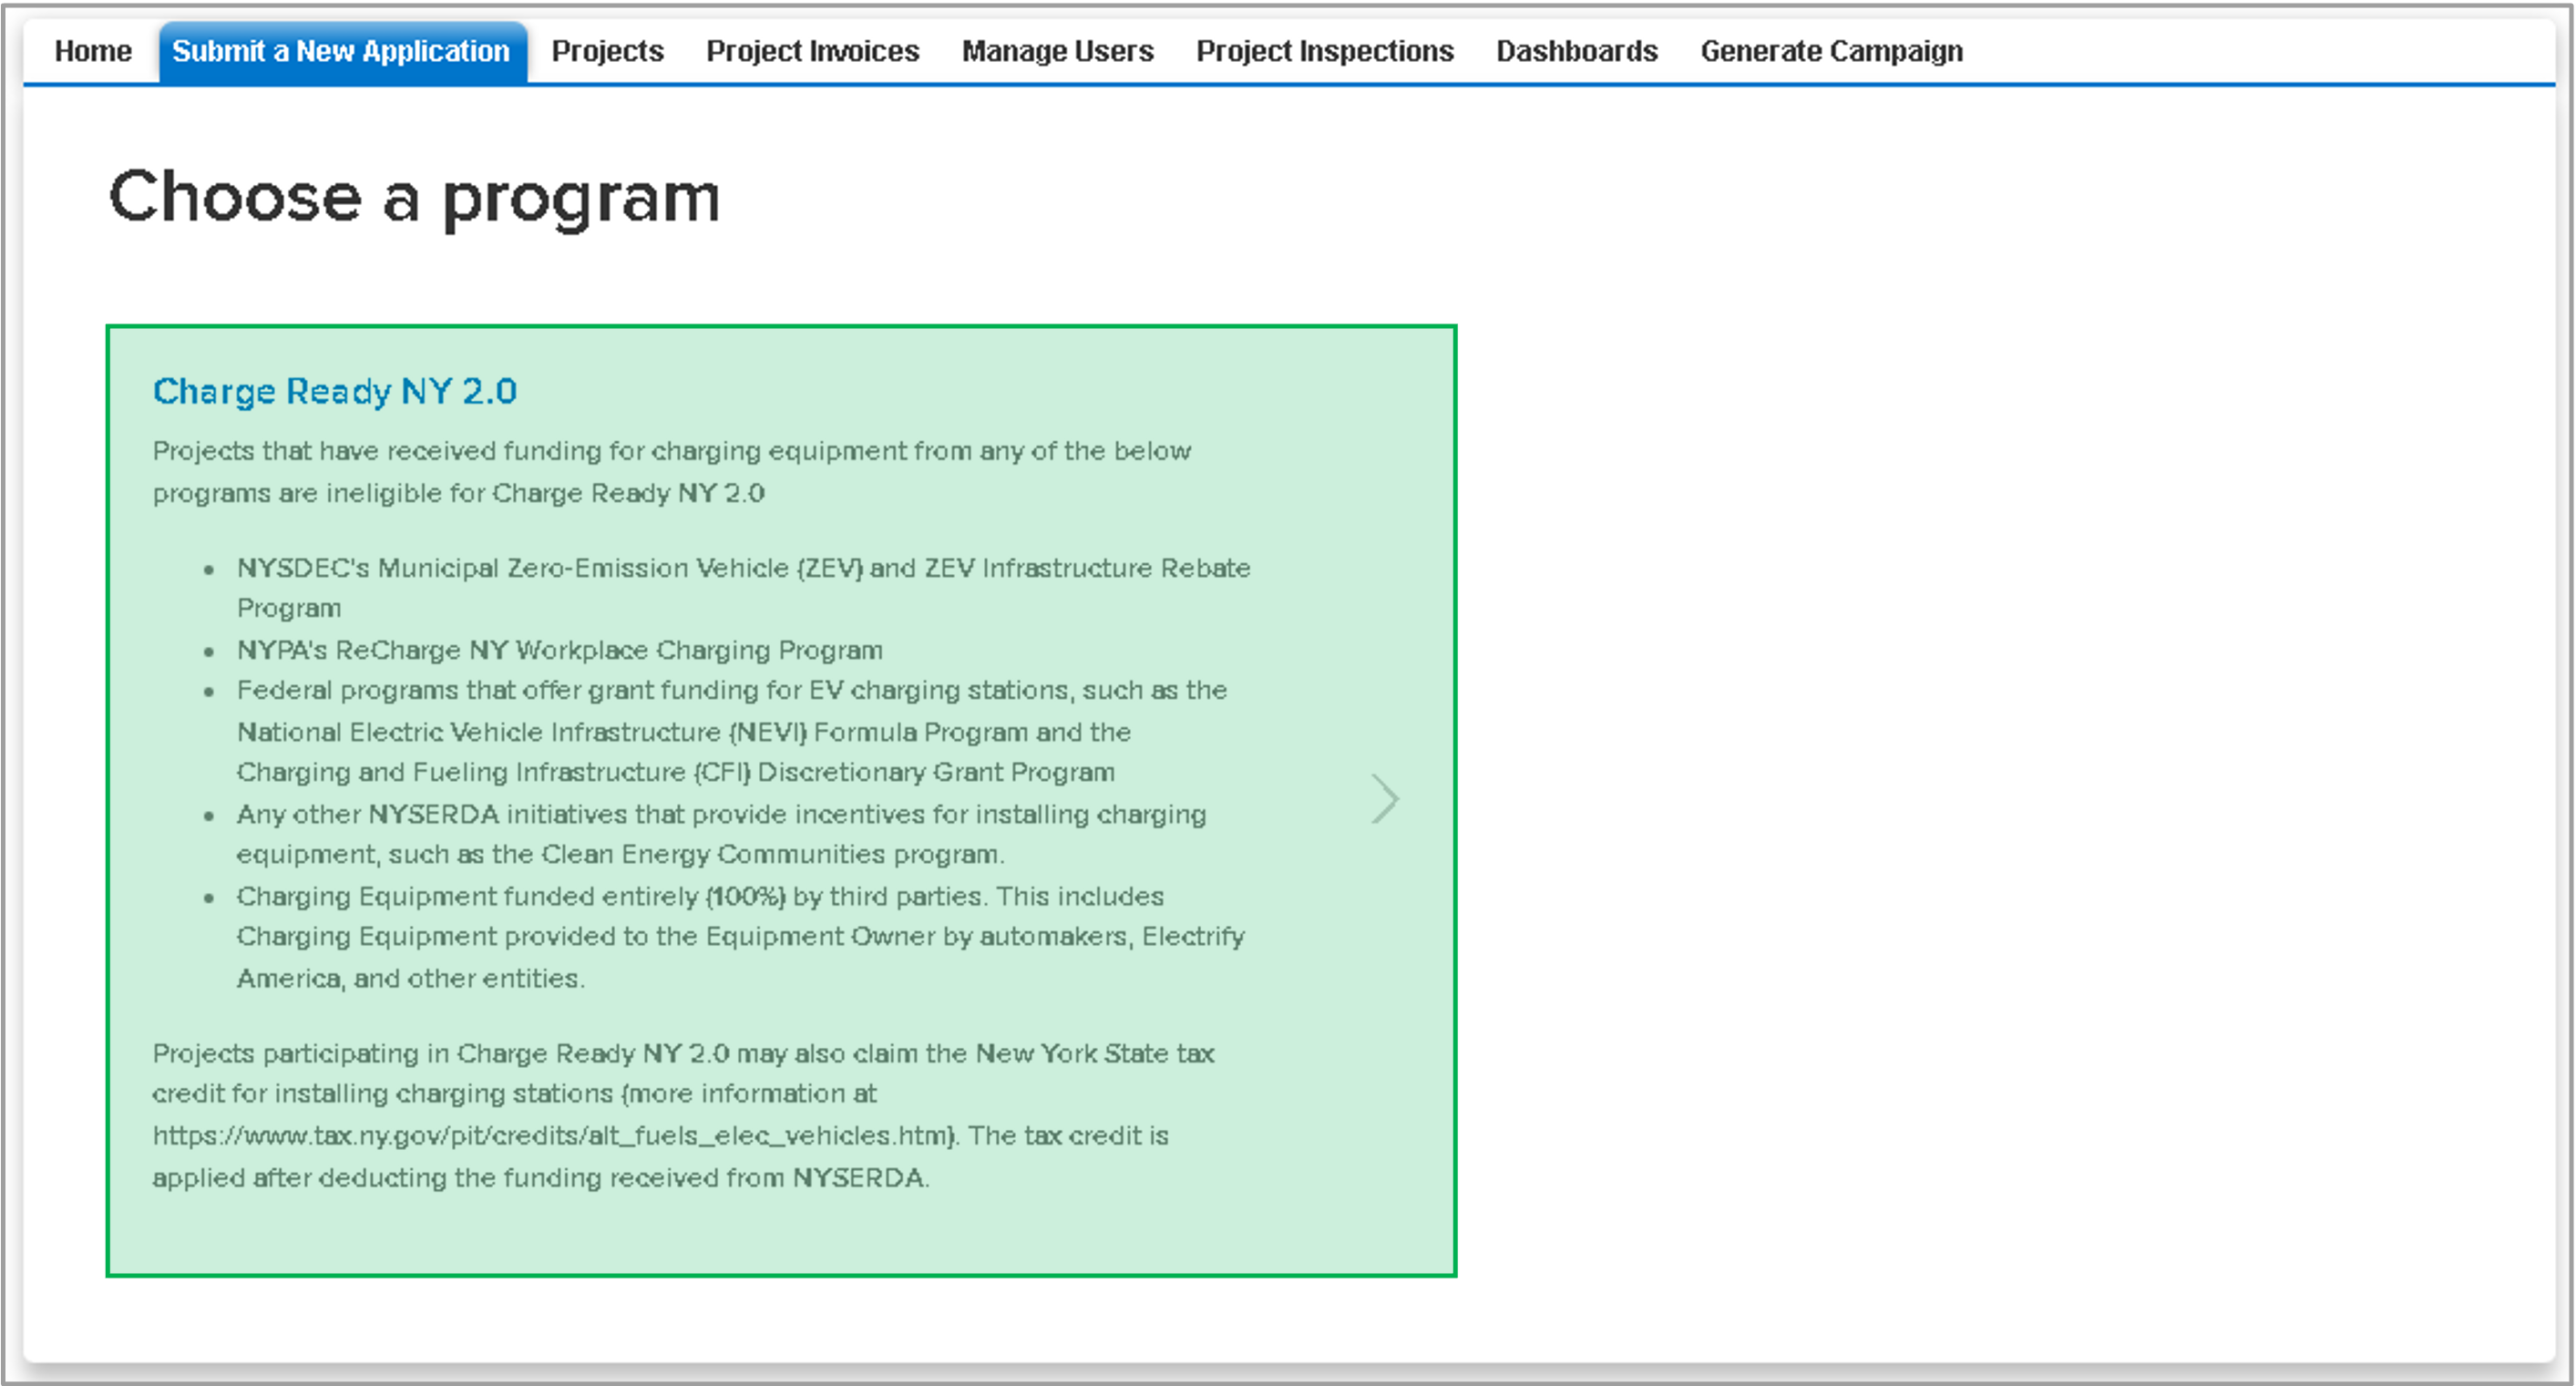
Access the Project Application form
The form is accessed from the Submit a New Application tab in the Salesforce Portal and clicking the Charge Ready NY box.
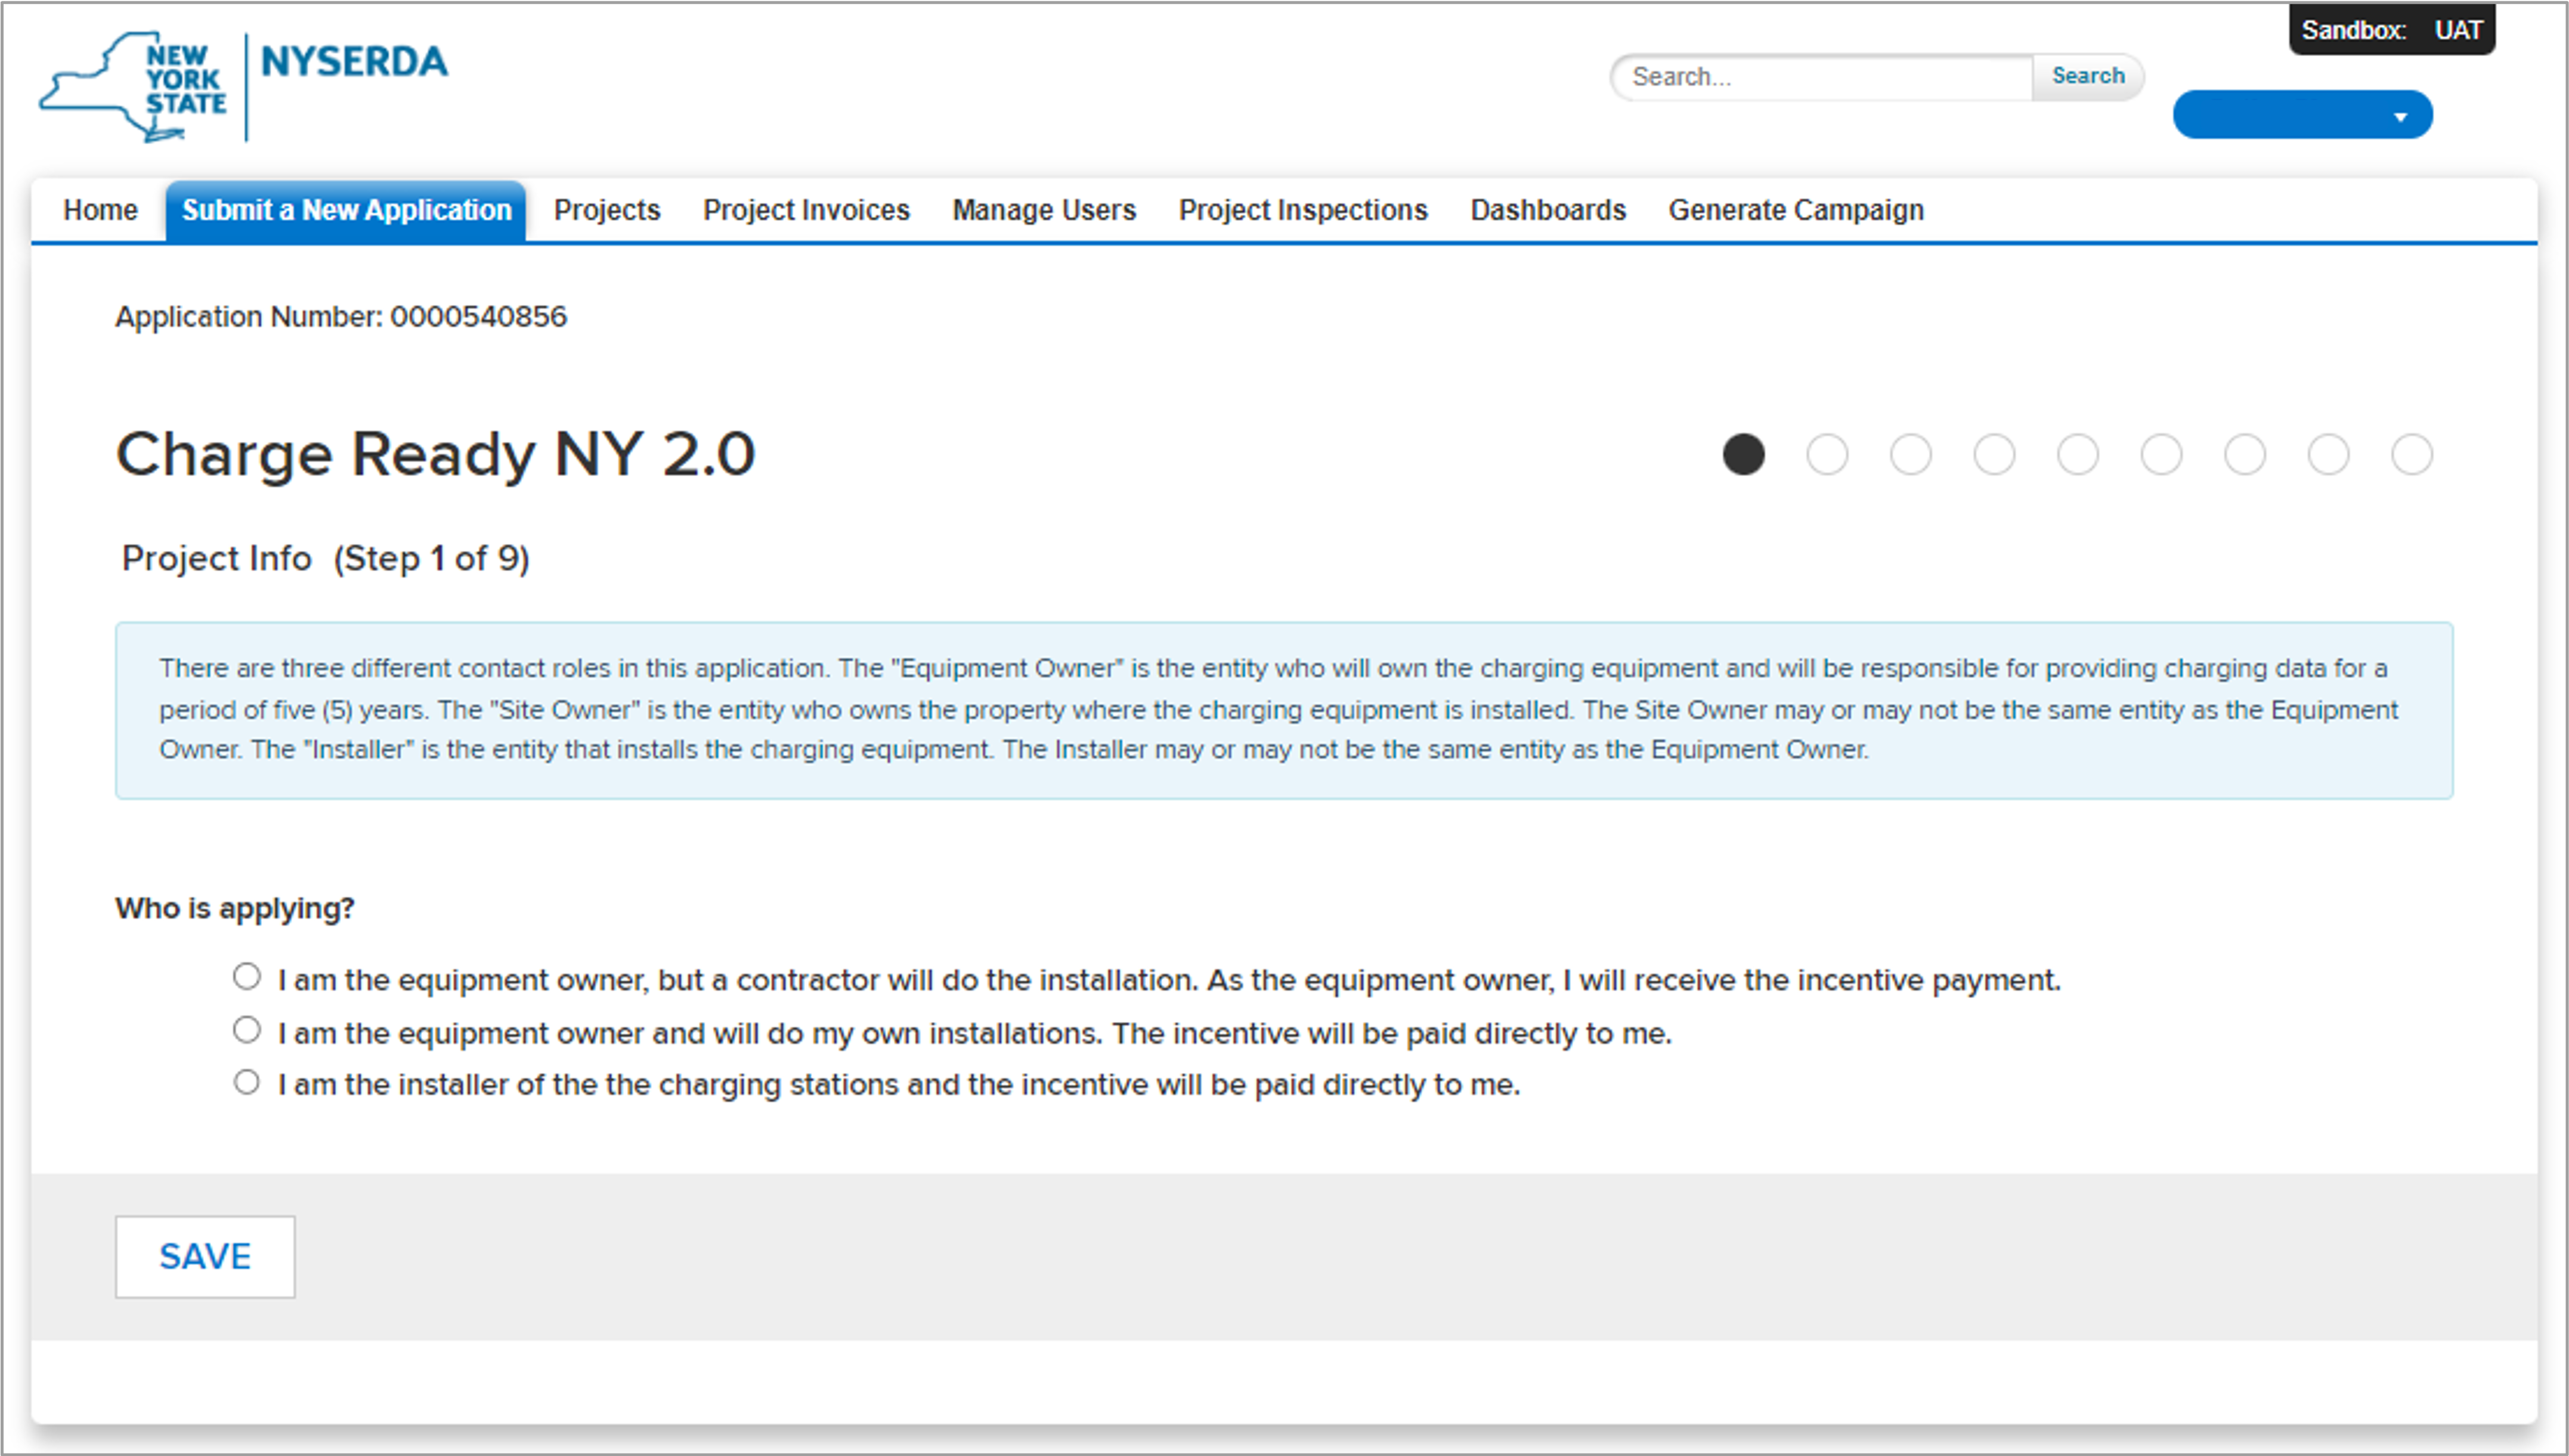
Project Info page
Select the appropriate option under the Who is applying section. Once the option is selected, click the Save button to continue.
Project Contacts page
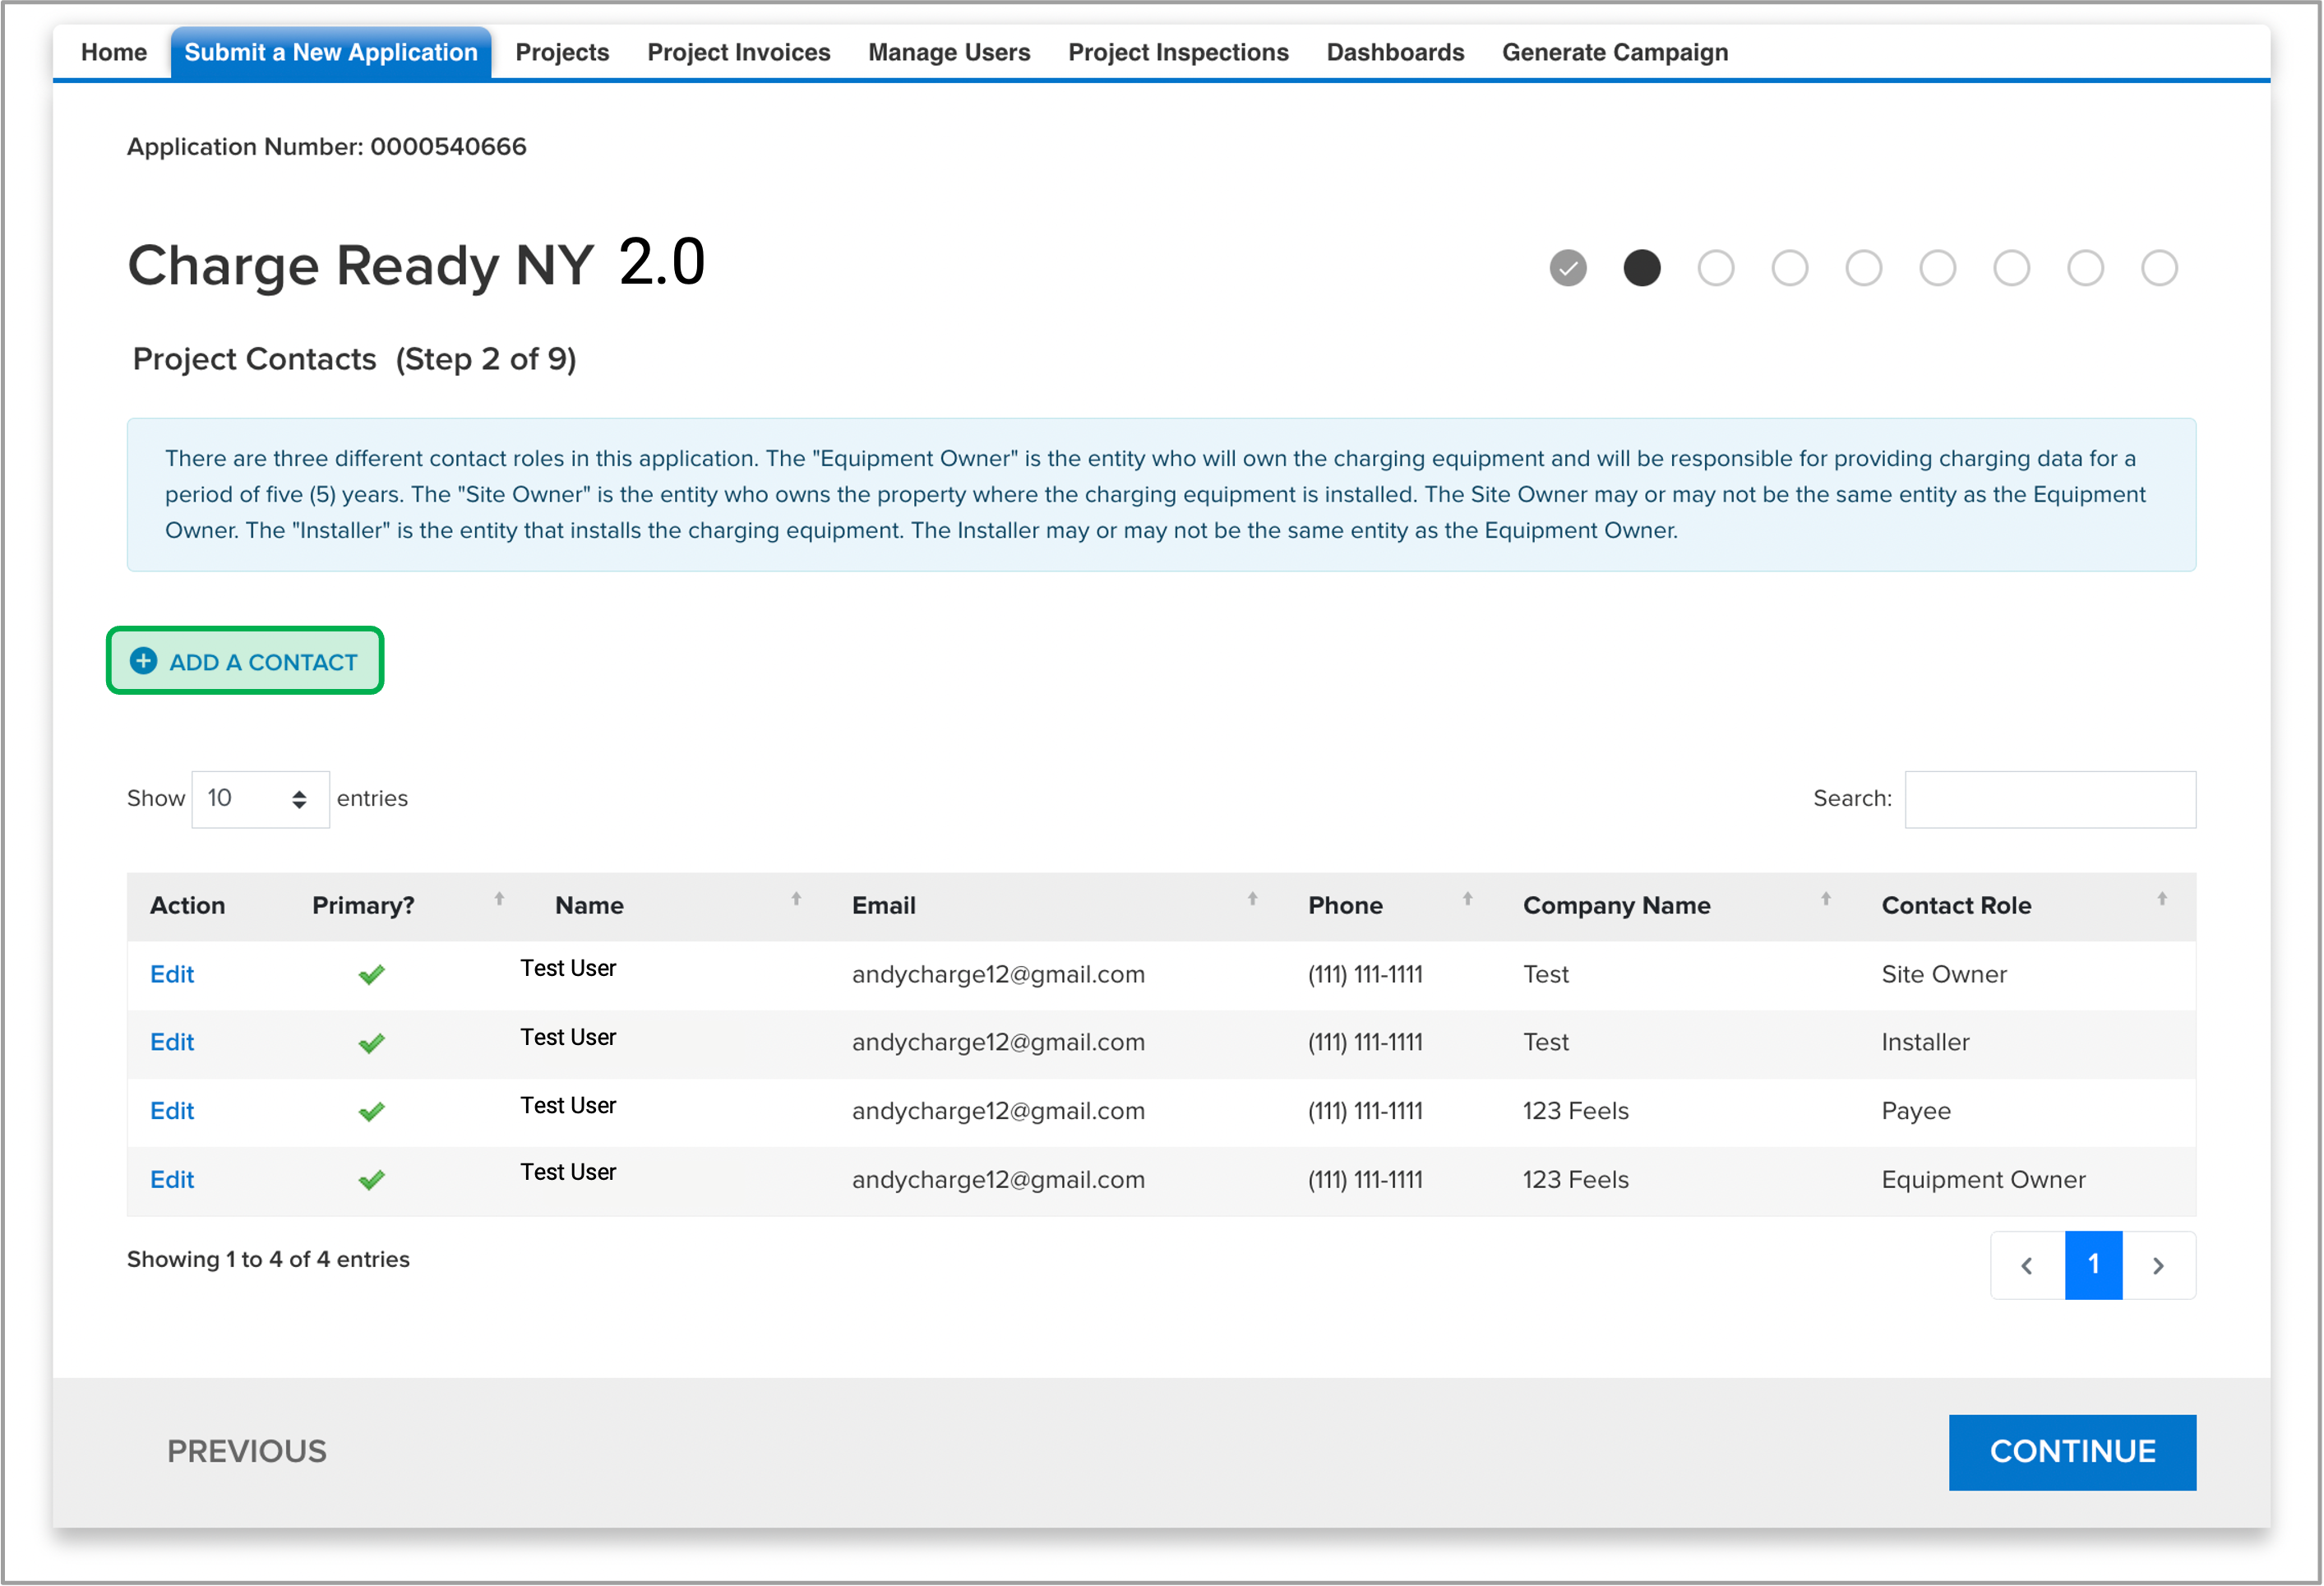
The Project Contacts page must contain four contacts (Site Owner, Installer, Payee, and Equipment Owner) before you can proceed to the next page. Some contacts for your application may already be populated on this page. To add one or more of the four contacts, click the Add a Contact link for each contact and complete, at minimum, the required fields. Then click the Save Changes button to finish adding a new contact. Once all four contact roles are added, click the Continue button to move to the next page.
There must be one primary contact for each field, but there can be multiple contacts in each field.
Site Information page
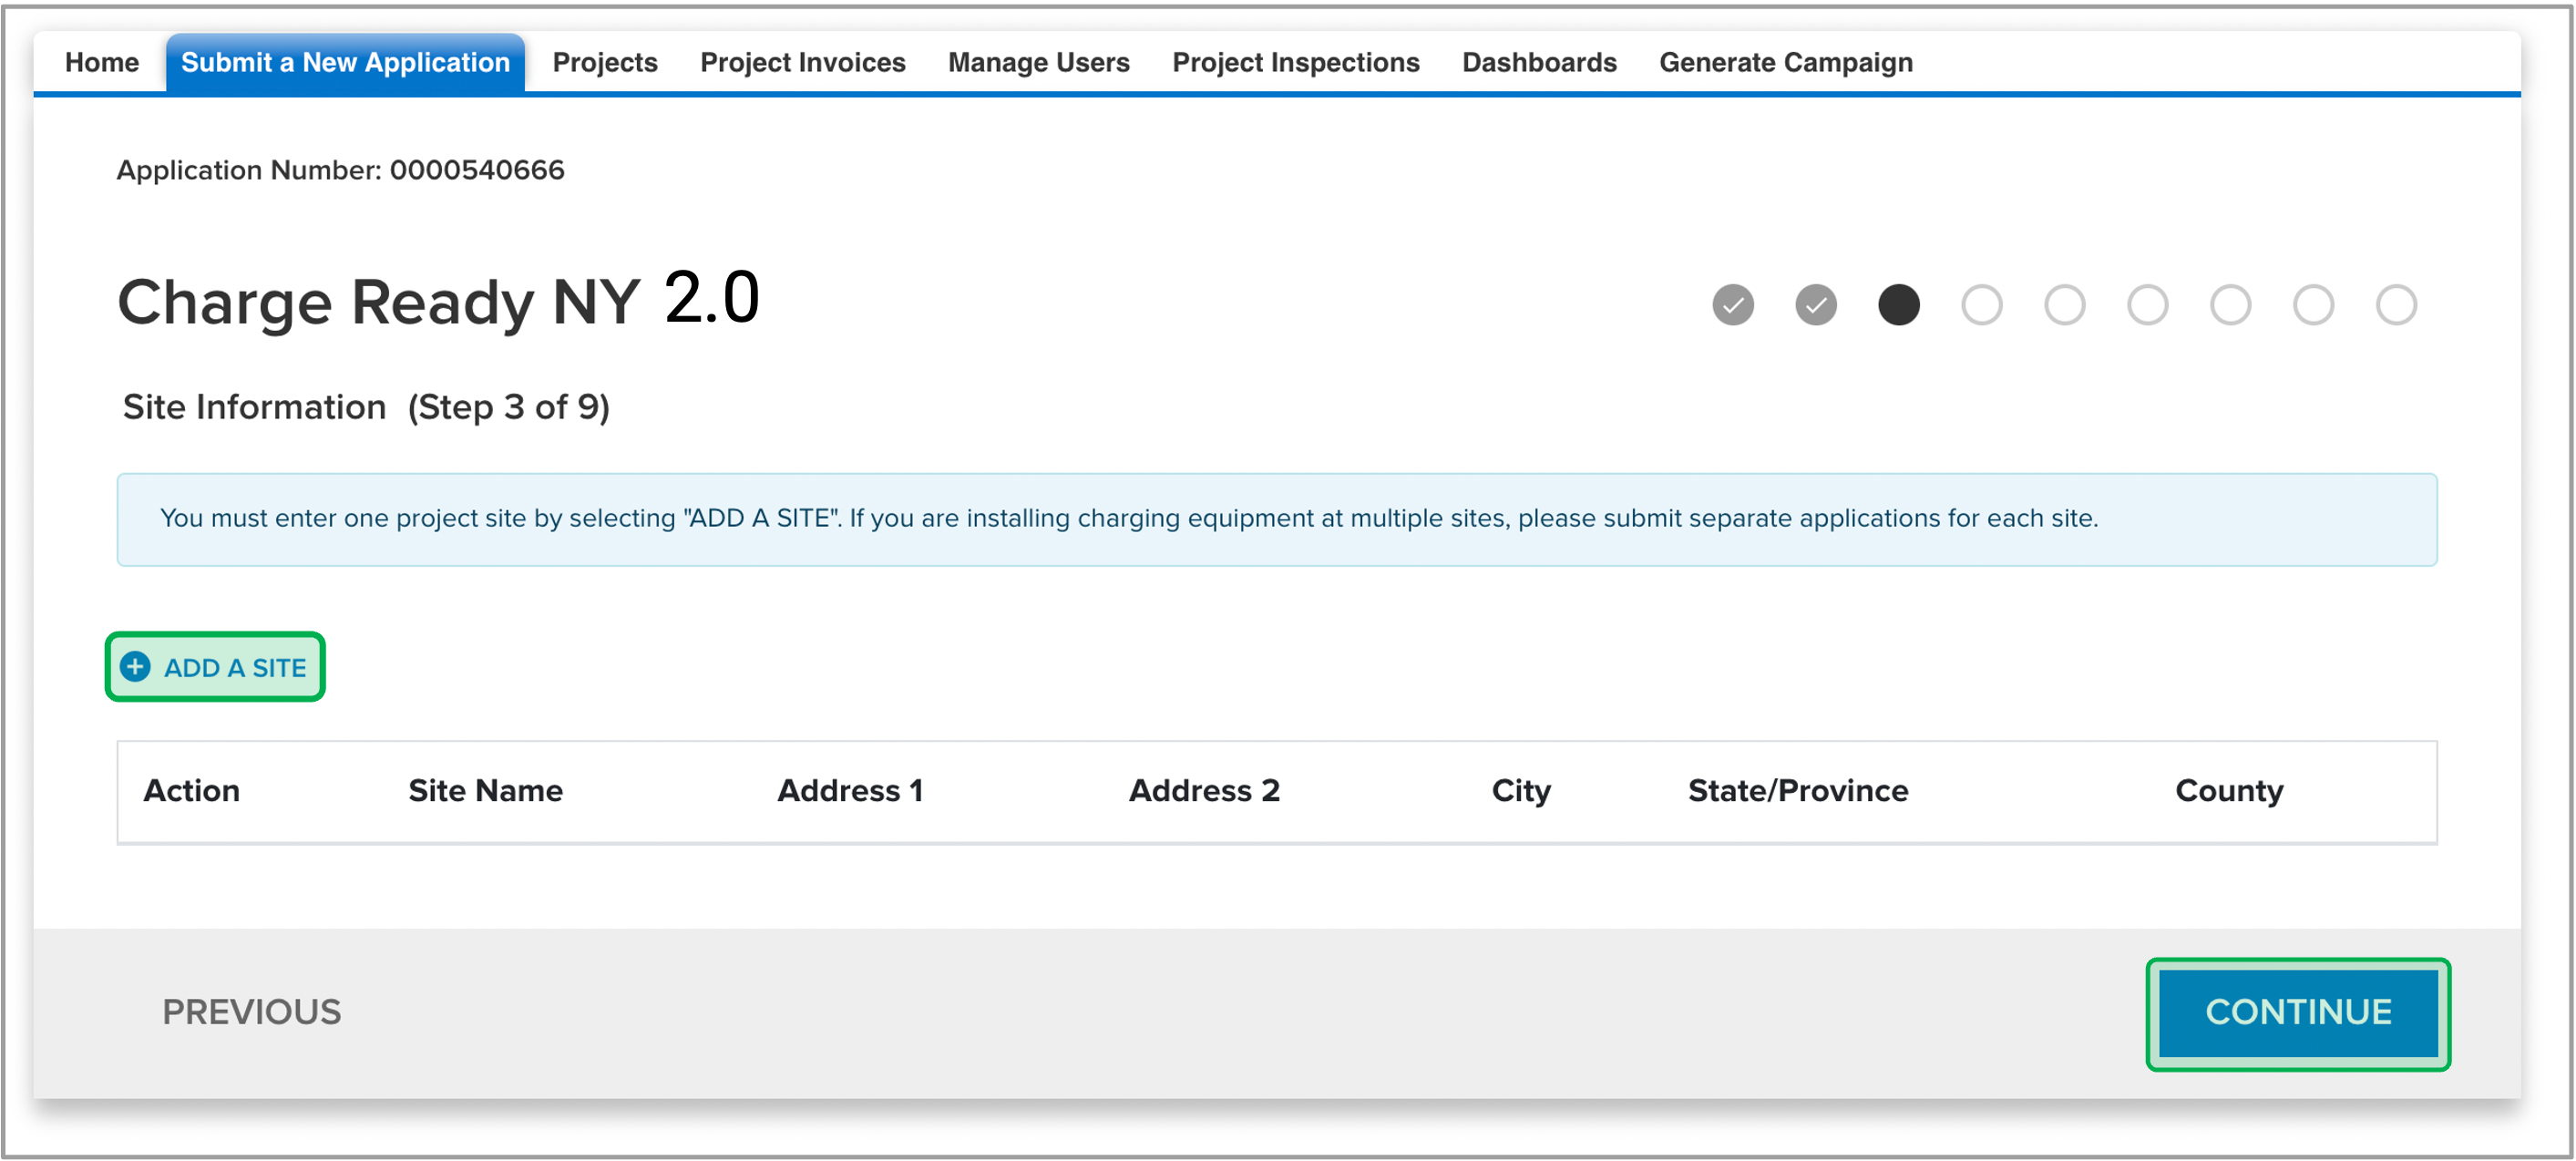
This page requires you to document the project site. To add the Project Site, click the Add a Site link to add an eligible site. A modal window will appear. Complete, at minimum, all required fields and click Save. Once the site is added, click the Continue button.
Once you start typing in the Address field, it will provide a list of suggestions. Selecting the suggested address will autofill all required fields except for Site Type.
Assigned parking spaces are reserved for an individual driver/apartment or reserved for fleet vehicles.
Unassigned parking spaces are available for anyone in general parking lot locations.
Equipment Information page
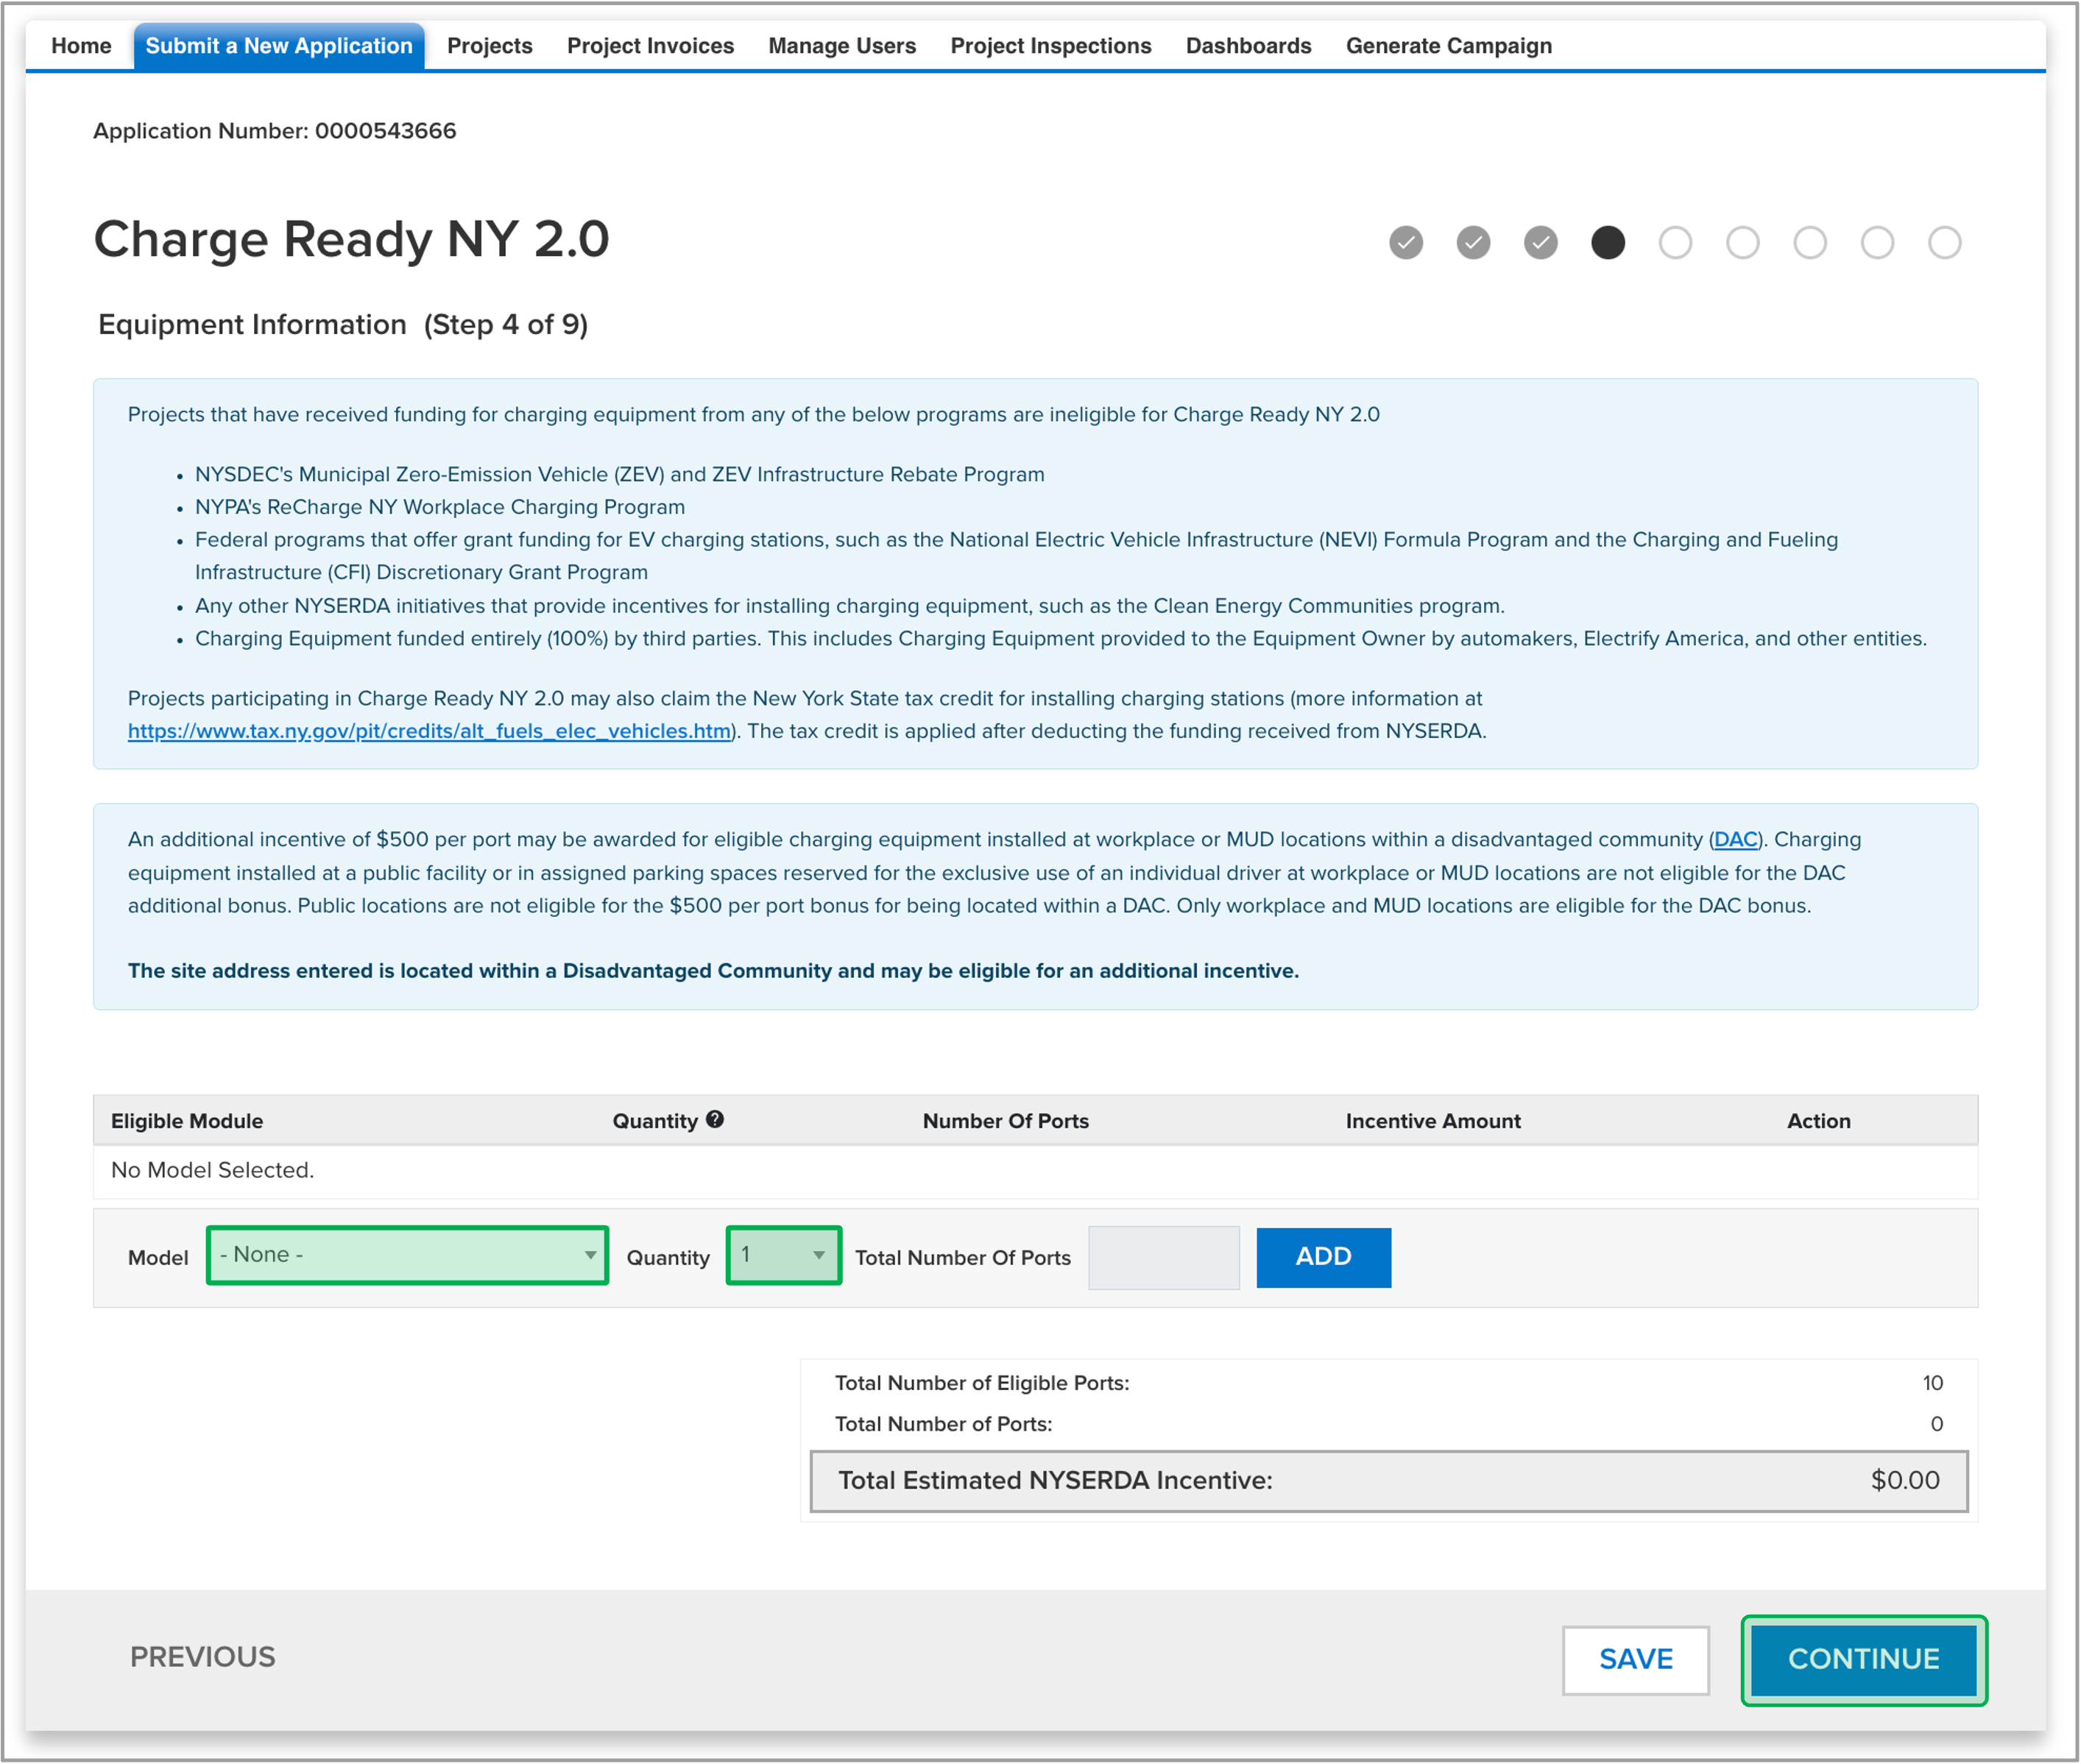
This page asks you to add eligible equipment models to receive additional incentives. Use the Model drop-down menu to add your equipment, then select the quantity and click Add. Once all eligible modules are added, review your Total Estimated NYSERDA Incentive amount and click the Continue button.
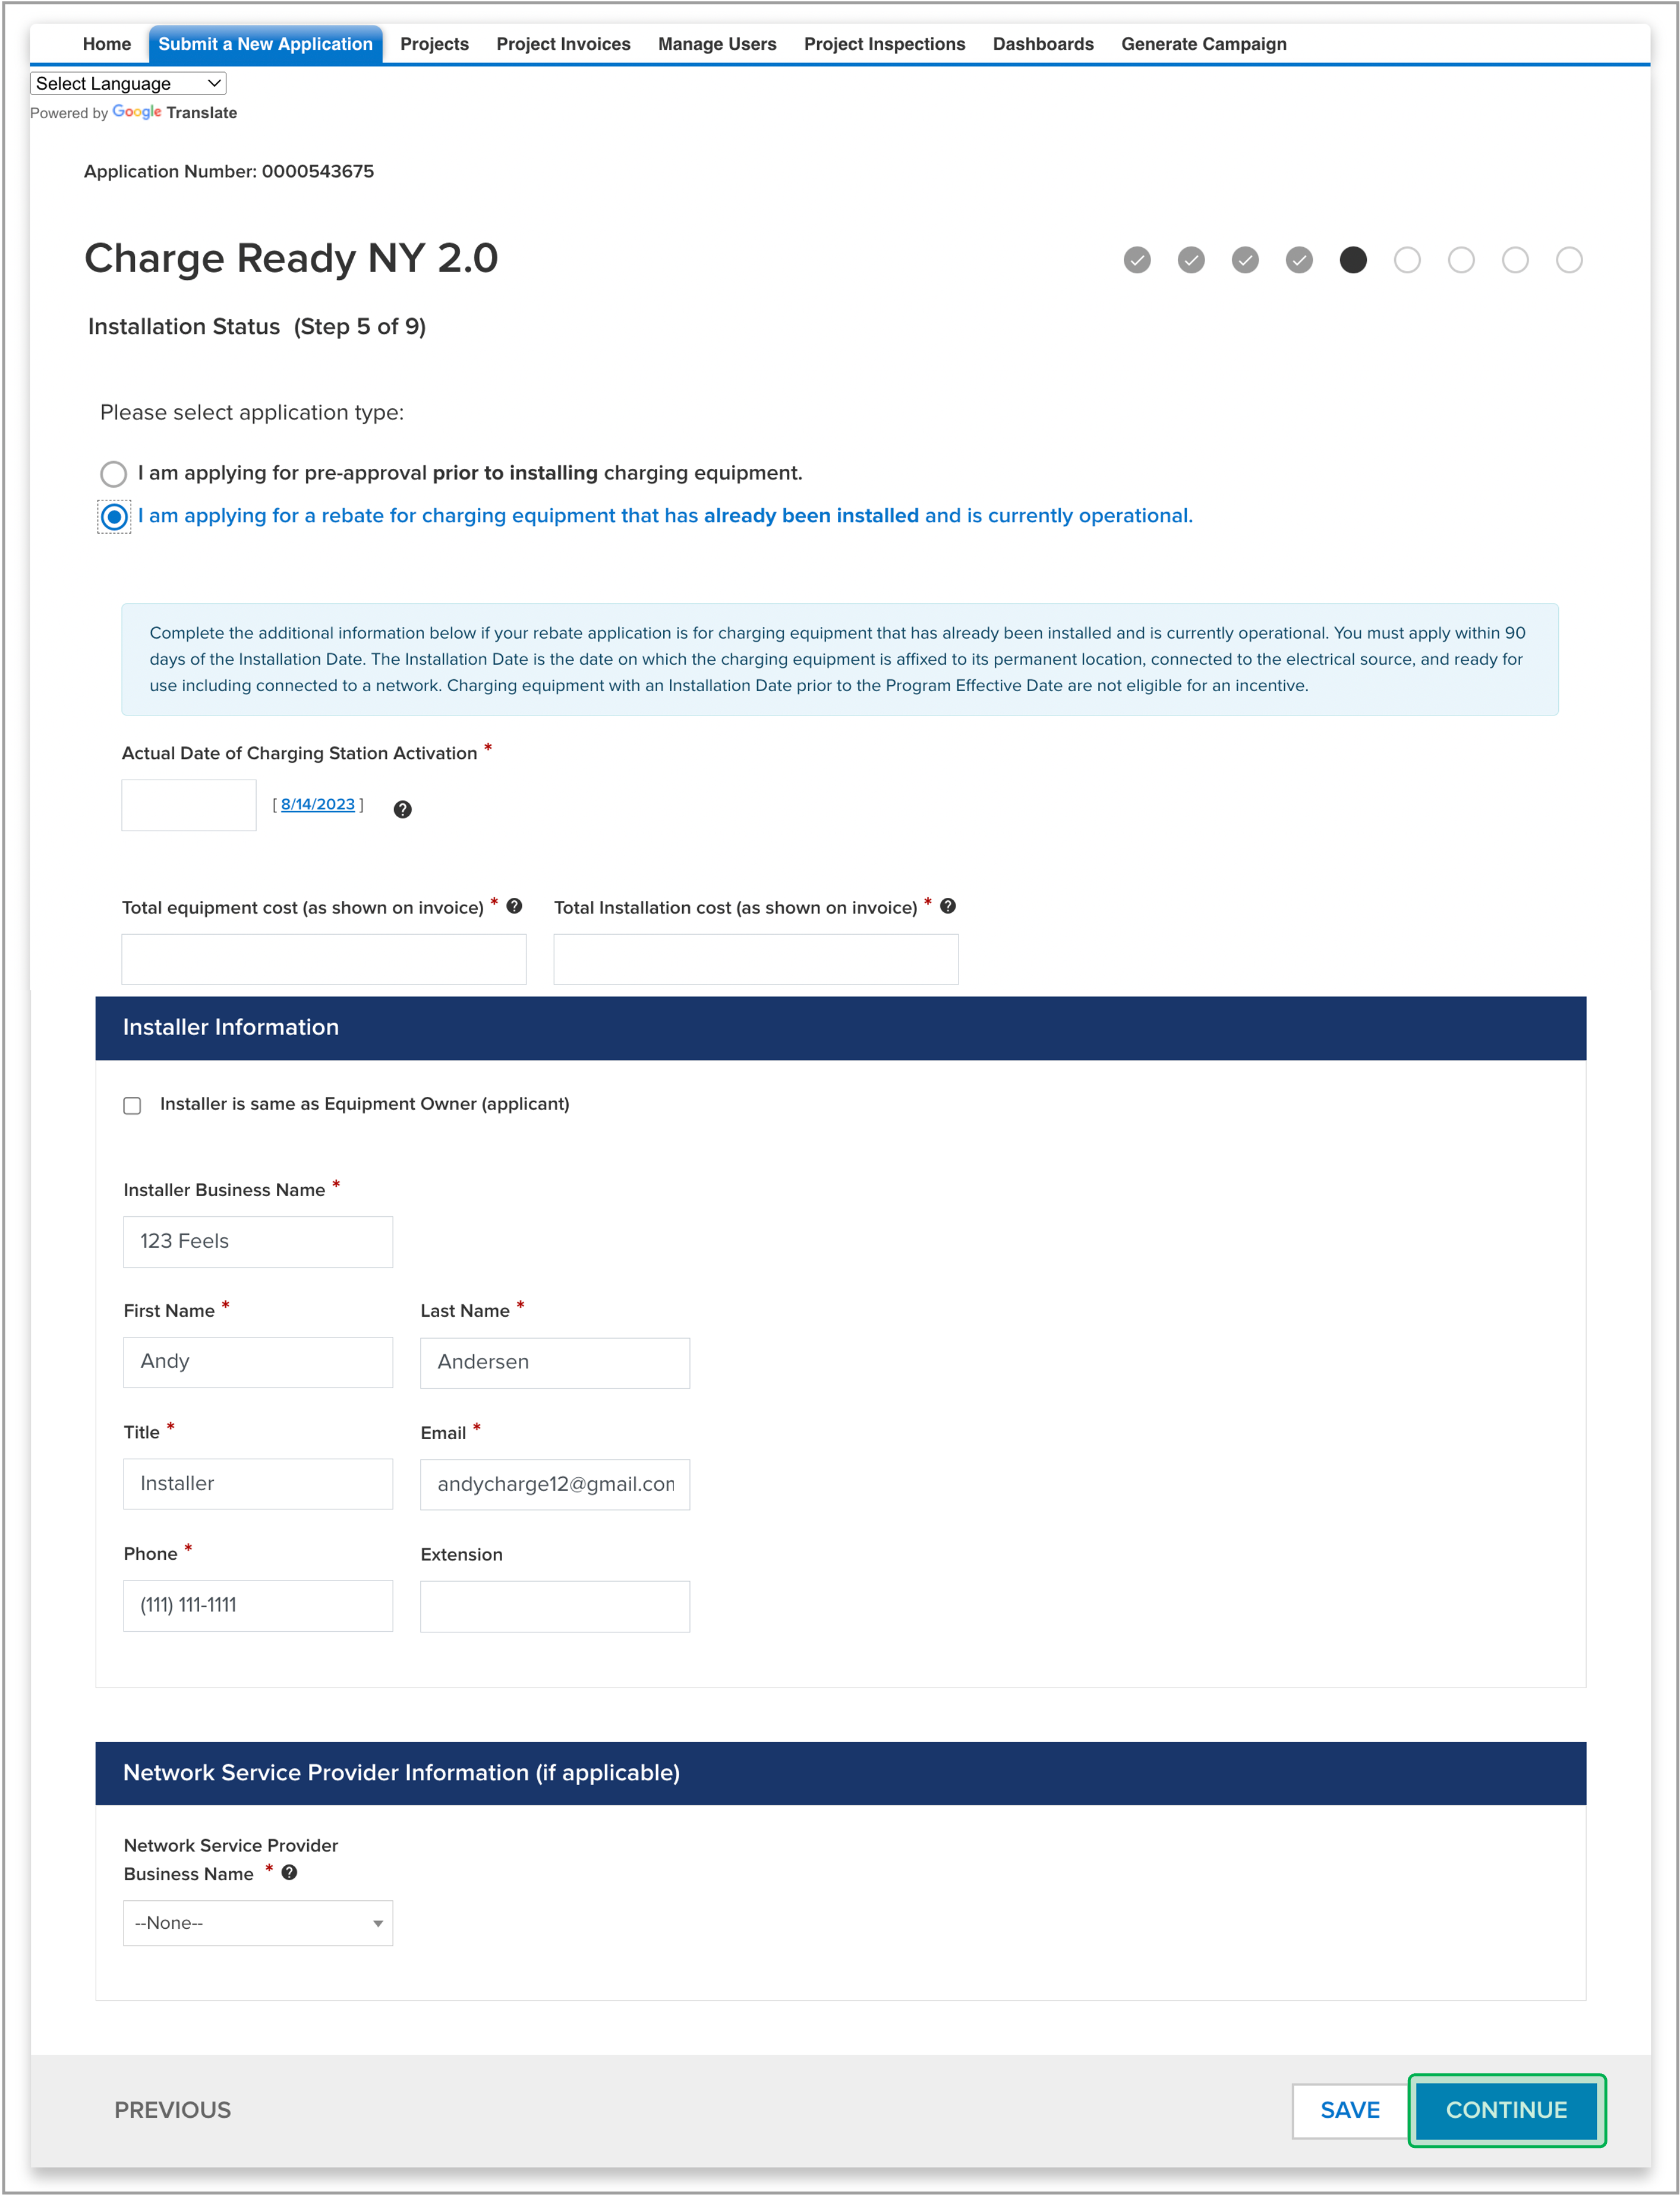
Installation Status
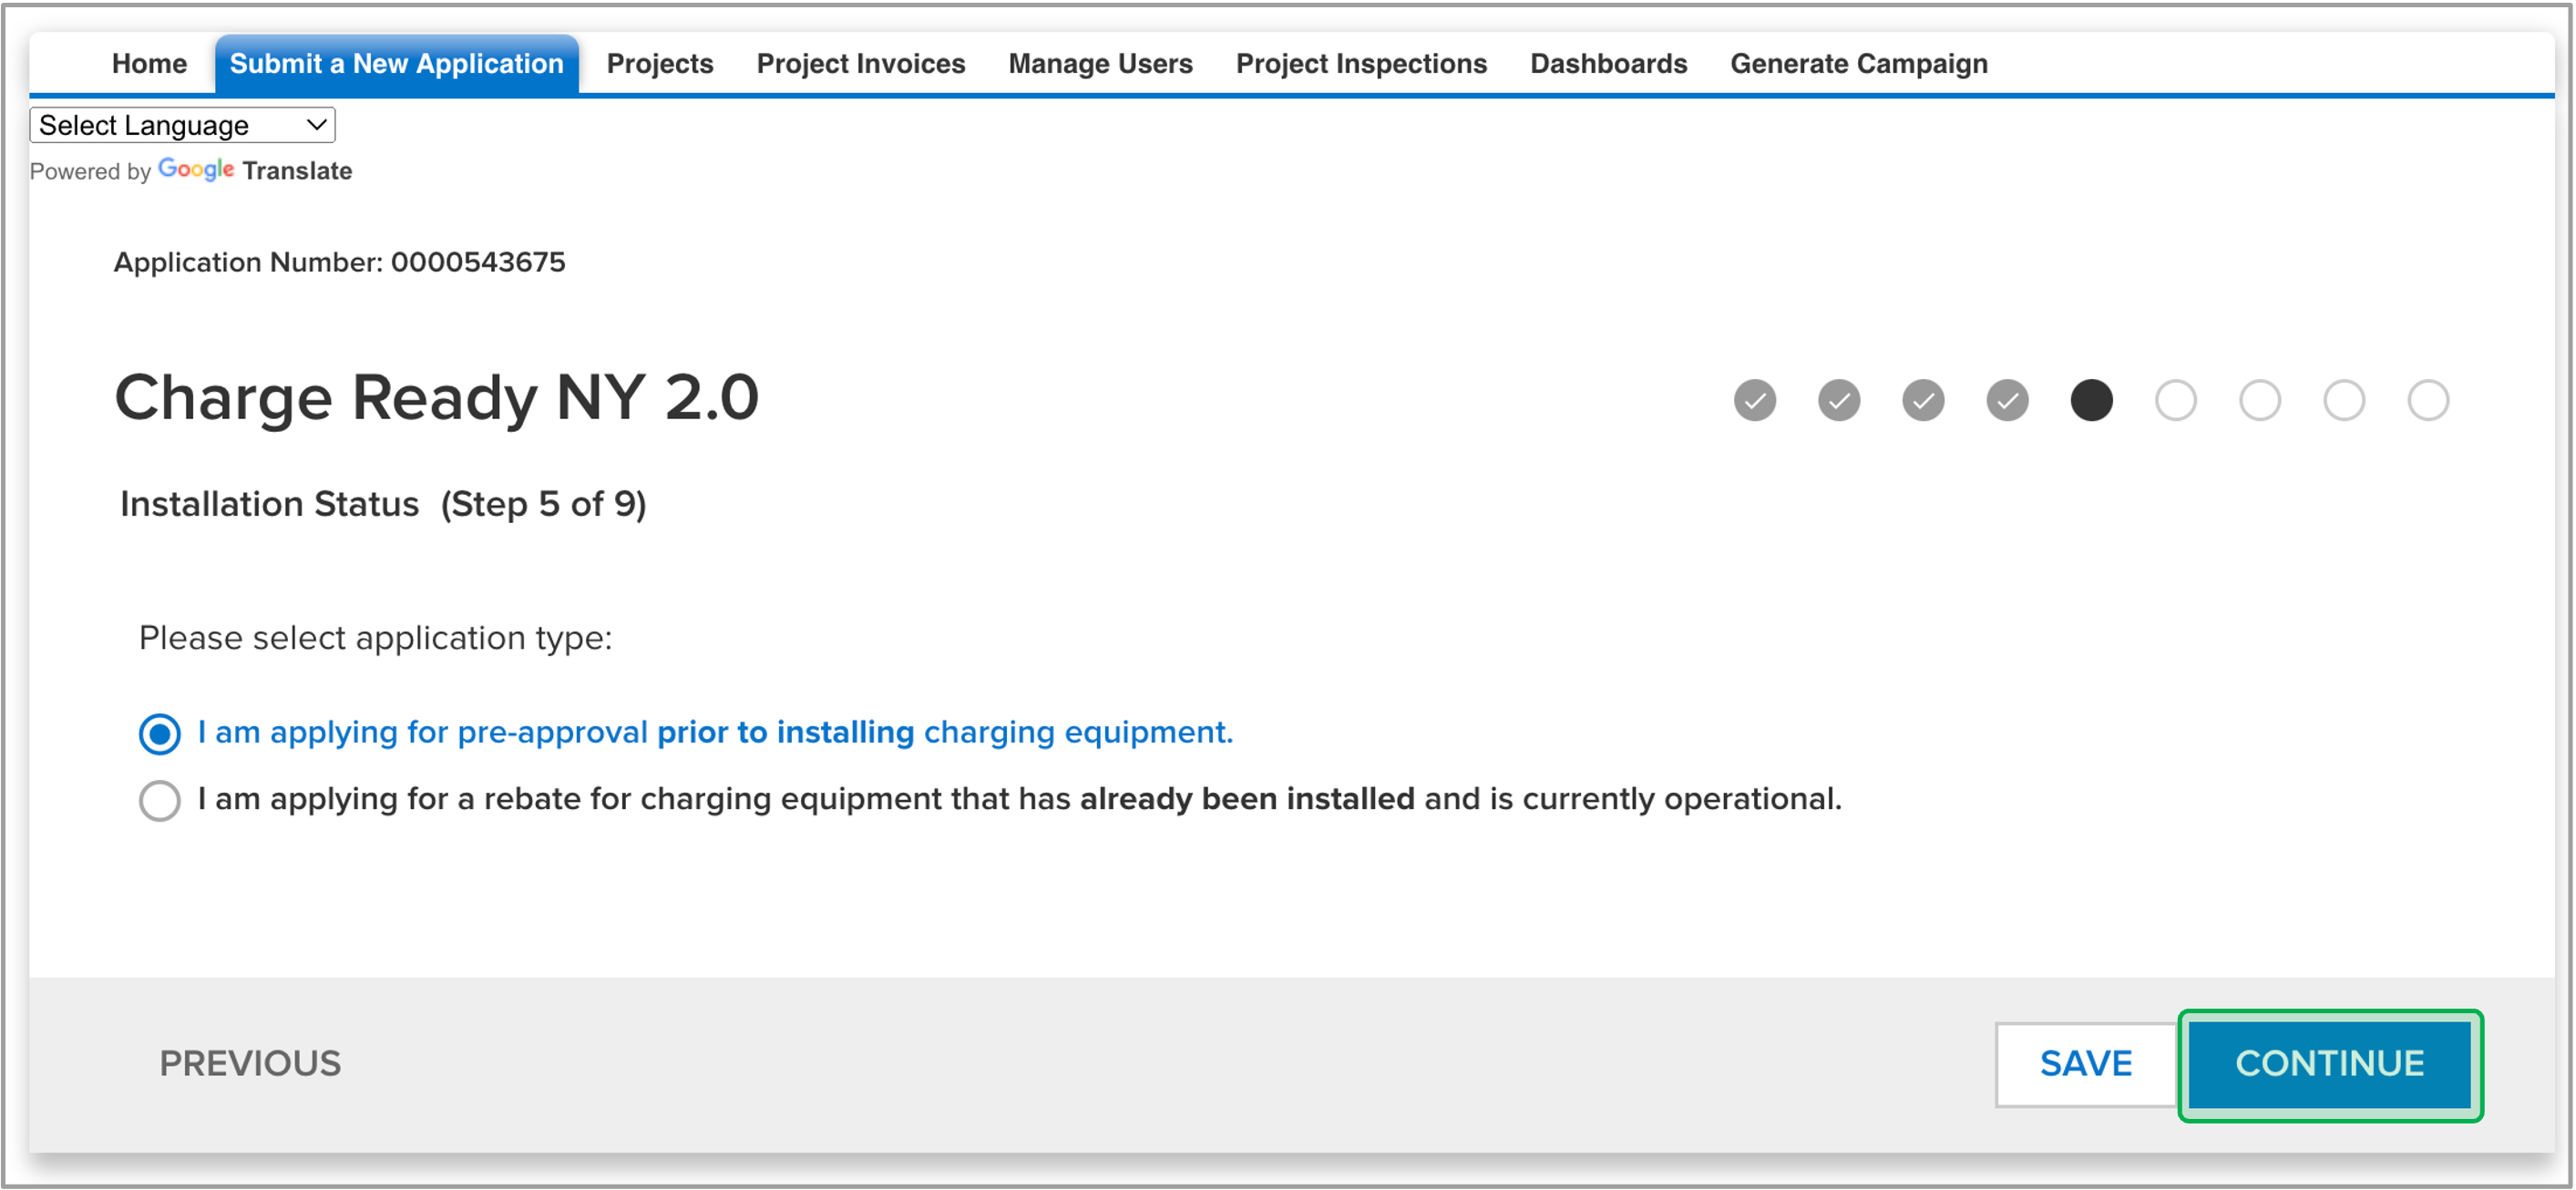
This page asks you to select your application type. Once the application type is selected/filled out, click the Continue button.
If you are applying for a Rebate for Charging Equipment that has already been installed and is currently operational, additional information is required to be filled out.
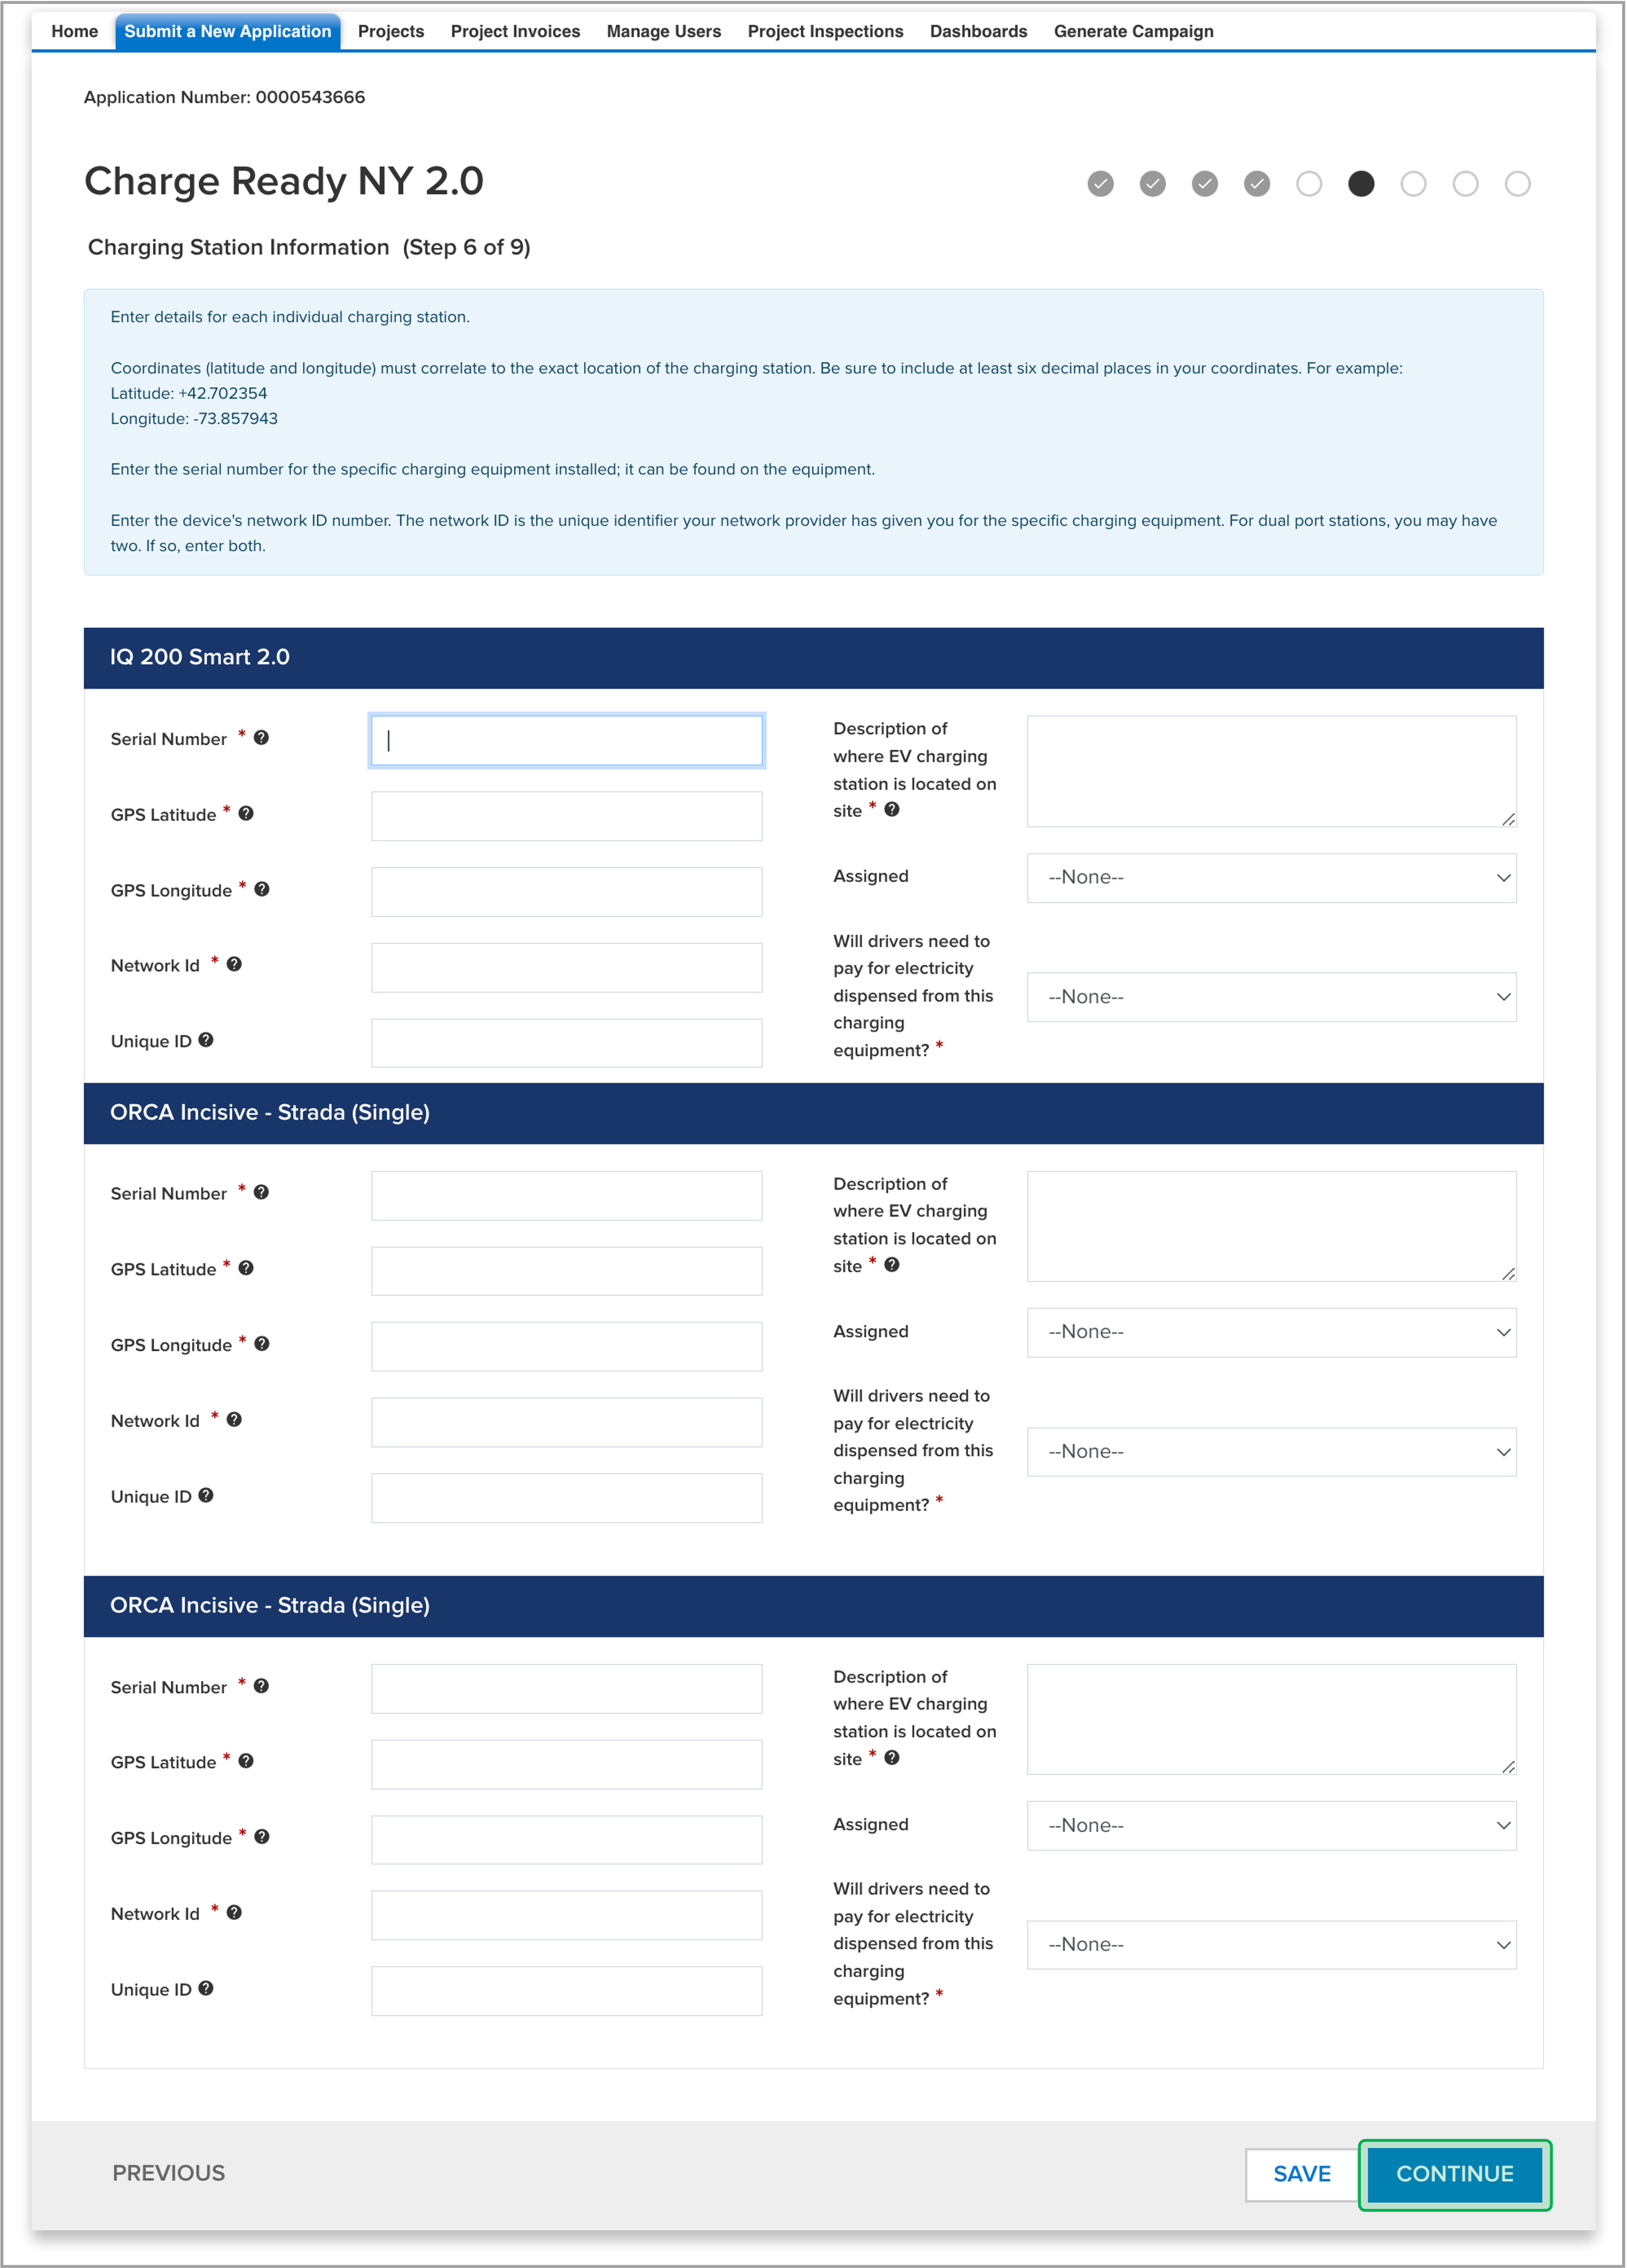
Charging Station Information page
This page requires you to enter details for each individual charging station. Once all required fields are completed, click Continue.
If your network provider uses a unique identification number to track charging stations seperate from serial numbers and network IDs, please enter in the Unique ID field for each station.
This page will only appear if you selected the rebate for charging equipment that has already been installed and is currently operational.
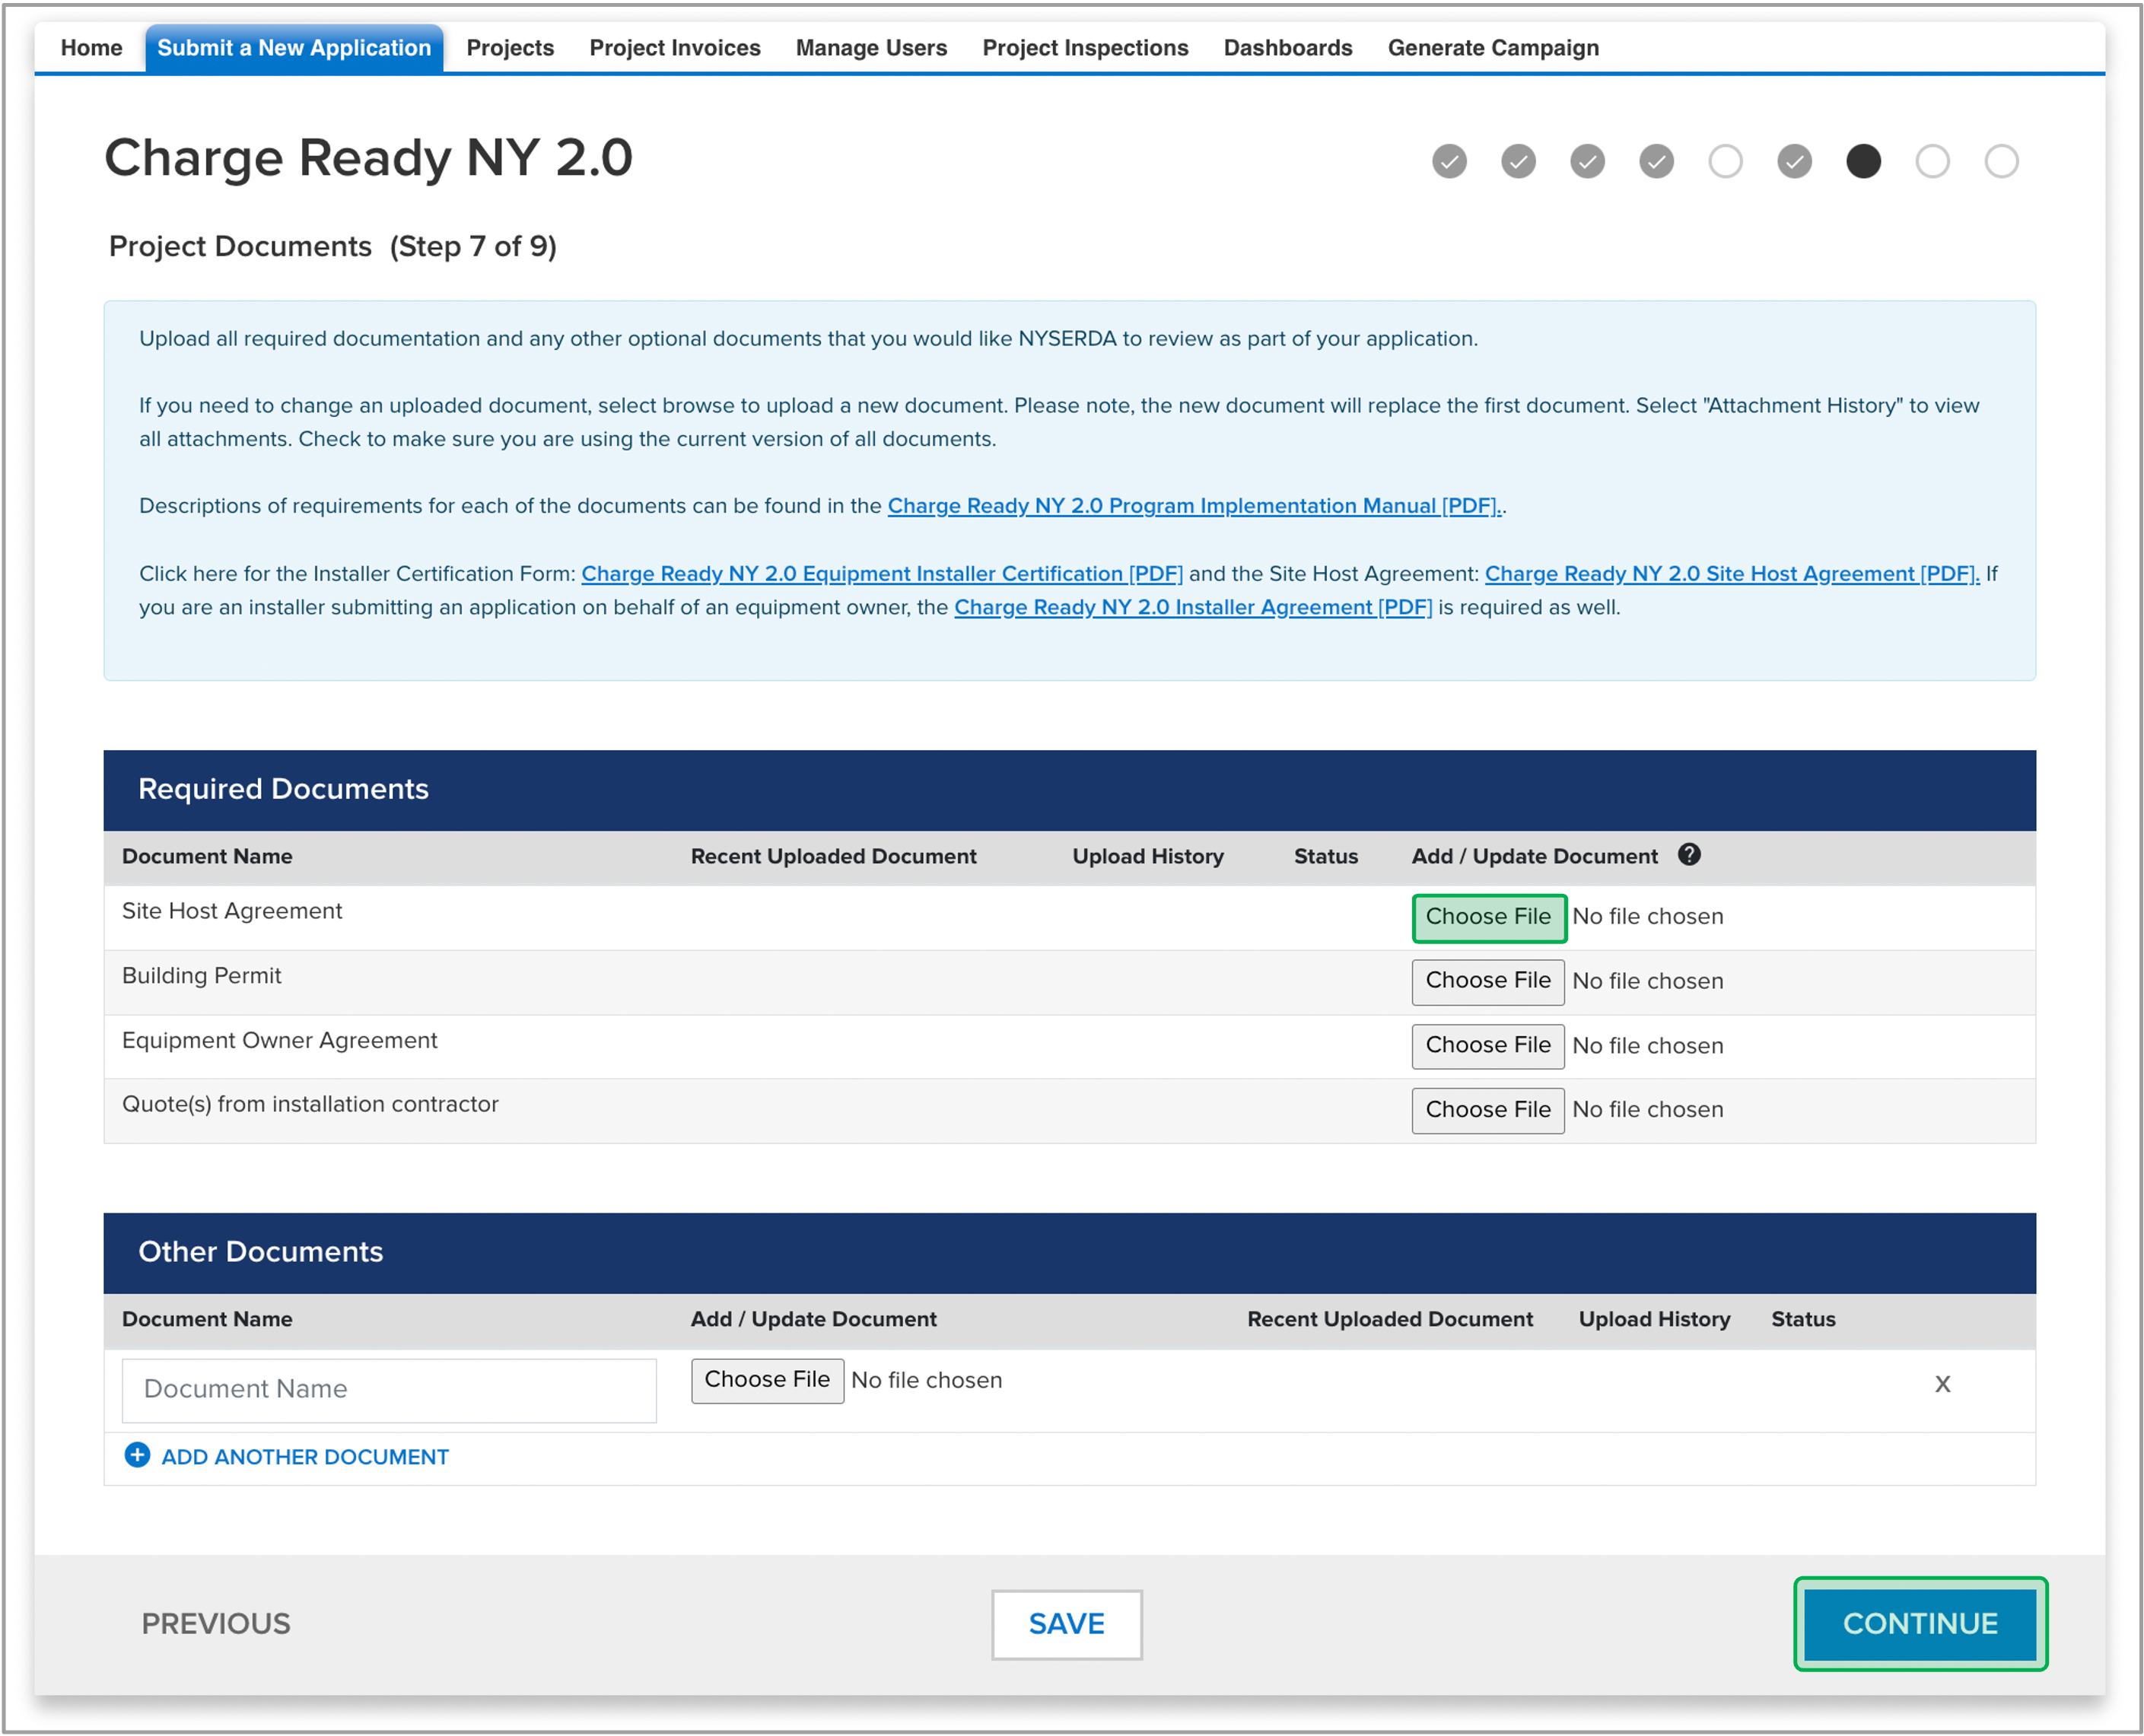
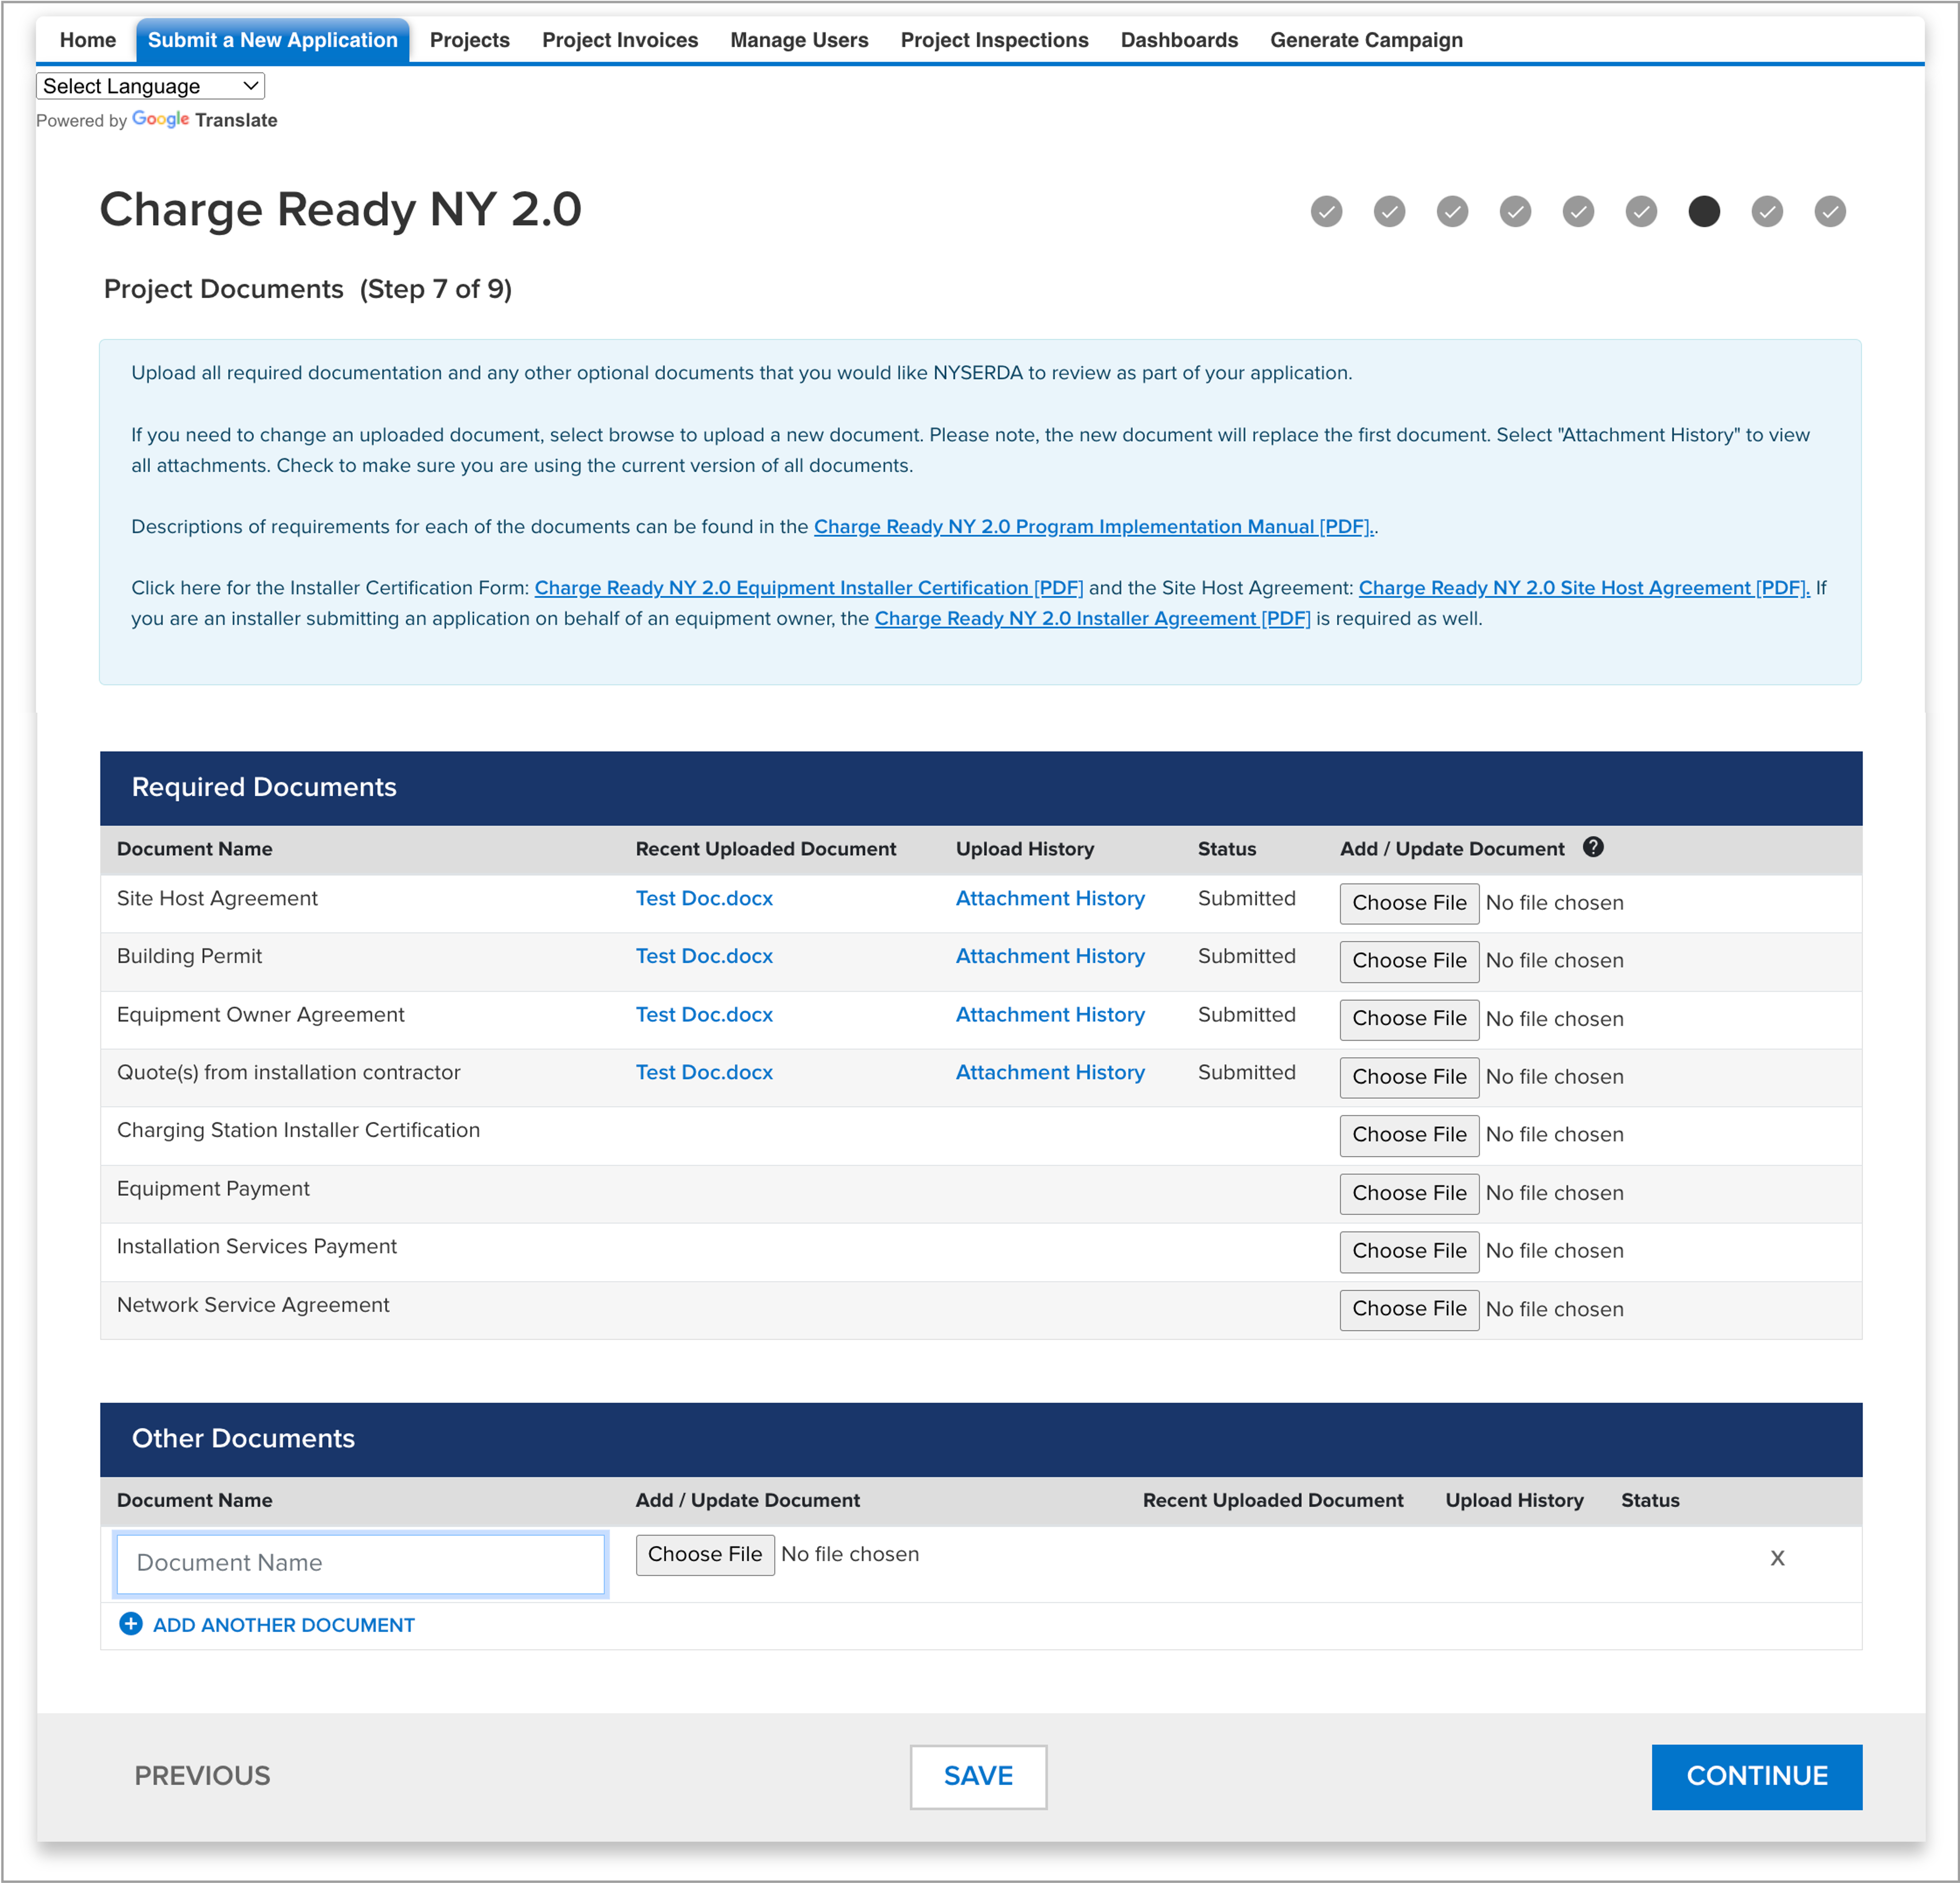
Project Documents page
This page requires you to upload all required documentation and any optional documents you'd like reviewed as part of your application. To add required documents, click the Choose File button for each required document to locate the file on your computer and upload to the application. Repeat for the Other Documents section to upload any optional documents. Once all document are successfully uploaded, click Continue.
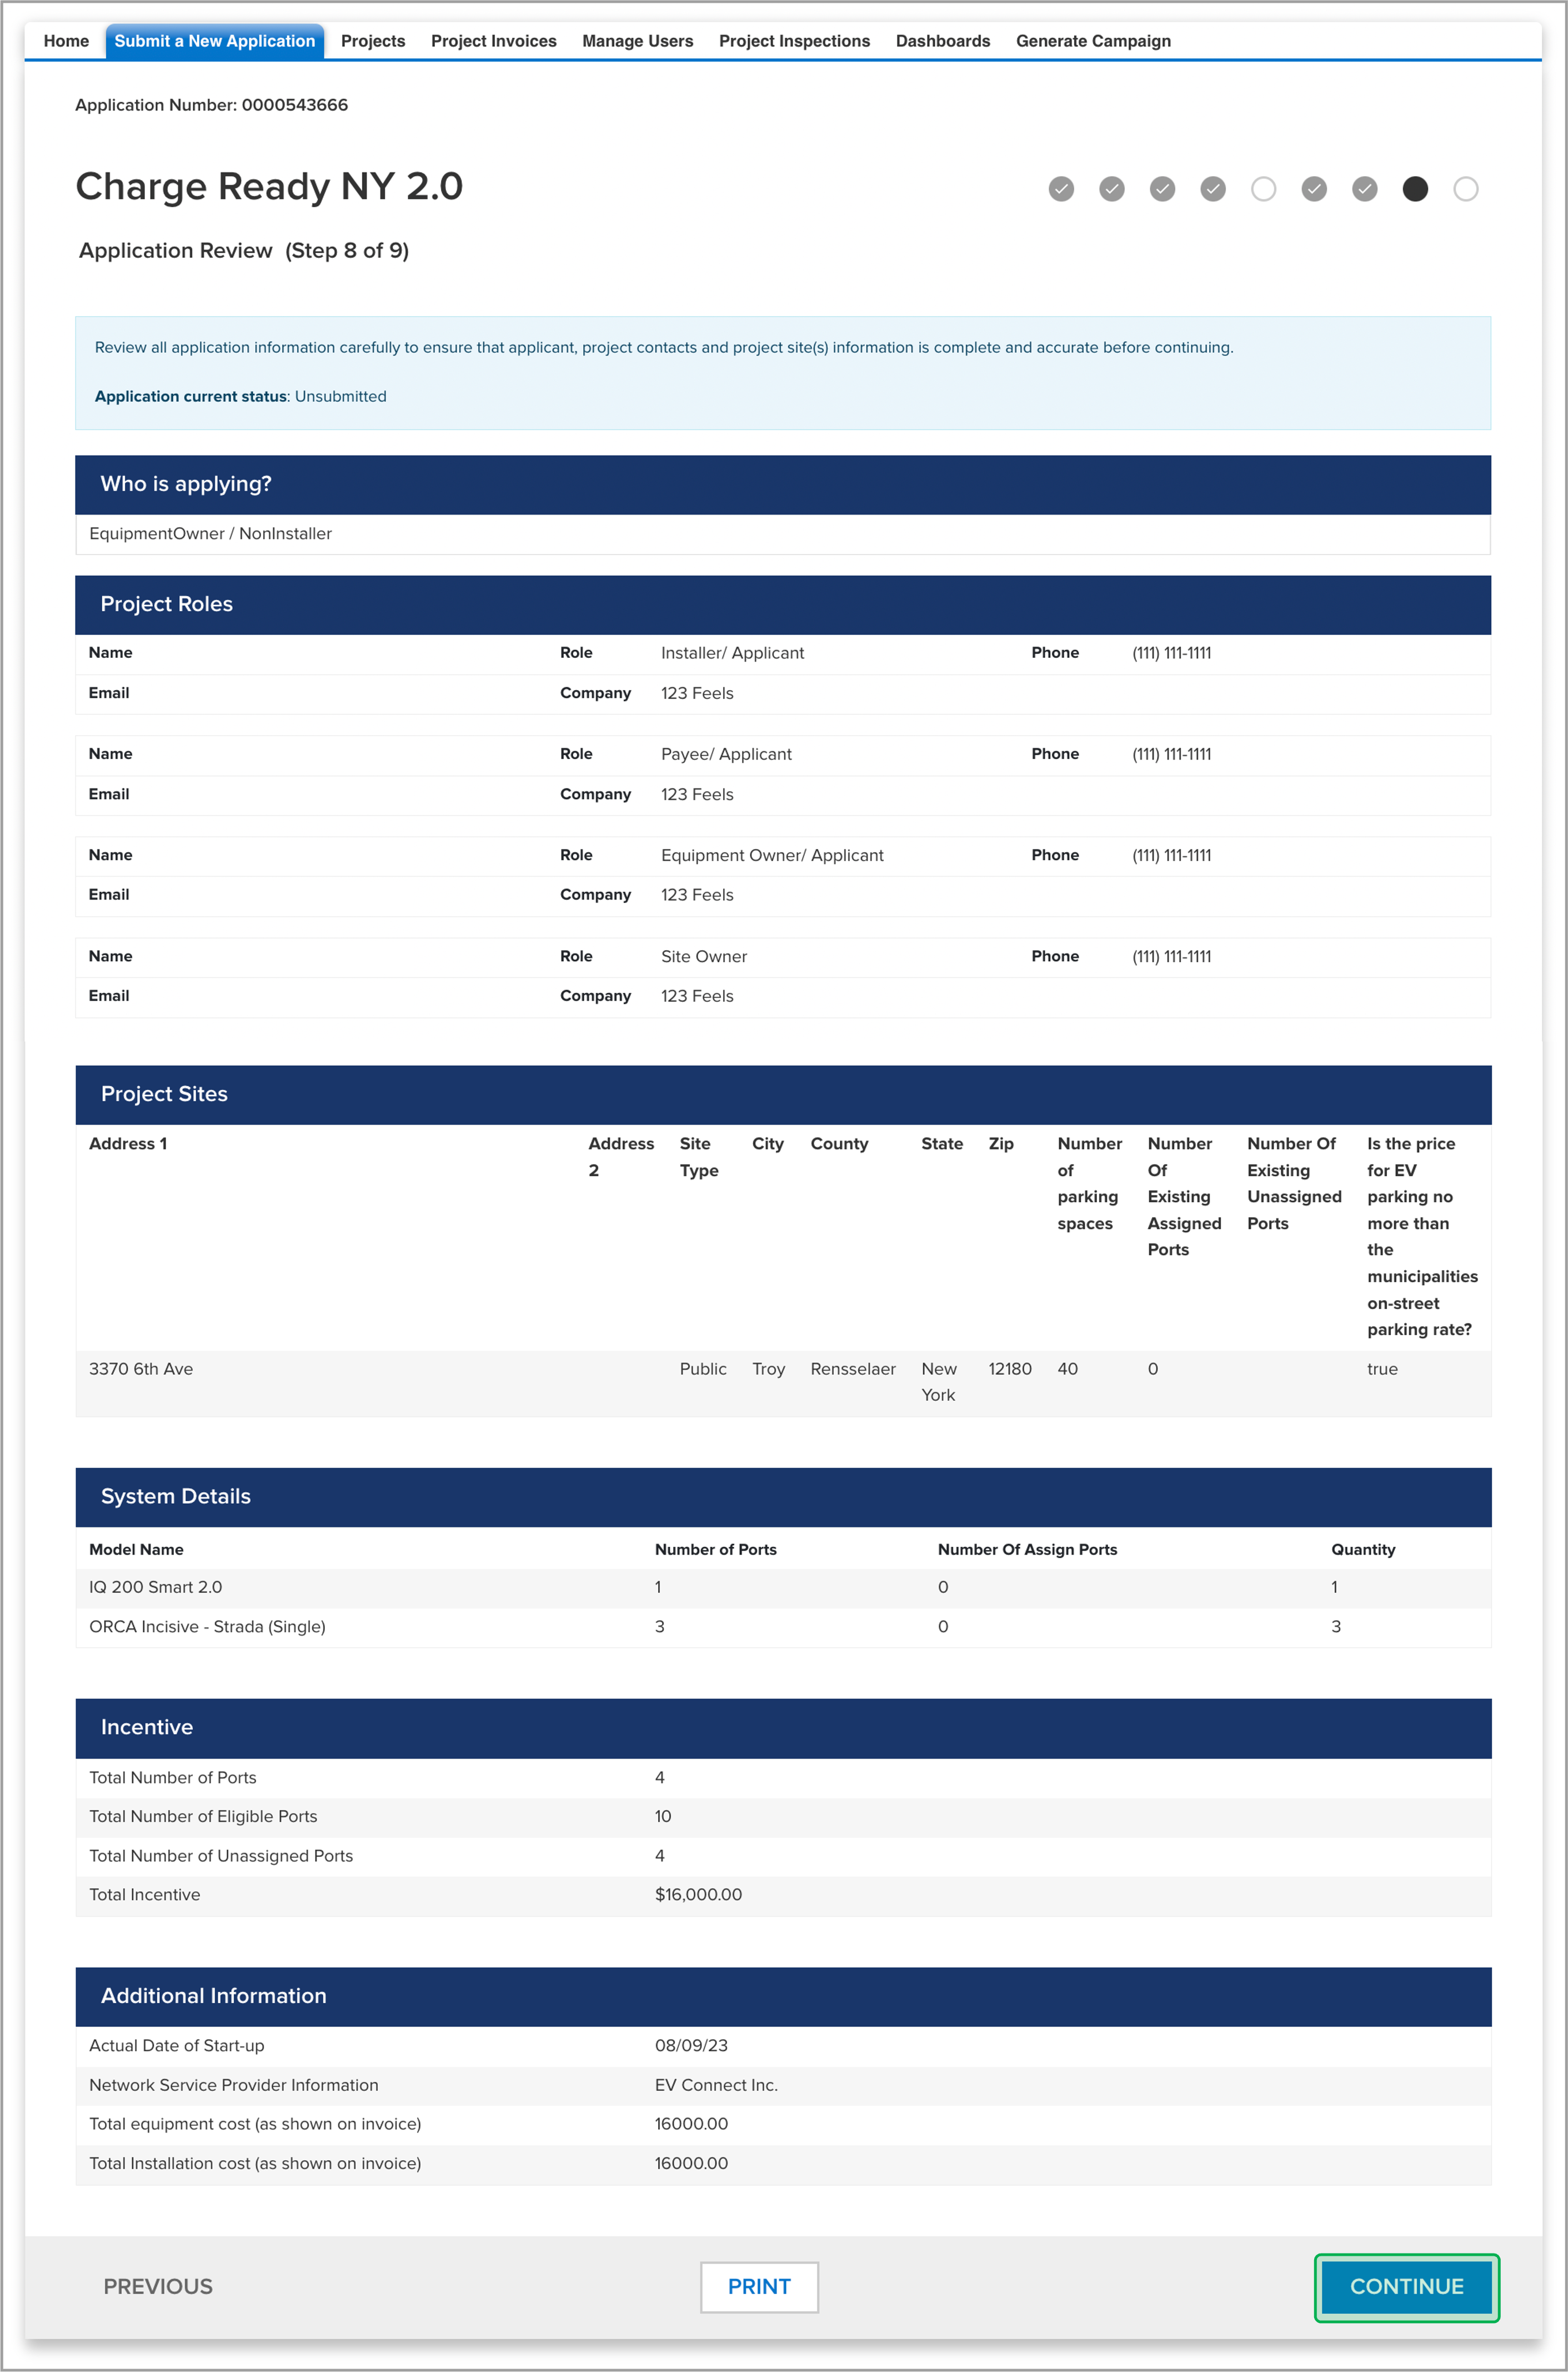
Application Review page
This page asks you to review all application information carefully to ensure that applicant, project contacts, and project site(s) information is complete and accurate before continuing. Once you finish reviewing the application, click the Continue button.
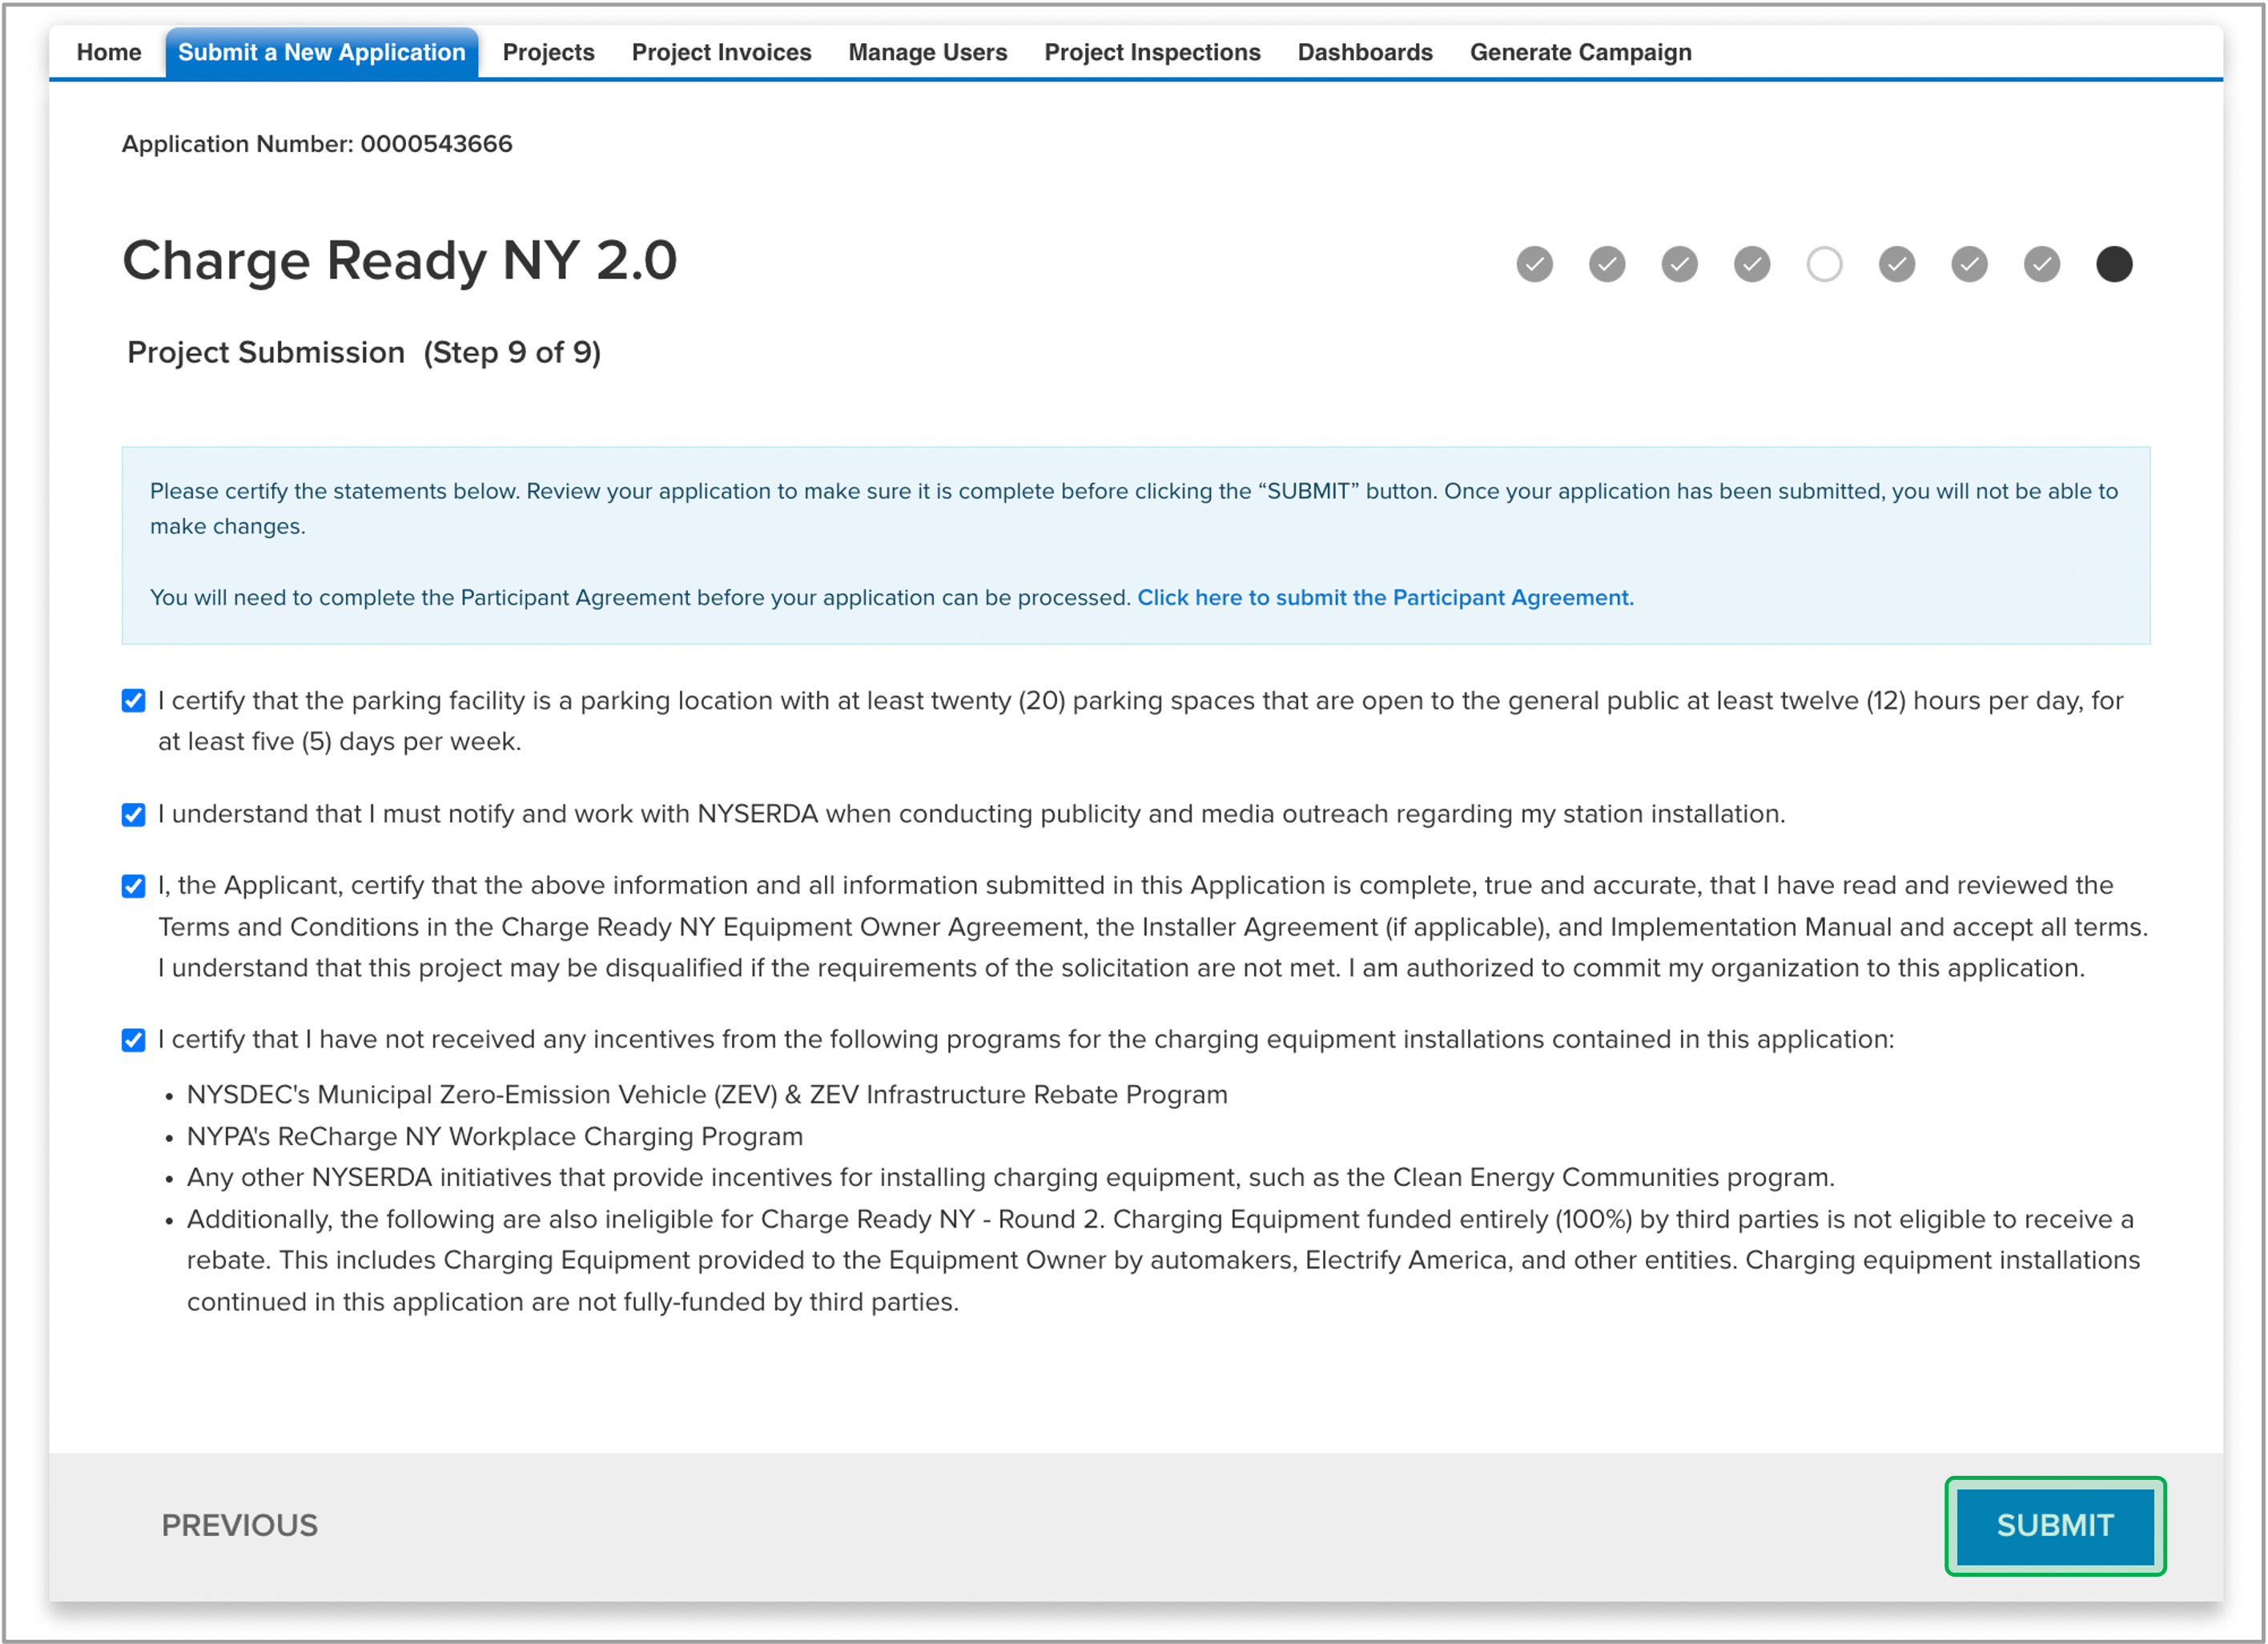
Project Submission page
This page asks you to review and certify all statements within the page before your submission. After you check off every box to certify the statements, click the Submit button to submit the project application.
Your application will be reviewed within 10 days of submission. If any corrections are needed, you will receive a request via email.
Application Approval
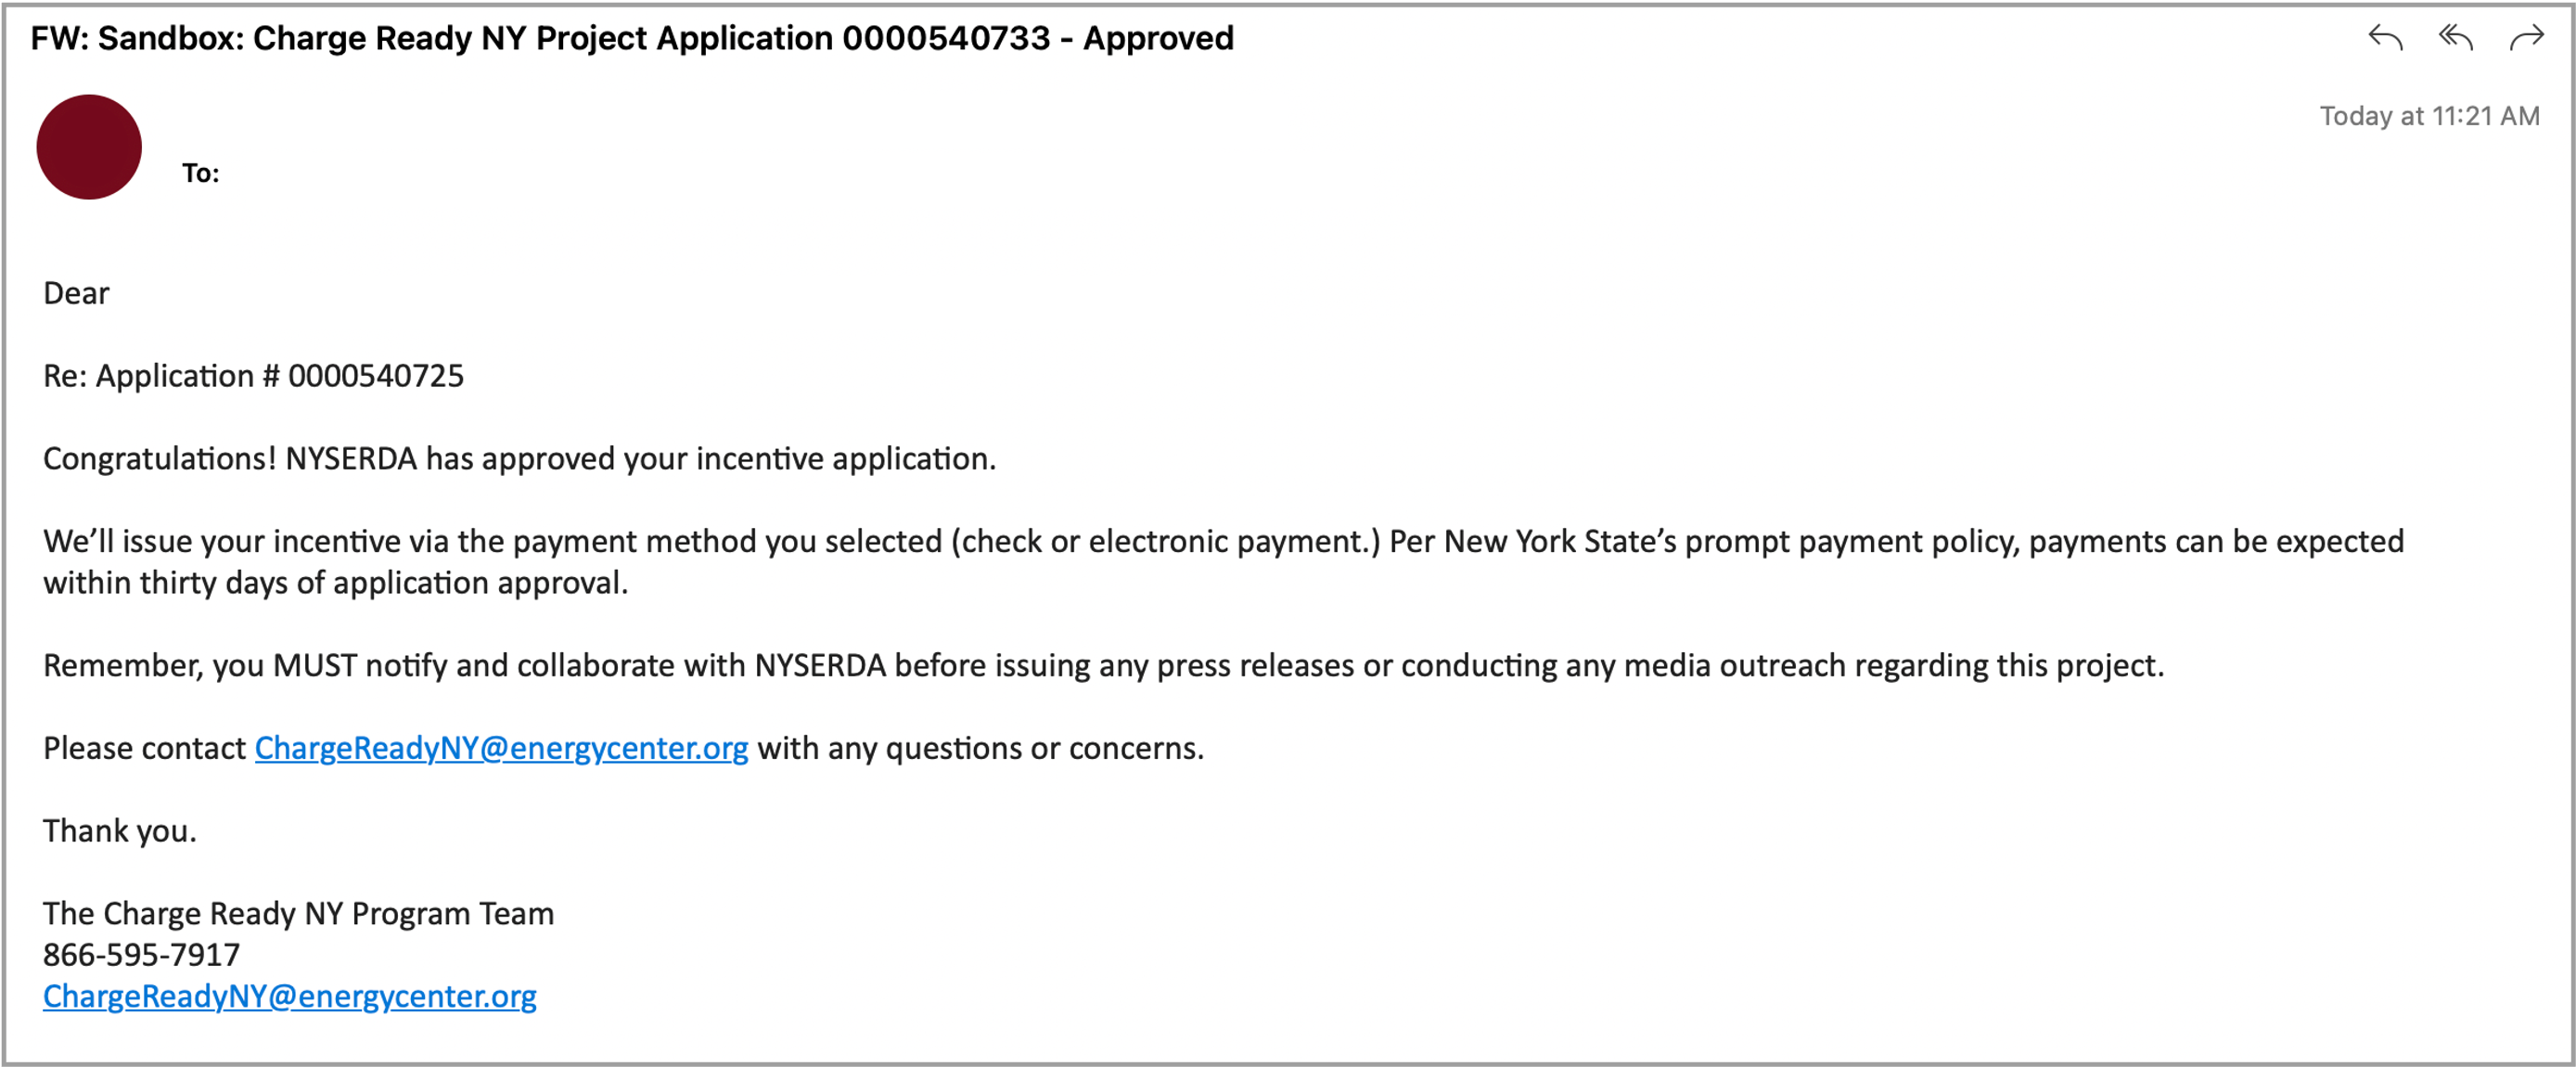
After the project submission, once your application is approved, an email notification will be sent out notifying your application status.
If you selected the Pre-Approval Application Type on the previous pages, continue to the Step 3: Pre-Approval Application Resubmission page and follow the remaining steps to complete your pre-approval project application.
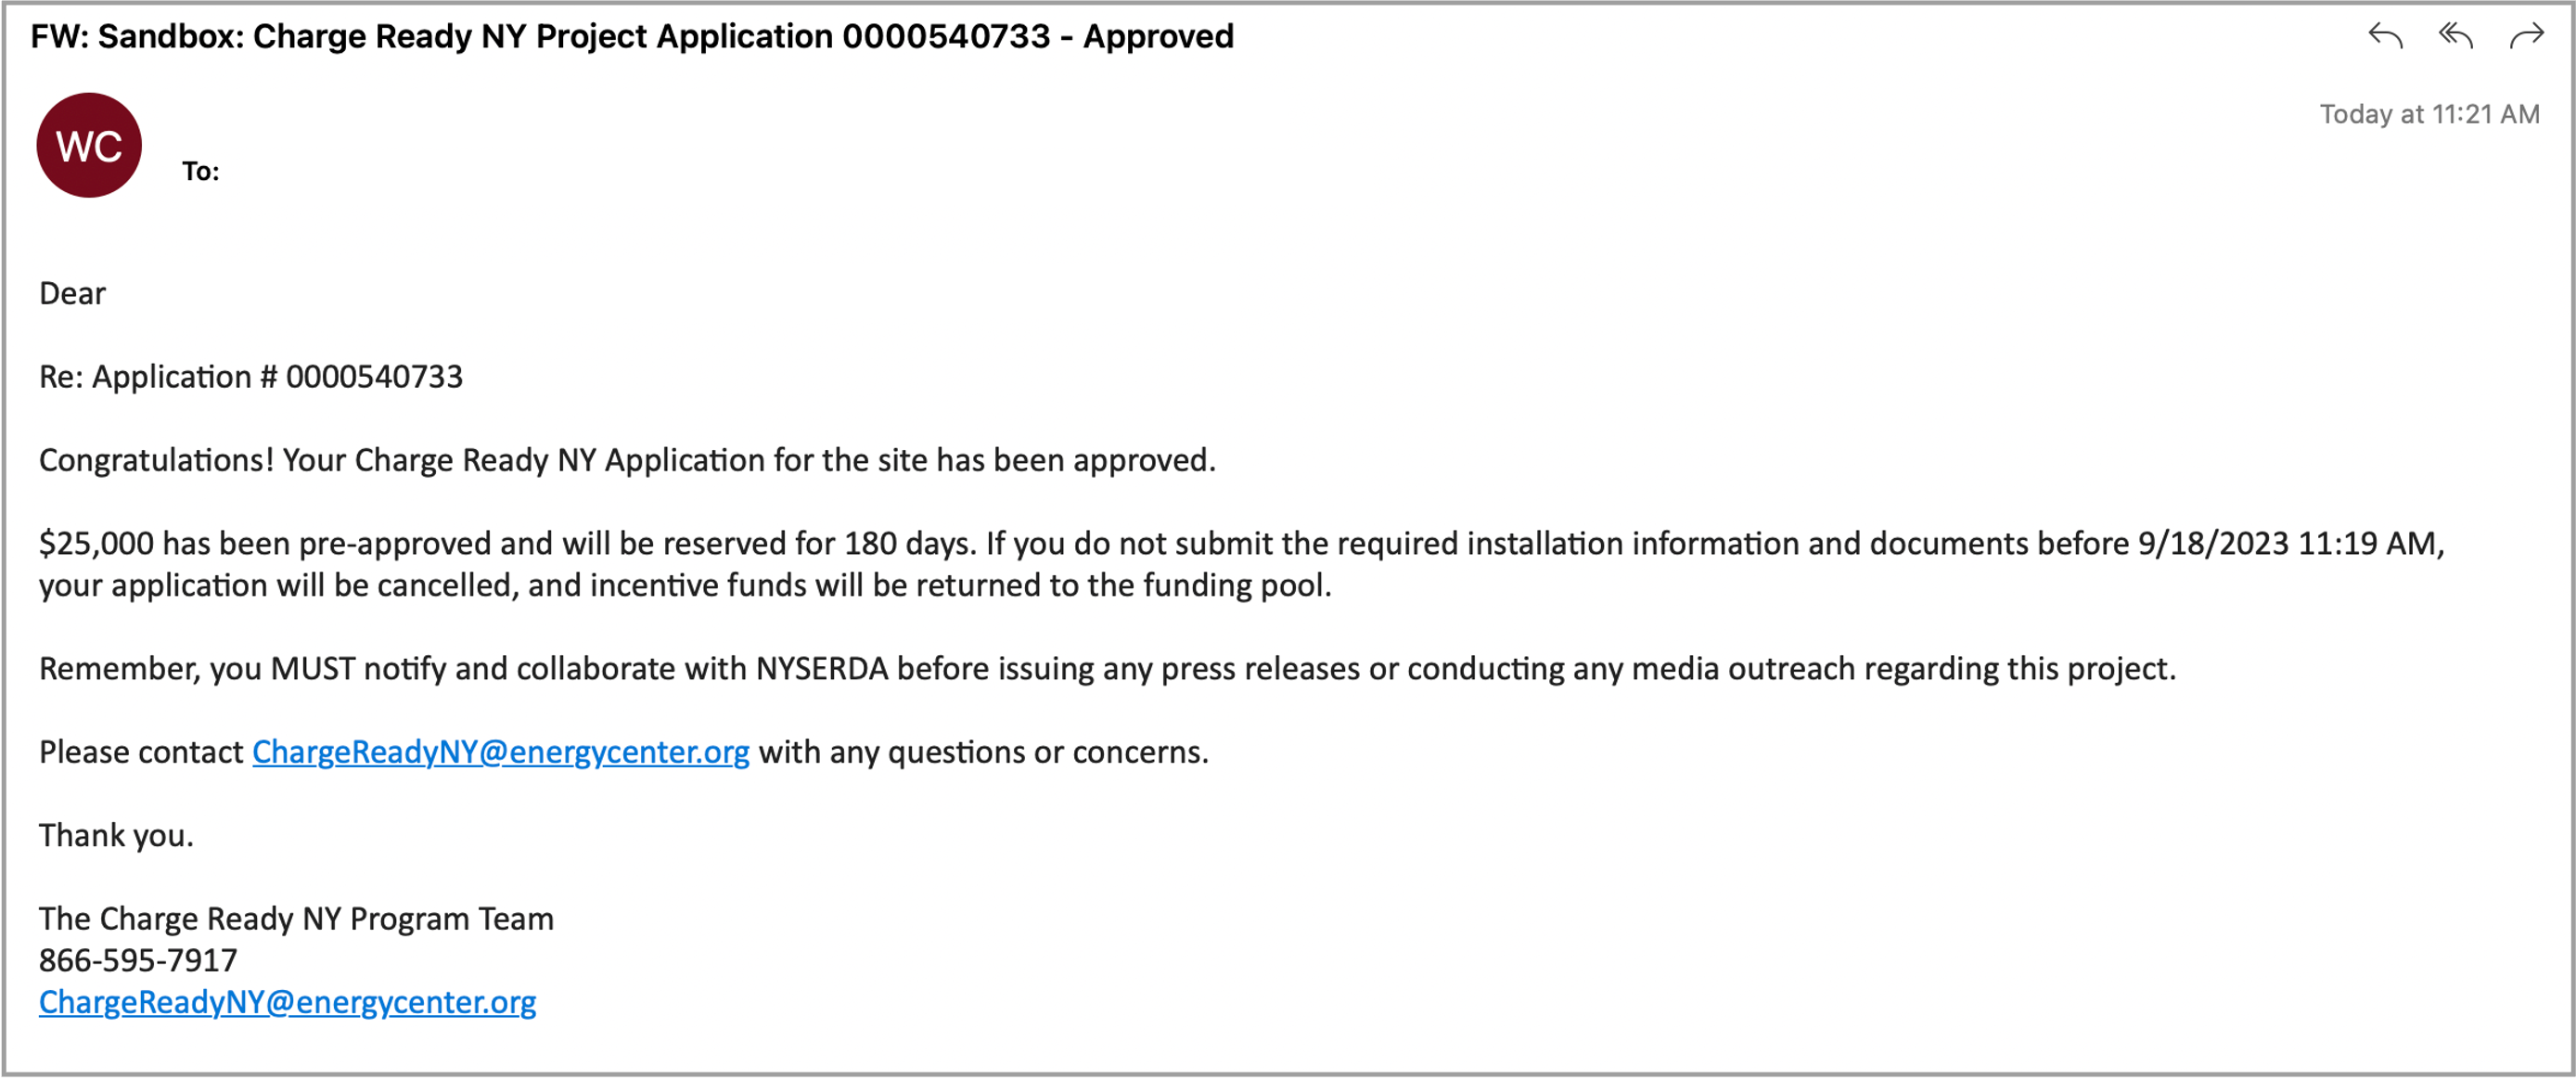
Once you complete the initial Pre-Approval Project Application, an email will be sent out notifying your application status. If application is approved, the applicant will receive 180 days to re-submit the project application for final approval.
The Project Application contains five (5) seperate pages. Review the information in the blue box at the top of the page. It provides high-level guidance and requirements that may be necessary for you to complete each page.
- Fields marked with a red asterisk ( * ) are required and must be completed before you can move on to the next page.
- Fields with thesymbol contain helpful field guidance and instructions that appear as tooltips when hovering your cursor over the symbol. The information in these tooltips is designed to help ensure that you are providing the correct information. Not all fields contain this symbol.
- Clicking Continue at the bottom of any page will save your progress (if all required fields have been completed) should you be unable to complete the agreement in one sitting.
To complete and submit a Project Application, log into the Salesforce Portal and follow the instructions below.
Pre-Approval Application Status
Once your initial Pre-Approval Project Application is approved, an email will be sent out notifying your application status.
Projects Tab
Once the email is received, the applicant will return to the Salesforce Portal and access the Projects tab, then select the appropriate Application under Project Name.
Application Wizard
In the Project Details page, click on the Application Wizard button.
Installation Status Page
The window will redirect to the installation status page. Select the No option and fill out all of the required fields on this page. Once you finish, click the Continue button.
If you select the Yes option due to your installation status matching the statments listed on the apge. The application will be canceled and the page will promt you to re-apply.
Charging Station Information page
This page requires you to enter details for each individual charging station. Once all required fields are completed, click Continue.
If you are applying for a Rebate for Charging Equipment that has already been installed and is currently operational, additional information is required to be filled out.
Project Documents Page
Application Review page
This page asks you to review all application information carefully to ensure that applicant, project contacts, and project site(s) information is complete and accurate before continuing. Once you finish reviewing the application, click the Continue button.
Project Submission page
This page asks you to review and certify all statements within the page before your submission. After you check off every box to certify the statements, click the Submit button to submit the project application.
Your application will be reviewed within 10 days of submission. If any corrections are needed, you will receive a request via email.
Application Approval
After the project submission, once your application is approved, an email notification will be sent out notifying your application status.
