| Info |
|---|
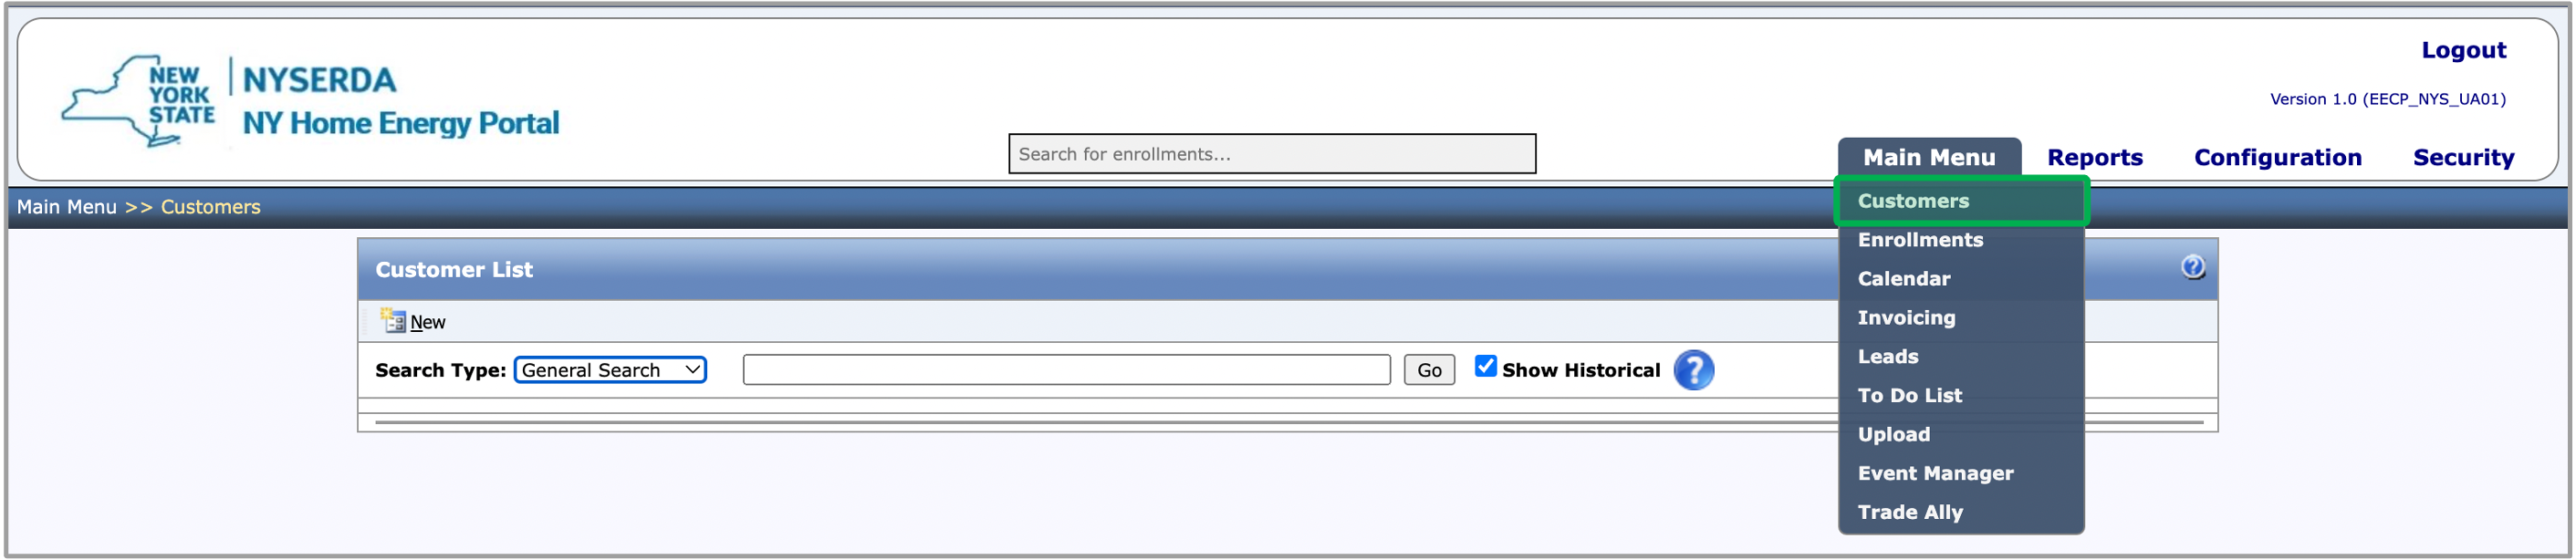
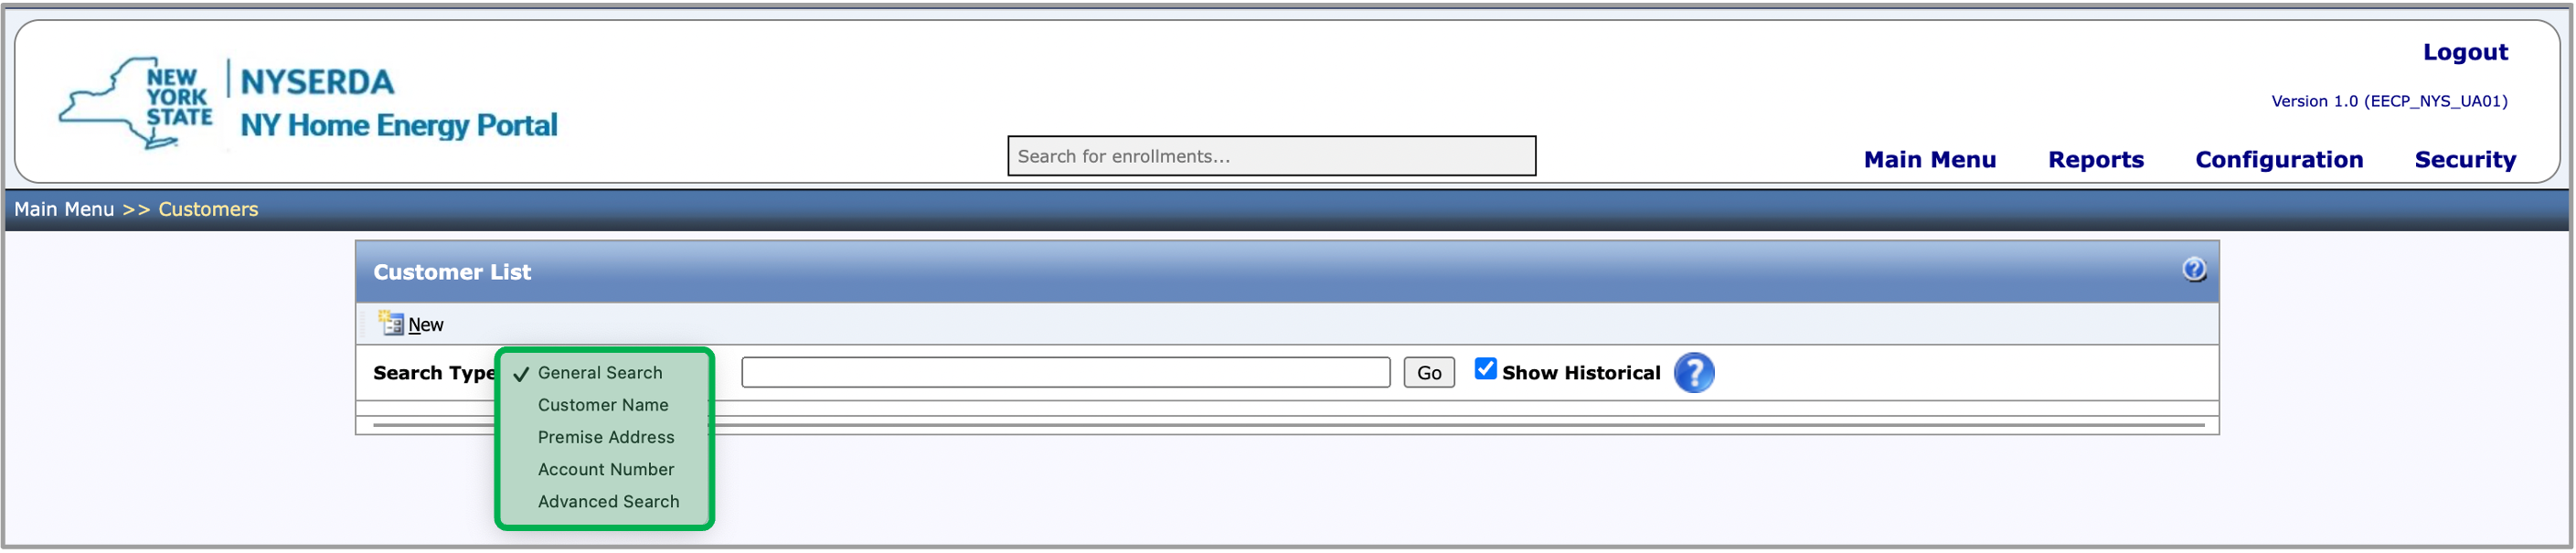
| The instruction below provides guidance for contractors with the Assessment Submission step. |
| Aura - Tab Group |
|---|
| settings | {"generalSettings":{"tabSpacing":0,"tabWidth":50,"tabHeight":40,"direction":"vertical"},"activeSettings":{"backgroundColor":{"color":"#002d72"},"text":{"fontSize":16,"color":"#fff","textAlign":"left","fontWeight":"normal"}},"inactiveSettings":{"backgroundColor":{"color":"#f4f5f7"},"text":{"fontSize":16,"color":"#5e6c84","textAlign":"left","fontWeight":"normal"}},"contentSettings":{"backgroundColor":{"color":"#fff"},"border":{"style":"solid","width":2,"top":false,"bottom":false,"left":true,"right":false,"color":"#002d72"},"padding":{"top":10,"right":10,"bottom":10,"left":10}},"hoverSettings":{"backgroundColor":{"color":"#0073a4"},"text":{"fontSize":16,"color":"#ffffff","textAlign":"left","fontWeight":"normal"}}} |
|---|
| tab | 1 |
|---|
|
| Aura - Tab |
|---|
| title | Applicant Information |
|---|
|
| Panel |
|---|
| borderColor | #002D72 |
|---|
| bgColor | #F3F4F9 |
|---|
| titleColor | #ffffff |
|---|
| borderWidth | 1 |
|---|
| titleBGColor | #002D72 |
|---|
| borderStyle | none |
|---|
| title | Assessment Submission - Applicant Information |
|---|
|
|
| Info |
|---|
When the Assessment Submission is in the New status, complete the following on the The instruction below provides guidance for contractors to review the Applicant Information tab. |
| UI Steps |
|---|
|
| UI Step |
|---|
Contractors should review all populated information on this tab and make updates if needed. |
| UI Step |
|---|
Once all of the fields are reviewed, | Input/select the Additional Applicant Information and Owner Information fields. | Tip |
|---|
The fields will be prepopulated by the Salesforce API call when the enrollment is created. |
| Warning |
|---|
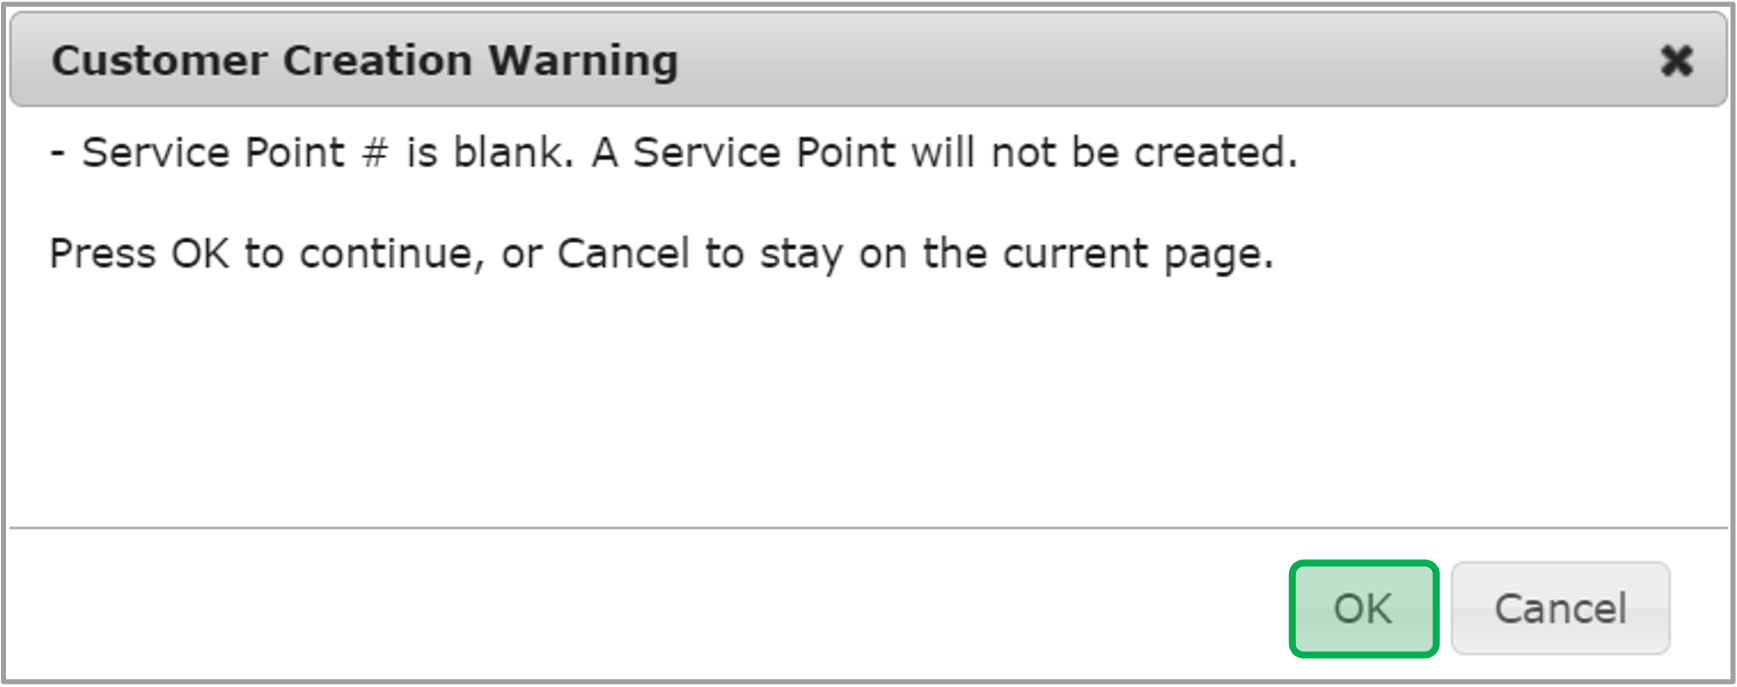
Proceed if the Project Type is set as Full Comprehensive or Muni Install. Audit Install is for non invasive measures, unless you are able to obtain the landload approval, in which case the Project Type can be changed to Full Comprehensive. No project should be changed to a Muni Install unless directed by NYSERDA or CLEAResult. |
| Expand |
|---|
| 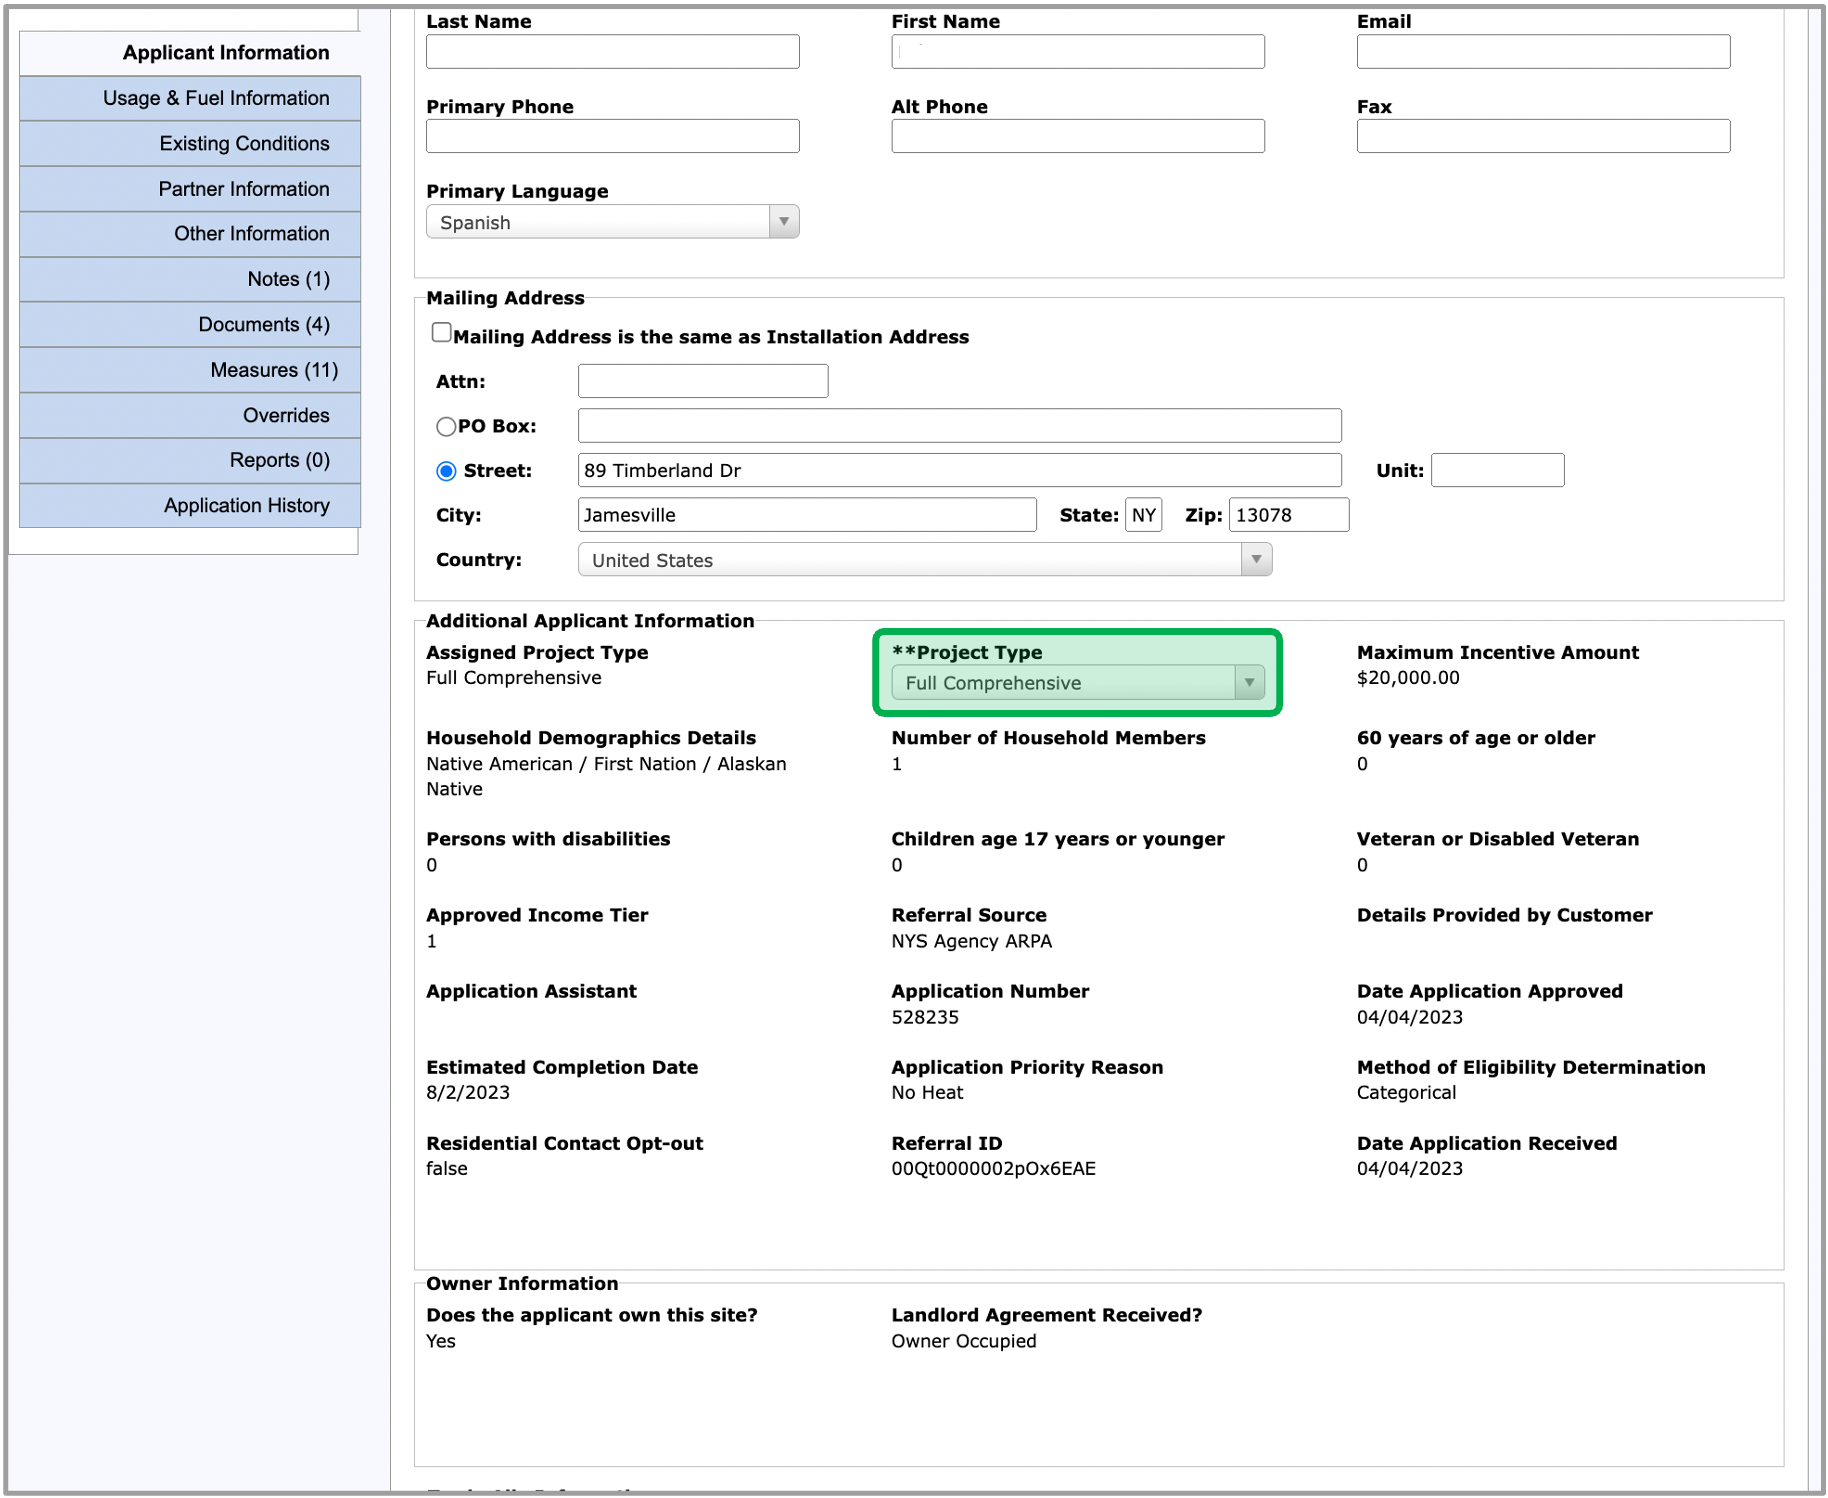 Image Removed Image Removed
|
| UI Step |
|---|
Once all of the required tabs are filled out, click the Save button and move on to the Usage & Fuel Information tab. |
|
|
| Aura - Tab |
|---|
|
| Panel |
|---|
| borderColor | #002D72 |
|---|
| bgColor | #F3F4F9 |
|---|
| titleColor | #ffffff |
|---|
| borderWidth | 1 |
|---|
| titleBGColor | #002D72 |
|---|
| borderStyle | none |
|---|
| title | Workscope Submission - Usage & Fuel Information |
|---|
|
|
| Info |
|---|
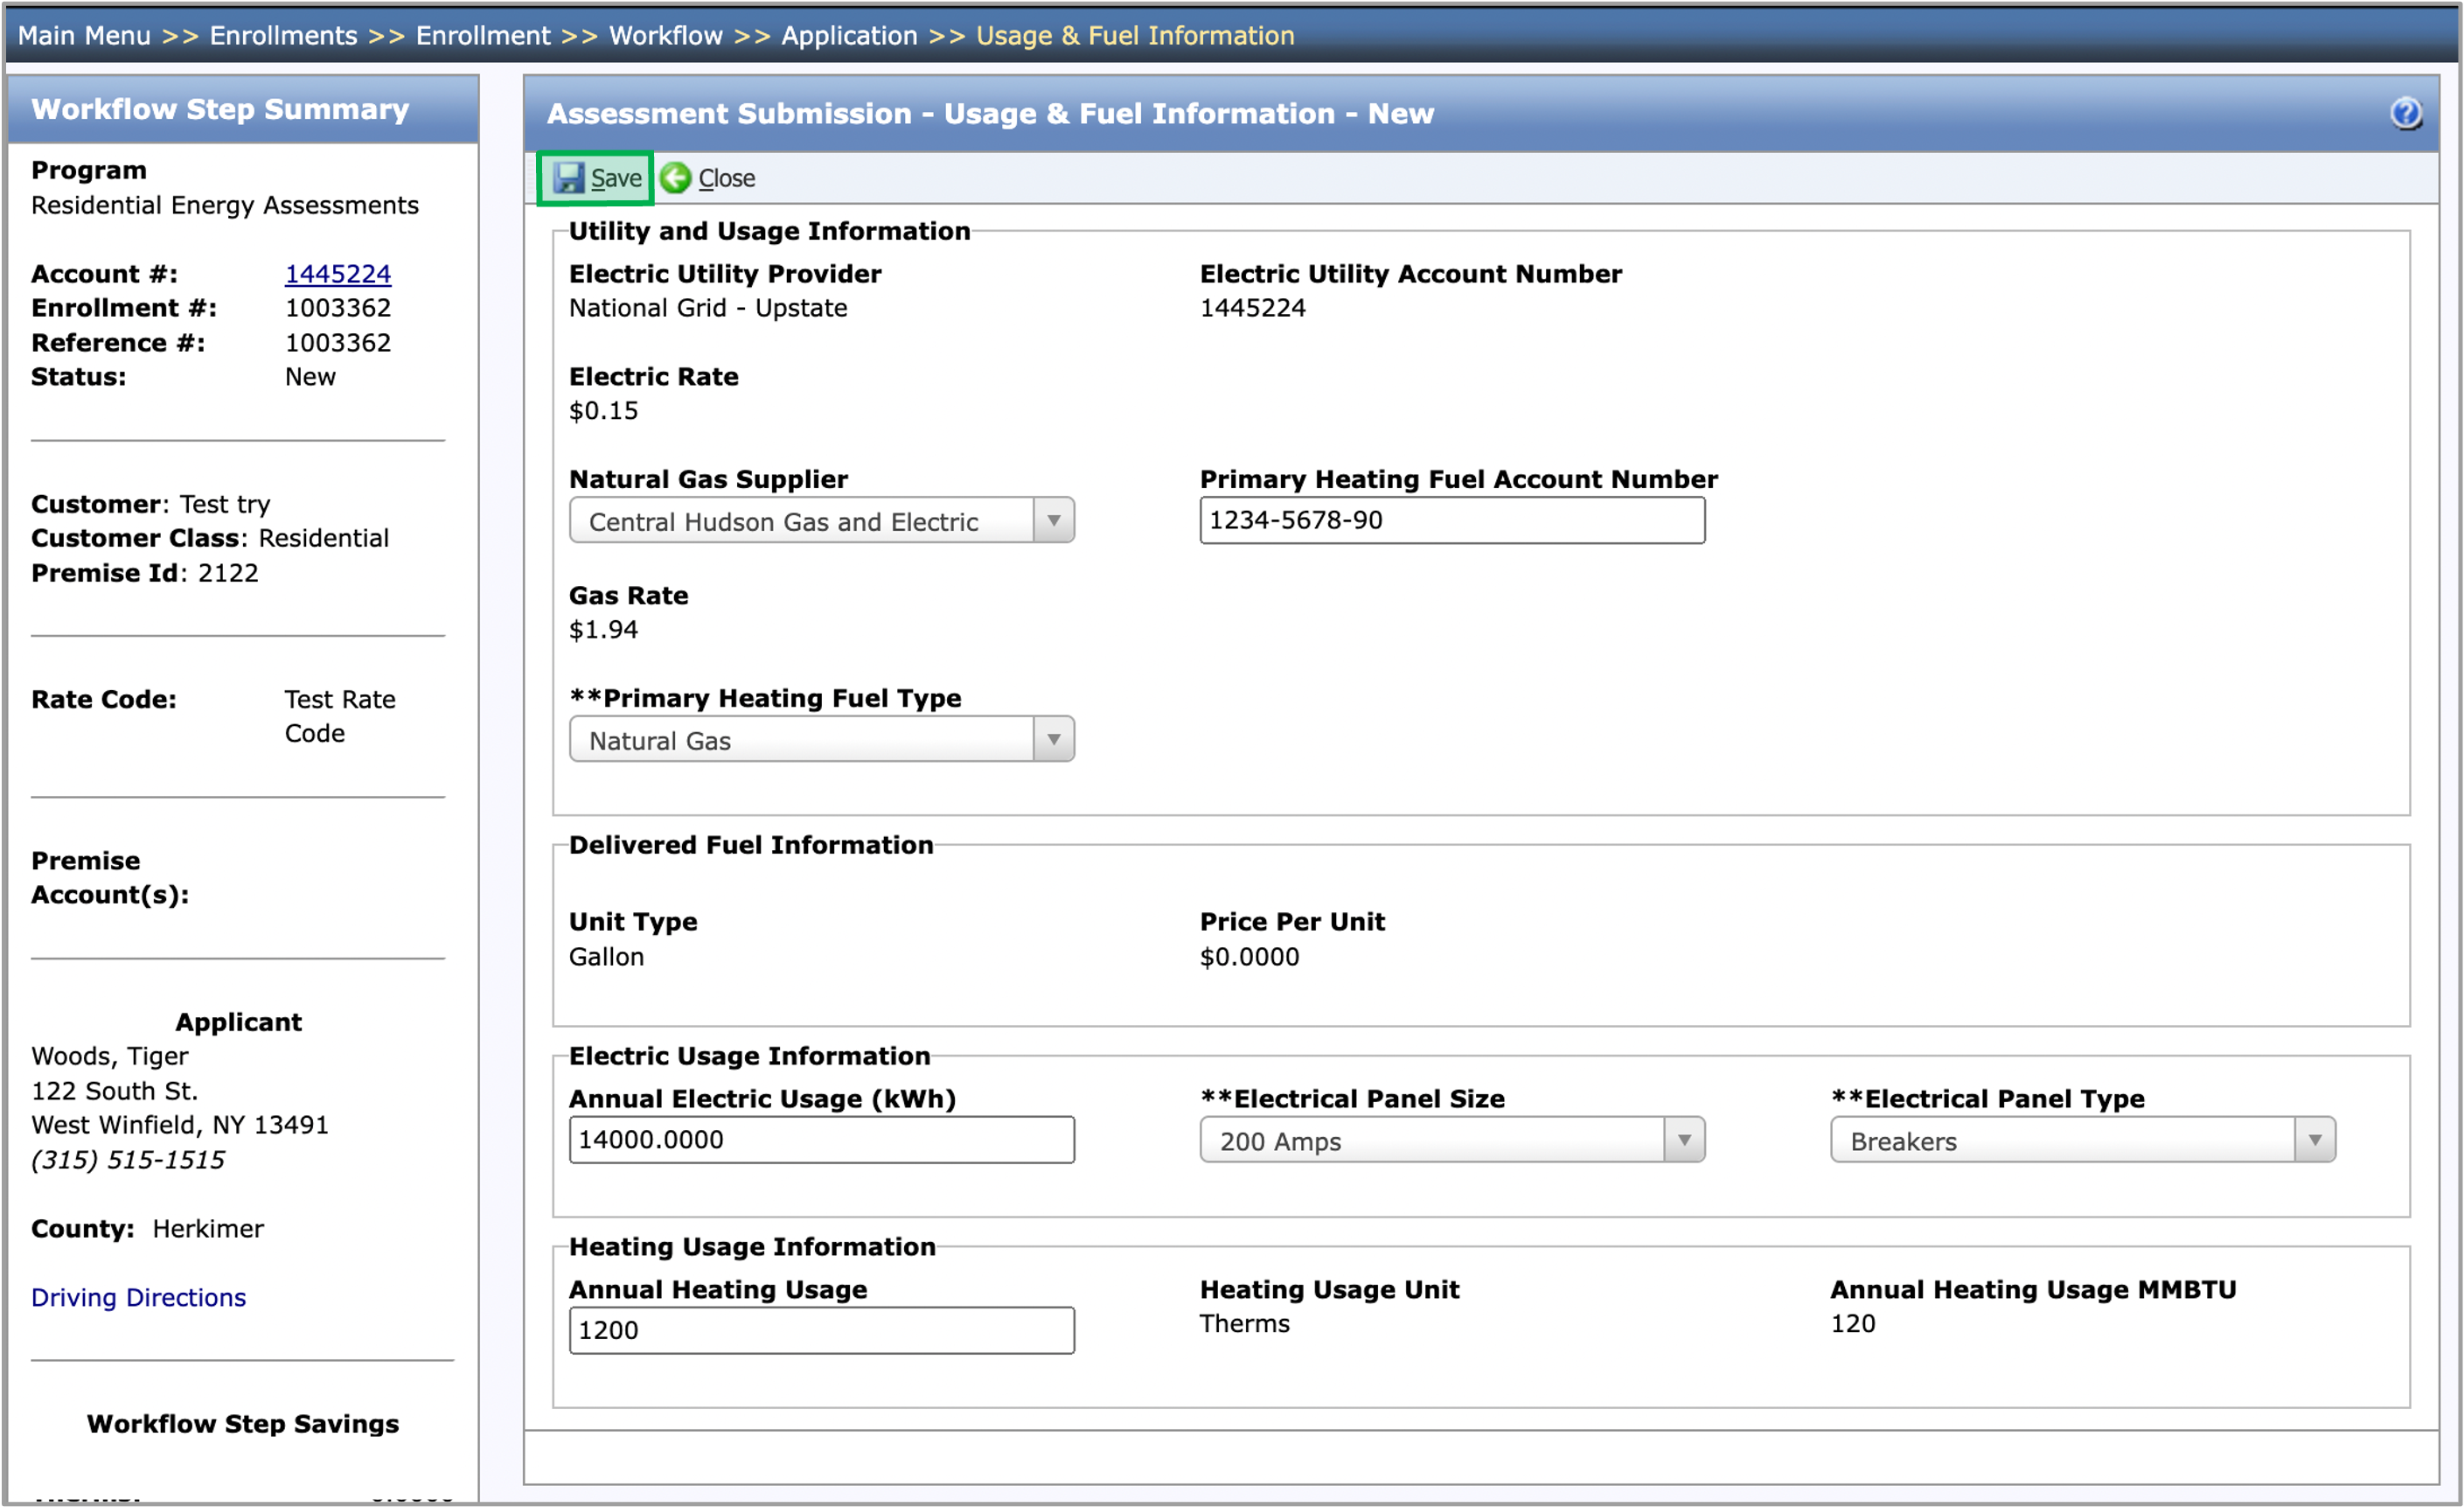
The instruction below provides guidance for contractors to complete the Usage & Fuel tab. Information in the Utility Information section on this tab will come from the Combined Residential Application for EmPower+ Enrollments but can be updated or changed if needed. |
| Section |
|---|
| Column |
|---|
|
| UI Steps |
|---|
|
| UI Step |
|---|
On the Usage & Fuel tab, fill in all of the required fields that contains two ** (asterisk). | Tip |
|---|
Some of the non-editable fields on this tab are calculated based on information added to editable fields. |
|
| UI Step |
|---|
Once all of the required fields are complete, click the Save button to save the Usage & Fuel information. |
|
|
| Column |
|---|
| 
|
|
|
| Aura - Tab |
|---|
|
| Panel |
|---|
| borderColor | #002D72 |
|---|
| bgColor | #F3F4F9 |
|---|
| titleColor | #ffffff |
|---|
| borderWidth | 1 |
|---|
| titleBGColor | #002D72 |
|---|
| borderStyle | none |
|---|
| title | Assessment Submission - Applicant Information |
|---|
|
|
| Info |
|---|
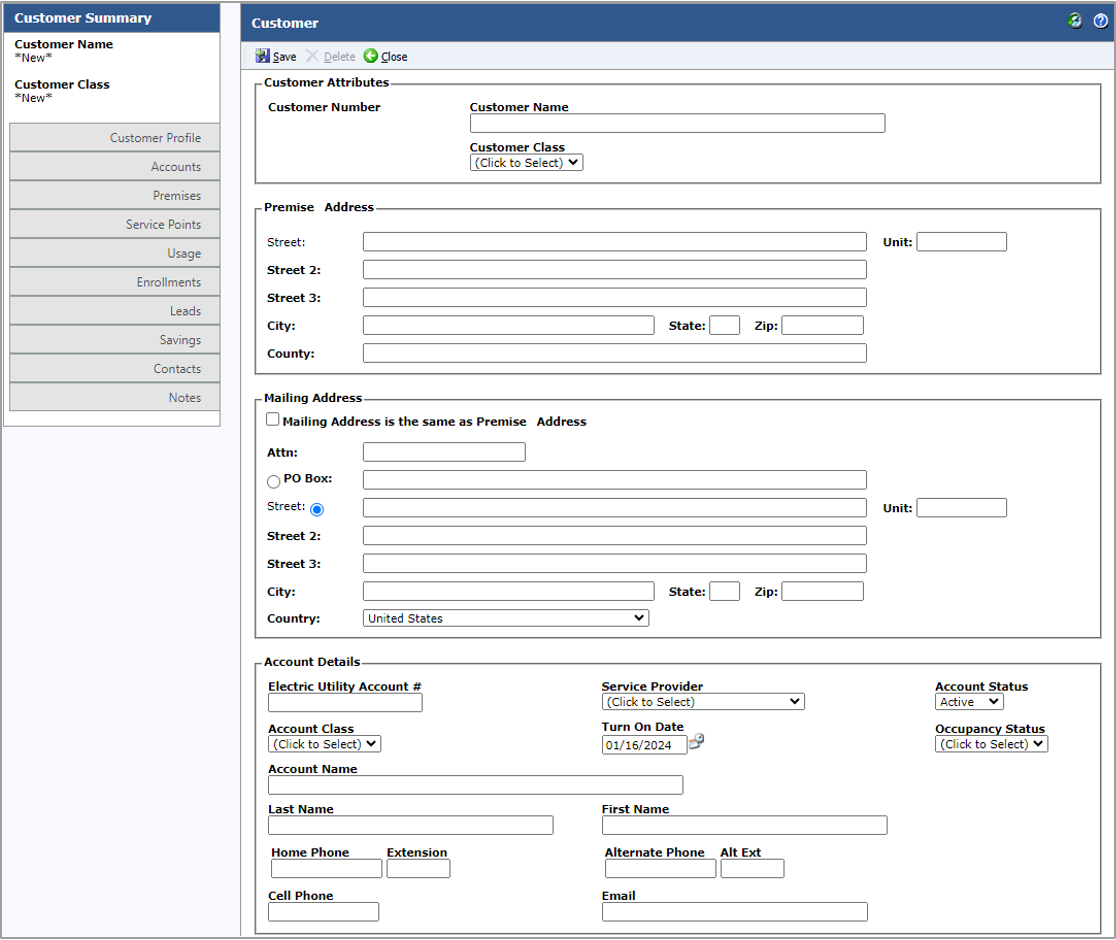
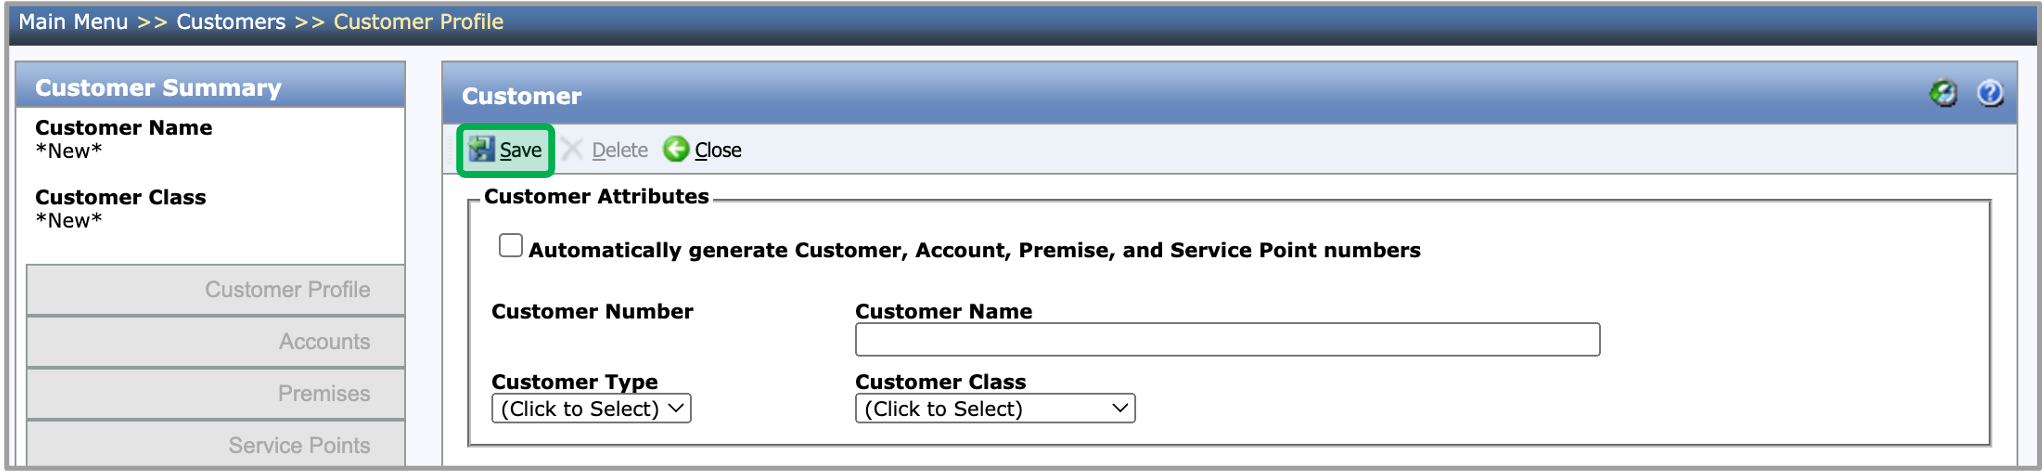
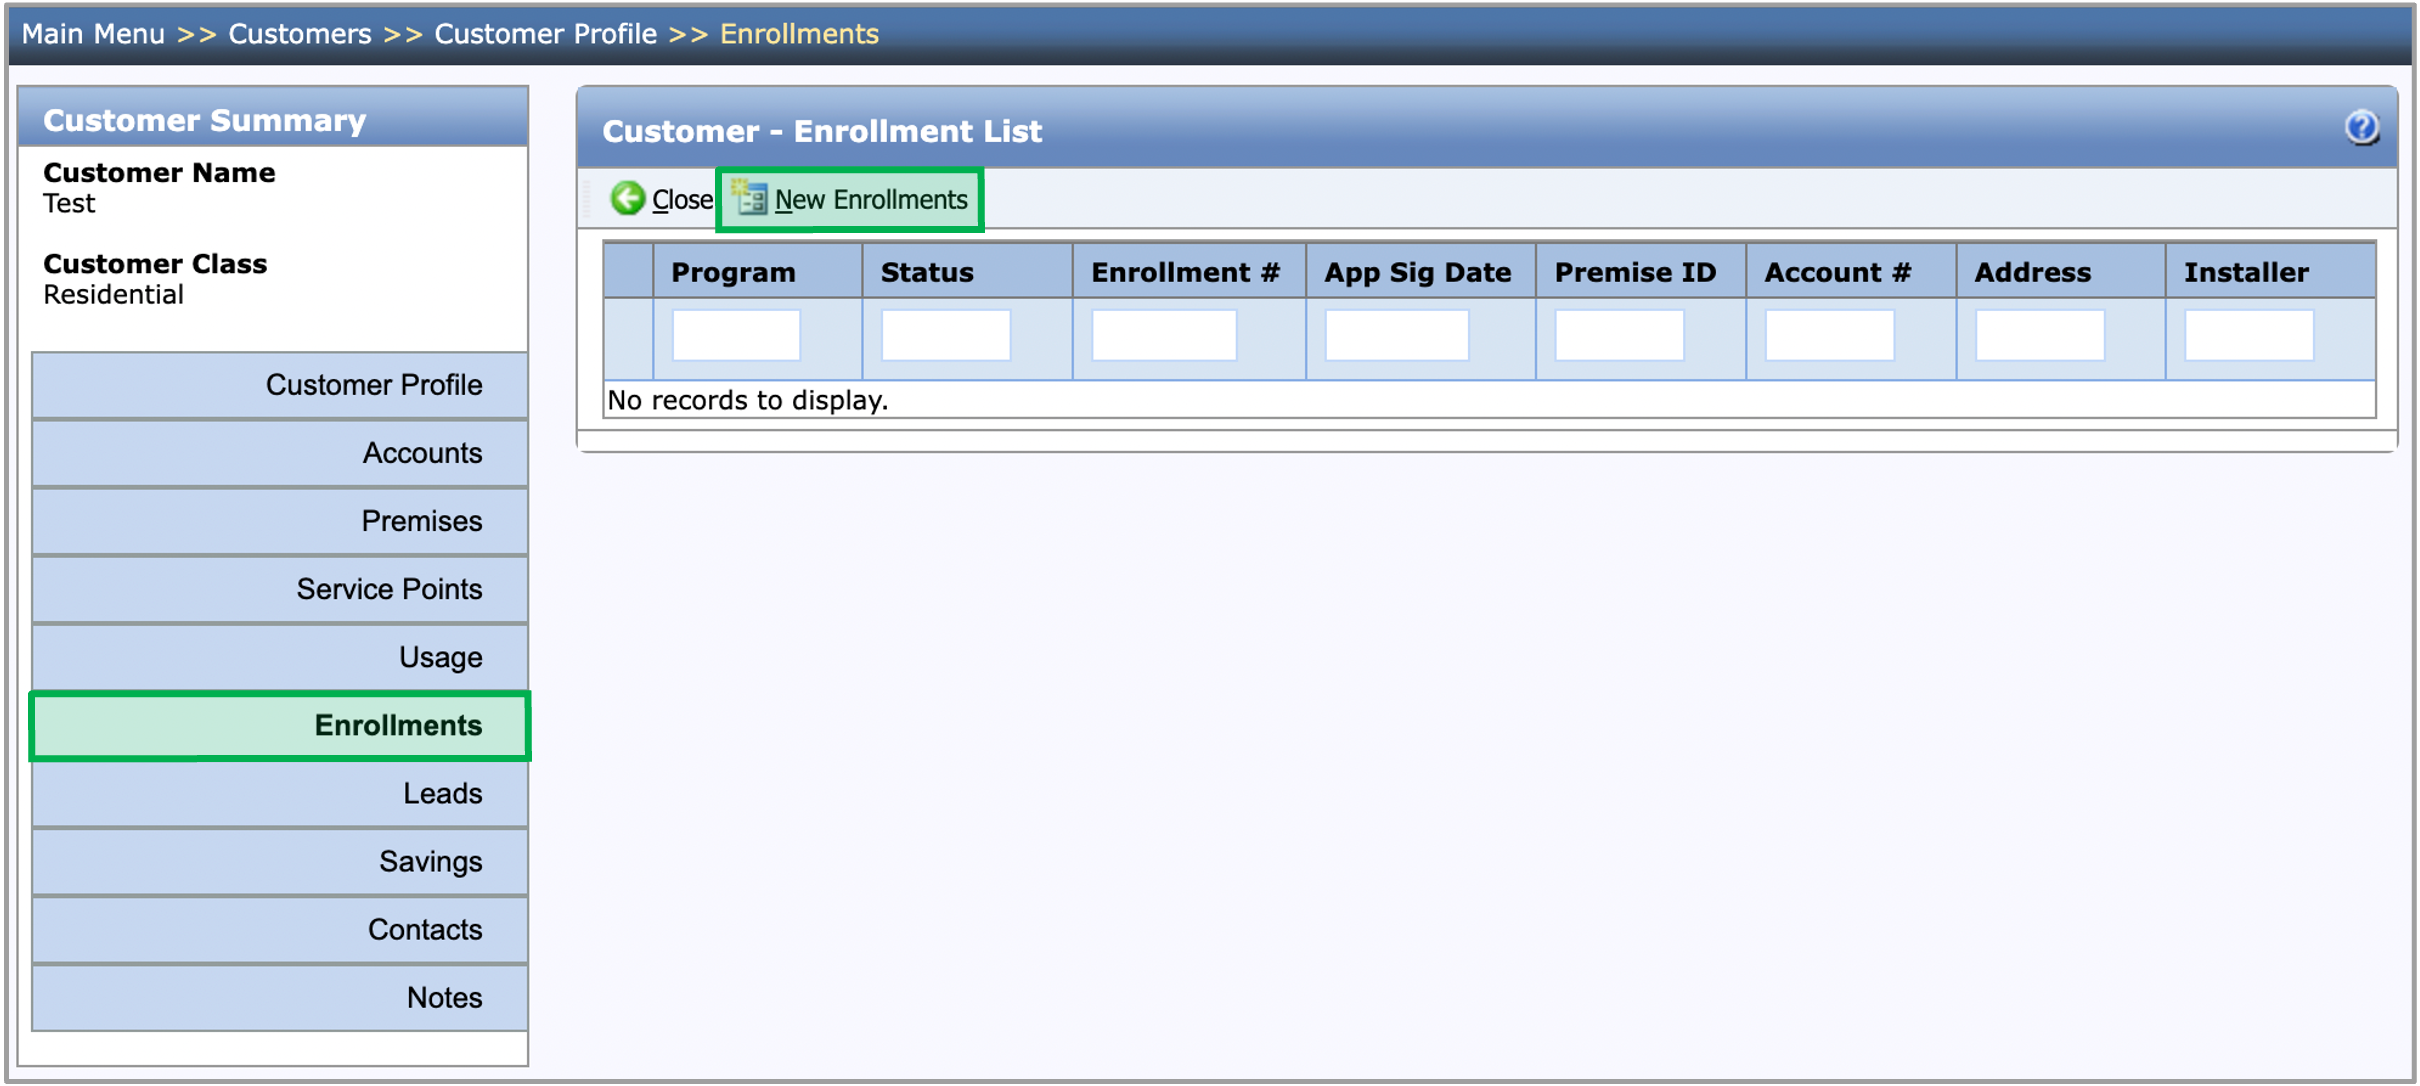
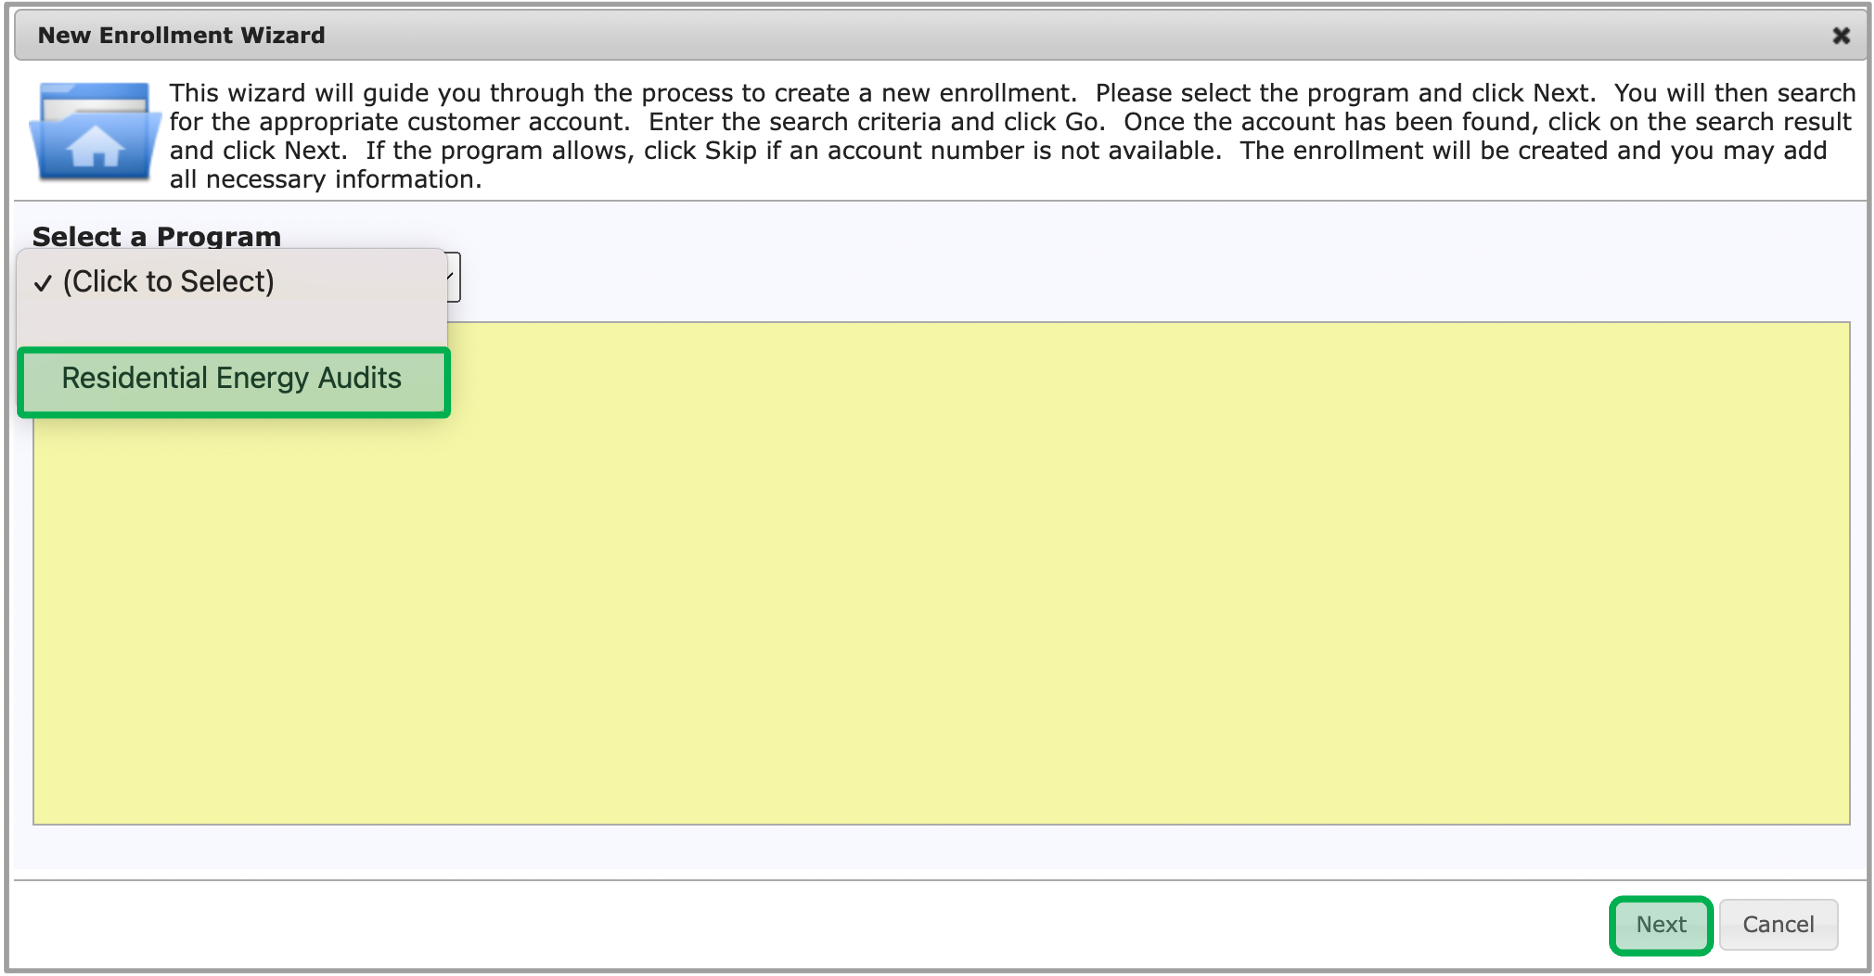
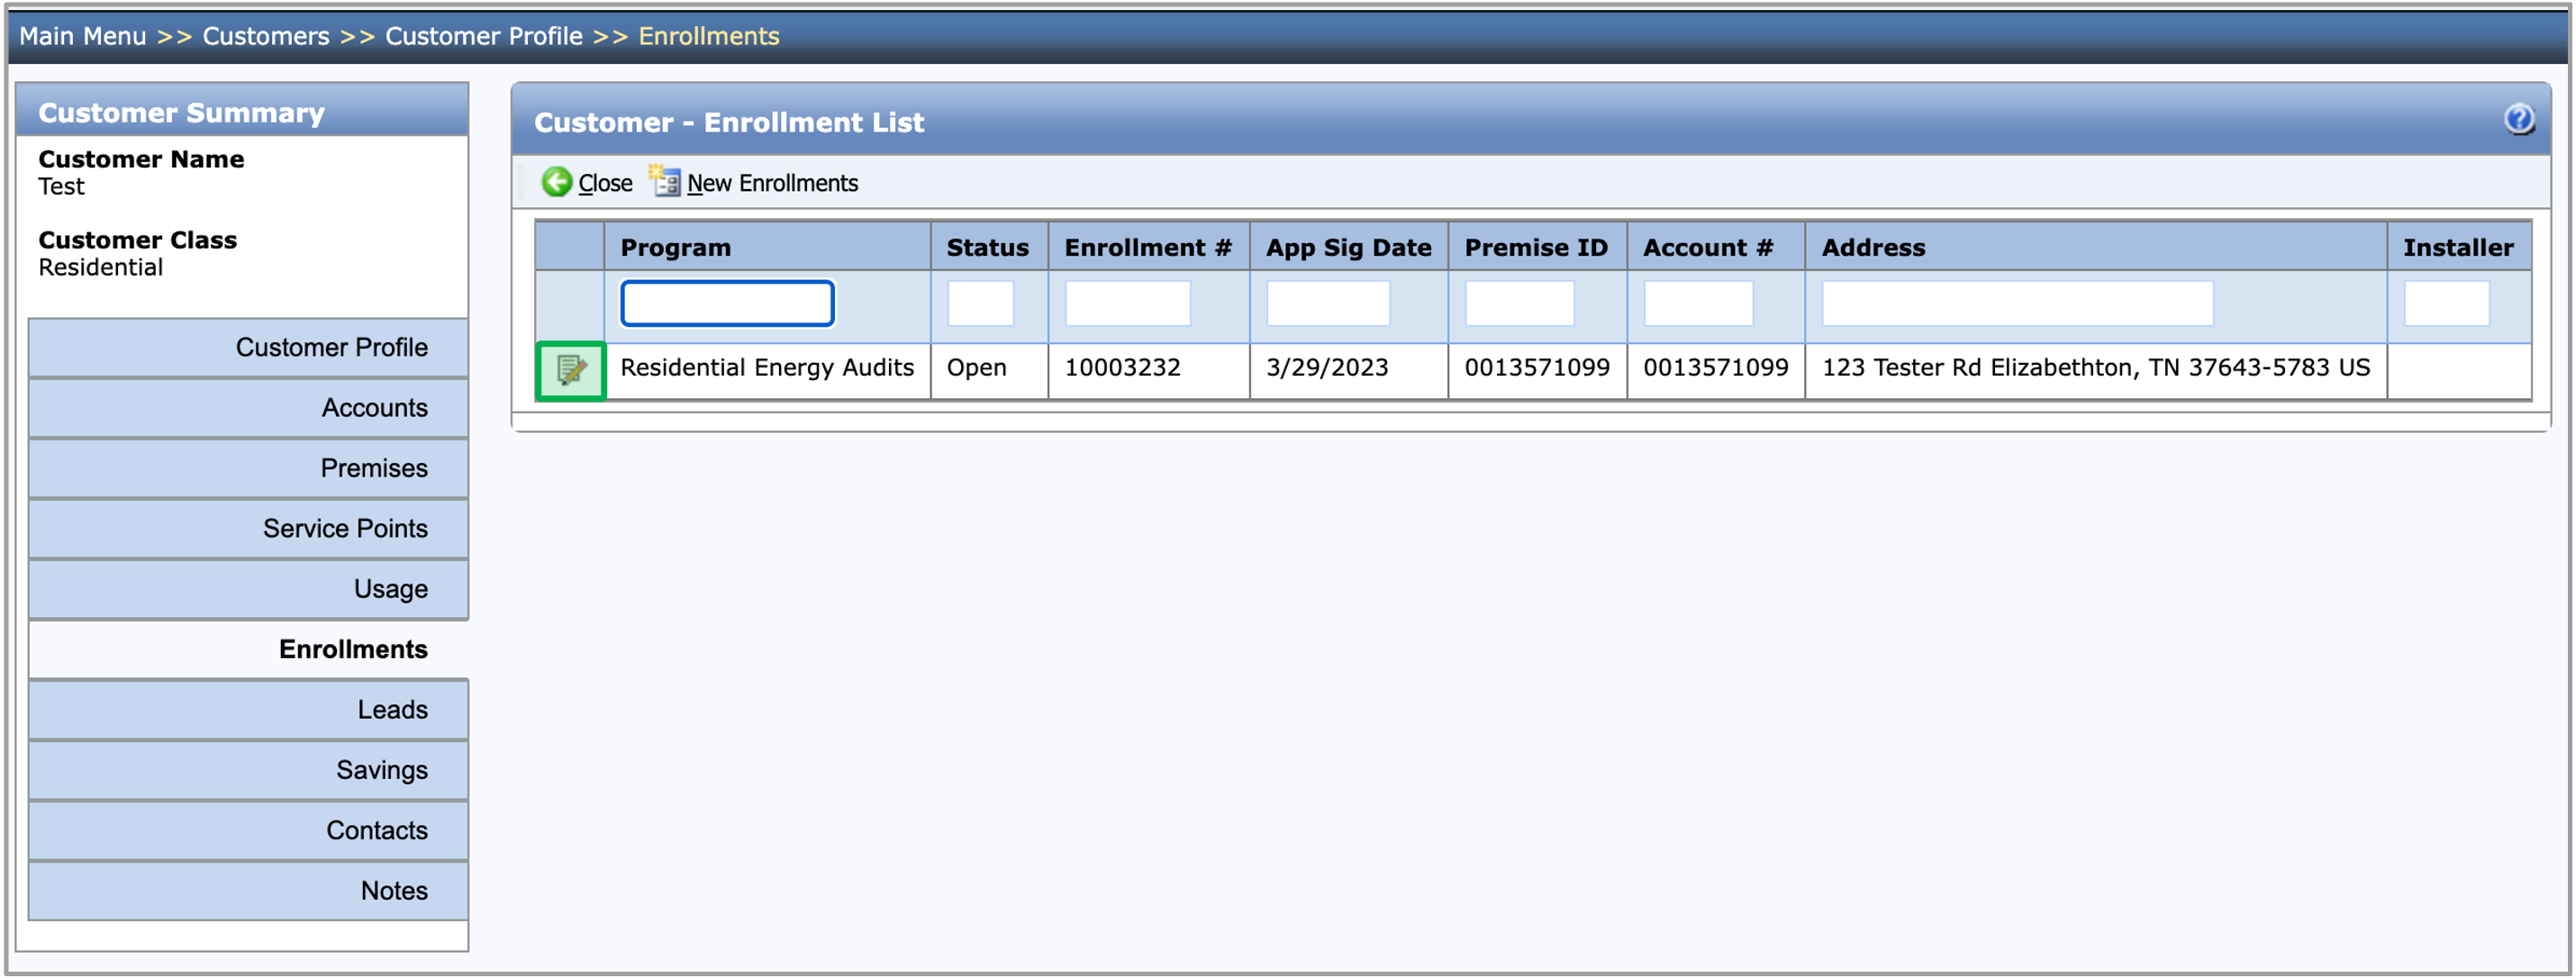
The instructions below provides guidance for contractors to update the Applicant Information, and filling out the Usage & Fuel Information, Existing Conditions, and Partner Information tabs. When a new Residential Energy Audits enrollment is created, it will contain an Assessment Submission step in the New status. The first tab of the Assessment Submission step is the Applicant Information tab. This tab will be prepopulated with the information on the Customer/Account/Premise. If you need to change the Customer Information, Installation Address, or Mailing Address, you can make those changes on the Applicant Information tab, then click Save. |
| UI Steps |
|---|
|
| UI Step |
|---|
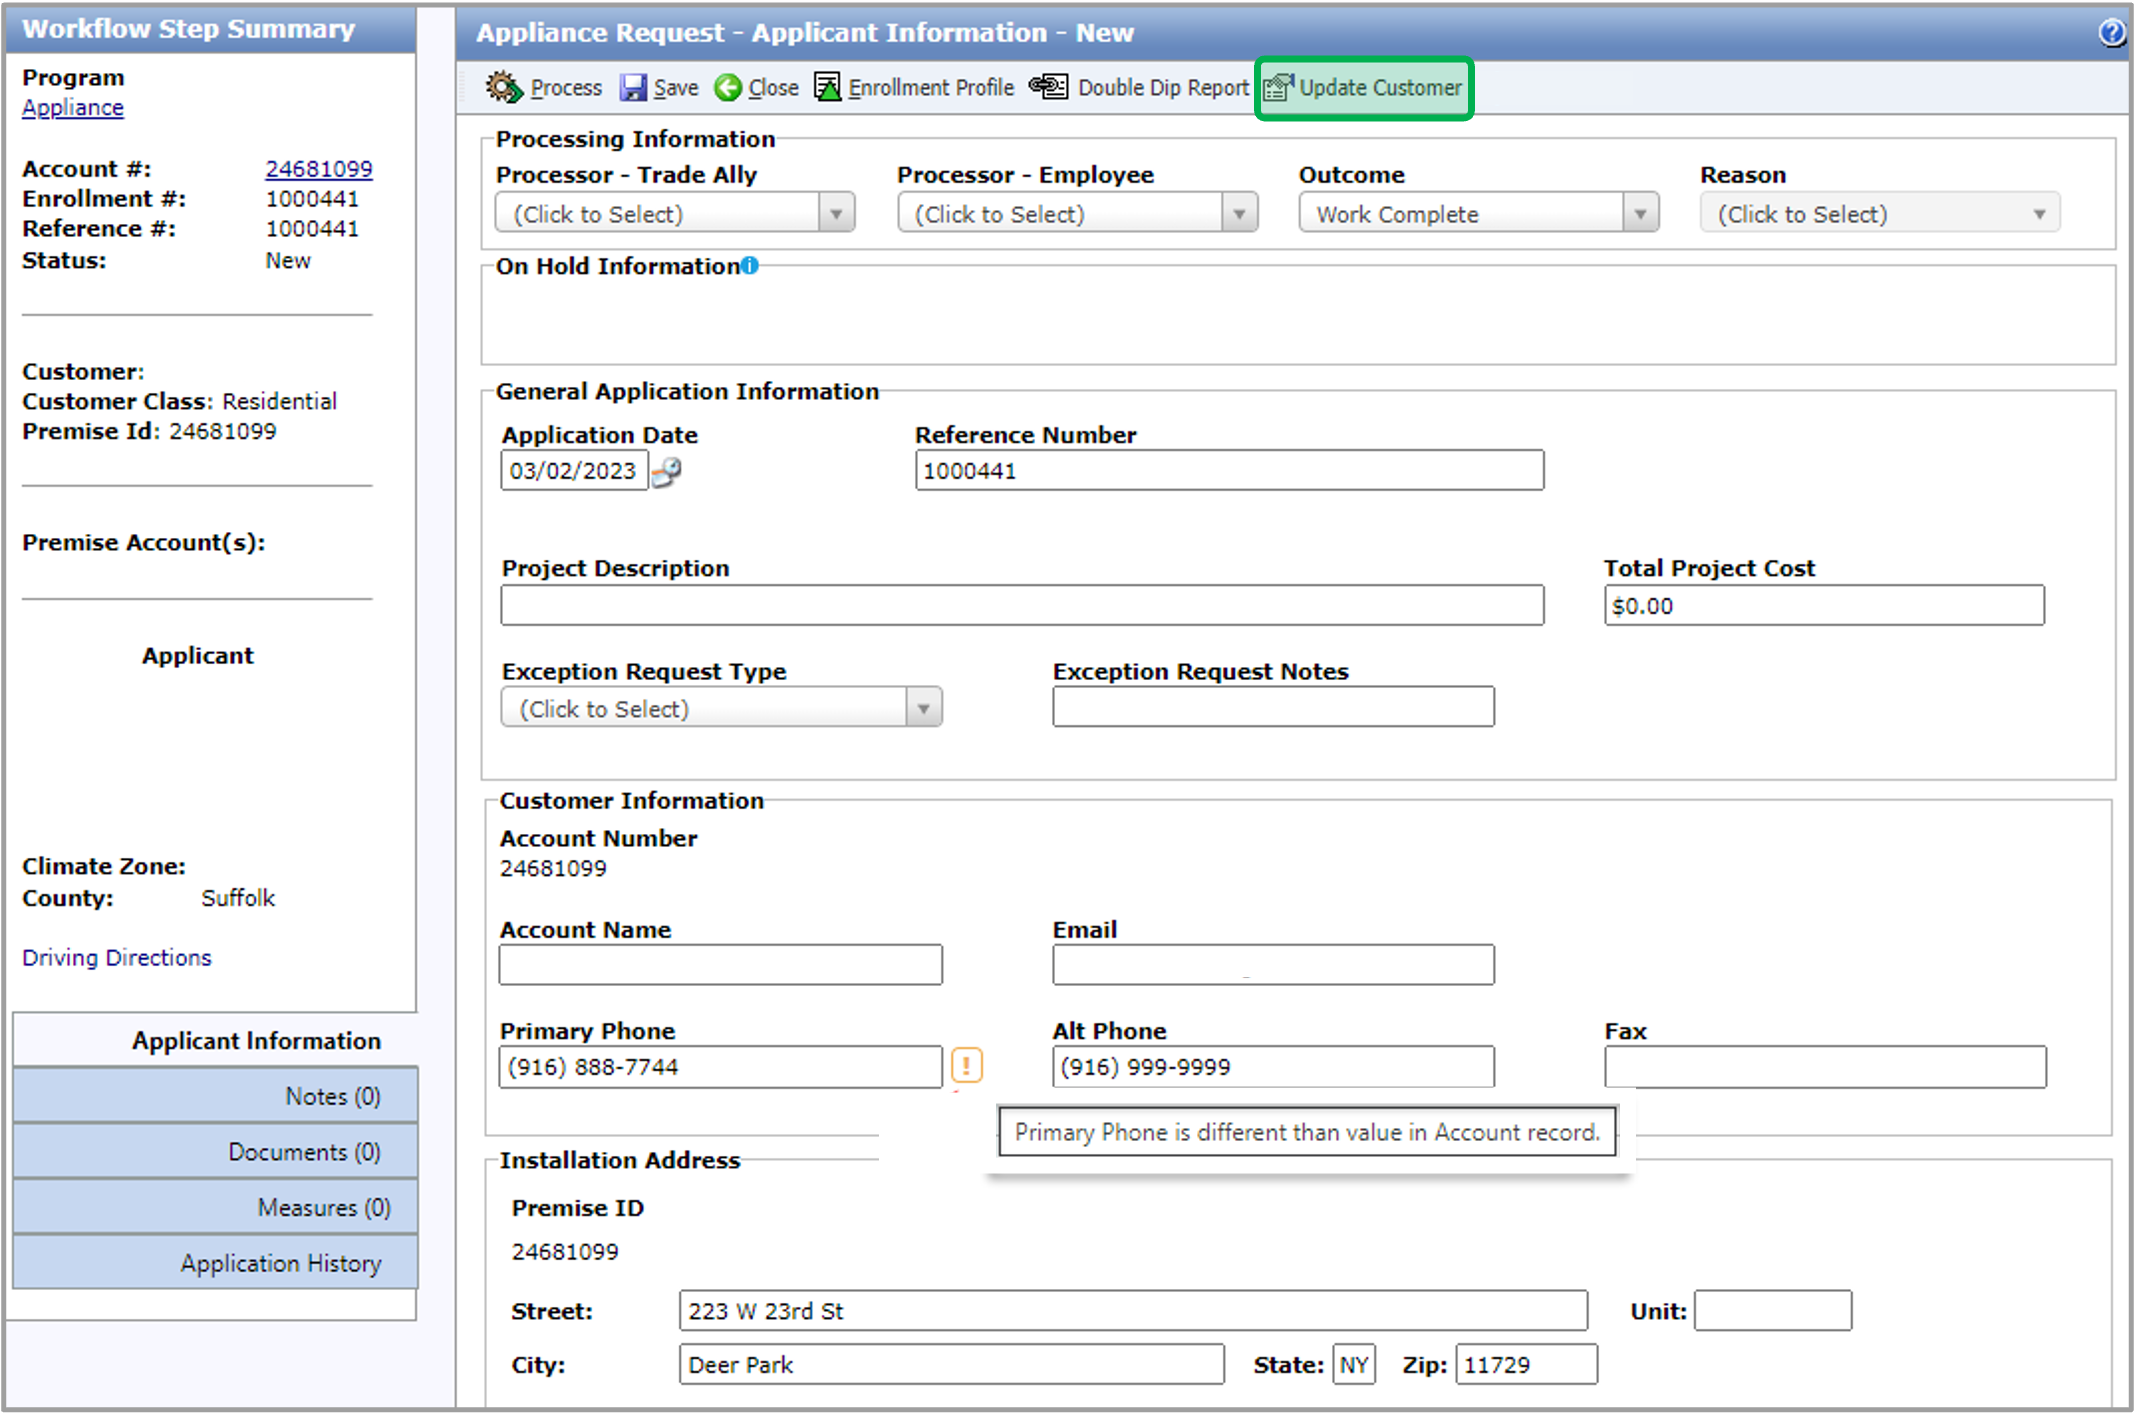
If the new value does not match the value that’s saved on the Customer/Account/Premise, an orange exclamation mark will be displayed next to it. If you hover over the exclamation mark, a tooltip will be displayed indicating that the values are different. You can click the Update Customer button to update the value that’s saved on the Customer/Account/Premise. | Expand |
|---|
| 
|
|
| UI Step |
|---|
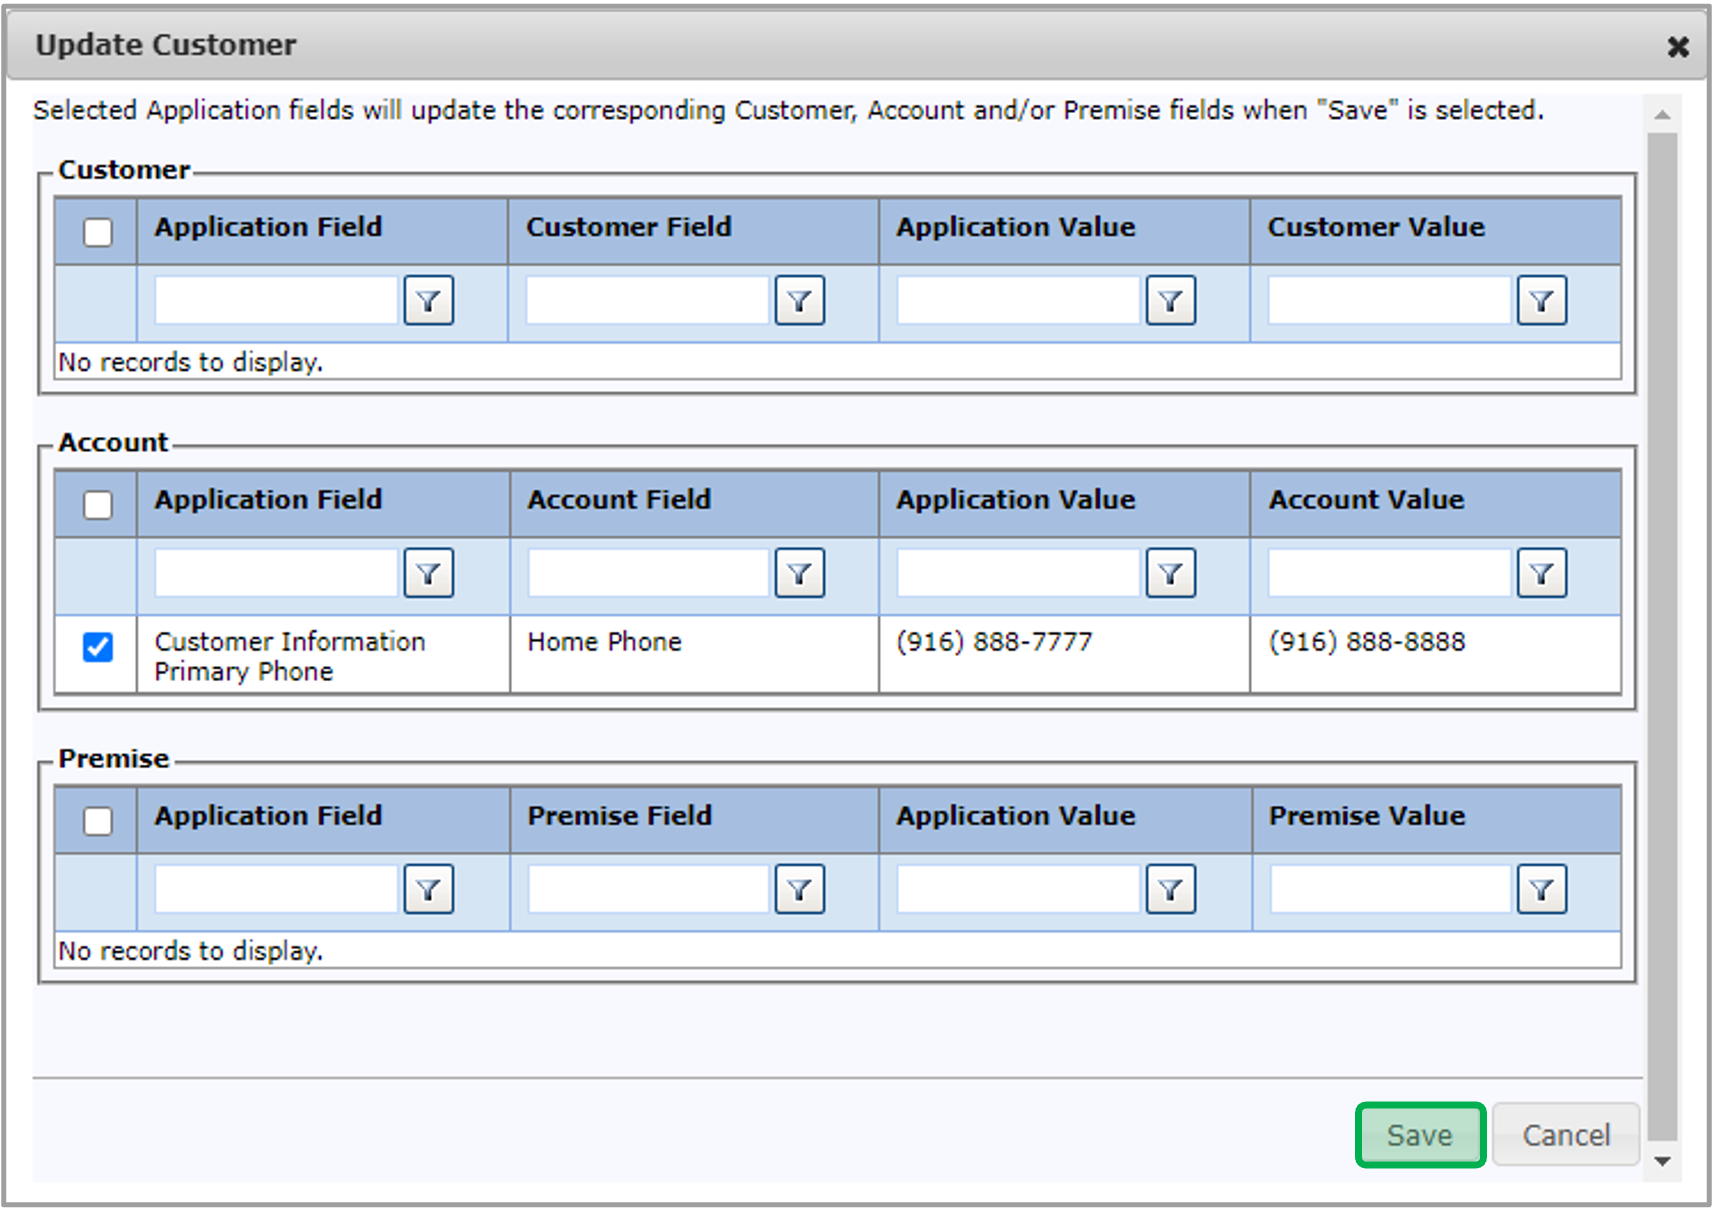
When you click the Update Customer button, the Update Customer dialog will open, displaying every value on the Assessment Submission step that is different than the value saved in the corresponding field on the Customer/Account/Premise. All these fields will be checked by default. When finished updating, click Save in the dialog. The system will update the checked Customer/Account/Premise fields for the values to match the Assessment Submission step. | Expand |
|---|
| 
|
|
| UI Step |
|---|
Back on the Applicant Information page, the Primary Trade Ally section on the Assessment Submission step will default to the Trade Ally and Employee associated with the user that created the enrollment. To change the Trade Ally to a Contractor/Vendor, click the Trade Ally Name Hyperlink. | Expand |
|---|
| 
|
|
| UI Step |
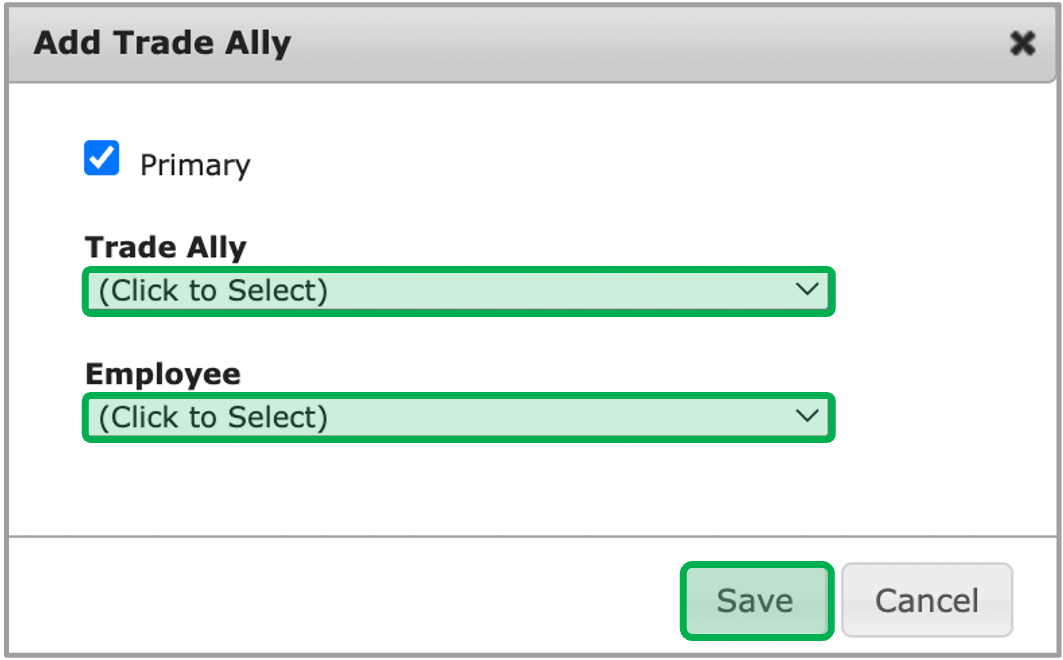
|---|
After you click the Trade Ally Name hyperlink, the Add Trade Ally dialog will open. Select the correct Contractor/Vendor and Employee in the Trade Ally and Employee dropdowns, then click Save. | Expand |
|---|
| 
|
|
| UI Step |
|---|
Once all of the required tabs are filled out, click on the Notes tab to learn how to add a note. |
|
|
| Aura - Tab |
|---|
|
| Panel |
|---|
| borderColor | #002D72 |
|---|
| bgColor | #F3F4F9 |
|---|
| titleColor | #ffffff |
|---|
| borderWidth | 1 |
|---|
| titleBGColor | #002D72 |
|---|
| borderStyle | none |
|---|
| title | Workscope Submission - Partner Information |
|---|
|
|
| Info |
|---|
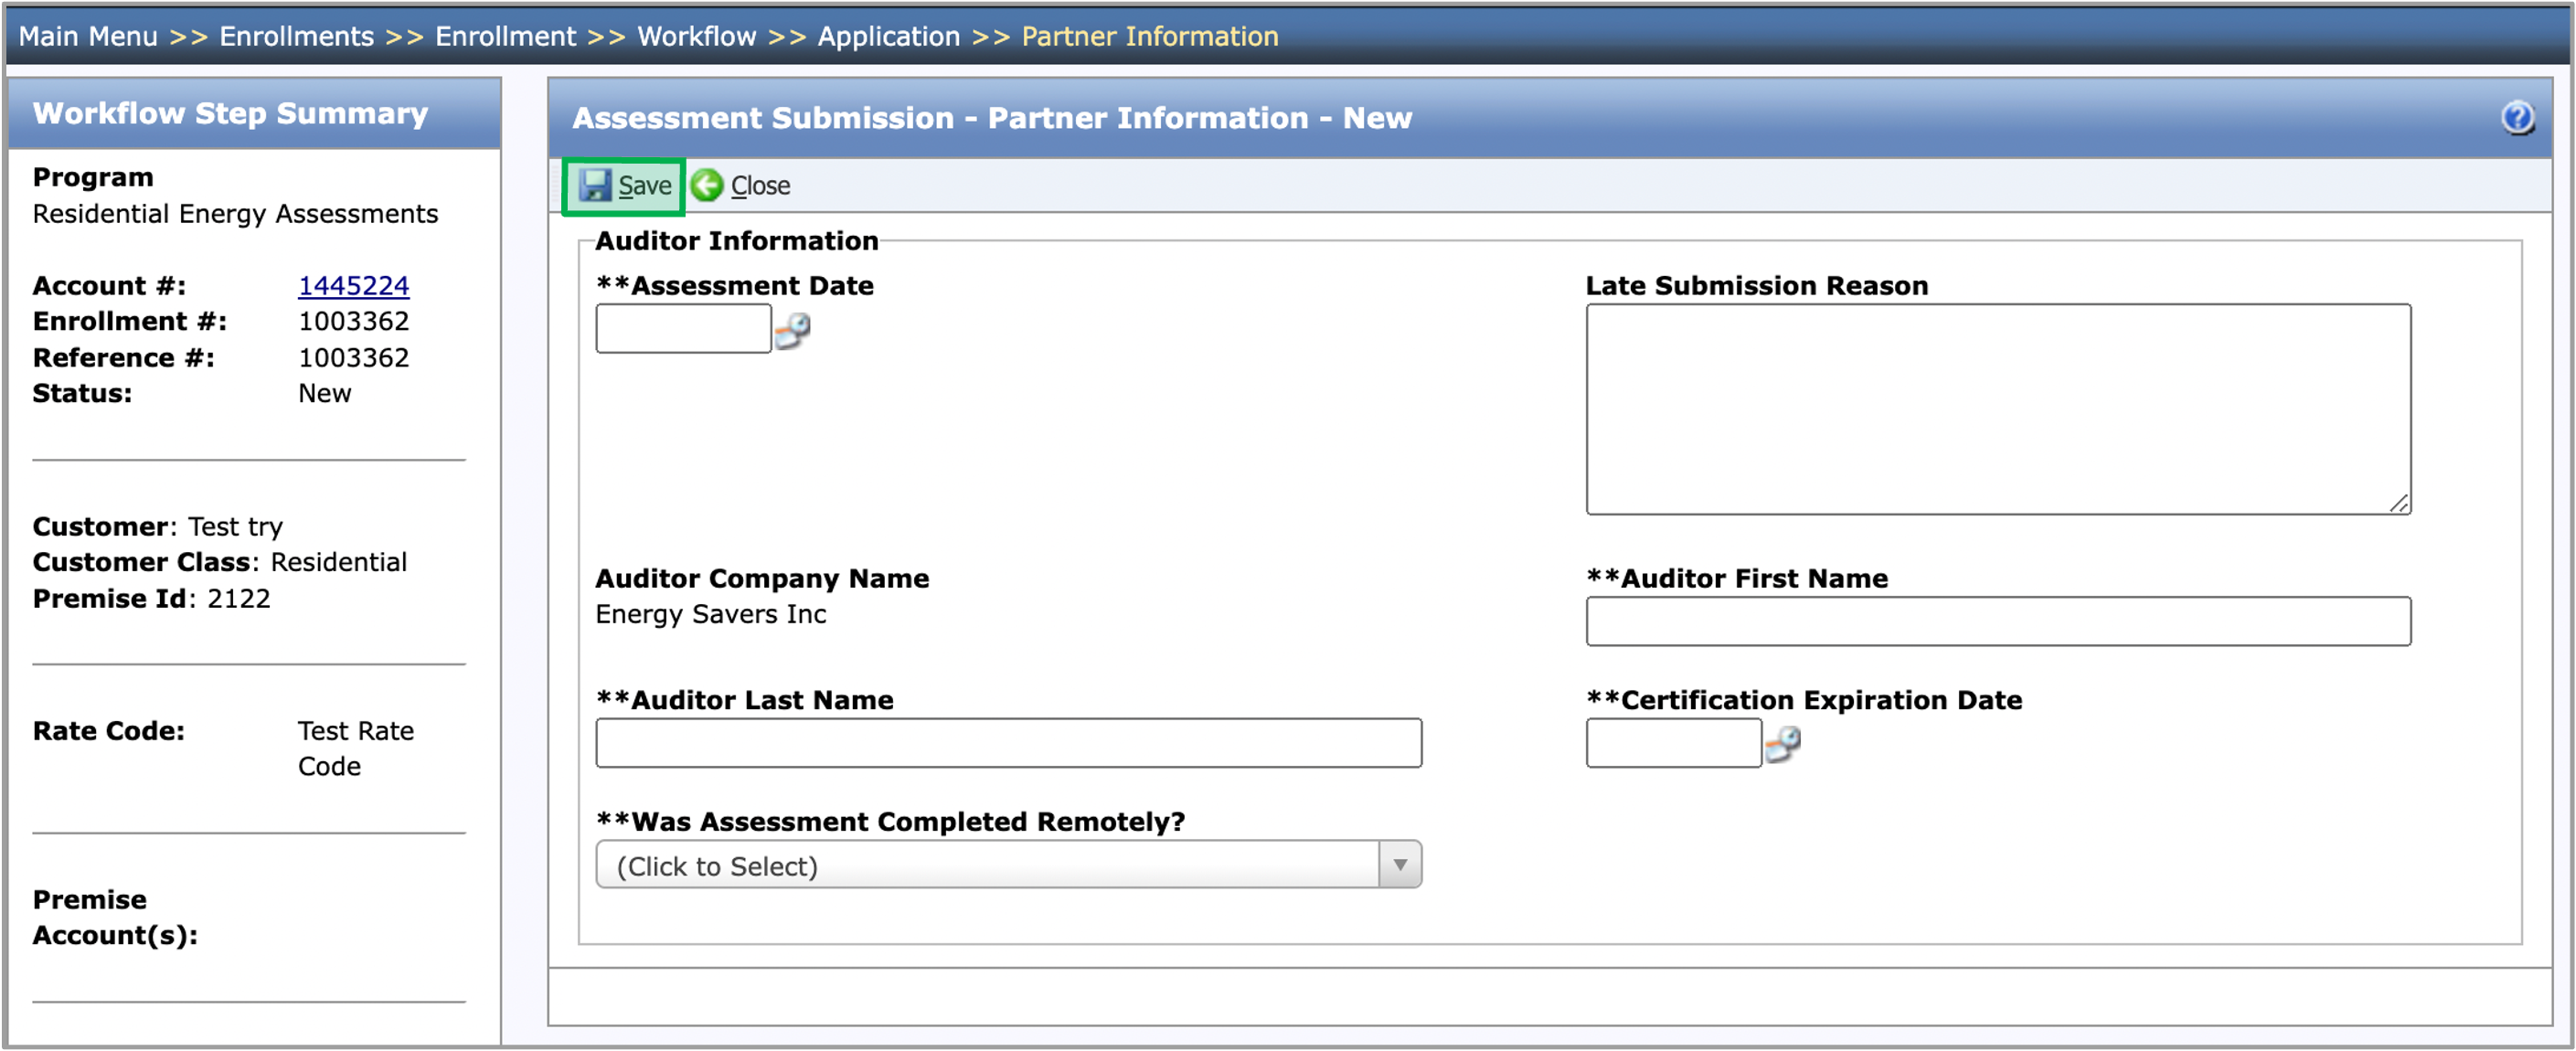
The instruction below provides guidance for contractors to complete the Partner Information tab. |
| Section |
|---|
| Column |
|---|
|
| UI Steps |
|---|
|
| UI Step |
|---|
On the Partner Information tab, Fill in all of the required fields that contains two ** (asterisk). | Tip |
|---|
Depending on the option you select, you may have to respond to additional questions. |
|
| UI Step |
|---|
Once all of the required fields are complete, click the Save button and move on the to Other Information tab. |
|
|
| Column |
|---|
| 
|
|
|
| Aura - Tab |
|---|
|
| Panel |
|---|
| borderColor | #002D72 |
|---|
| bgColor | #F3F4F9 |
|---|
| titleColor | #ffffff |
|---|
| borderWidth | 1 |
|---|
| titleBGColor | #002D72 |
|---|
| borderStyle | none |
|---|
| title | Assessment Submission - Notes |
|---|
|
|
| Excerpt Include |
|---|
| NY Home Energy Portal Overview |
|---|
| NY Home Energy Portal Overview |
|---|
| nopanel | true |
|---|
|
|
| Aura - Tab |
|---|
|
| Panel |
|---|
| borderColor | #002D72 |
|---|
| bgColor | #F3F4F9 |
|---|
| titleColor | #ffffff |
|---|
| borderWidth | 1 |
|---|
| titleBGColor | #002D72 |
|---|
| borderStyle | none |
|---|
| title | Assessment Submission - Documents |
|---|
|
|
| Info |
|---|
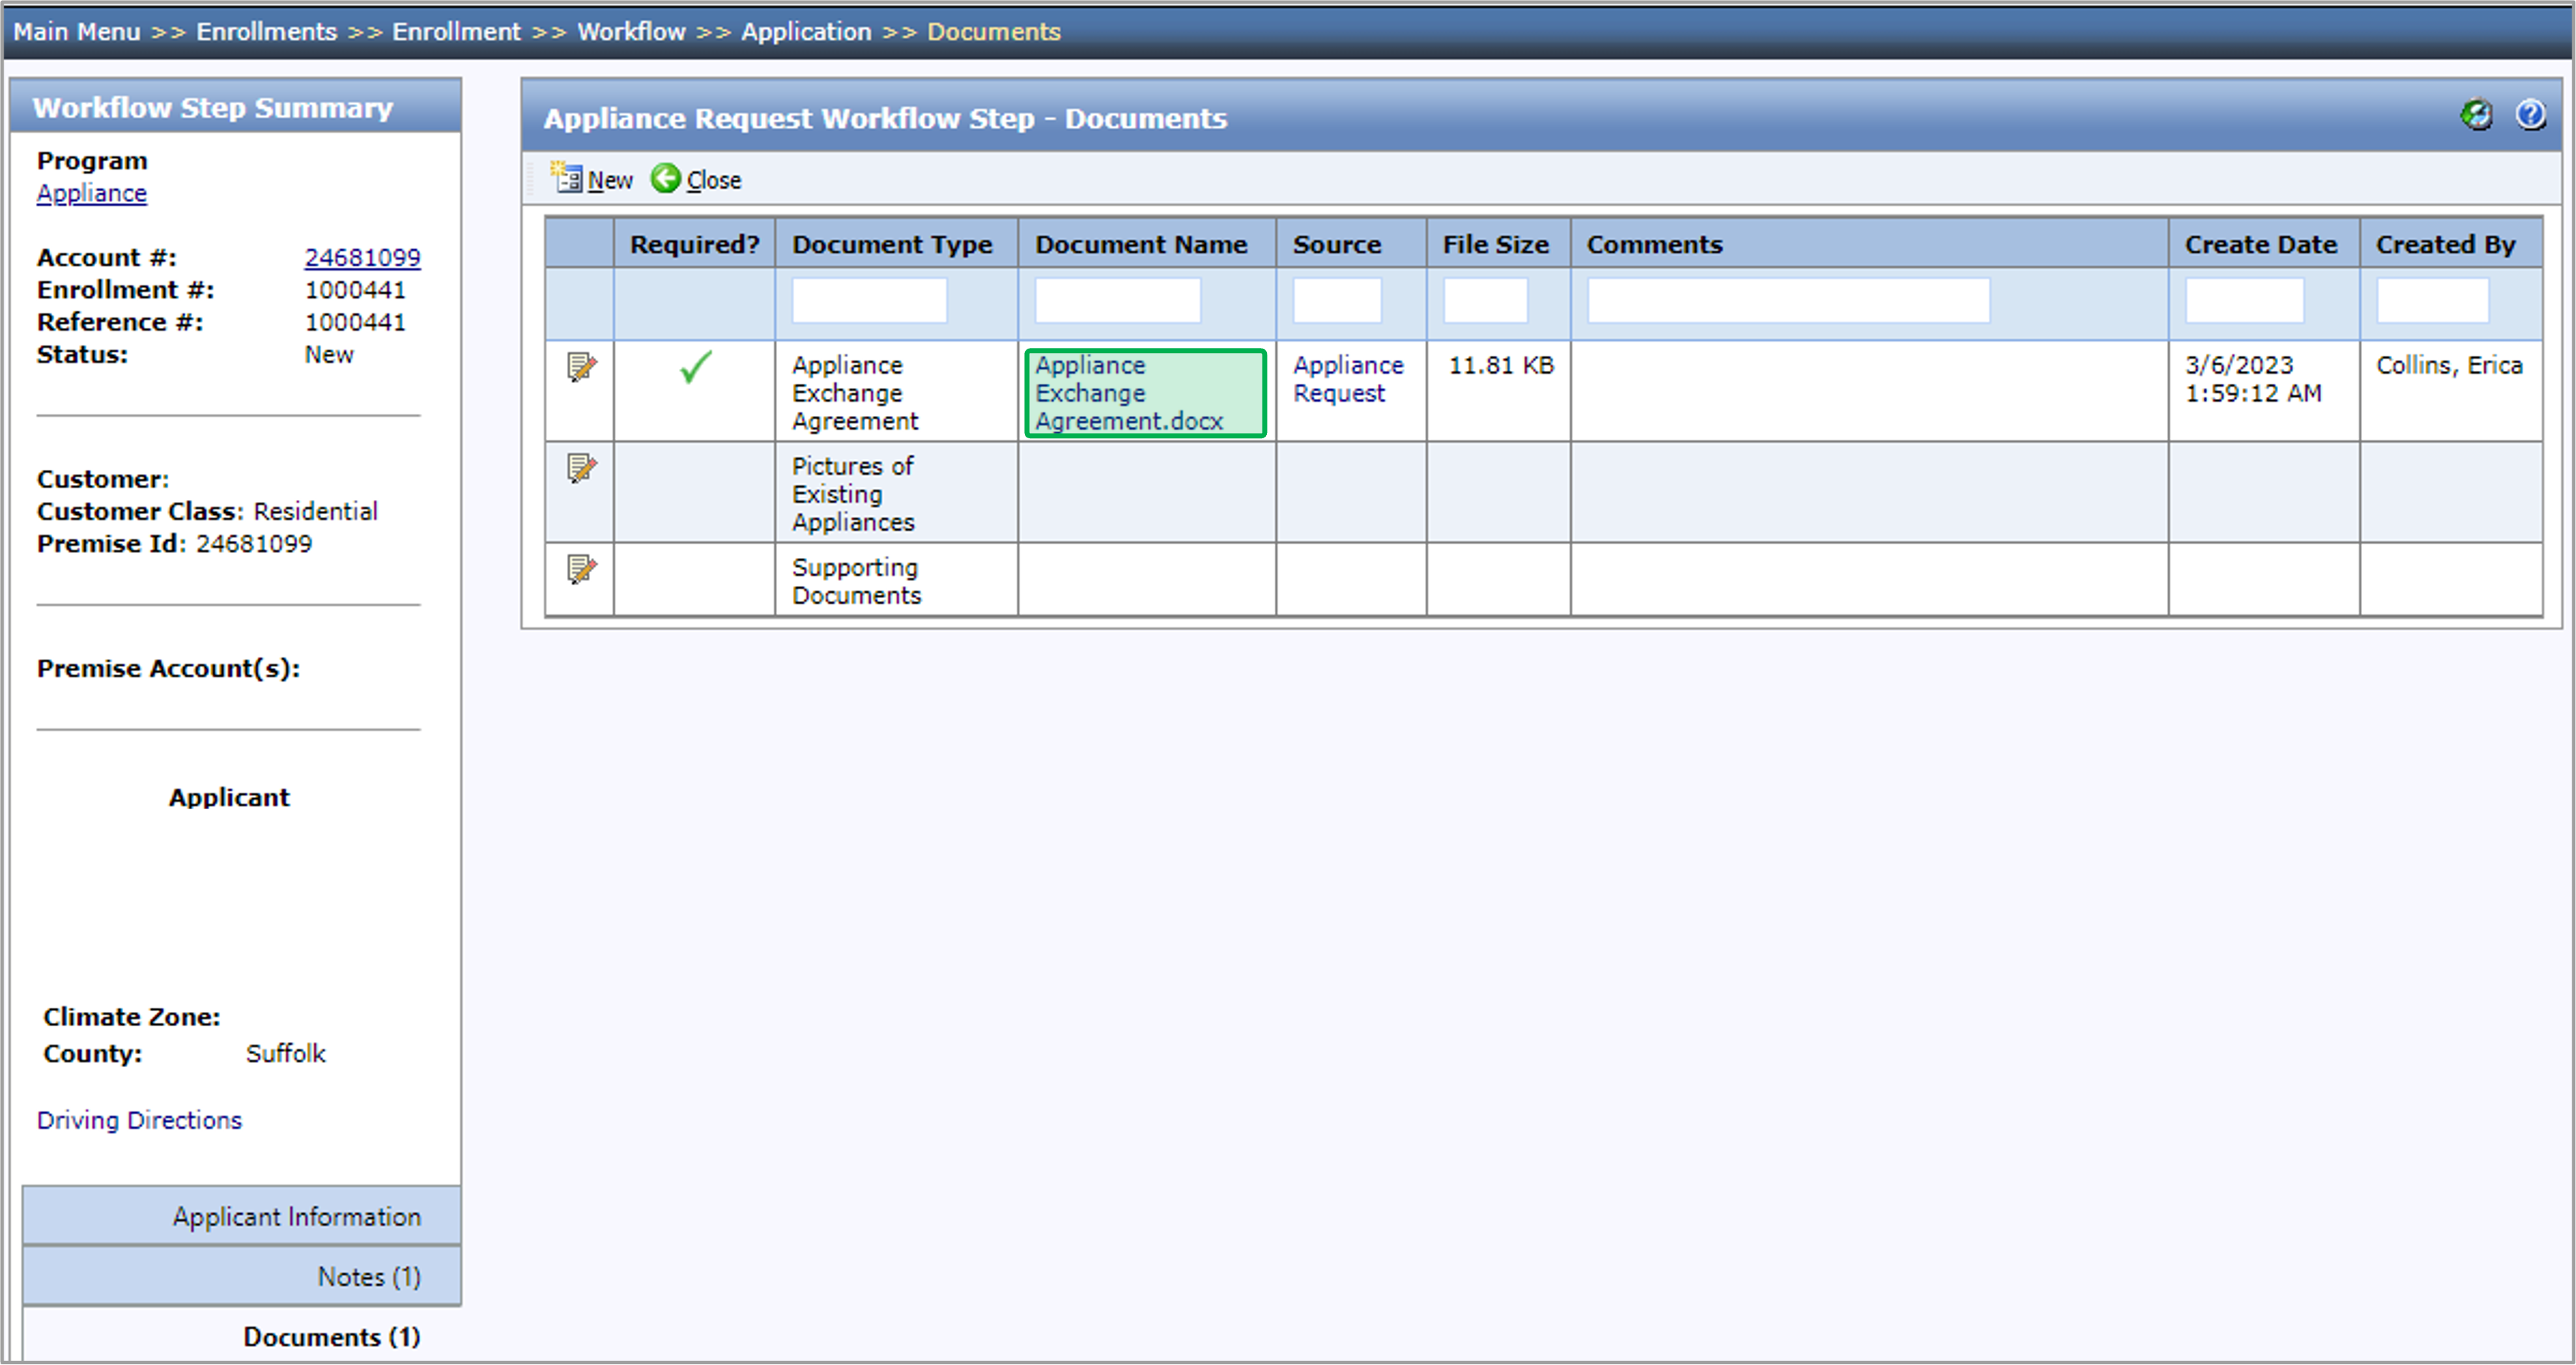
The instruction below provides guidances on how to upload document(s) within an enrollment. A red exclamation mark will be displayed under the Required column indicating the document type being a Required Document. Multiple documents can be uploaded at the same time: PC Users: CTRL + Click Mac Users: Command + Click |
| UI Steps |
|---|
|
| UI Step |
|---|
To upload a Document, access the enrollment's Documents tab during any step. |
| UI Step |
|---|
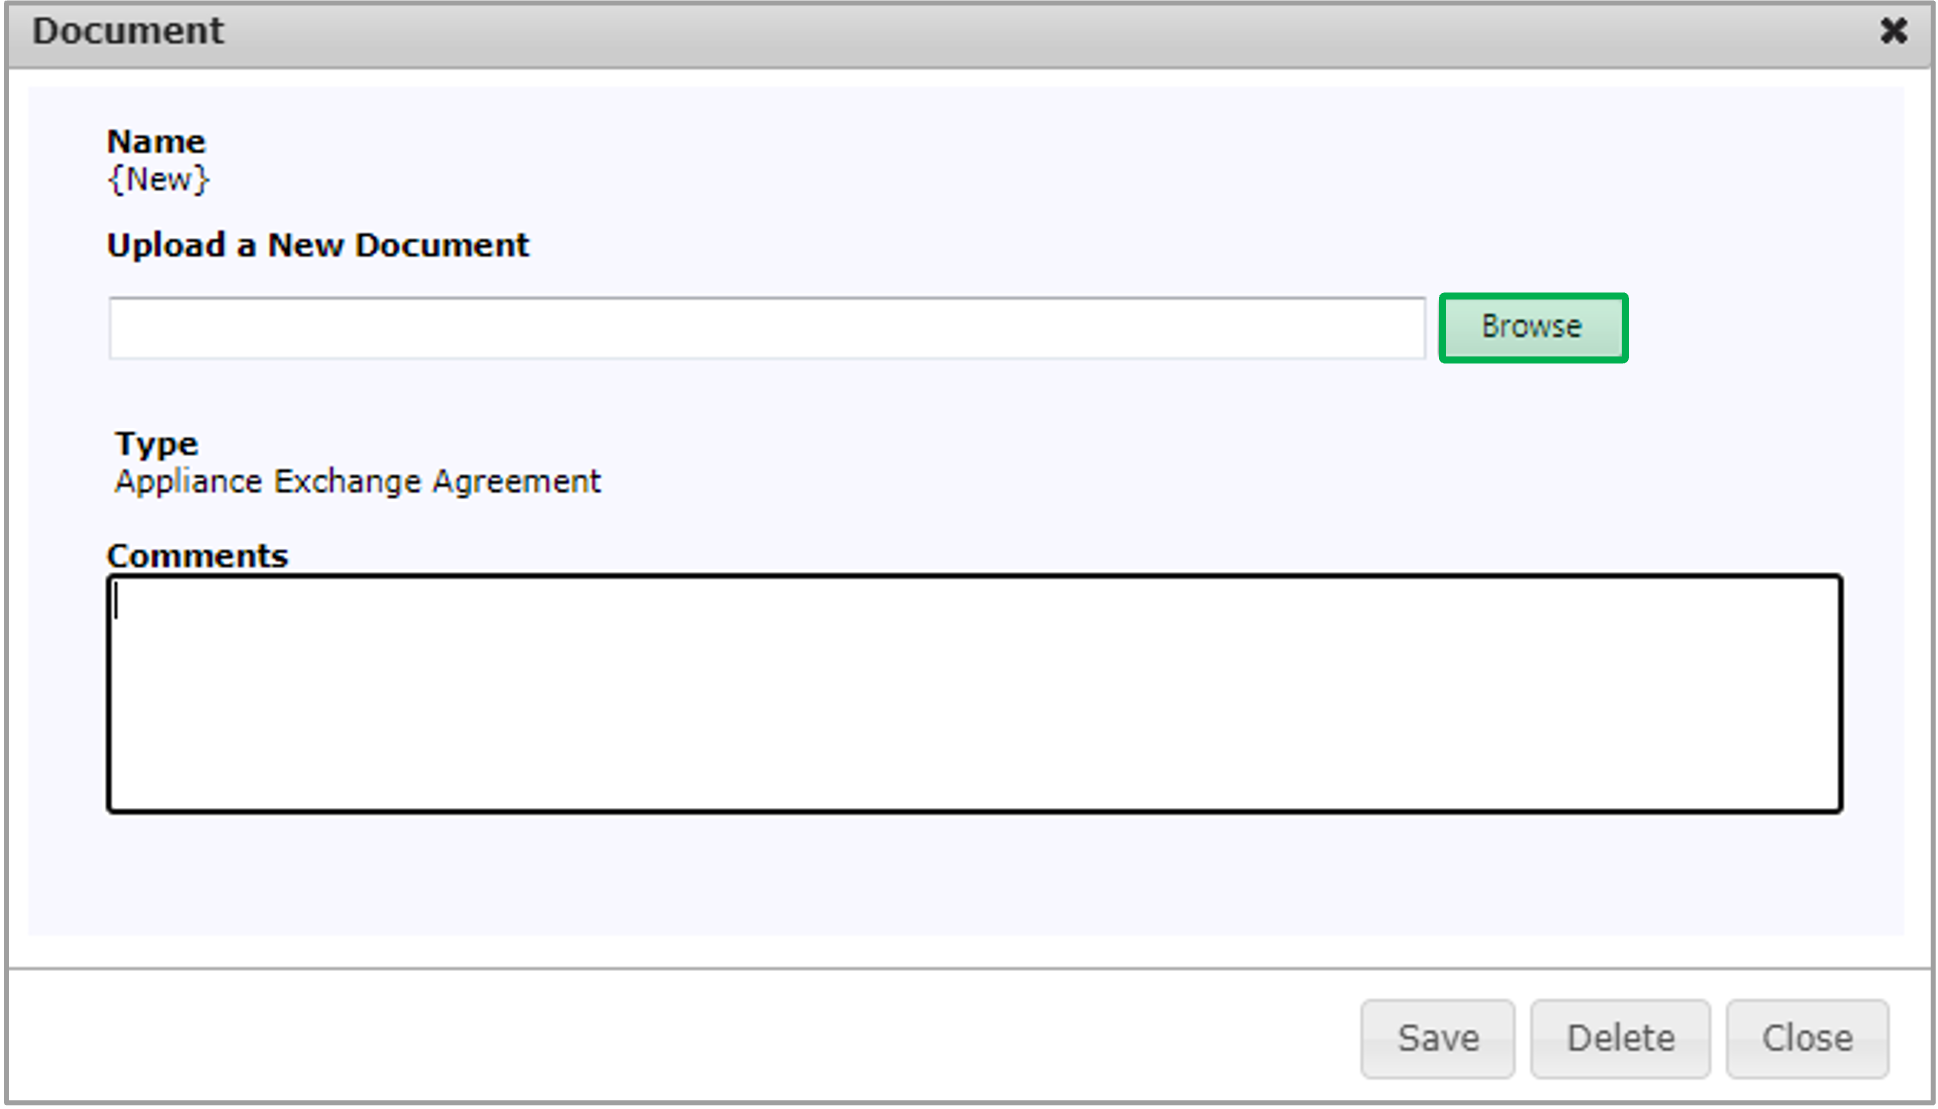
Click the New button for the Document dialog will open. | Expand |
|---|
| 
|
|
| UI Step |
|---|
Click Browse to select a file to upload. | Tip |
|---|
Multiple documents can be uploaded at the same time. |
| Expand |
|---|
| 
|
|
| UI Step |
|---|
After the file is uploaded for the Document Type, click Save and then click Close to upload the file and close the dialog. | Tip |
|---|
After you’ve selected a file, you can remove it by clicking the x Remove button. |
| Warning |
|---|
This is the Contractors last opportunity to click Remove to not upload a specific document. Once Save is clicked, the document becomes a public record and it cannot be edited, deleted, or otherwise overwritten. If the wrong document is uploaded, Contractors will need to upload the correct document and use the Comments fields to let both CLEAResult and NYSERDA know which is the correct document to review. |
| Expand |
|---|
| 
|
|
| UI Step |
|---|
To download and view an uploaded document, click the Document Name Hyperlink. | Expand |
|---|
| 
|
|
|
|
| Aura - Tab |
|---|
|
| Panel |
|---|
| borderColor | #002D72 |
|---|
| bgColor | #F3F4F9 |
|---|
| titleColor | #ffffff |
|---|
| borderWidth | 1 |
|---|
| titleBGColor | #002D72 |
|---|
| borderStyle | none |
|---|
| title | Assessment Submission - Measures |
|---|
|
|
| Info |
|---|
The instruction below provides guidance for contractors to complete the required data entry fields when adding measures to the Assessment Submission step. Some measures will automatically be added to the Measures tab. For measures that are automatically added, they should NOT be deleted. If any of those are deleted, Contractors will have to manually add them back otherwise the system will not allow the Contractor to process the step. As Measures are configured, calculations for Measure Cost, Incentives, and Savings will begin to populate. Contractors may need to click the Save button a few times to have calculations show correctly. Newly added measures will always appear at the top of the list to make them easier to find and configure. Clicking save will alphabetize all measures but the Funding Information measure. That will always be at the bottom and sums up the calculations for all other measures. Once a new measure is accessed to configure, the previous measure will become read only until it is clicked in again. Be sure to save before leaving this tab otherwise the added and configured measures will be lost. For a full list of all program measures that may help with this tab, please access the NY HEP Measures List. |
| UI Steps |
|---|
|
| UI Step |
|---|
On the Measures tab, click the Add Measures button. The Add Measures dialog will open. | Expand |
|---|
| 
|
|
| UI Step |
|---|
To select one or more measures to add to the step, check the box in the left-hand column. To add the selected measures to the step, click the Save button in the dialog. | Tip |
|---|
If you increase the No. to Add value after selecting the measure, the system will add that many unique instances of the measure to the Add Measure step. |
| Expand |
|---|
| 
|
|
| UI Step |
|---|
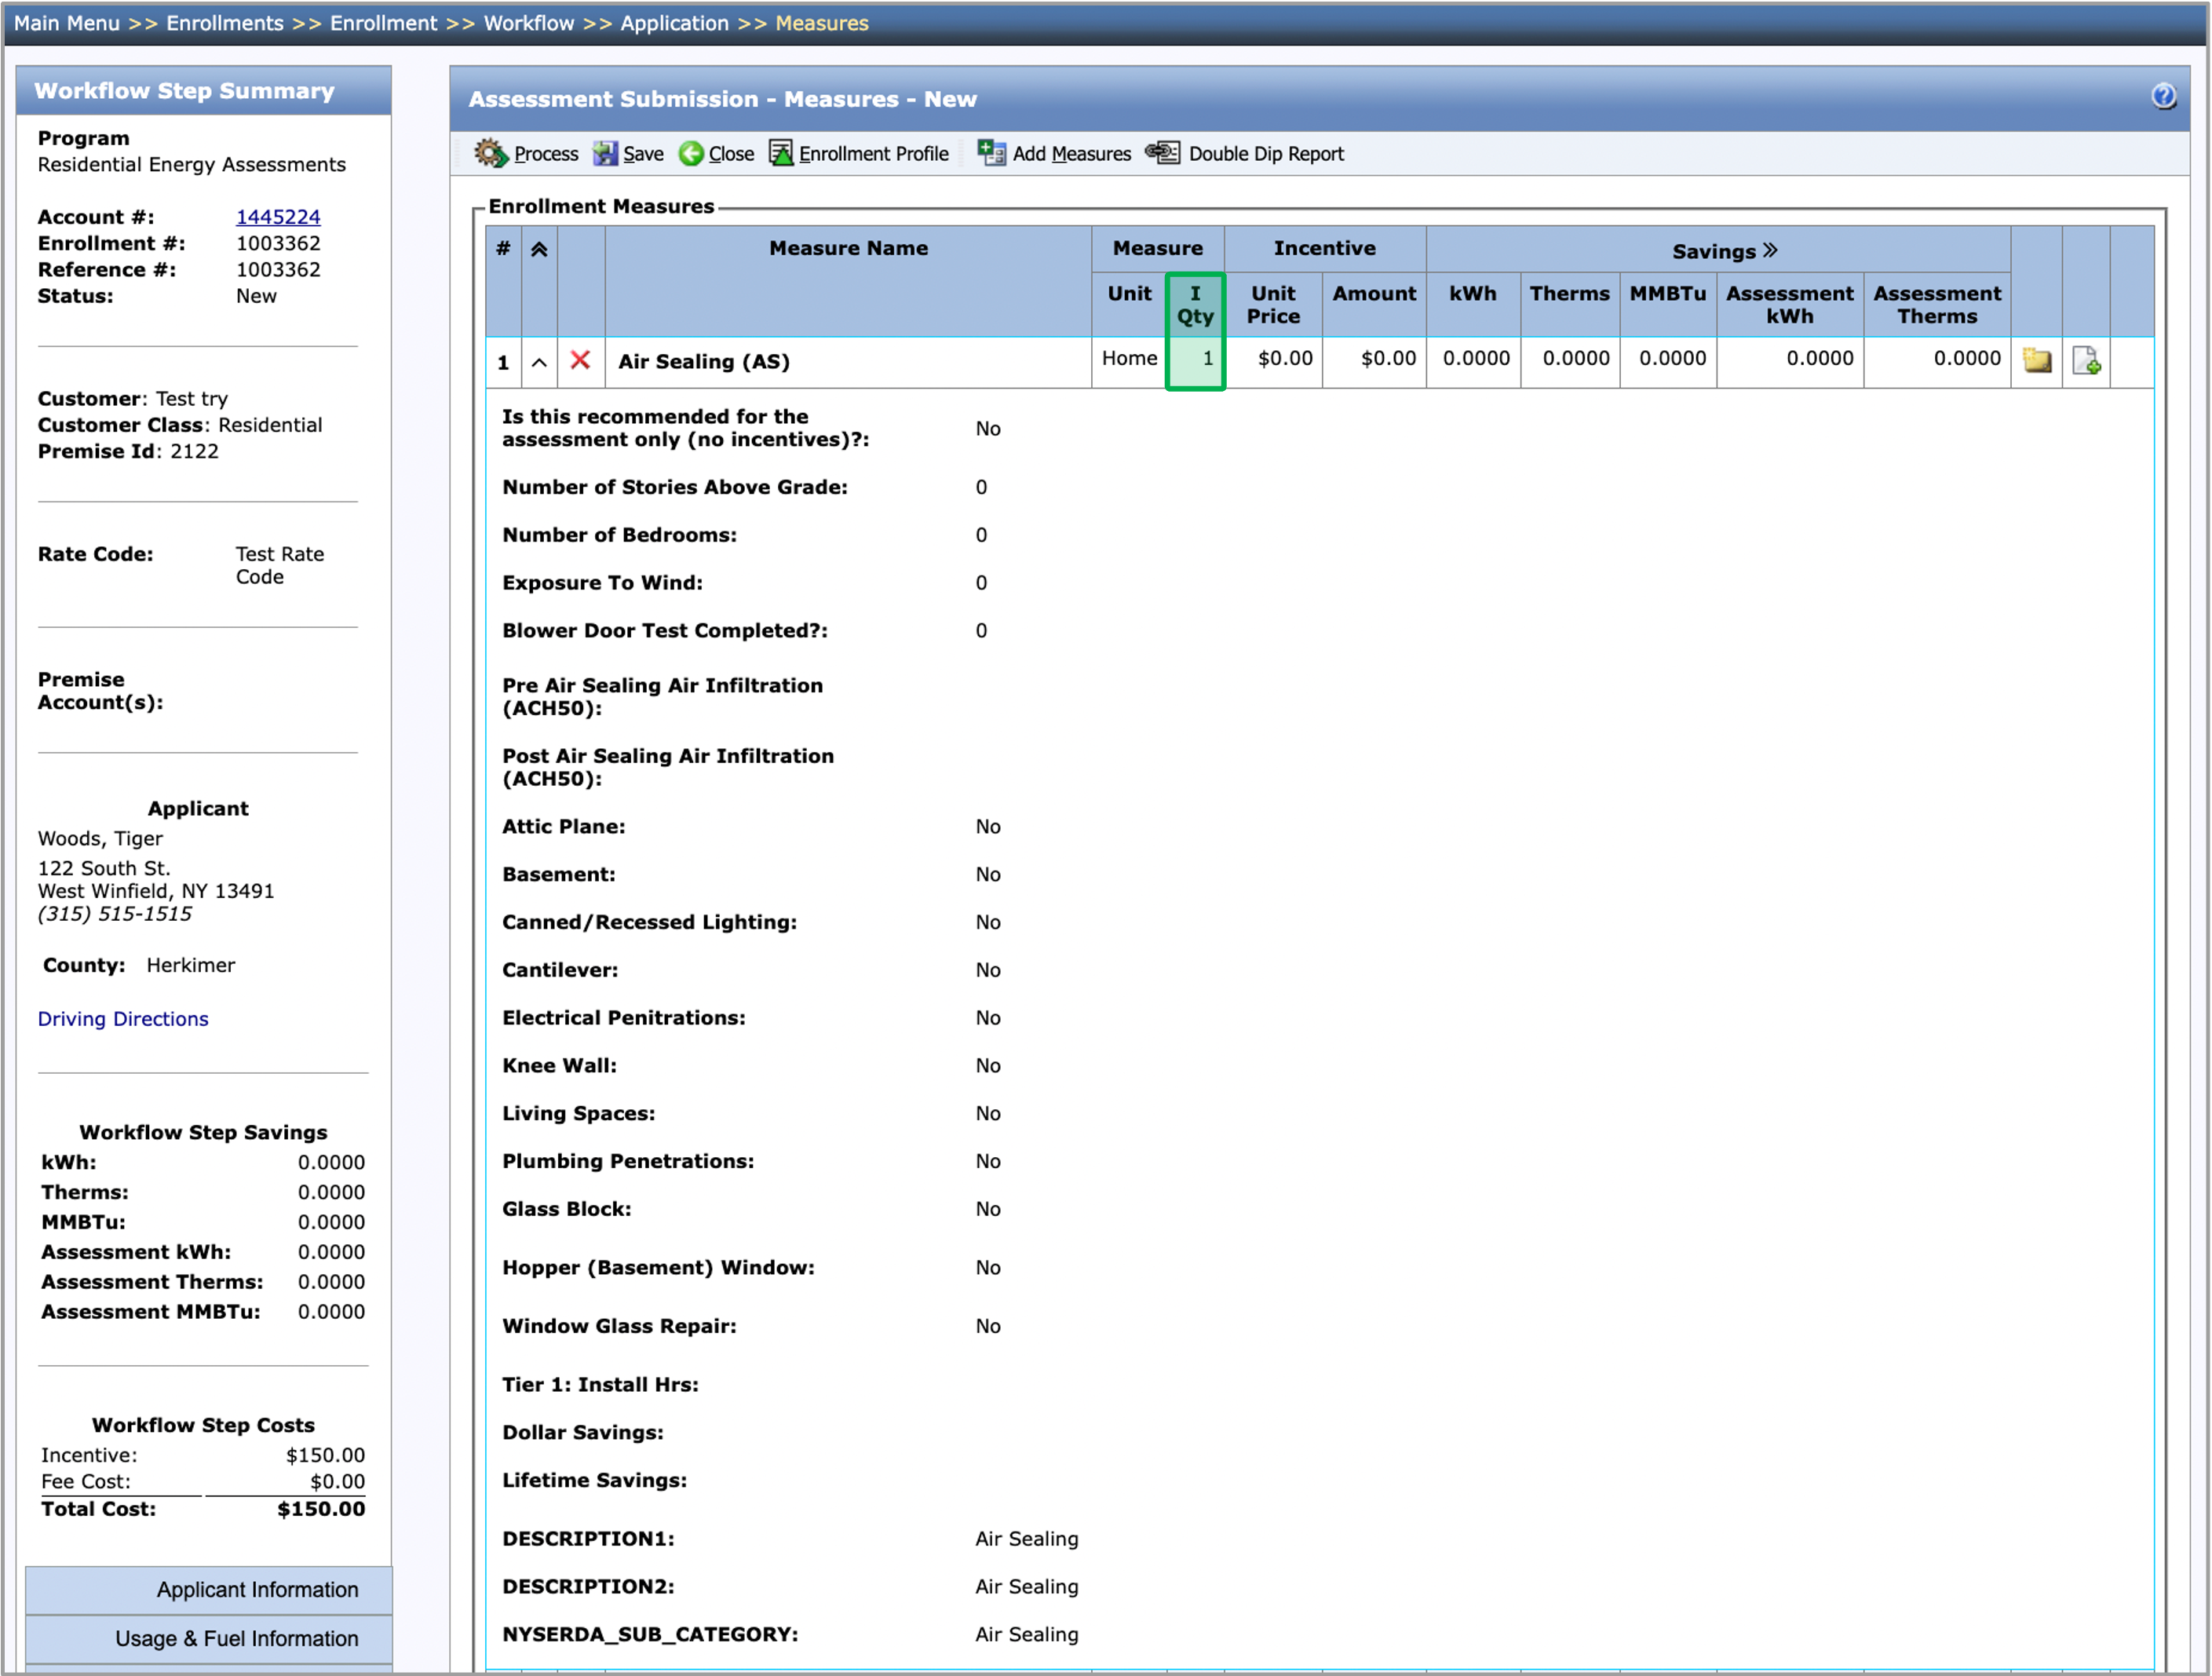
After you add one or more measures to the step, enter each measure’s I Qty (installed quantity) if it is not prepopulated. Then, complete the data entry fields for each measure. Required fields are denoted with **. After all the measures are added and all the data entry fields are filled out, the Appliance Request step can be processed. | Warning |
|---|
If the Contractor leaves the Is this recommended for assessment only question on No, then this is a proposed measure, meaning that the contractor is saying they will do this work. If contractors changes the answer to yes, this work is Recommended and will not be performed by the contractor as part of this project. Recommended measures do no effect Incentive amounts |
| Expand |
|---|
| 
|
|
| UI Step |
|---|
Contractors can delete a Measure by clicking on the Red X button. | Expand |
|---|
| 
|
|
| UI Step |
|---|
The Folder Icon at the fart right of each measure will allow Contractors to add 1 comment per measure per step. These comments are visible during Final Project submission for Measures that come through to the Final Project Submission. | Tip |
|---|
I QTY measures will not show on the Final Project Submission. These are measures that are typically installed during the audit (done before workscope submission and what helps contractors complete the Existing Conditions tab.) Only measures at this step that are P QTY will migrate to Final Project Submission. |
| Expand |
|---|
| 
|
|
| UI Step |
|---|
The Paper Icon at the far right of each measure will allows Contractors to associated previously uploaded documents to specific measures, such as the Workscope Submission Photos (required document). | Expand |
|---|
| 
|
|
| UI Step |
|---|
After all the measures are added and all the data entry fields are filled out, the Assessment Submission step can be processed. Click the Process button at the top of the Measures tab or the Applicant Information tab. | Tip |
|---|
If there are any missing fields, a popup will appear notifying you of what is missing. |
| Expand |
|---|
| 
|
|
| UI Step |
|---|
Once all of the required fields are completed, click the Save button and move on the to the Reports tab. |
|
|
| Aura - Tab |
|---|
|
| Panel |
|---|
| borderColor | #002D72 |
|---|
| bgColor | #F3F4F9 |
|---|
| titleColor | #ffffff |
|---|
| borderWidth | 1 |
|---|
| titleBGColor | #002D72 |
|---|
| borderStyle | none |
|---|
| title | Workscope Submission - Reports |
|---|
|
|
| Info |
|---|
The instructions below provides guidance for contractors to generate reports. The reports tab is used to generate either the Customer Audit Report (required to give to customers to show the work recommend or proposed) and the Pre Install Audit report (which the customer will need to sign so the Contractor can upload during Final Project Submission. |
| UI Steps |
|---|
|
| UI Step |
|---|
On the Reports tab, click the Generate Reports button, a new Report dialog will open. | Expand |
|---|
| 
|
|
| UI Step |
|---|
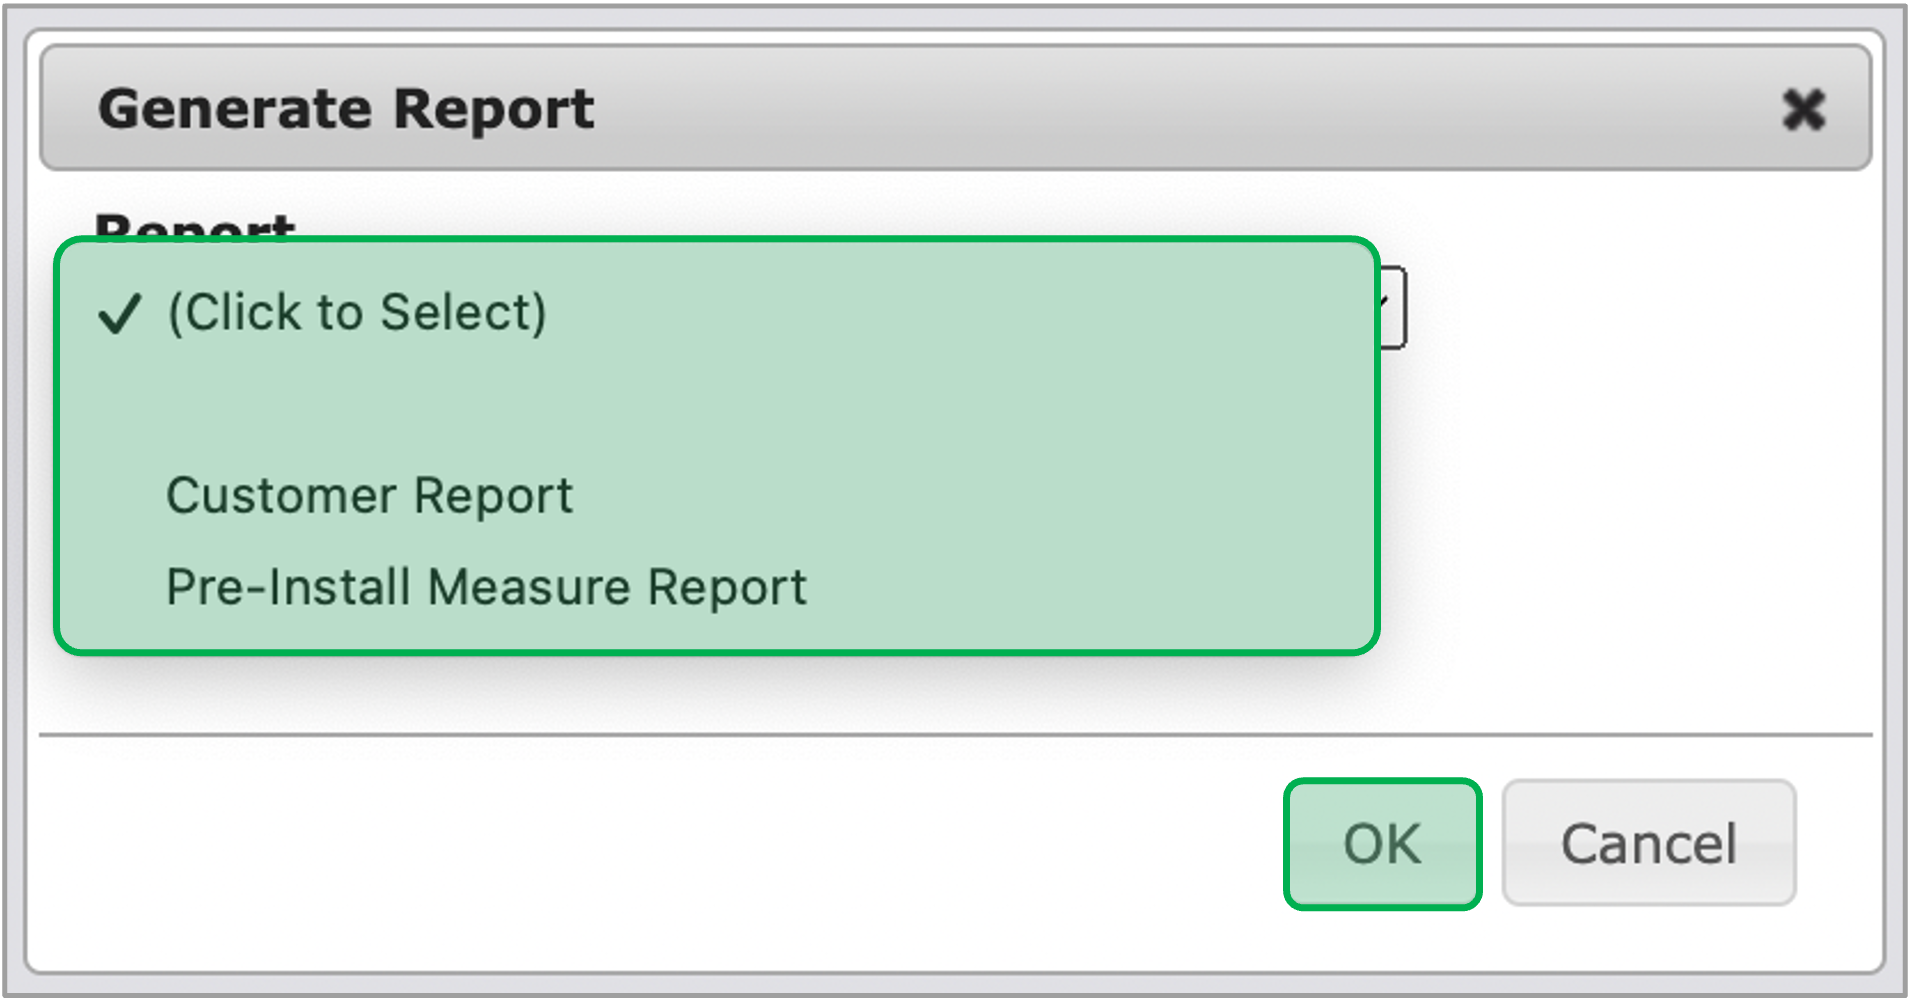
Select either the Customer Audit Report or Pre Install Audit report and click the OK button. | Expand |
|---|
| 
|
|
| UI Step |
|---|
The reports will automatically download once they are generated. Reports can also be downloaded manually by clicking on the hyperlink under the Name column. | Expand |
|---|
| 
|
|
|
|
|
|