Versions Compared

Key

  • This line was added.
  • This line was removed.
  • Formatting was changed.


Aura - Title
color#002d72
textAlignleft
fontSize28
lineHeight28
cloudTextDemo Title
tagh1
fontWeightbold
Participating Contractors: Appliance Enrollments
Aura - Divider
serializedStyles{"alignment":{"horizontal":"start"},"icon":{"name":"faPaperPlane","color":"#333","size":24},"text":{"color":"#333","fontSize":14,"textAlign":"left","fontWeight":"bold","text":"Aura Divider"},"border":{"top":false,"right":false,"bottom":true,"left":false,"color":"#002d72","style":"solid","width":2},"size":{}}
typeregular
Info
iconfalse

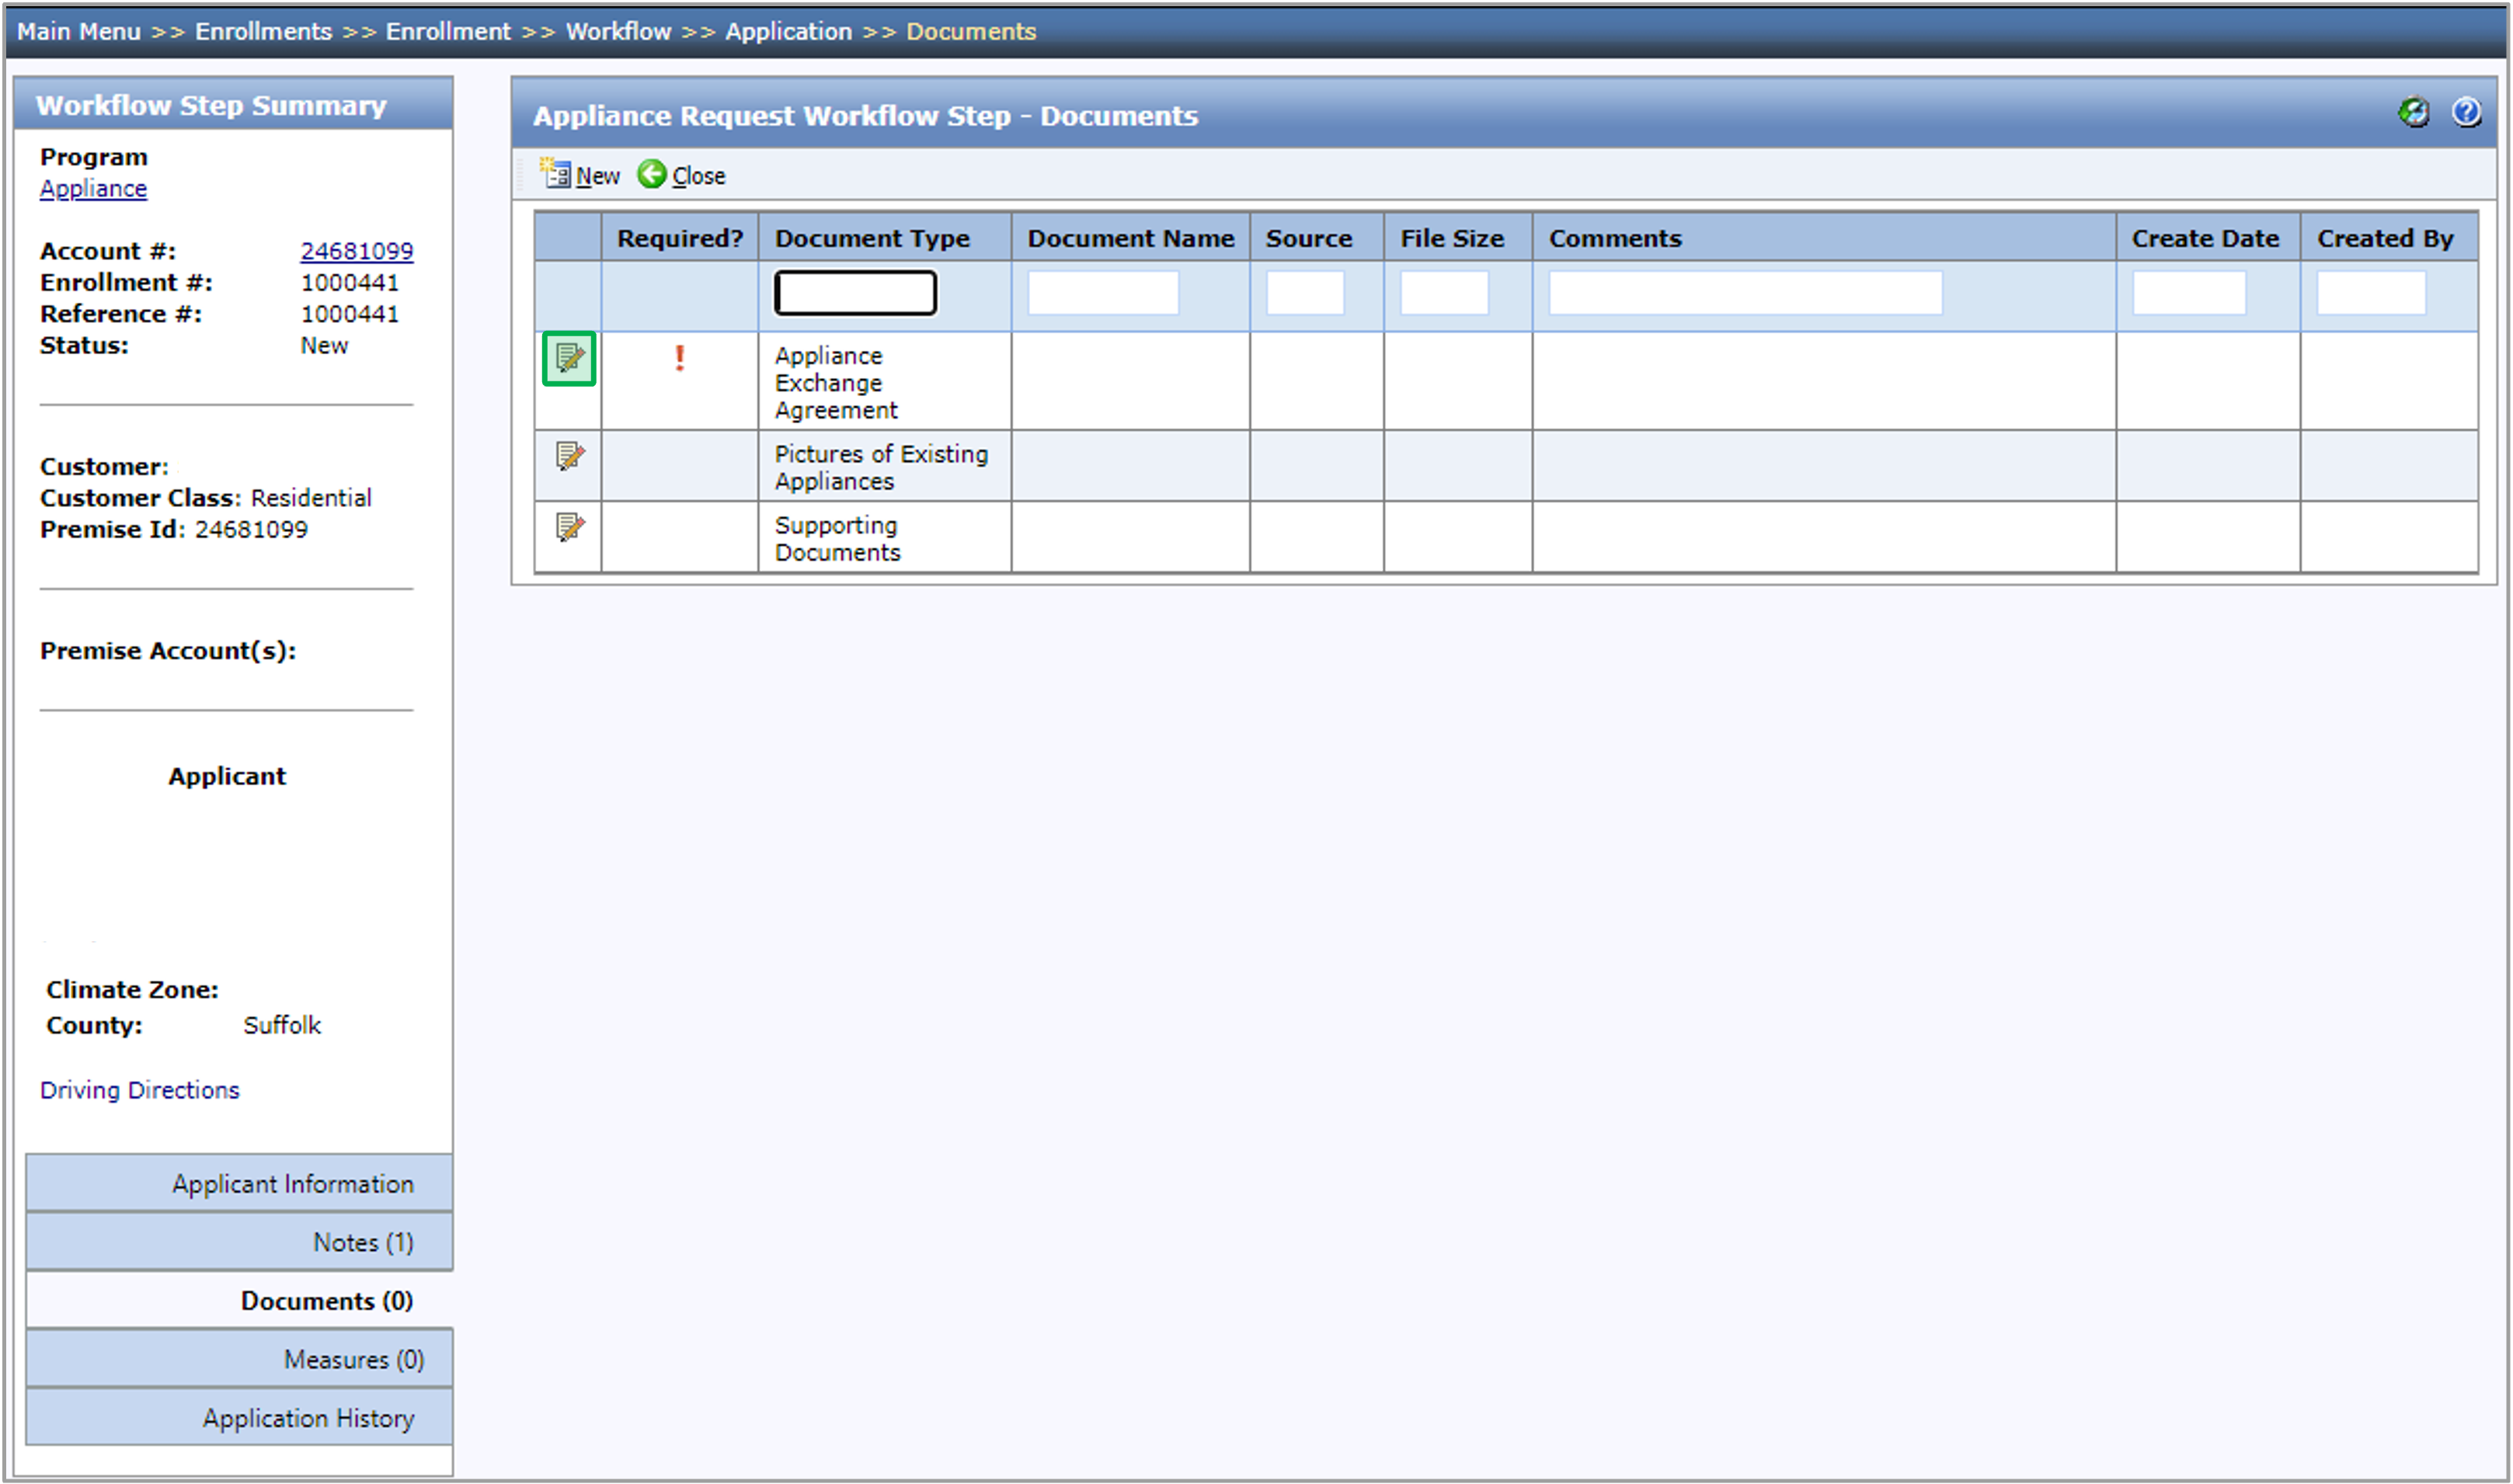
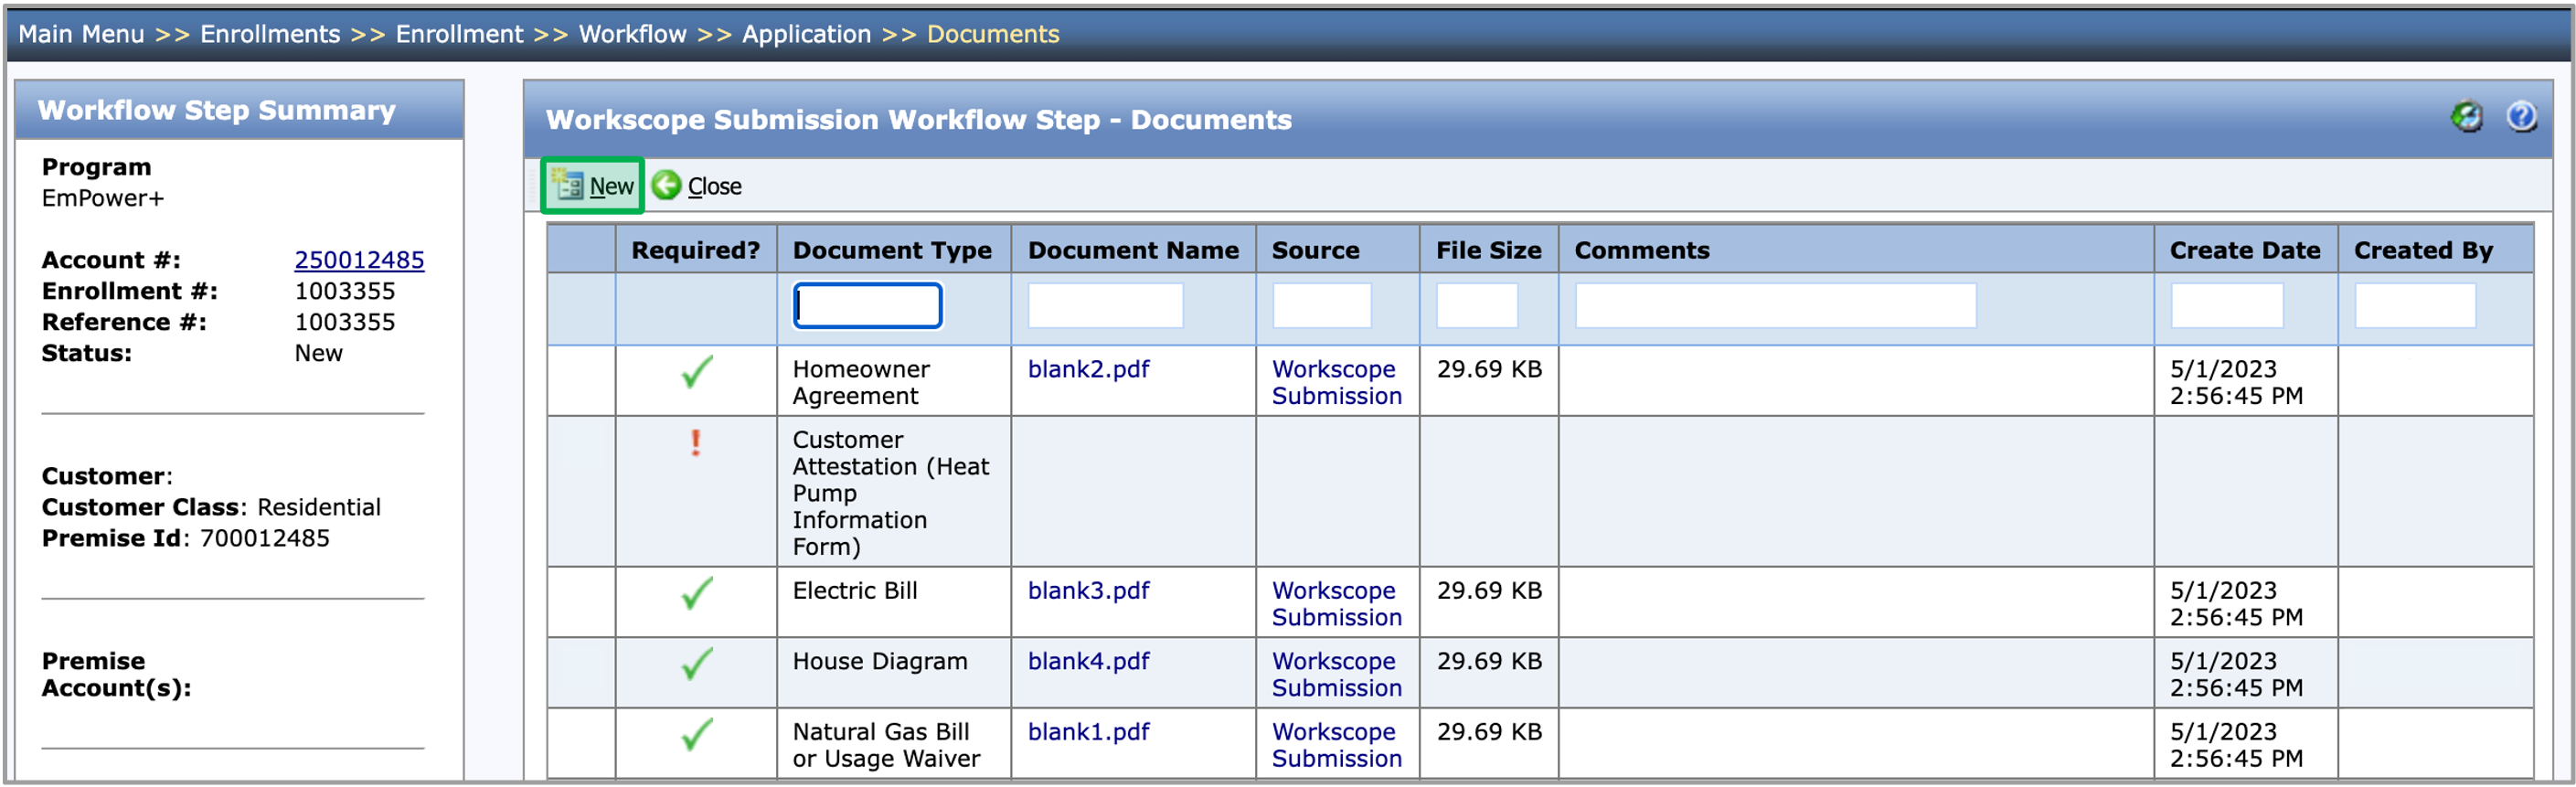
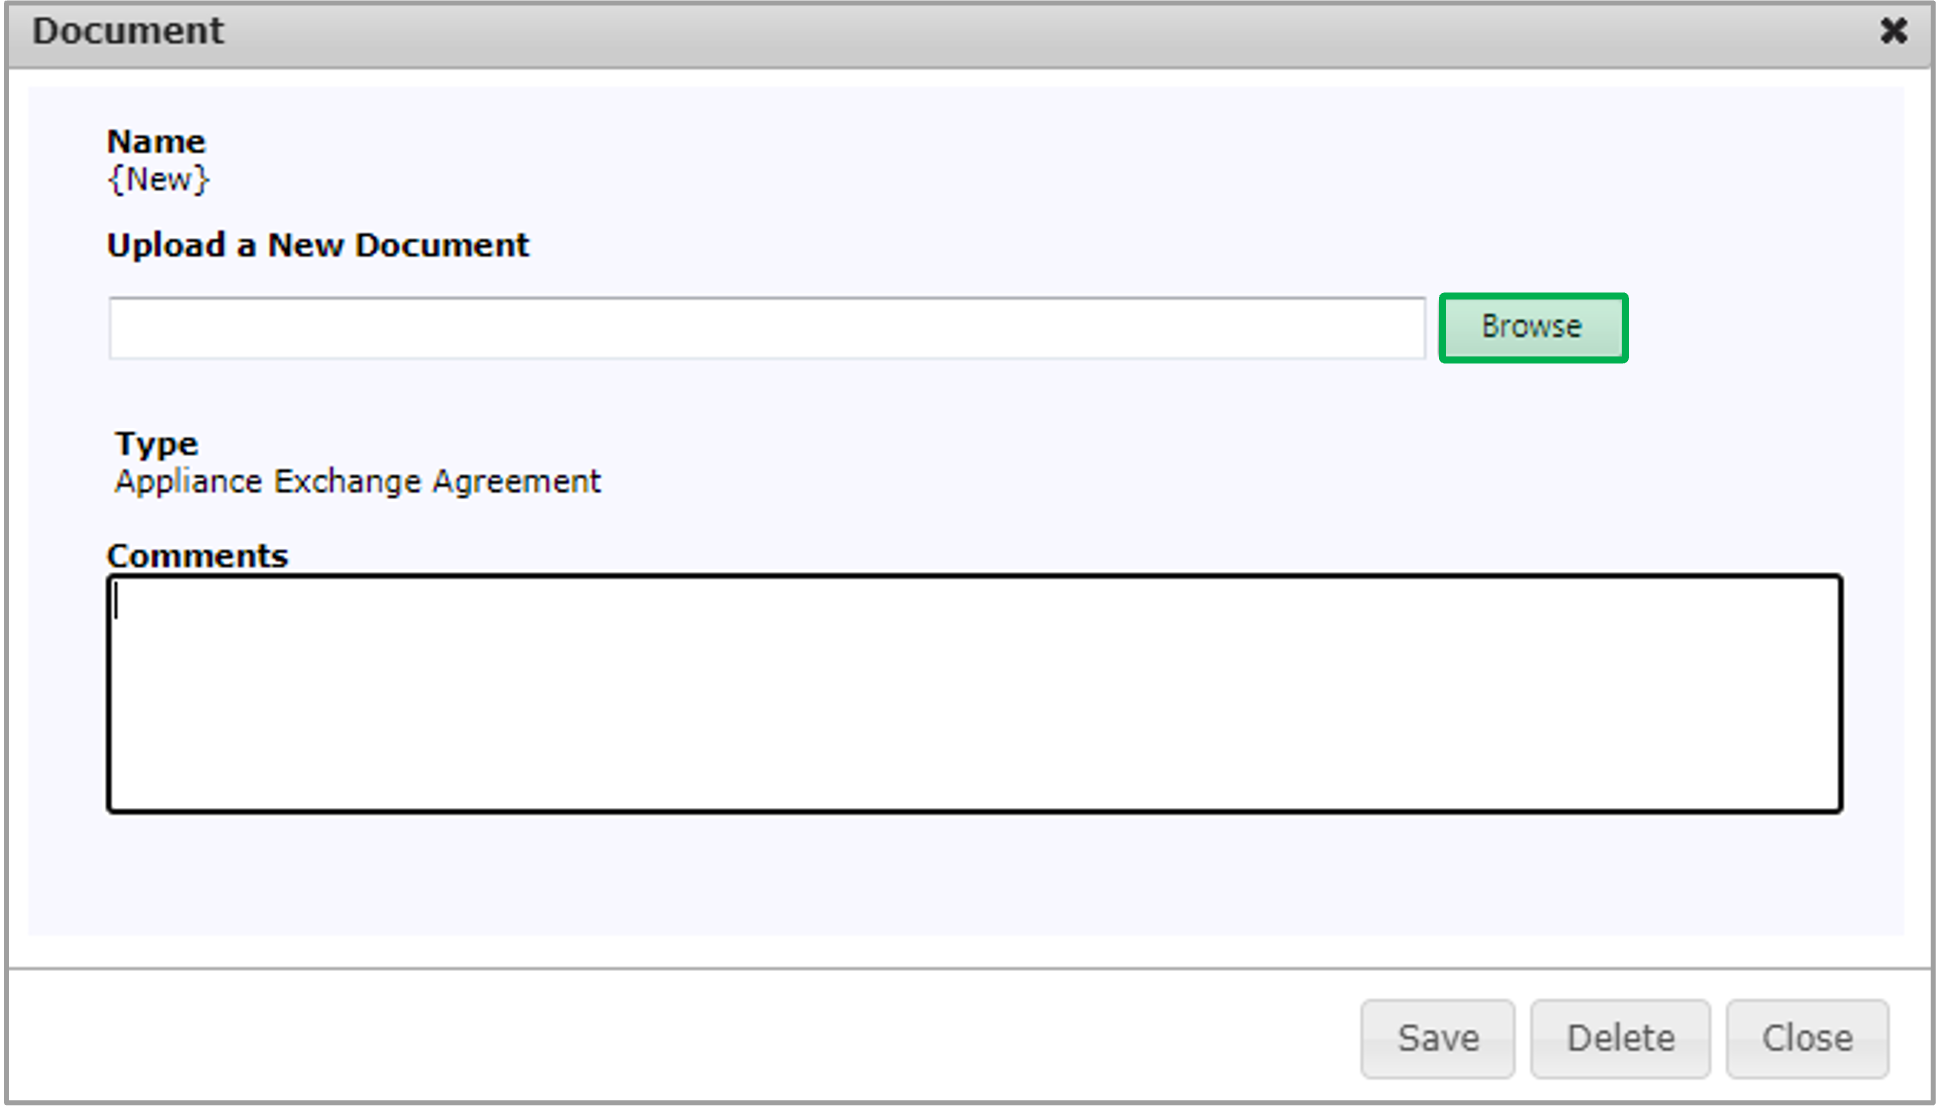
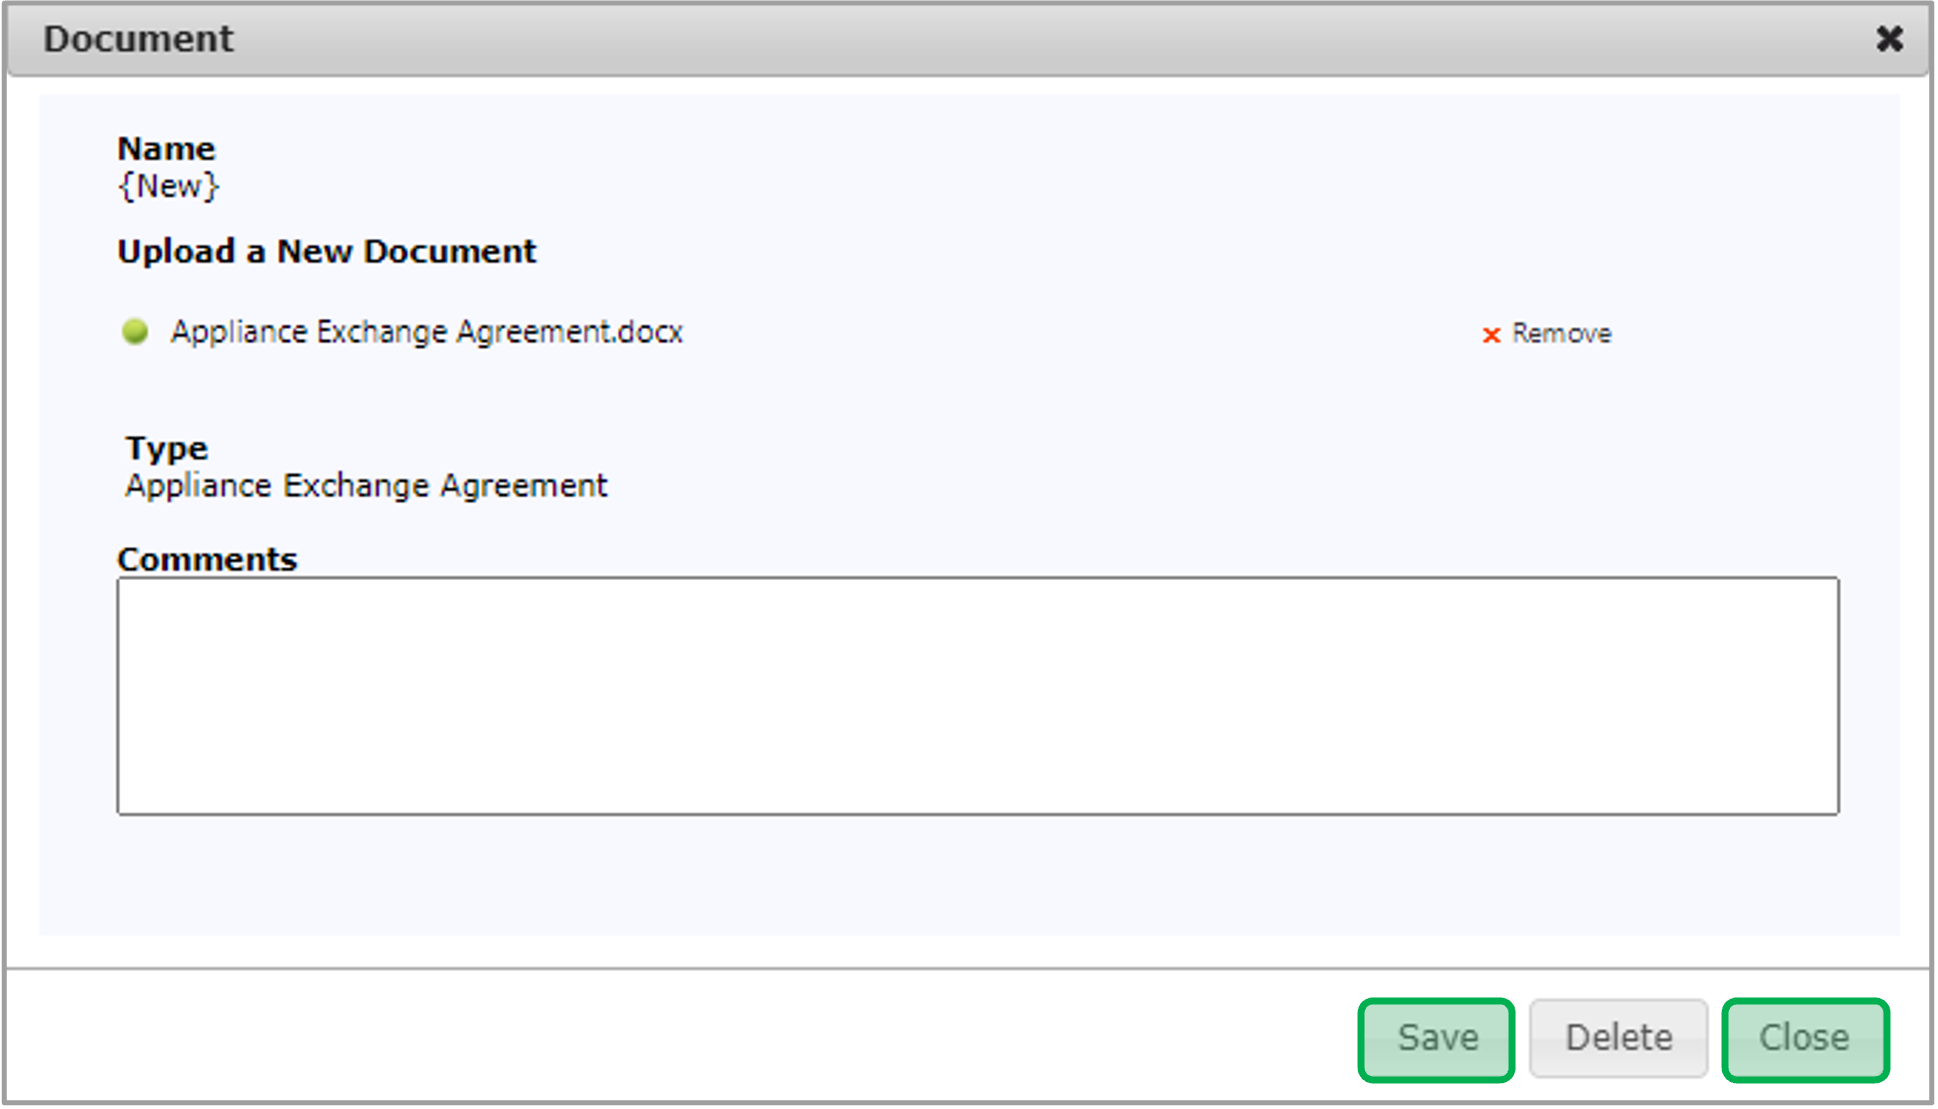
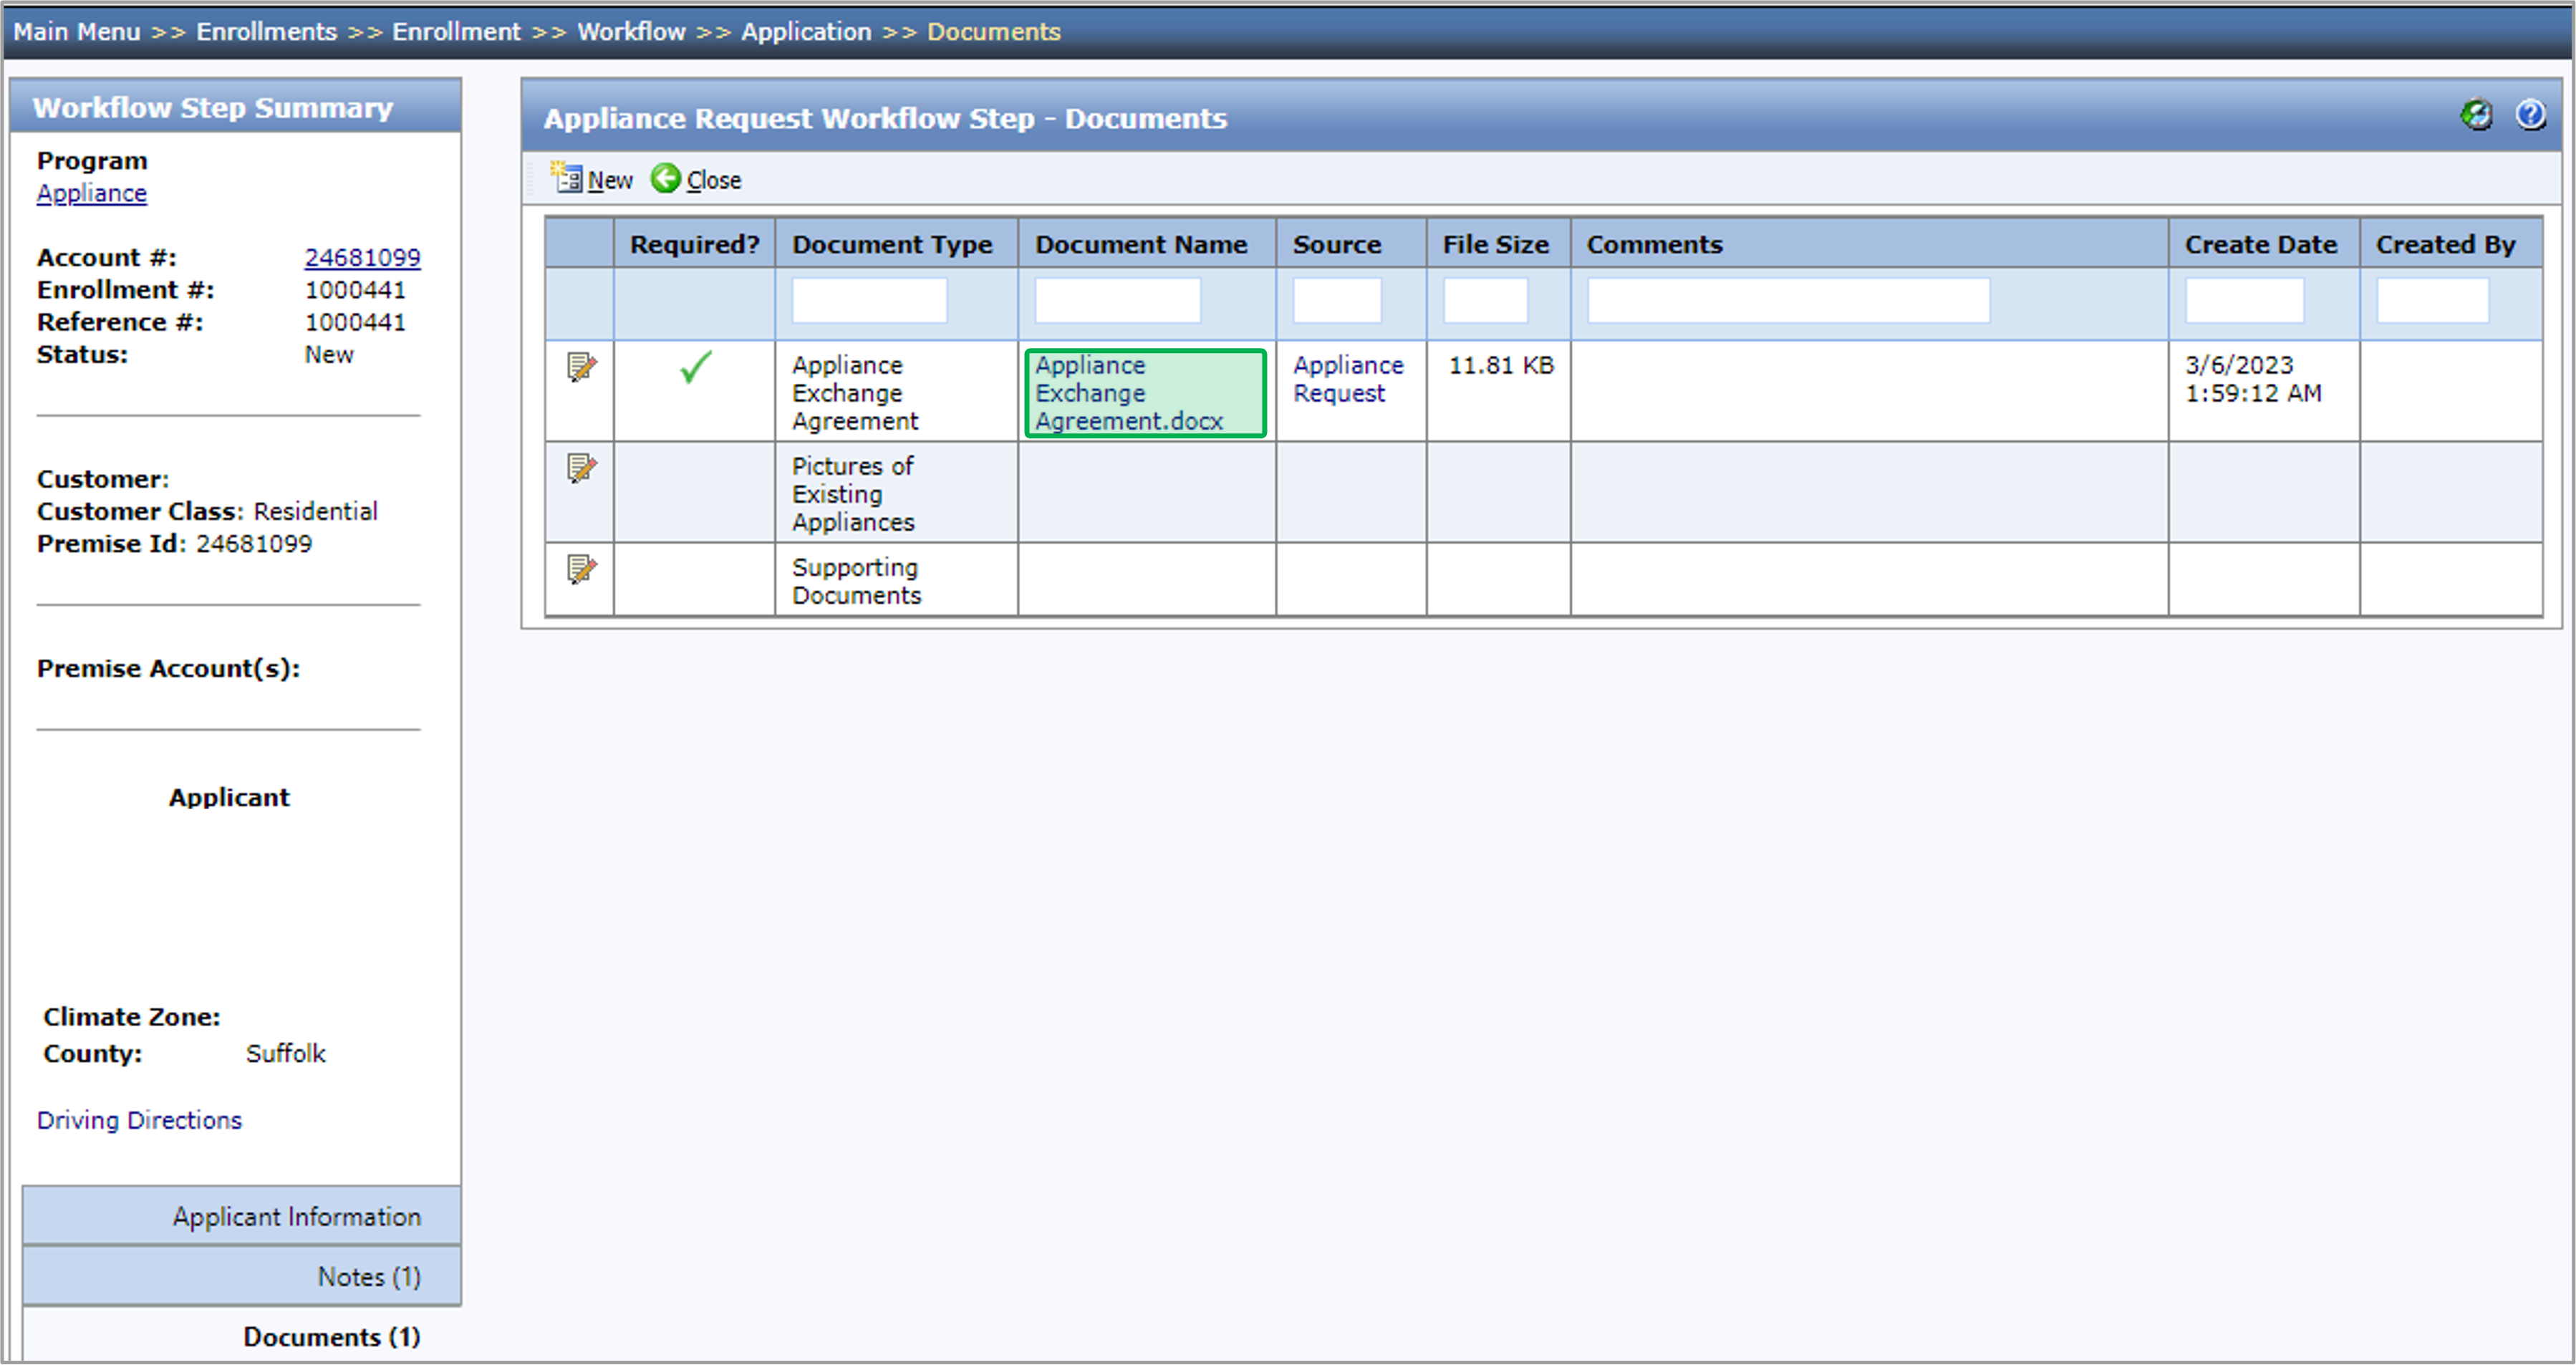
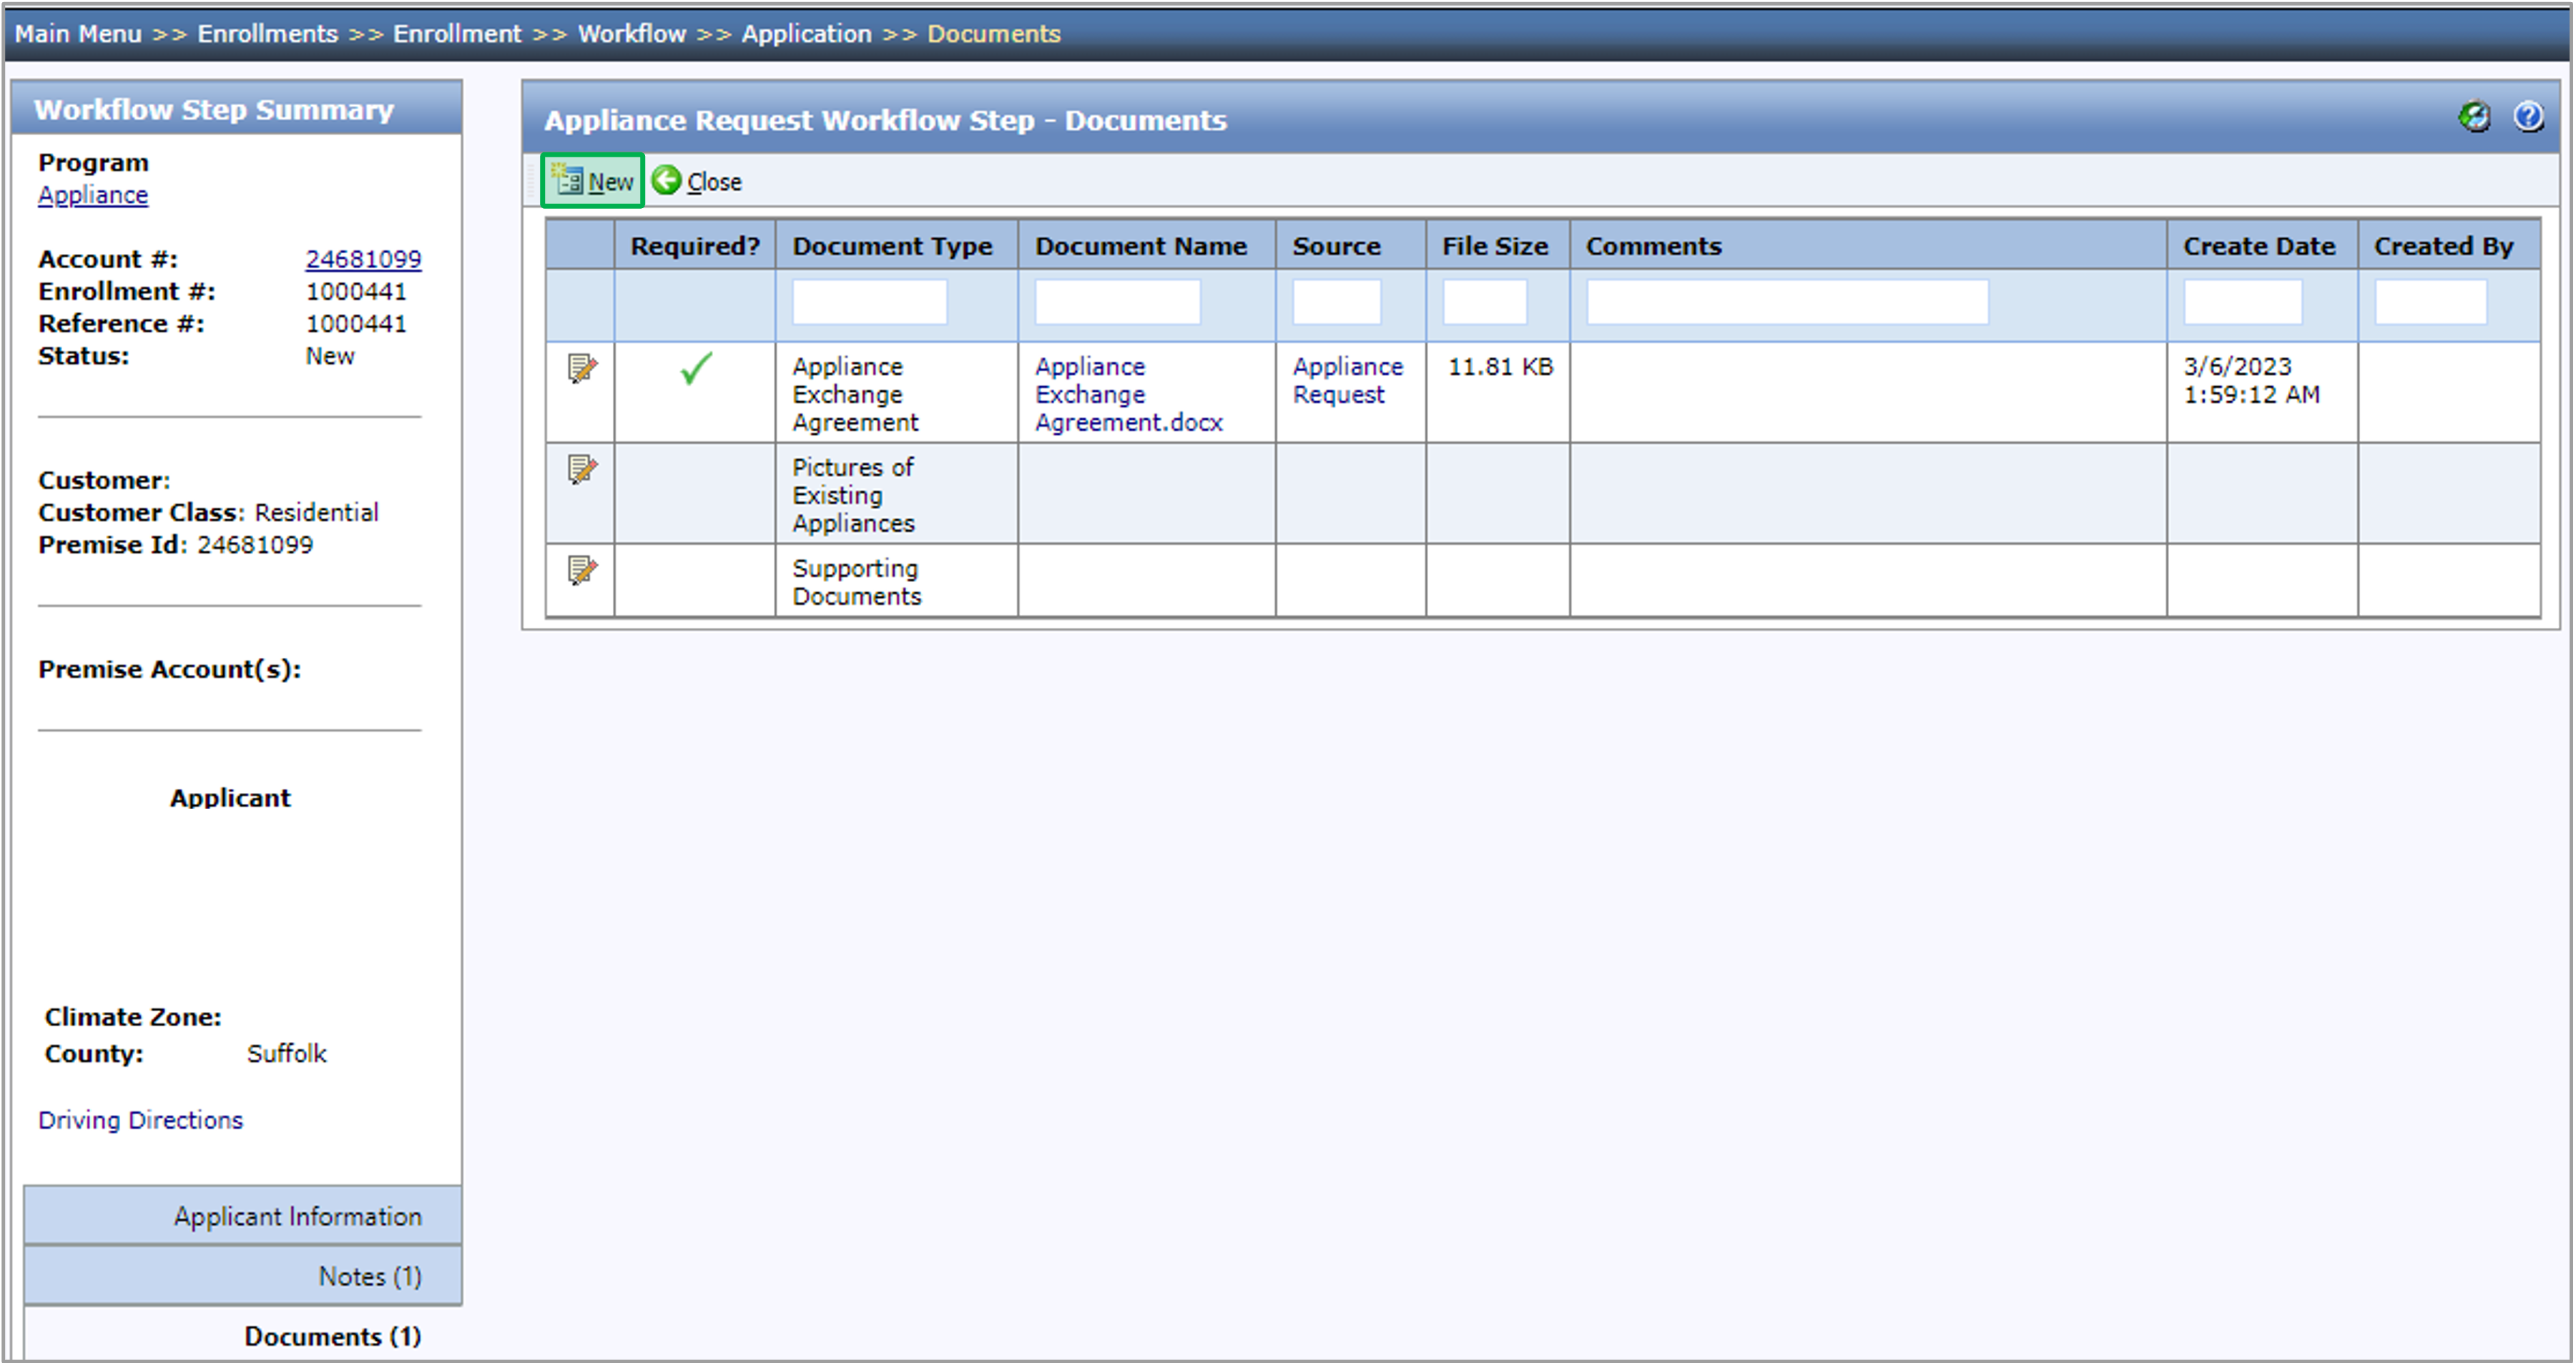
Welcome! Here you will find information for Participating Contractors and Vendors to submit and manage EmPower+ Appliance enrollments through the NY Home Energy Portal.

The EmPower+ Appliance enrollment can only be initiated from an EmPower+ Enrollment during either the Workscope Submission or Final Project Submission Steps. Additionally, this enrollment should only be created if the Contractor is proposing to replace an existing refrigerator and/or freezer. When an existing EmPower+ Appliance Enrollment has already been created, the NY HEP will warn the contractor when attempting to create another. In most cases, there should only be one EmPower+ Appliance Enrollment for EmPower+ Enrollments. However, in the case where one of the replacement appliances is backordered, it would be best to initiate a second EmPower+ Appliance enrollment so each replaced appliance can be invoiced separately.

Contractors will be required to upload the Appliance Exchange Agreement with the options to also upload photos of the existing appliance(s).

UI Expand
titleNY HEP Measures List

View file
nameNY HEP Measure List.pdf
pageNY Home Energy Portal: Participating Contractors
spacePUBLIC
height250


UI Expand
titleNew Appliance Enrollment Training Video

Multimedia
nameNew Appliance COMPLETE Aug 16.mp4
width100%
height100%


Aura - Tab Group
settings{"generalSettings":{"tabSpacing":0,"tabWidth":40,"tabHeight":40,"direction":"vertical"},"activeSettings":{"backgroundColor":{"color":"#002d72"},"text":{"fontSize":16,"color":"#fff","textAlign":"left","fontWeight":"normal"}},"inactiveSettings":{"backgroundColor":{"color":"#f4f5f7"},"text":{"fontSize":16,"color":"#5e6c84","textAlign":"left","fontWeight":"normal"}},"contentSettings":{"backgroundColor":{"color":"#fff"},"border":{"style":"solid","width":2,"top":false,"bottom":false,"left":true,"right":false,"color":"#002d72"},"padding":{"top":10,"right":10,"bottom":10,"left":10}},"hoverSettings":{"backgroundColor":{"color":"#0073a4"},"text":{"fontSize":16,"color":"#ffffff","textAlign":"left","fontWeight":"normal"}}}
tab1


Aura - Tab
titleInformation


Panel
borderColor#002D72
bgColor#F3F4F9
titleColor#ffffff
borderWidth1
titleBGColor#002D72
borderStylenone
titleApplicant Information


Info

This tab will be prepopulated with the information on the Customer/Account/Premise.

If you need to change the Customer Information, Installation Address, or Mailing Address, you can make those changes on the Applicant Information tab, then click Save.

The Number of Full Time Occupants field on this tab must be completed before the enrollment step can be processes.


UI Steps
sizesmall


UI Step

If the new value does not match the value that’s saved on the Customer/Account/Premise, an orange exclamation mark will be displayed next to it. If you hover over the exclamation mark, a tooltip will be displayed indicating that the values are different. You can click the Update Customer button to update the value that’s saved on the Customer/Account/Premise.

Expand
titlescreenshot


UI Step

When you click the Update Customer button, the Update Customer dialog will open, displaying every value on the Appliance Request step that is different than the value saved in the corresponding field on the Customer/Account/Premise. All these fields will be checked by default. When finished updating, click Save in the dialog. The system will update the checked Customer/Account/Premise fields for the values to match the Appliance Request step.

Expand
titlescreenshot


UI Step

The enrollment can be placed on hold by selecting On Hold from the Outcome drop-down. 

Expand
titlescreenshot


UI Step

If the enrollment is placed on hold, select a reason from the Reason drop-down and click Save.

Expand
titlescreenshot


UI Step

Two new fields will appear in the On Hold Information section to allow contractors to add details on why they are placing the enrollment on hold and an On Hold Reminder date that will send them a notification once that date arrives.

Expand
titlescreenshot


Aura - Tab
titleNotes


Panel
borderColor#002D72
bgColor#F3F4F9
titleColor#ffffff
borderWidth1
titleBGColor#002D72
borderStylenone
titleNotes


Info

The instruction below provides guidance on how to add notes within an enrollment. 

The following Notes will be displayed on the Notes tab:

  • The Notes that were added to this workflow step.
  • The Notes that were added to a different workflow step on the Appliance enrollment that the user has access to.
  • The Notes that were added to a different workflow step on the Appliance enrollment that the user does not have access to as long as the Note’s Who can view this note? field is set to Users with access to this enrollment.

To see these instructions in action, watch the training video below:

Expand
titletraining video

Multimedia
nameNY HEP Adding Notes.mp4
width100%
pageExternal Guide Video Library
height100%


UI Steps
sizesmall


UI Step

To add a new note, access the Note tab and click the New Note button. A new Note dialog will open. 

Tip

Notes can be added to any Record or Enrollment in the NY HEP where a Note tab is present.


Expand
titlescreenshot


UI Step

Fill in the Notes field. 

Tip

The Note Date and Note Time fields will automatically populate with the current date and time. Users can change these fields if needed. The system will still document the actual date and time the note was created as well.


Expand
titlescreenshot


UI Step

The Who can view this note? field will default to Users with access to this enrollment.

Tip

For Contractors, it does not matter what option is selected for this field as anyone with access to the enrollment will also have access to the workflow step. It is best to leave this field alone.


UI Step

Click Save to save the new Note. 

Tip

Once a note is saved, Contractors cannot edit or delete it. Be sure to review the note carefully before clicking save.


Expand
titlescreenshot


Aura - Tab
titleDocuments


Panel
borderColor#002D72
bgColor#F3F4F9
titleColor#ffffff
borderWidth1
titleBGColor#002D72
borderStylenone
titleWorkscope Submission - Documents


Info
iconfalse

The instruction below provides guidance on how to upload document(s) within an enrollment. A red exclamation mark will be displayed under the Required column indicating the document type being a Required Document. When uploading documents, multiple document types can be selected for a single document. This is helpful when a single document can satisfy multiple document requirements.

Multiple documents can be uploaded at the same time:

PC Users: CTRL + Click

Mac Users: Command + Click

To see these instructions in action, please watch the training video below:

Expand
titletraining video

Multimedia
nameNY HEP Uploading Documents.mp4
width100%
pageNY Home Energy Portal Overview
height100%


UI Steps
sizesmall


UI Step

To upload a Document, access the enrollment's Documents tab during any step.


UI Step

Click the New button for click the Edit button icon in that Document Type’s row, the Document dialog will open.

Expand
titlescreenshot

Image RemovedImage Added


UI Step

Click Browse to select a file to upload. 

Tip
iconfalse

Multiple documents can be uploaded at the same time.


Warning
iconfalse

If no Refrigerator/Freezer is planned for a Tier 1 Enrollment, the Appliance Exchange Agreement (AEA) is a required document on the EmPower + EnrollmentAfter you’ve selected a file, you can remove it by clicking the x Remove button.


Expand
titlescreenshot


To view an uploaded document, click the Document Name Hyperlink.

UI Step

After the file is uploaded for the Document Type, click Save and then click Close to to upload the file and close the dialog. 

Expandtip
titleiconscreenshot

Image Removed

UI Step
Expand
titlescreenshot

Image Removed

false

After you’ve selected a file, you can remove it by clicking the x Remove button.

Multiple document types can be selected for a single document during upload. This is helpful when a single document can be used to satisfy multiple document requirements. Once the initial document type is selected, re-click the document type field to add an additional document type.


Warning
iconfalse

This is the Contractors last opportunity to click Remove to not upload a specific document. Once Save is clicked, the document becomes a public record and it cannot be edited, deleted, or otherwise overwritten. If the wrong document is uploaded, Contractors will need to upload the correct document and use the Comments fields to let both CLEAResult and NYSERDA know which is the correct document to review

UI Step
If you want to upload more than one Document Type at the same time, click the New button at the top of the Documents tab

.


Expand
titlescreenshot

Image RemovedImage Added


UI Step

The Upload Documents dialog will open. You will need to select the Document Type for every file you choose in the Upload Documents dialog. When finished, click Save.To download and view an uploaded document, click the Document Name Hyperlink.

Expand
titlescreenshot

Image RemovedImage Added


Aura - Tab
titleMeasures


Panel
borderColor#002D72
bgColor#F3F4F9
titleColor#ffffff
borderWidth1
titleBGColor#002D72
borderStylenone
titleMeasures


Info

The Measures tab asks you to add measures to the Appliance Request step.

For a full list of al program measures that may help with this tab, please access the NY HEP Measures List.

To see these instructions in action, watch the training video below:

Expand
titletraining video

Multimedia
nameNY HEP Adding and Configuring Measures.mp4
width100%
pageExternal Guide Video Library
height100%


UI Steps
sizesmall


UI Step

Click the Add Measures button. The Add Measures dialog will open. 

Expand
titlescreenshot


UI Step

To select one or more measures to add to the step, check the box in the left-hand column. To add the selected measures to the step, click the Save button in the dialog. 

Warning

If you increase the No. to Add value after selecting the measure, the system will add that many unique instances of the measure to the Appliance Request step.


Expand
titlescreenshot


UI Step

Click on any of the added measure to complete required fields (marked with a ** to the left of the field name). Information capture for each measure details the specs of the existing appliance.

Tip

Required fields are denoted with ** (asterisk). After all the measures are added and all the data entry fields are filled out, the Appliance Request step can be processed. 


UI Step

Click the Save button before Processing and re-review the Documents tab to be sure you have uploaded the correct required documents.

Expand
titlescreenshot


UI Step

After your review, click the Process button at the top of the Measures tab or the Applicant Information tab. 

Tip

If there are any missing fields, a popup will appear notifying you of what is missing. The system will also validate whether a measure’s primary Existing Unit Approximate Model Year is 2011-present while the Exception Request Type field is blank. If yes, an error will be displayed that prevents the user from being able to process the step.


Expand
titlescreenshot


HTML
<style type="text/css">  
#title-text { display: none;}
.panelContent {
display: none;
}
.aura-tab-content {
margin-top: 0px!important;
padding-top: 0px!important;
}
.panel, .alertPanel, .infoPanel {
margin-top: 0px!important;
}
.panelHeader {
font-size: 20px;
padding-top: 5px!important;
padding-bottom: 5px!important;
}
</style>