Versions Compared

Key

  • This line was added.
  • This line was removed.
  • Formatting was changed.


Aura - Title
color#002d72
textAlignleft
fontSize28
lineHeight28
cloudTextDemo Title
tagh1
fontWeightbold
Charge Ready User Guide

Aura - Divider
serializedStyles{"alignment":{"horizontal":"start"},"icon":{"name":"faPaperPlane","color":"#333","size":24},"text":{"color":"#333","fontSize":14,"textAlign":"left","fontWeight":"bold","text":"Aura Divider"},"border":{"top":false,"right":false,"bottom":true,"left":false,"color":"#002d72","style":"solid","width":2},"size":{}}
typeregular

Info
iconfalse

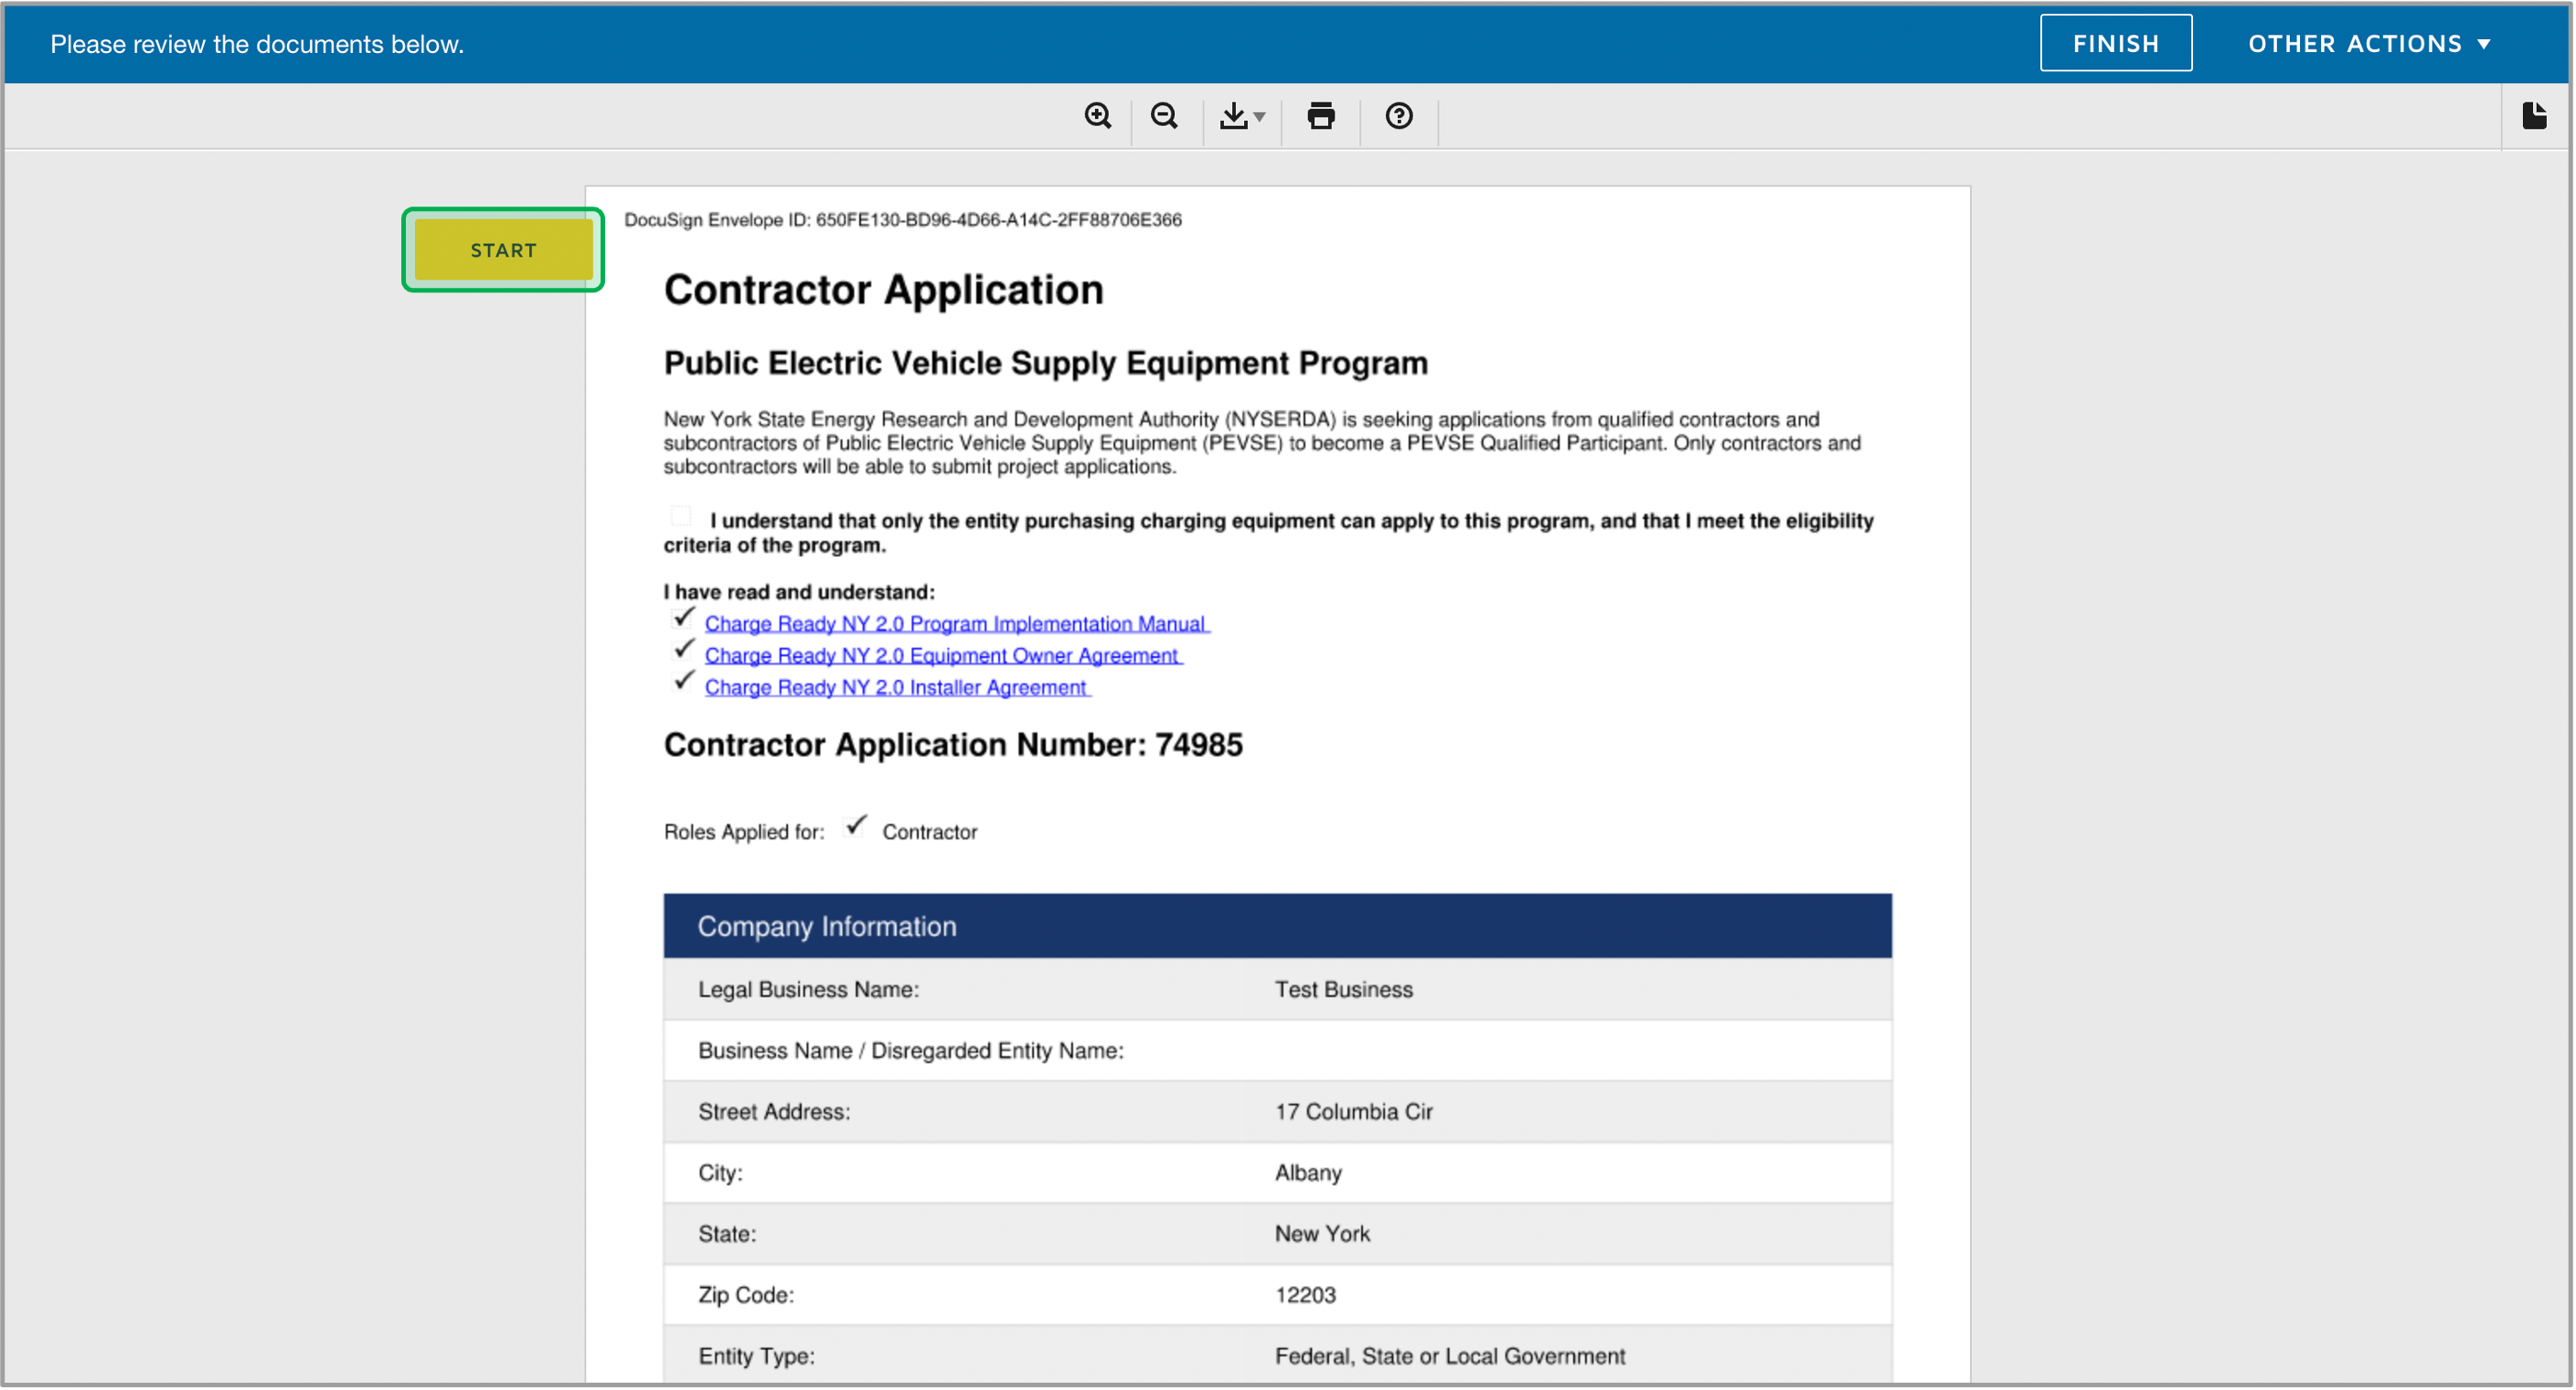
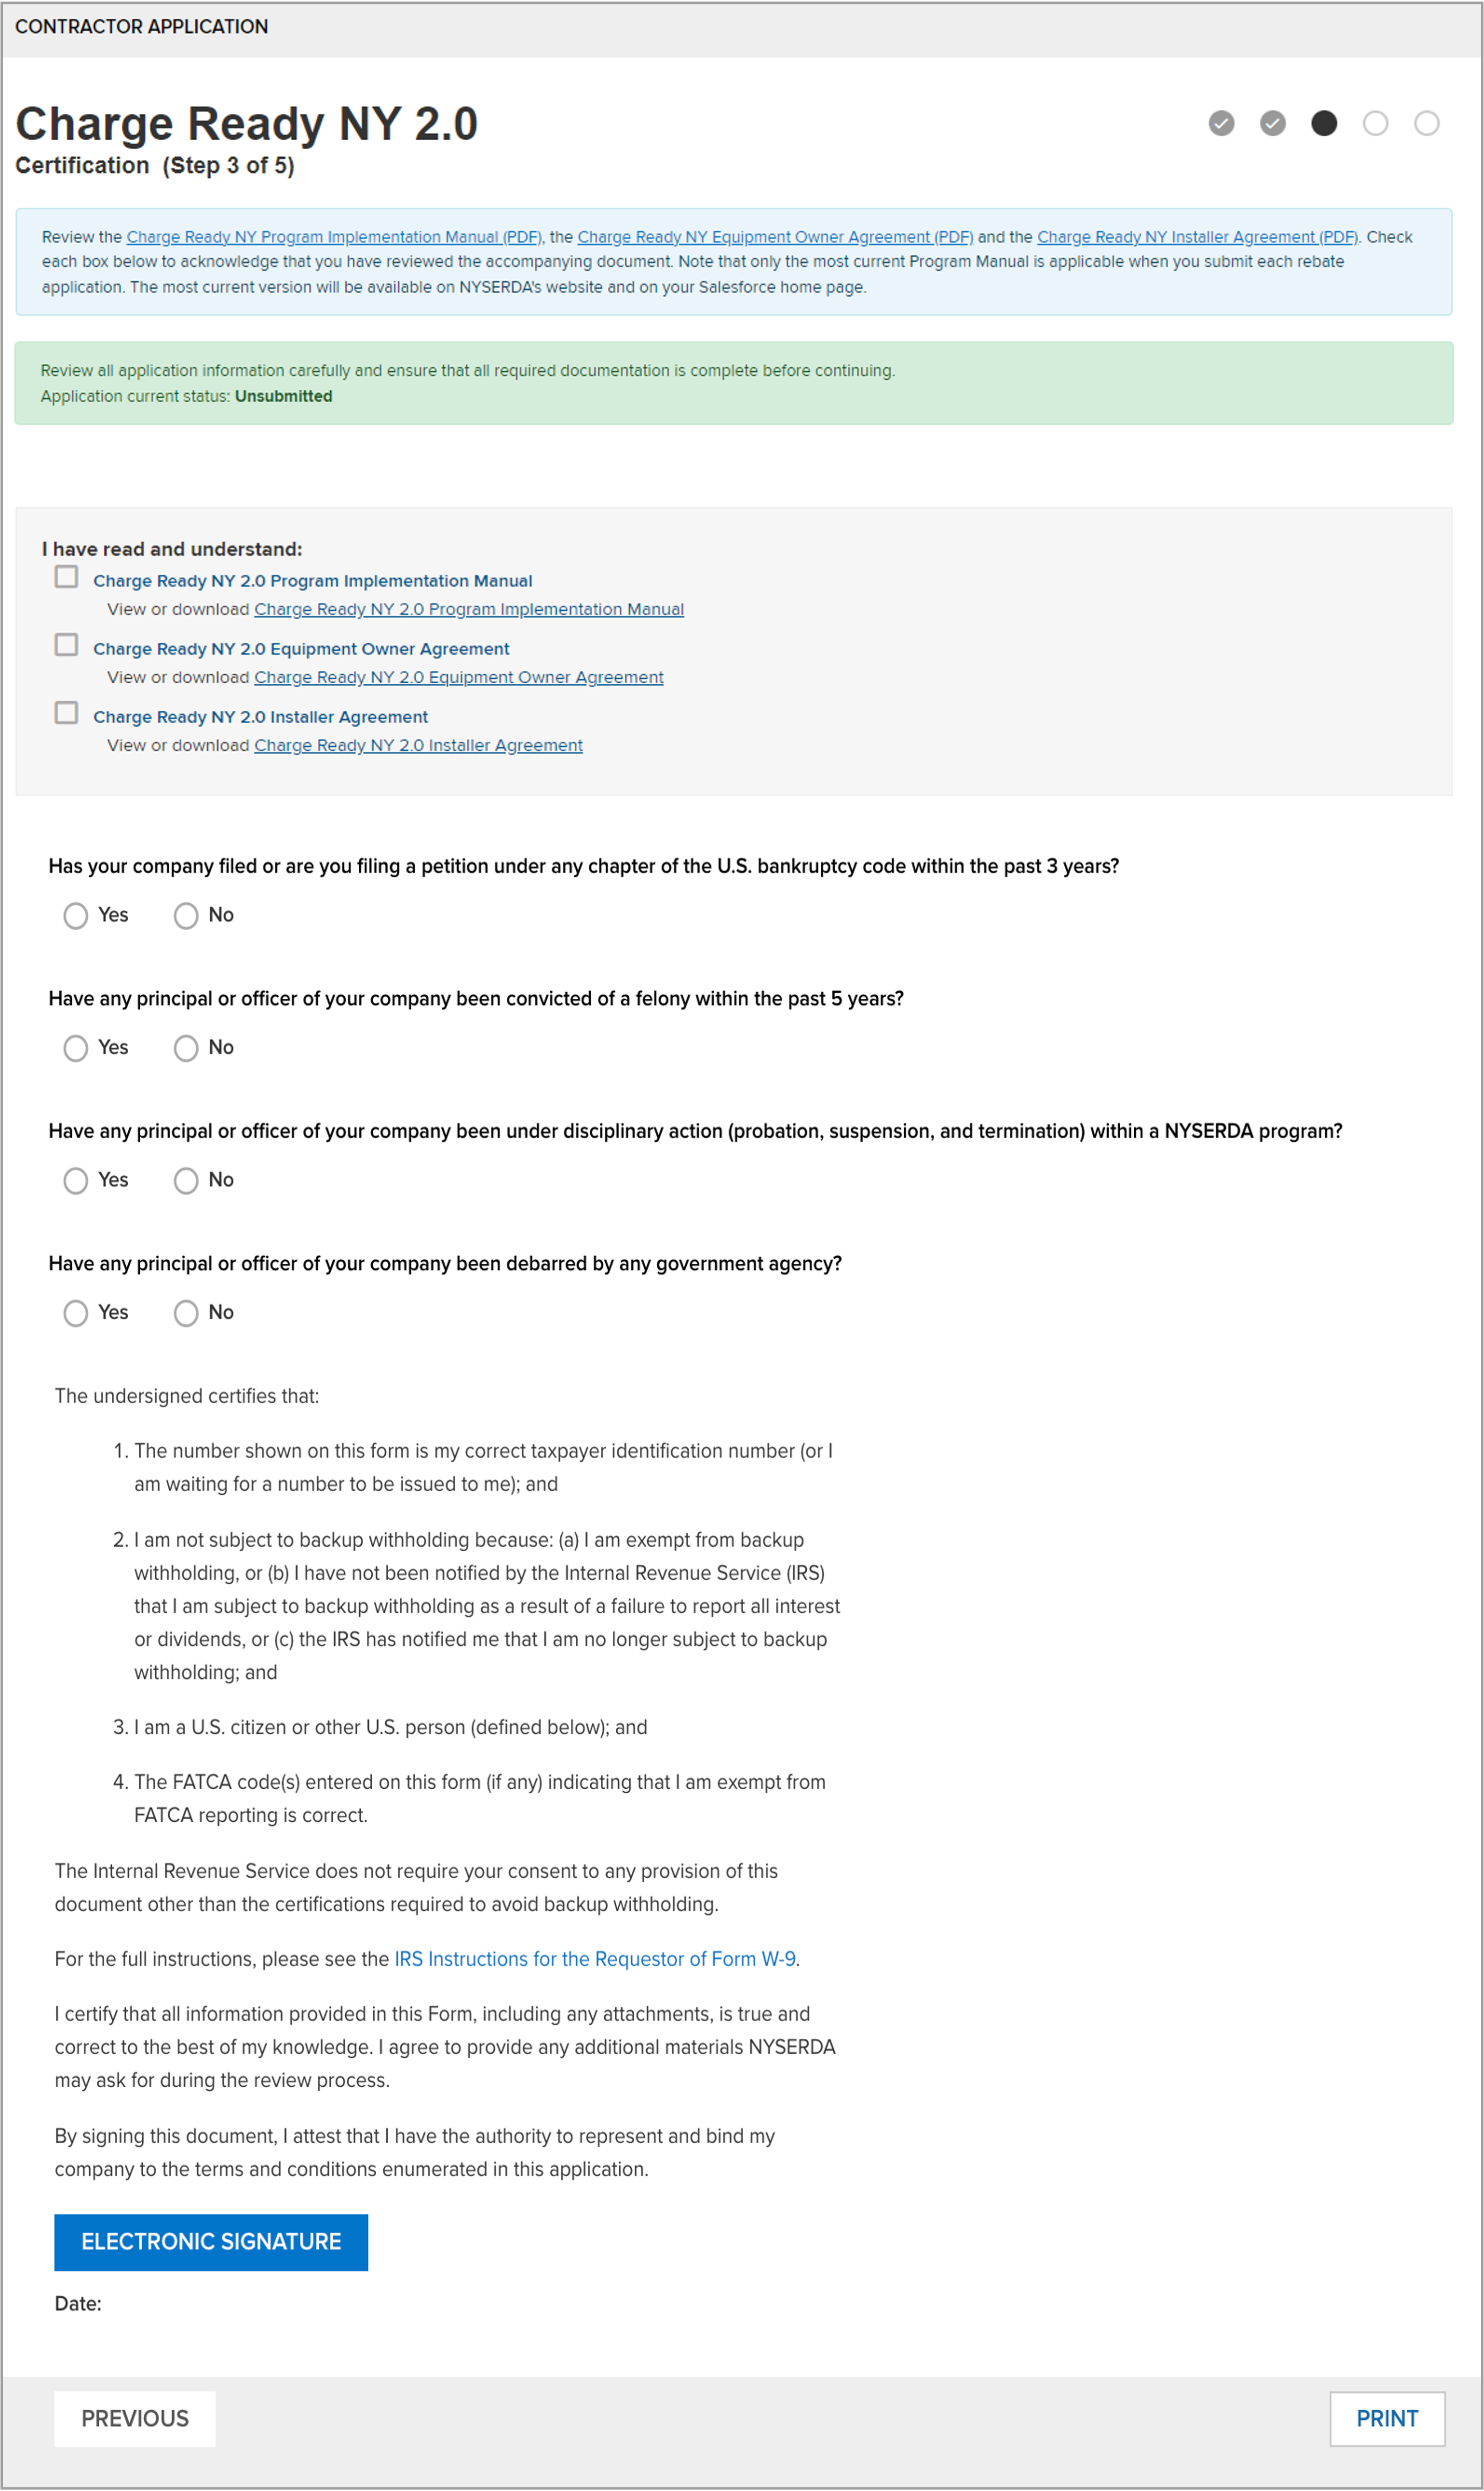
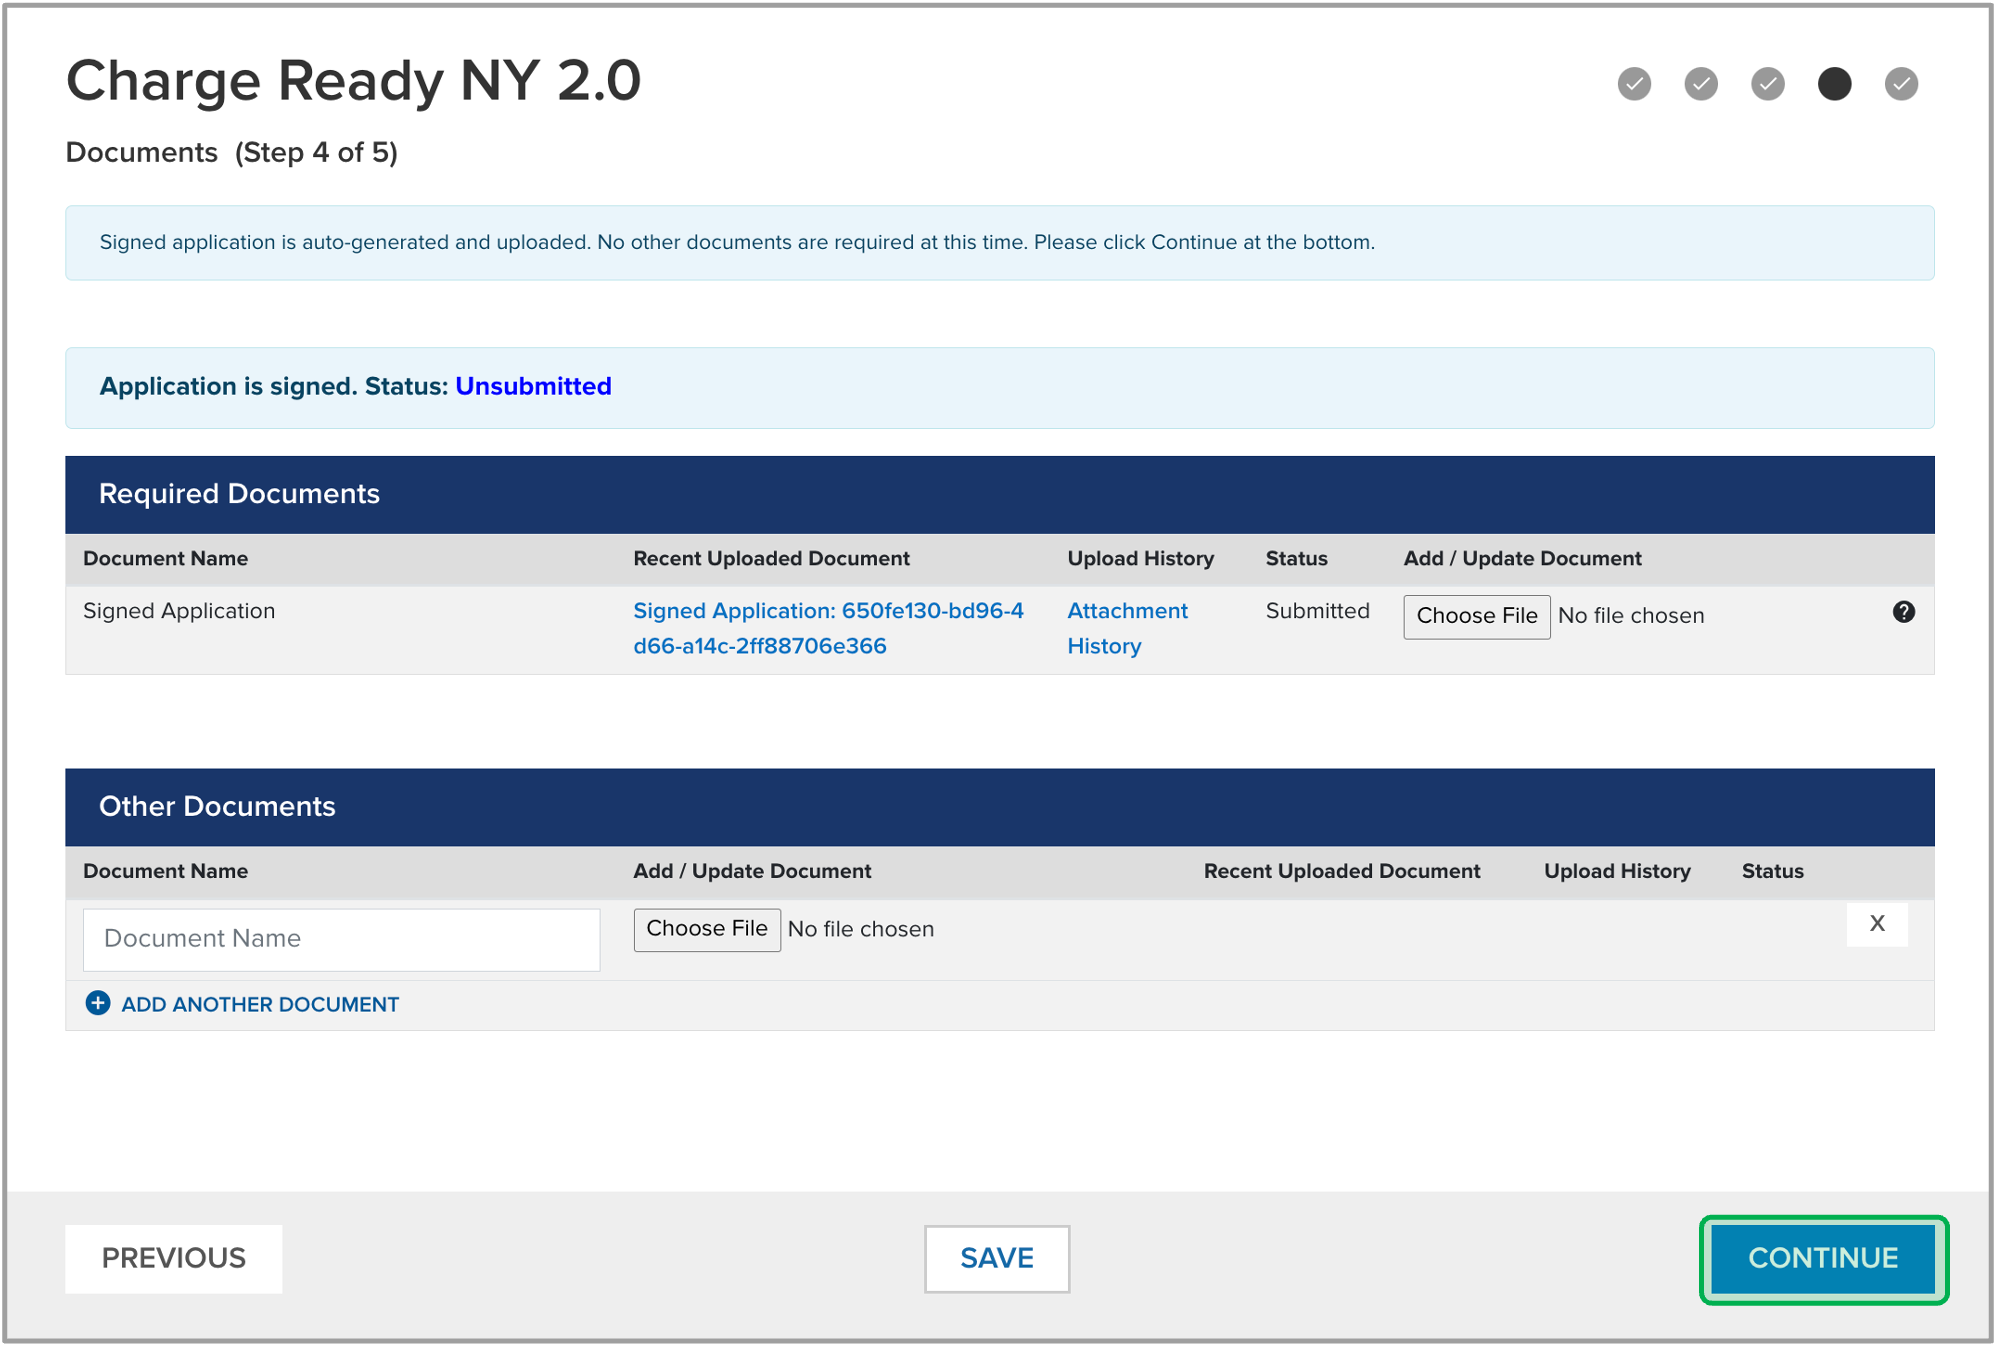
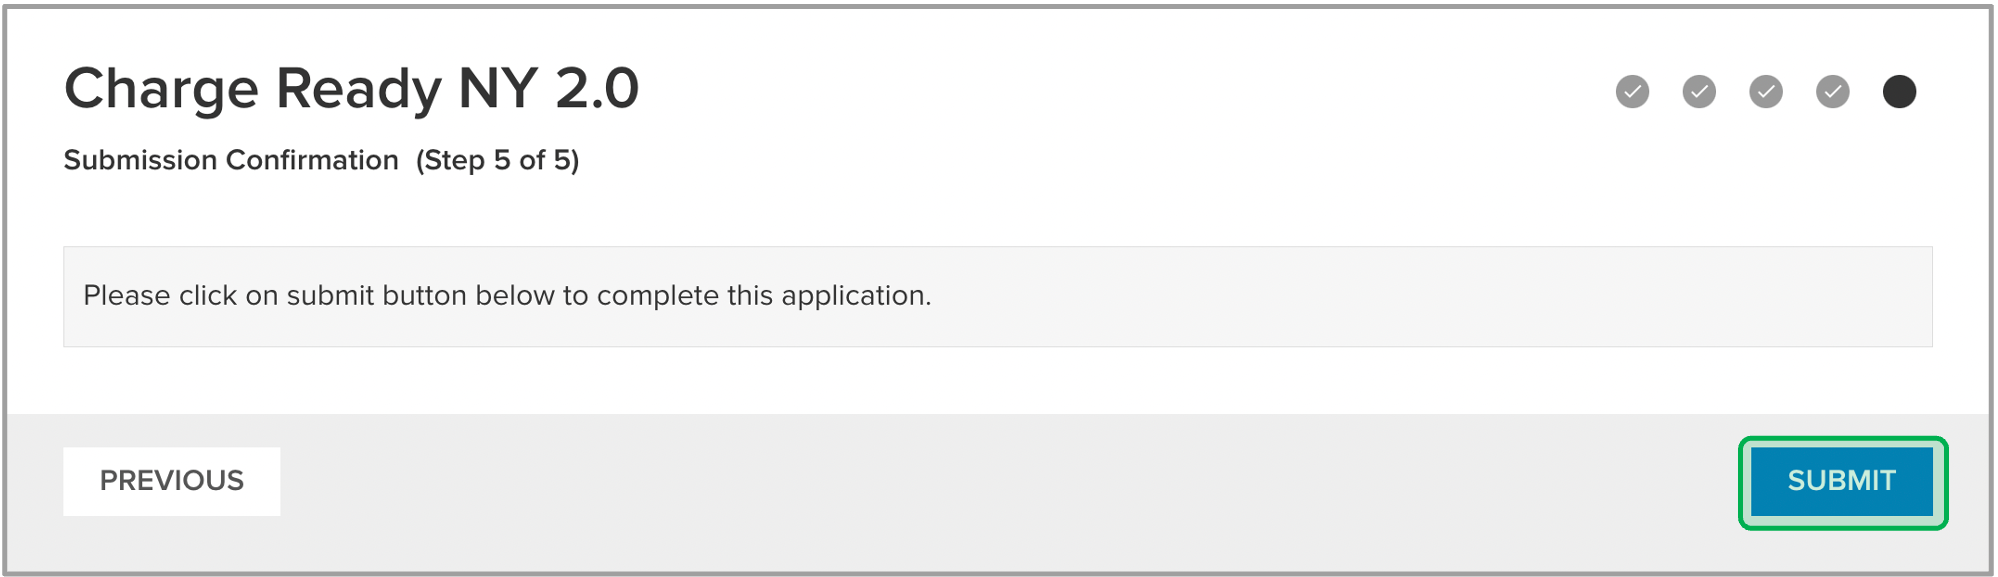
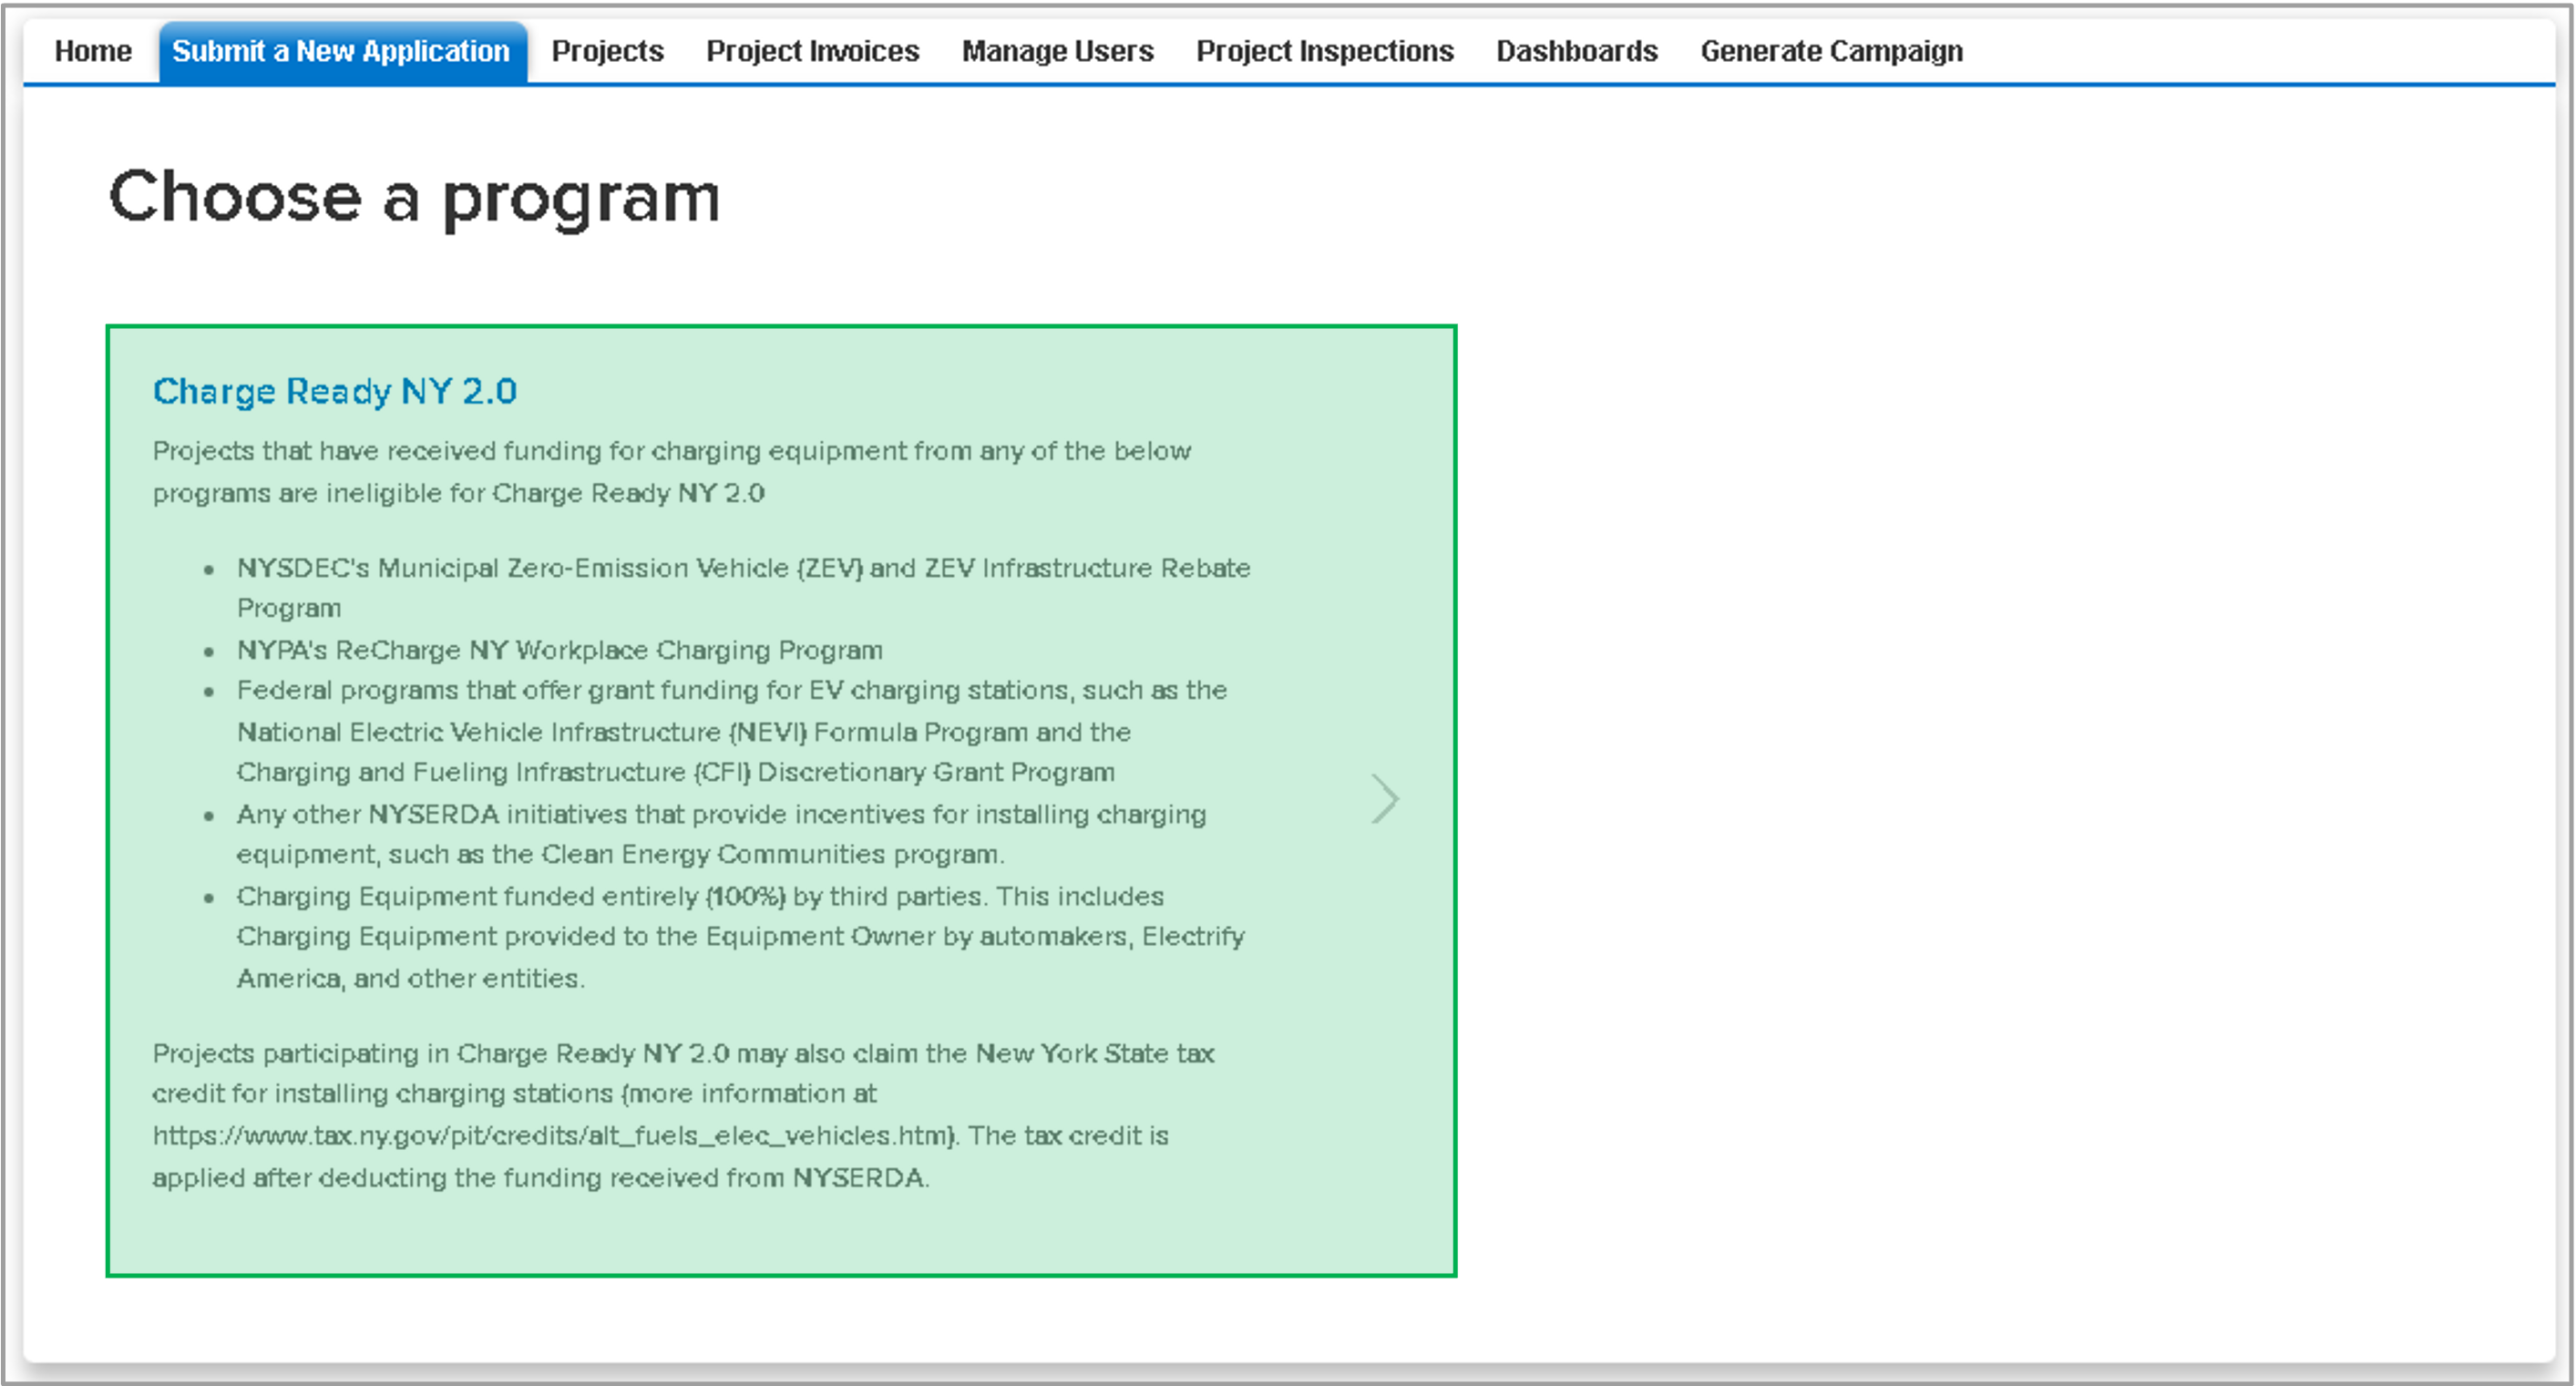
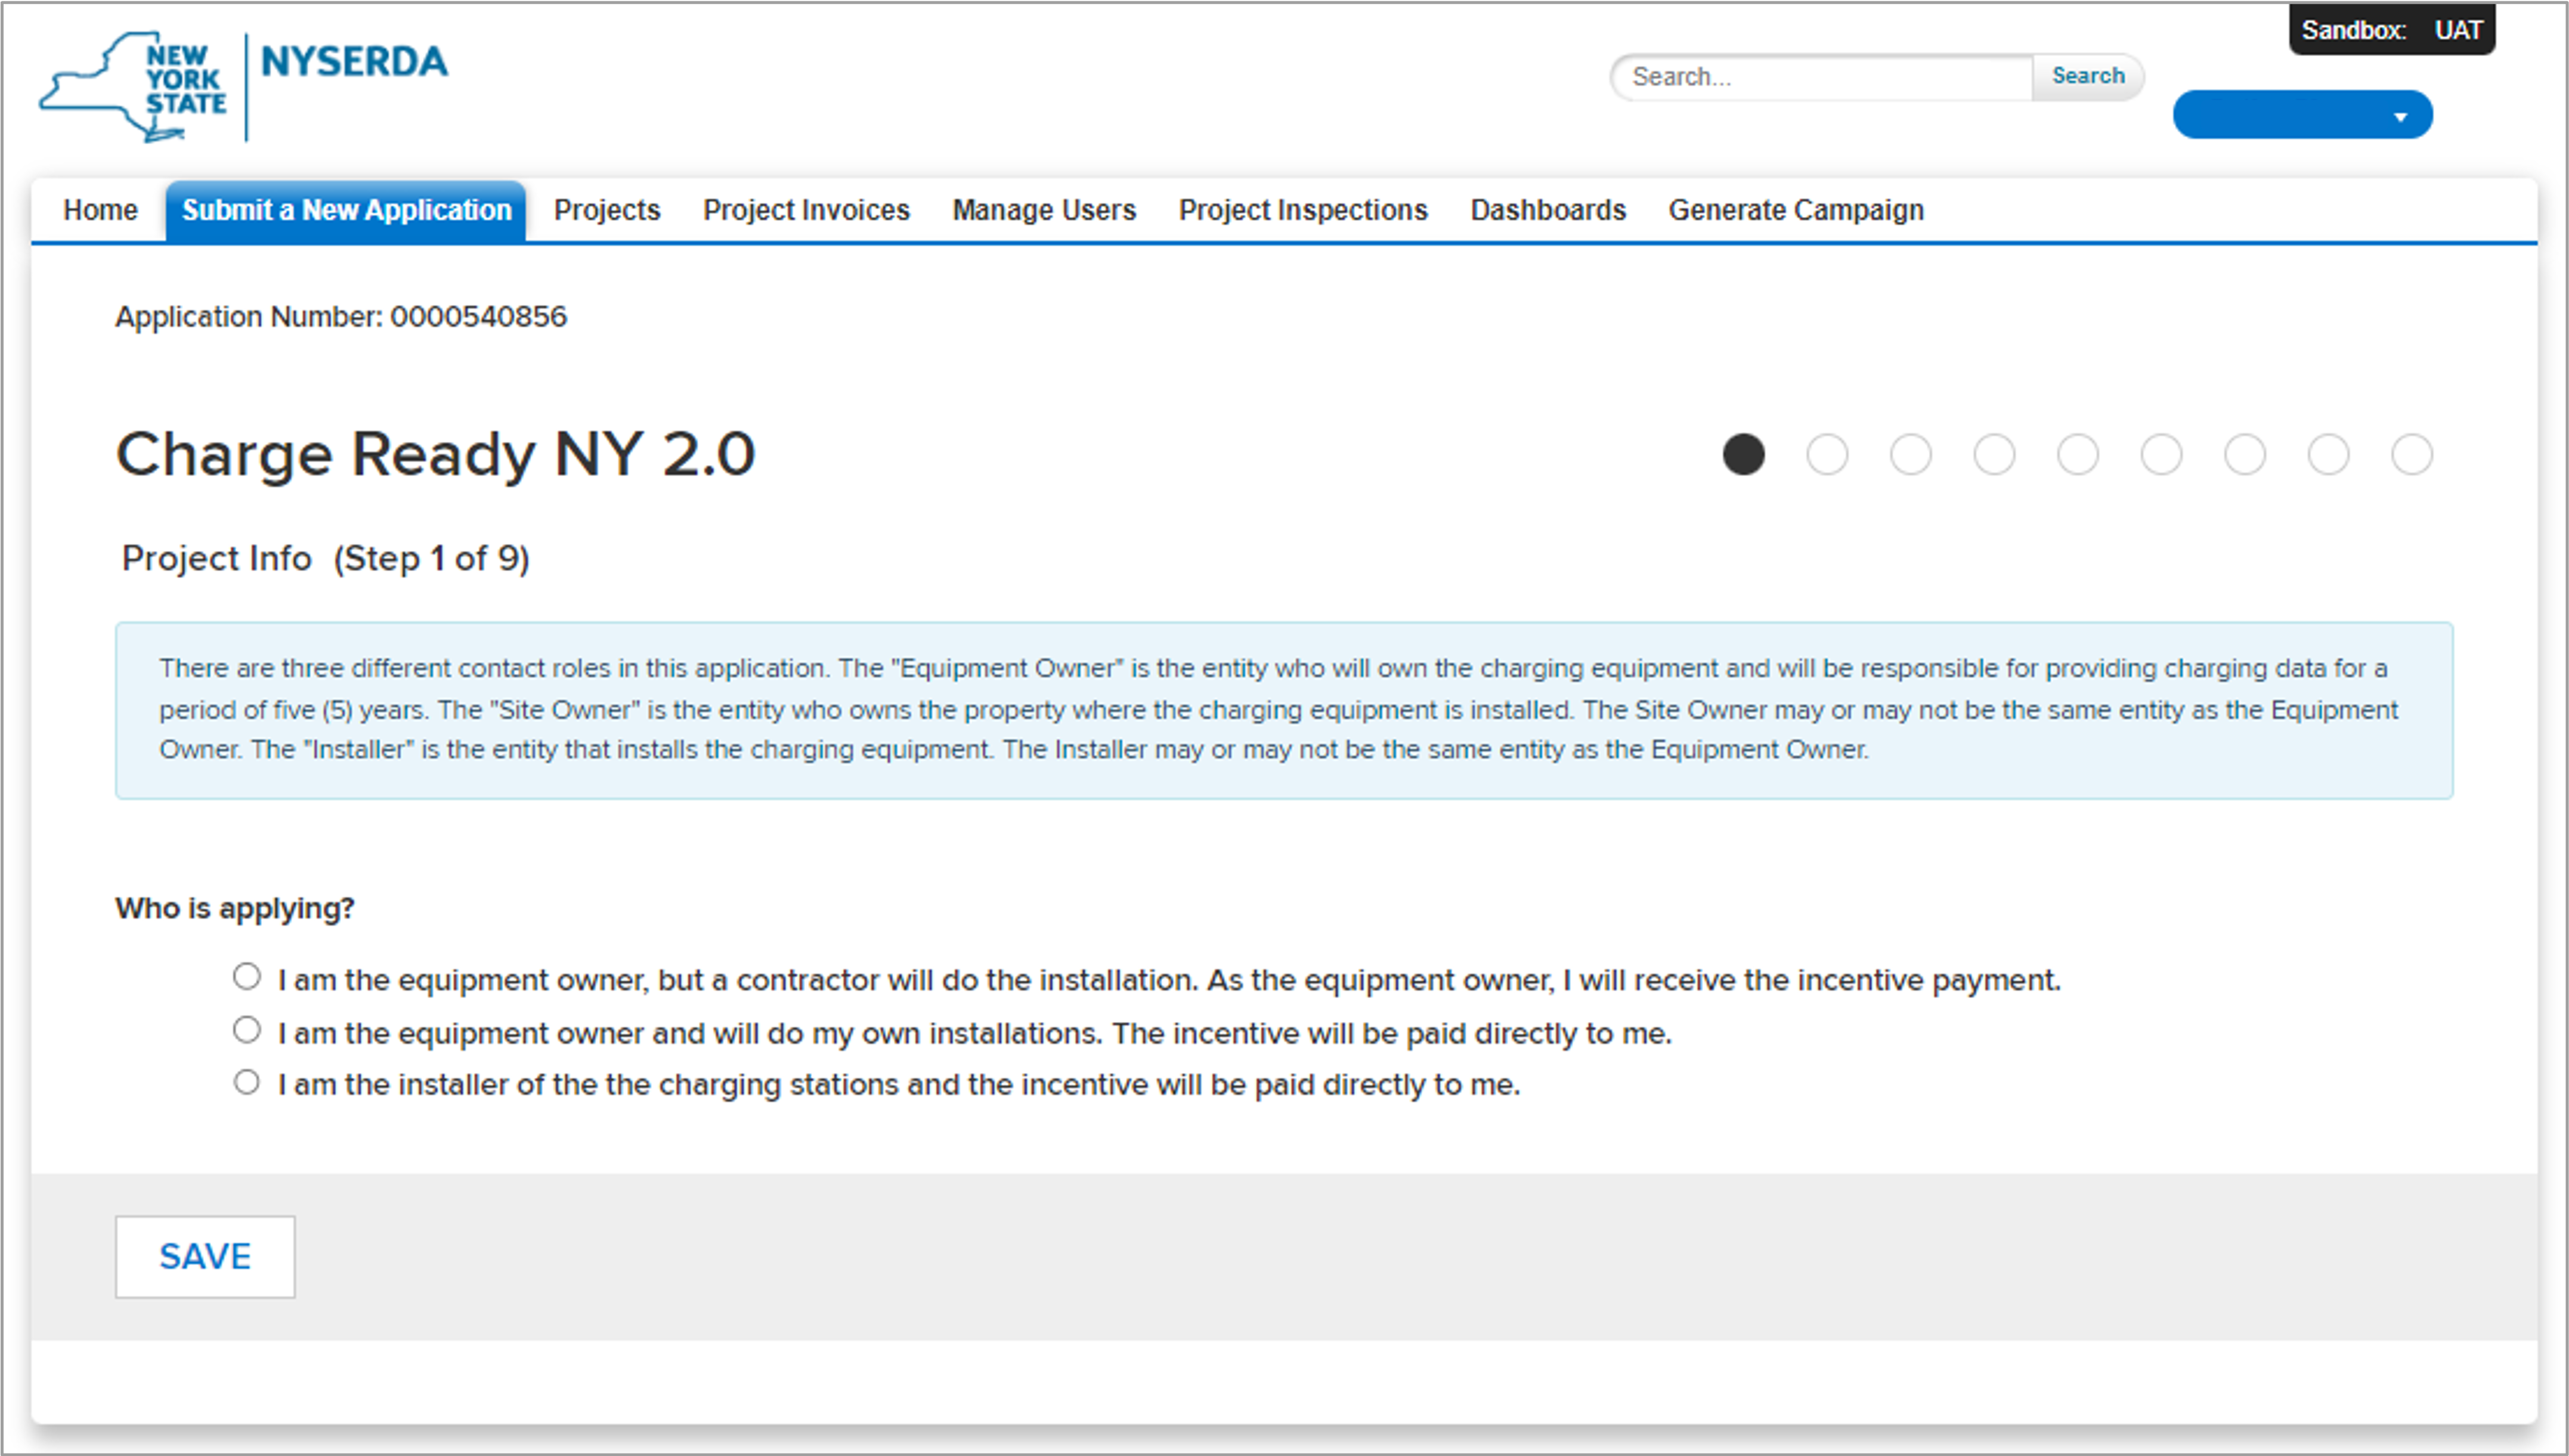
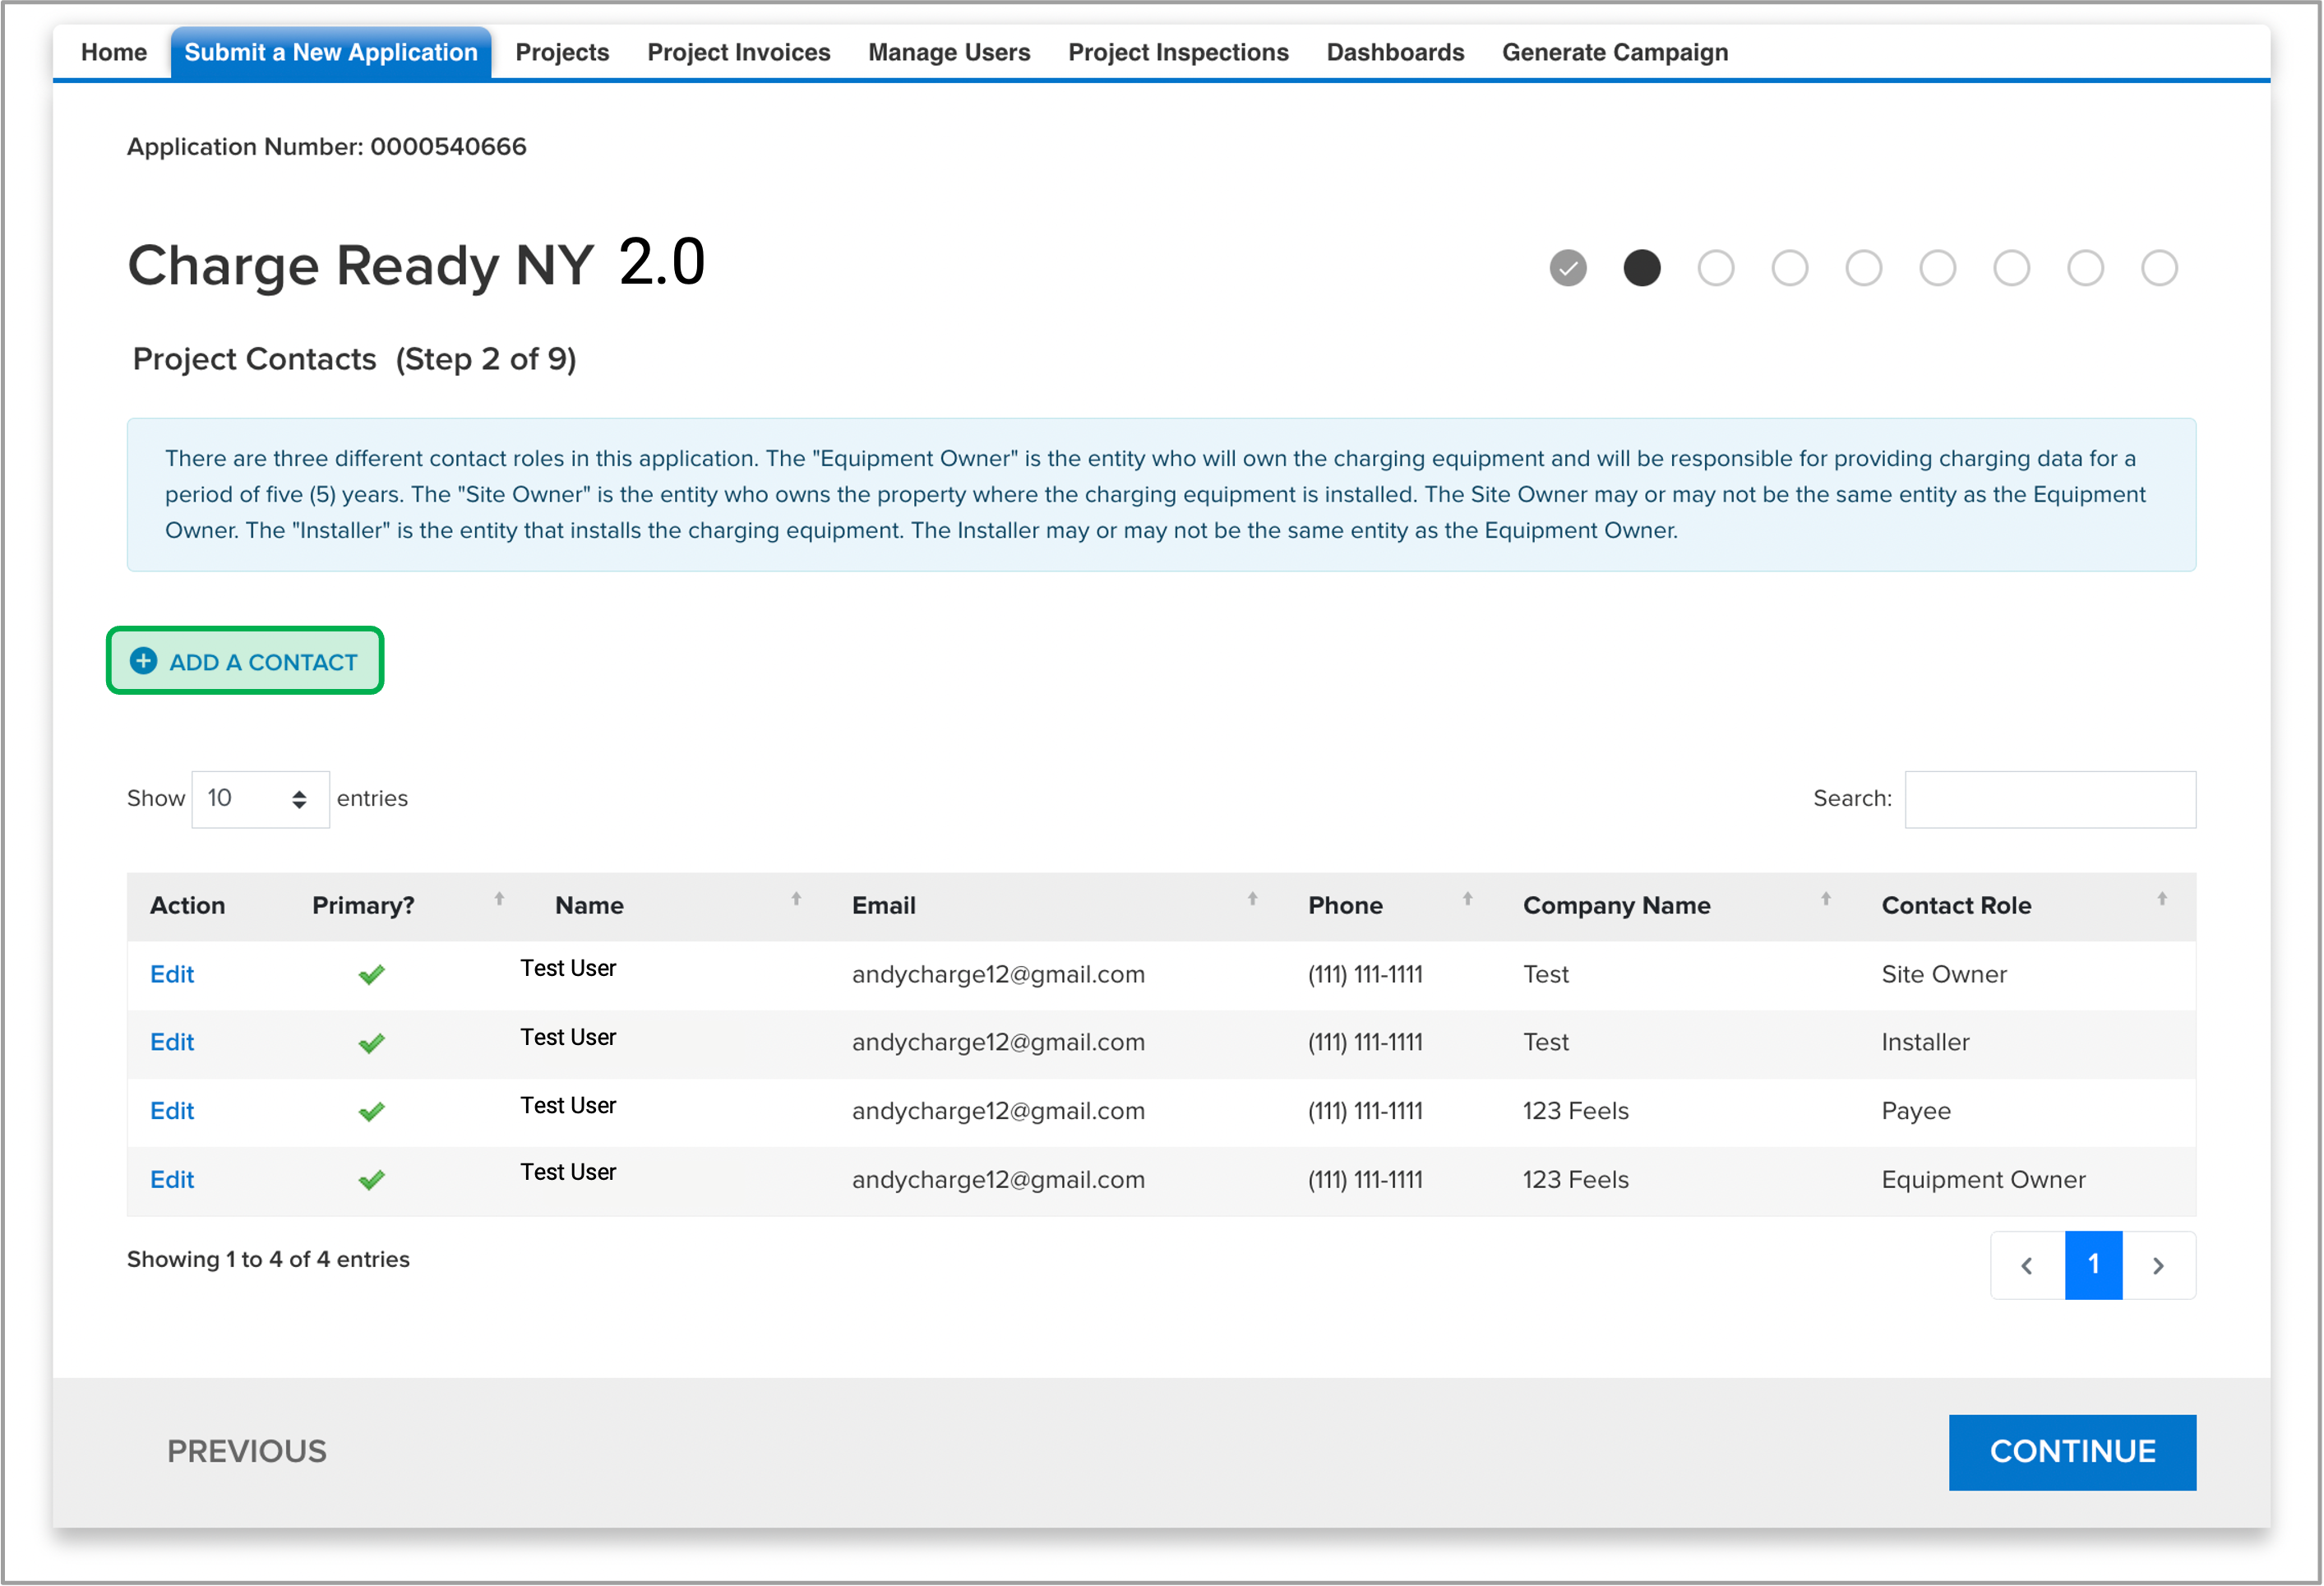
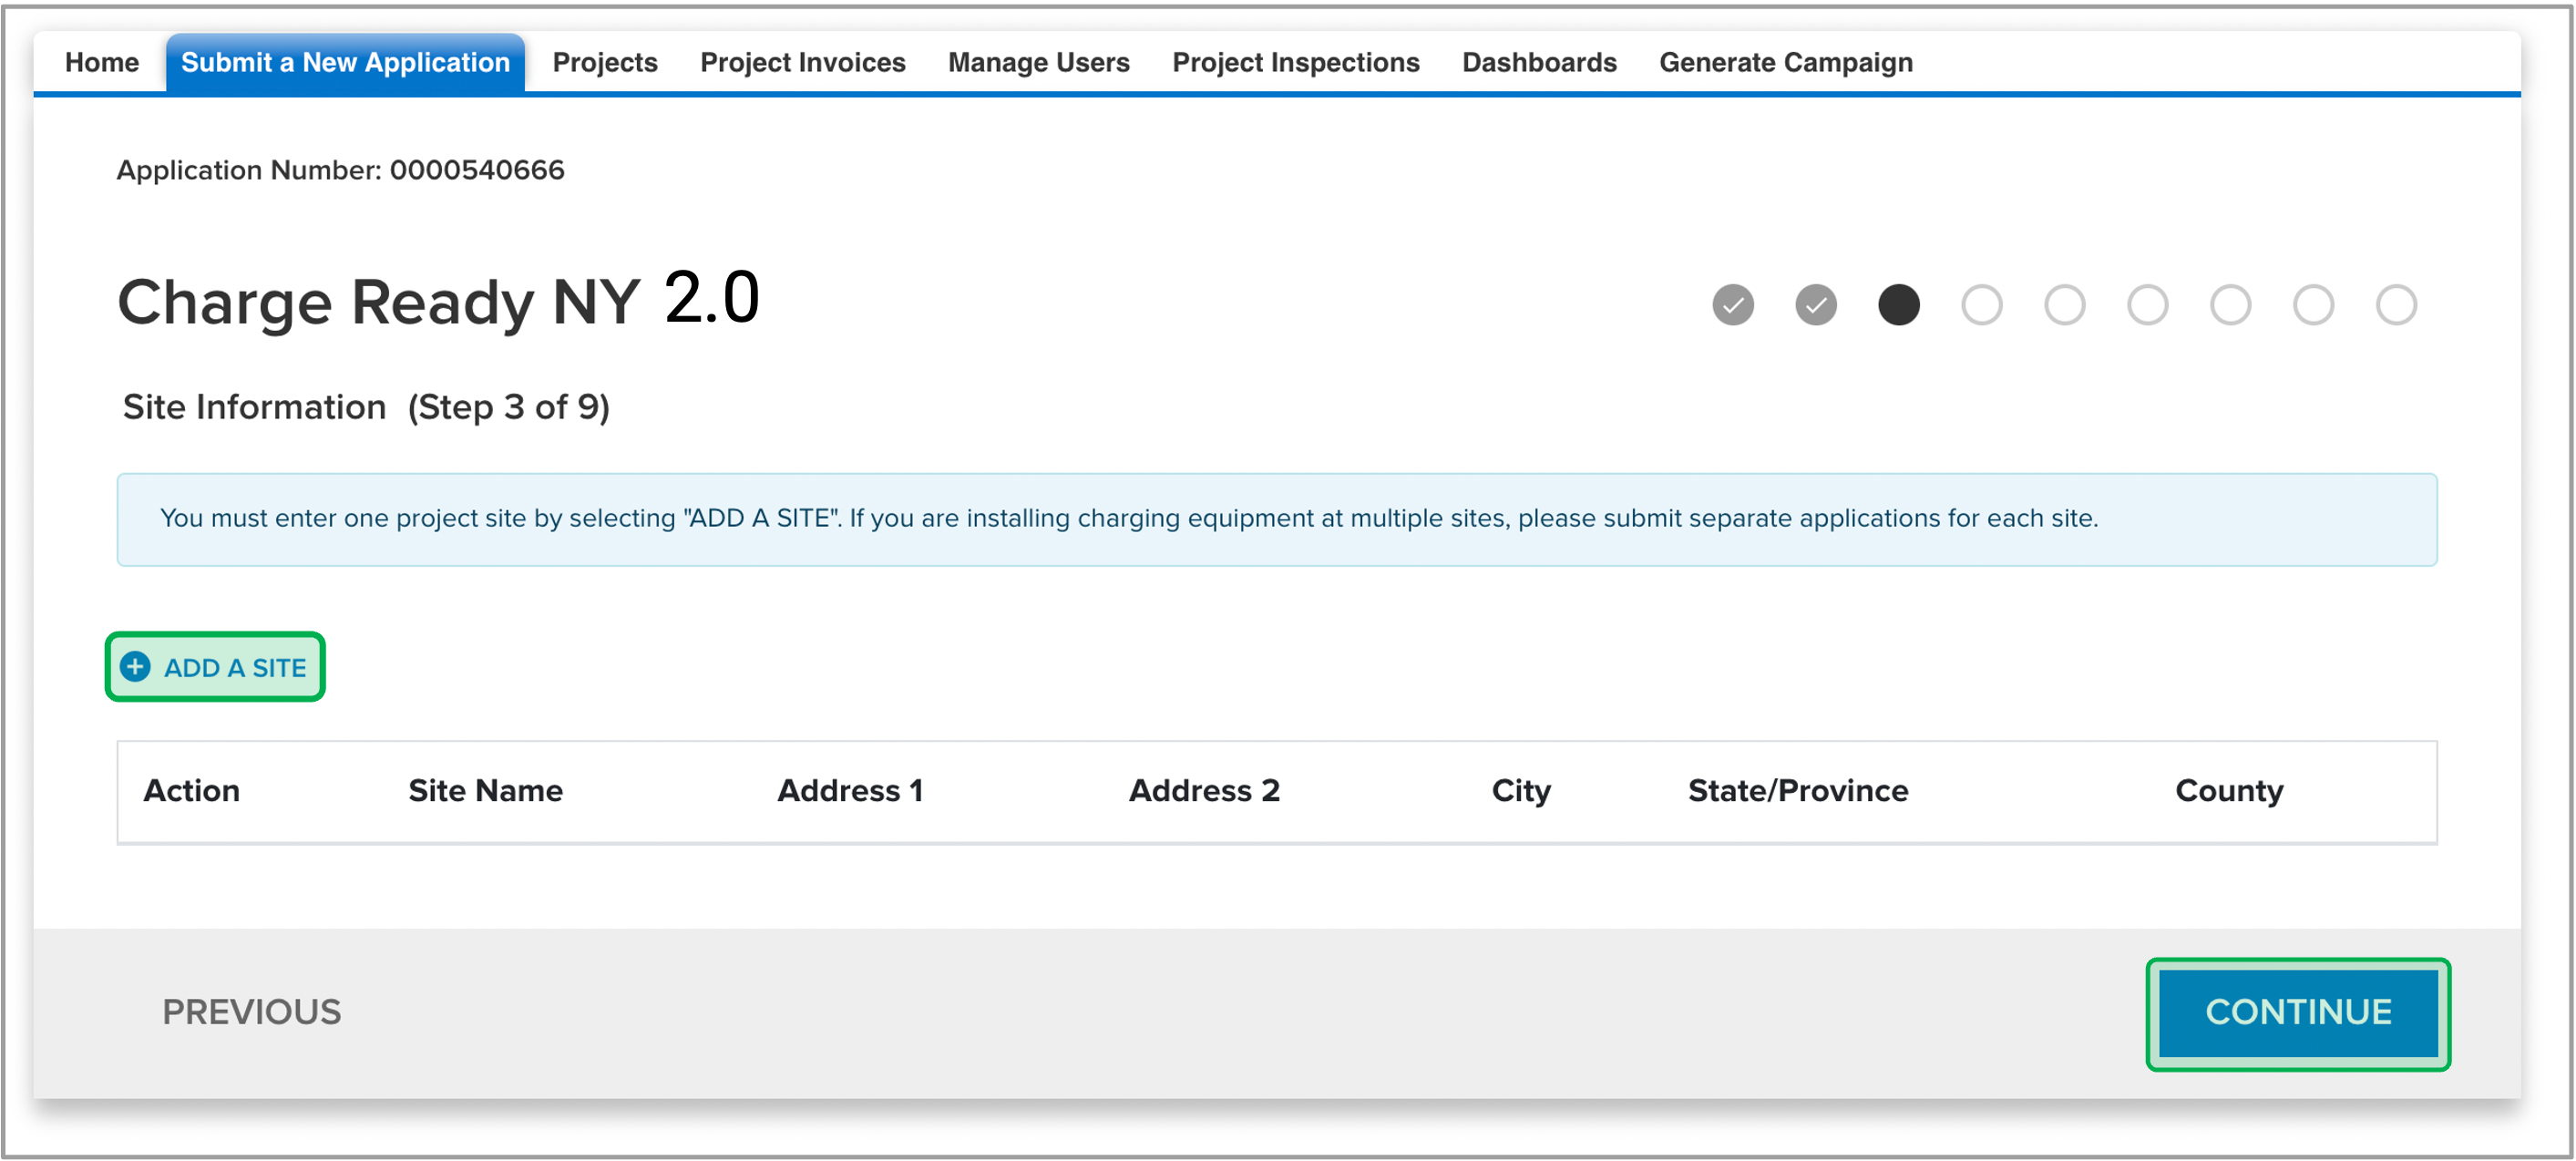
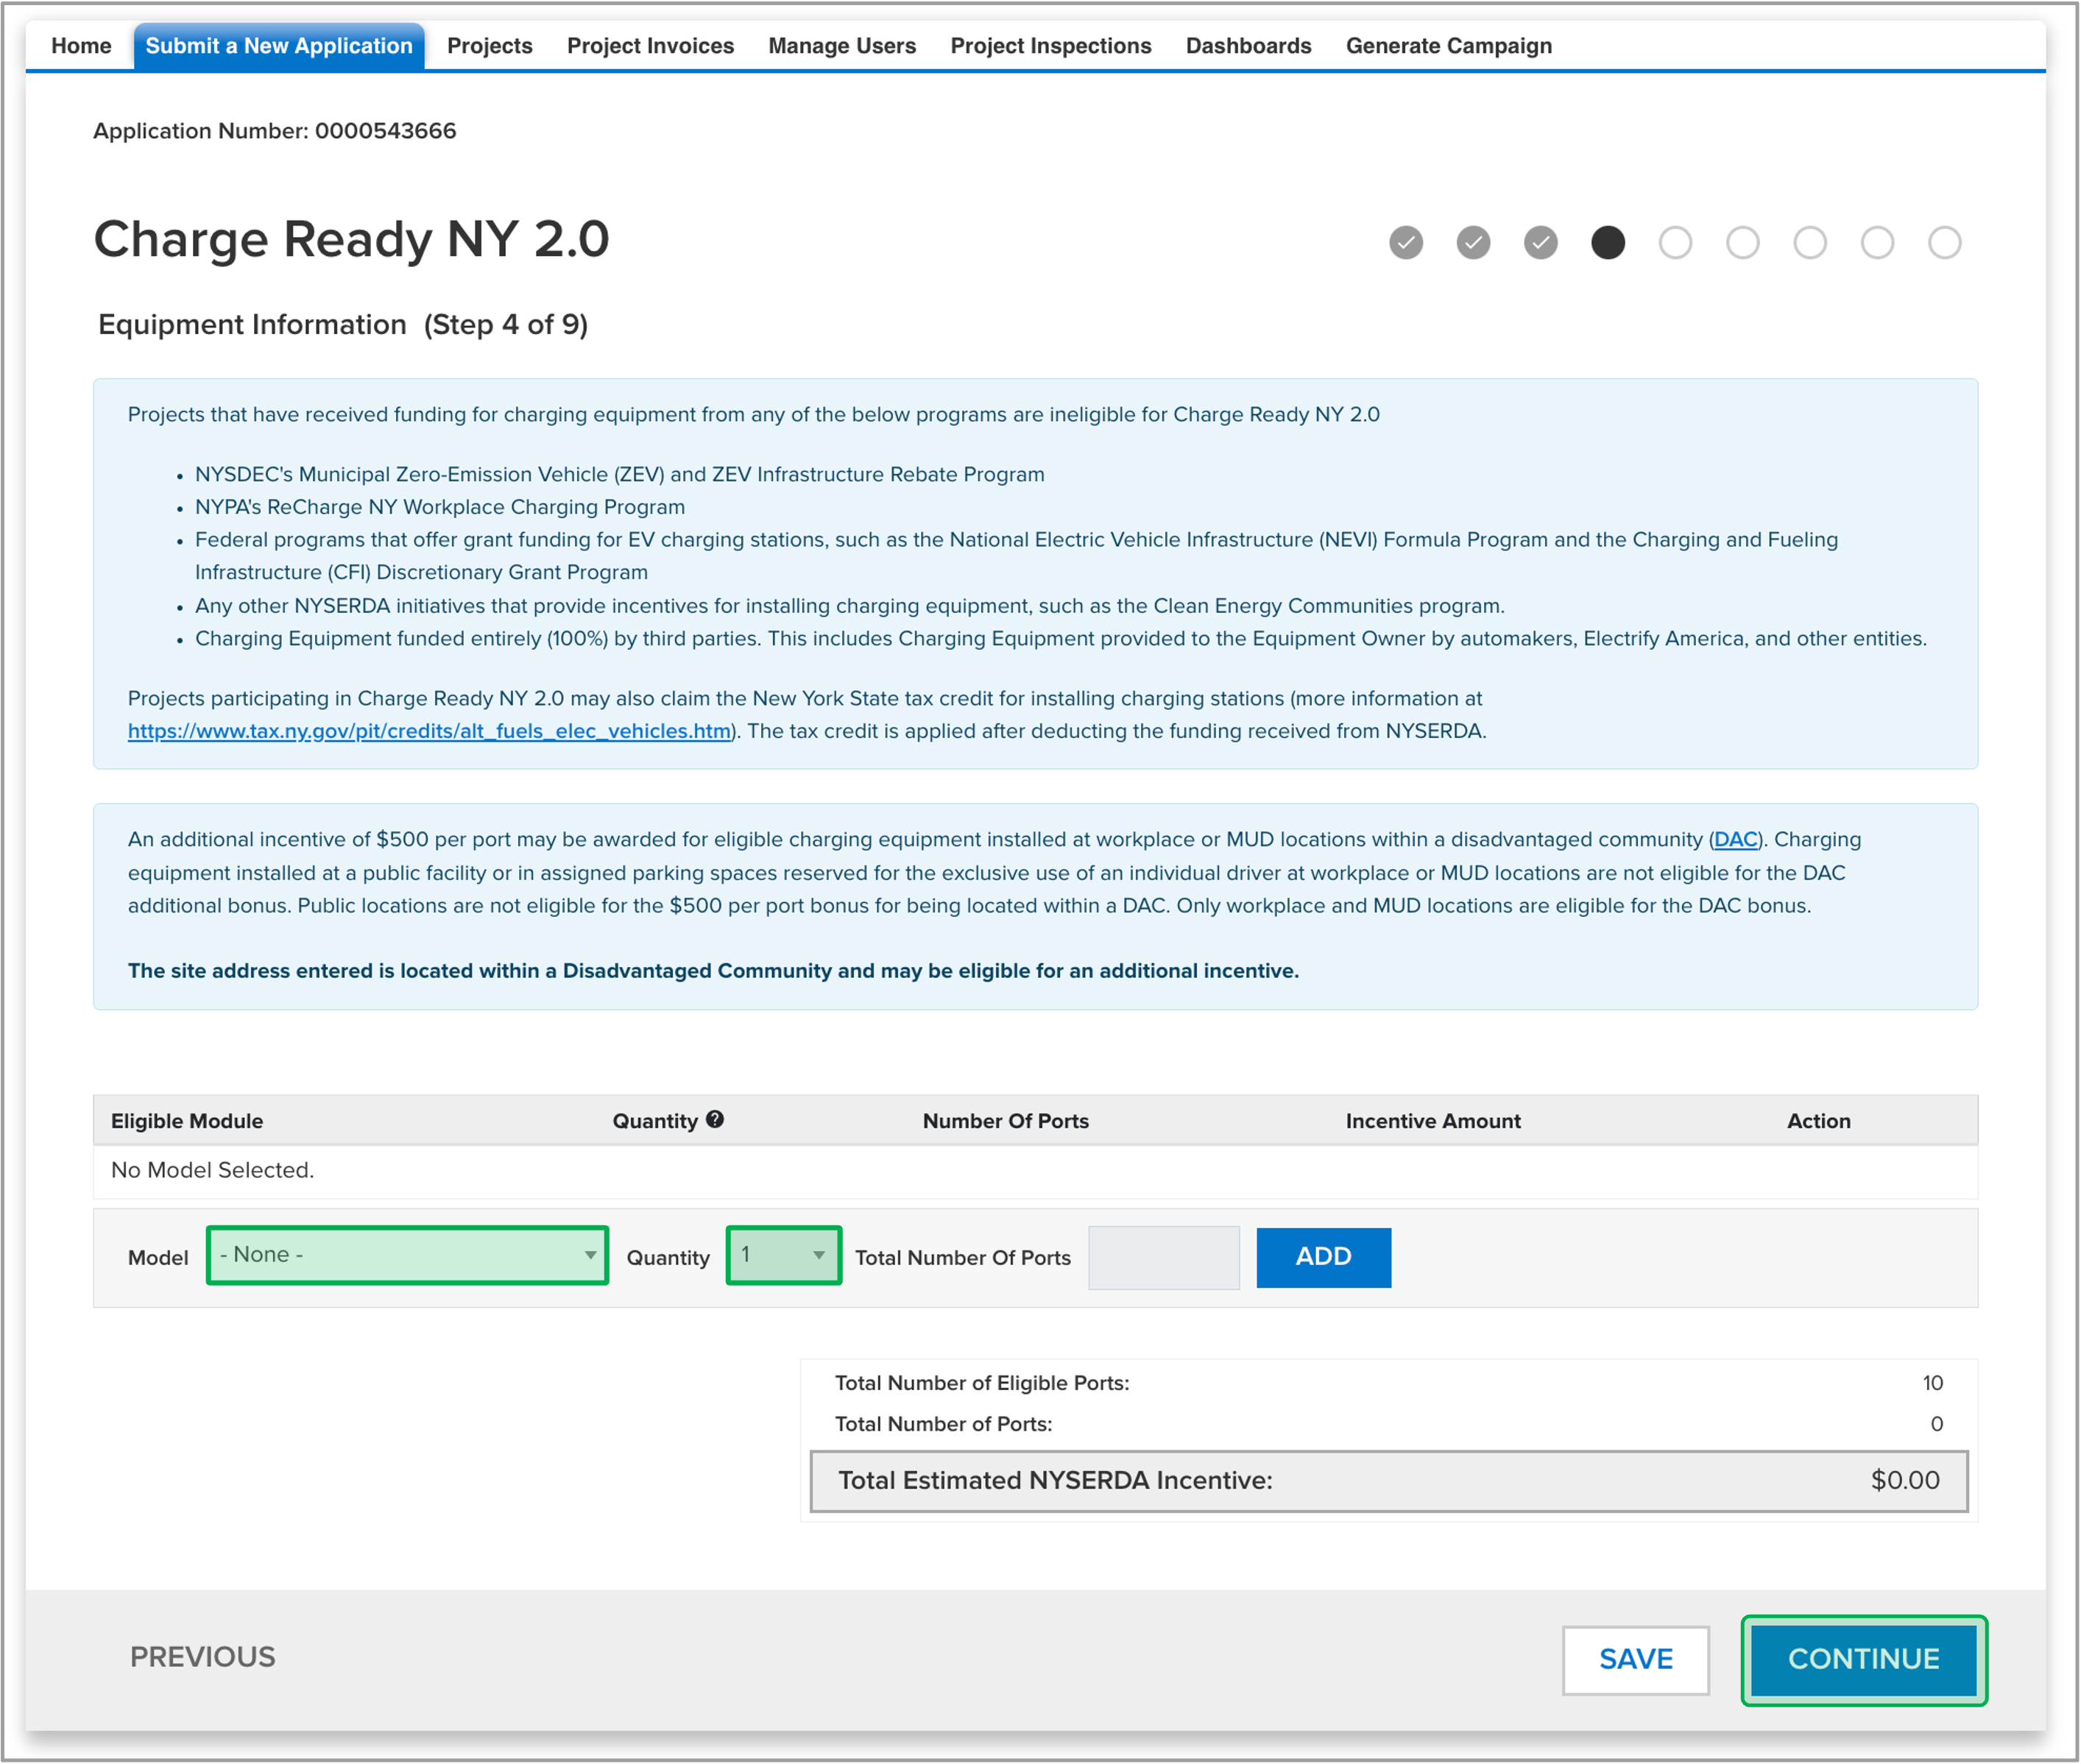
The Charge Ready NY 2.0 Program (Program) is  is an incentive program designed to accelerate the deployment of Level 2 electric vehicle charging equipment in New York State. By increasing the use of electric vehicles and electric vehicle charging stations, this program benefits New York State by reducing harmful emissions and the transportation sector’s dependence on petroleum. The New York State Energy Research and Development Authority (NYSERDA) developed the Program to provide incentives that reduce the cost of purchasing and installing eligible Level 2 charging equipment for use in New York State. 

The instructions below guide you through the processes of applying for incentives before and after chargers are installed in the Salesforce Partner Portal. You will need an active portal account to submit a Participant Agreement and a Project Application. To learn how to create a portal account, expand the link below. If you already have a portal account, you can log in using this link: Salesforce Portal. Once you have an active portal account, use the two tabs below to learn how to submit a Participation Agreement, which should be completed first, and a Project Application.

UI Expand
titleRegister for a Portal Account


Info

To register for a portal account, access this link: Portal Registration Link.

The Portal Registration website contains two messages at the top. The first provides some guidance on what company information should be entered into the Company Information section of the registration form. The second message provides a link to the Salesforce Portal login page should you lose it.

To register a new Salesforce Portal account, follow the instructions below.


UI Steps
sizesmall


UI Step

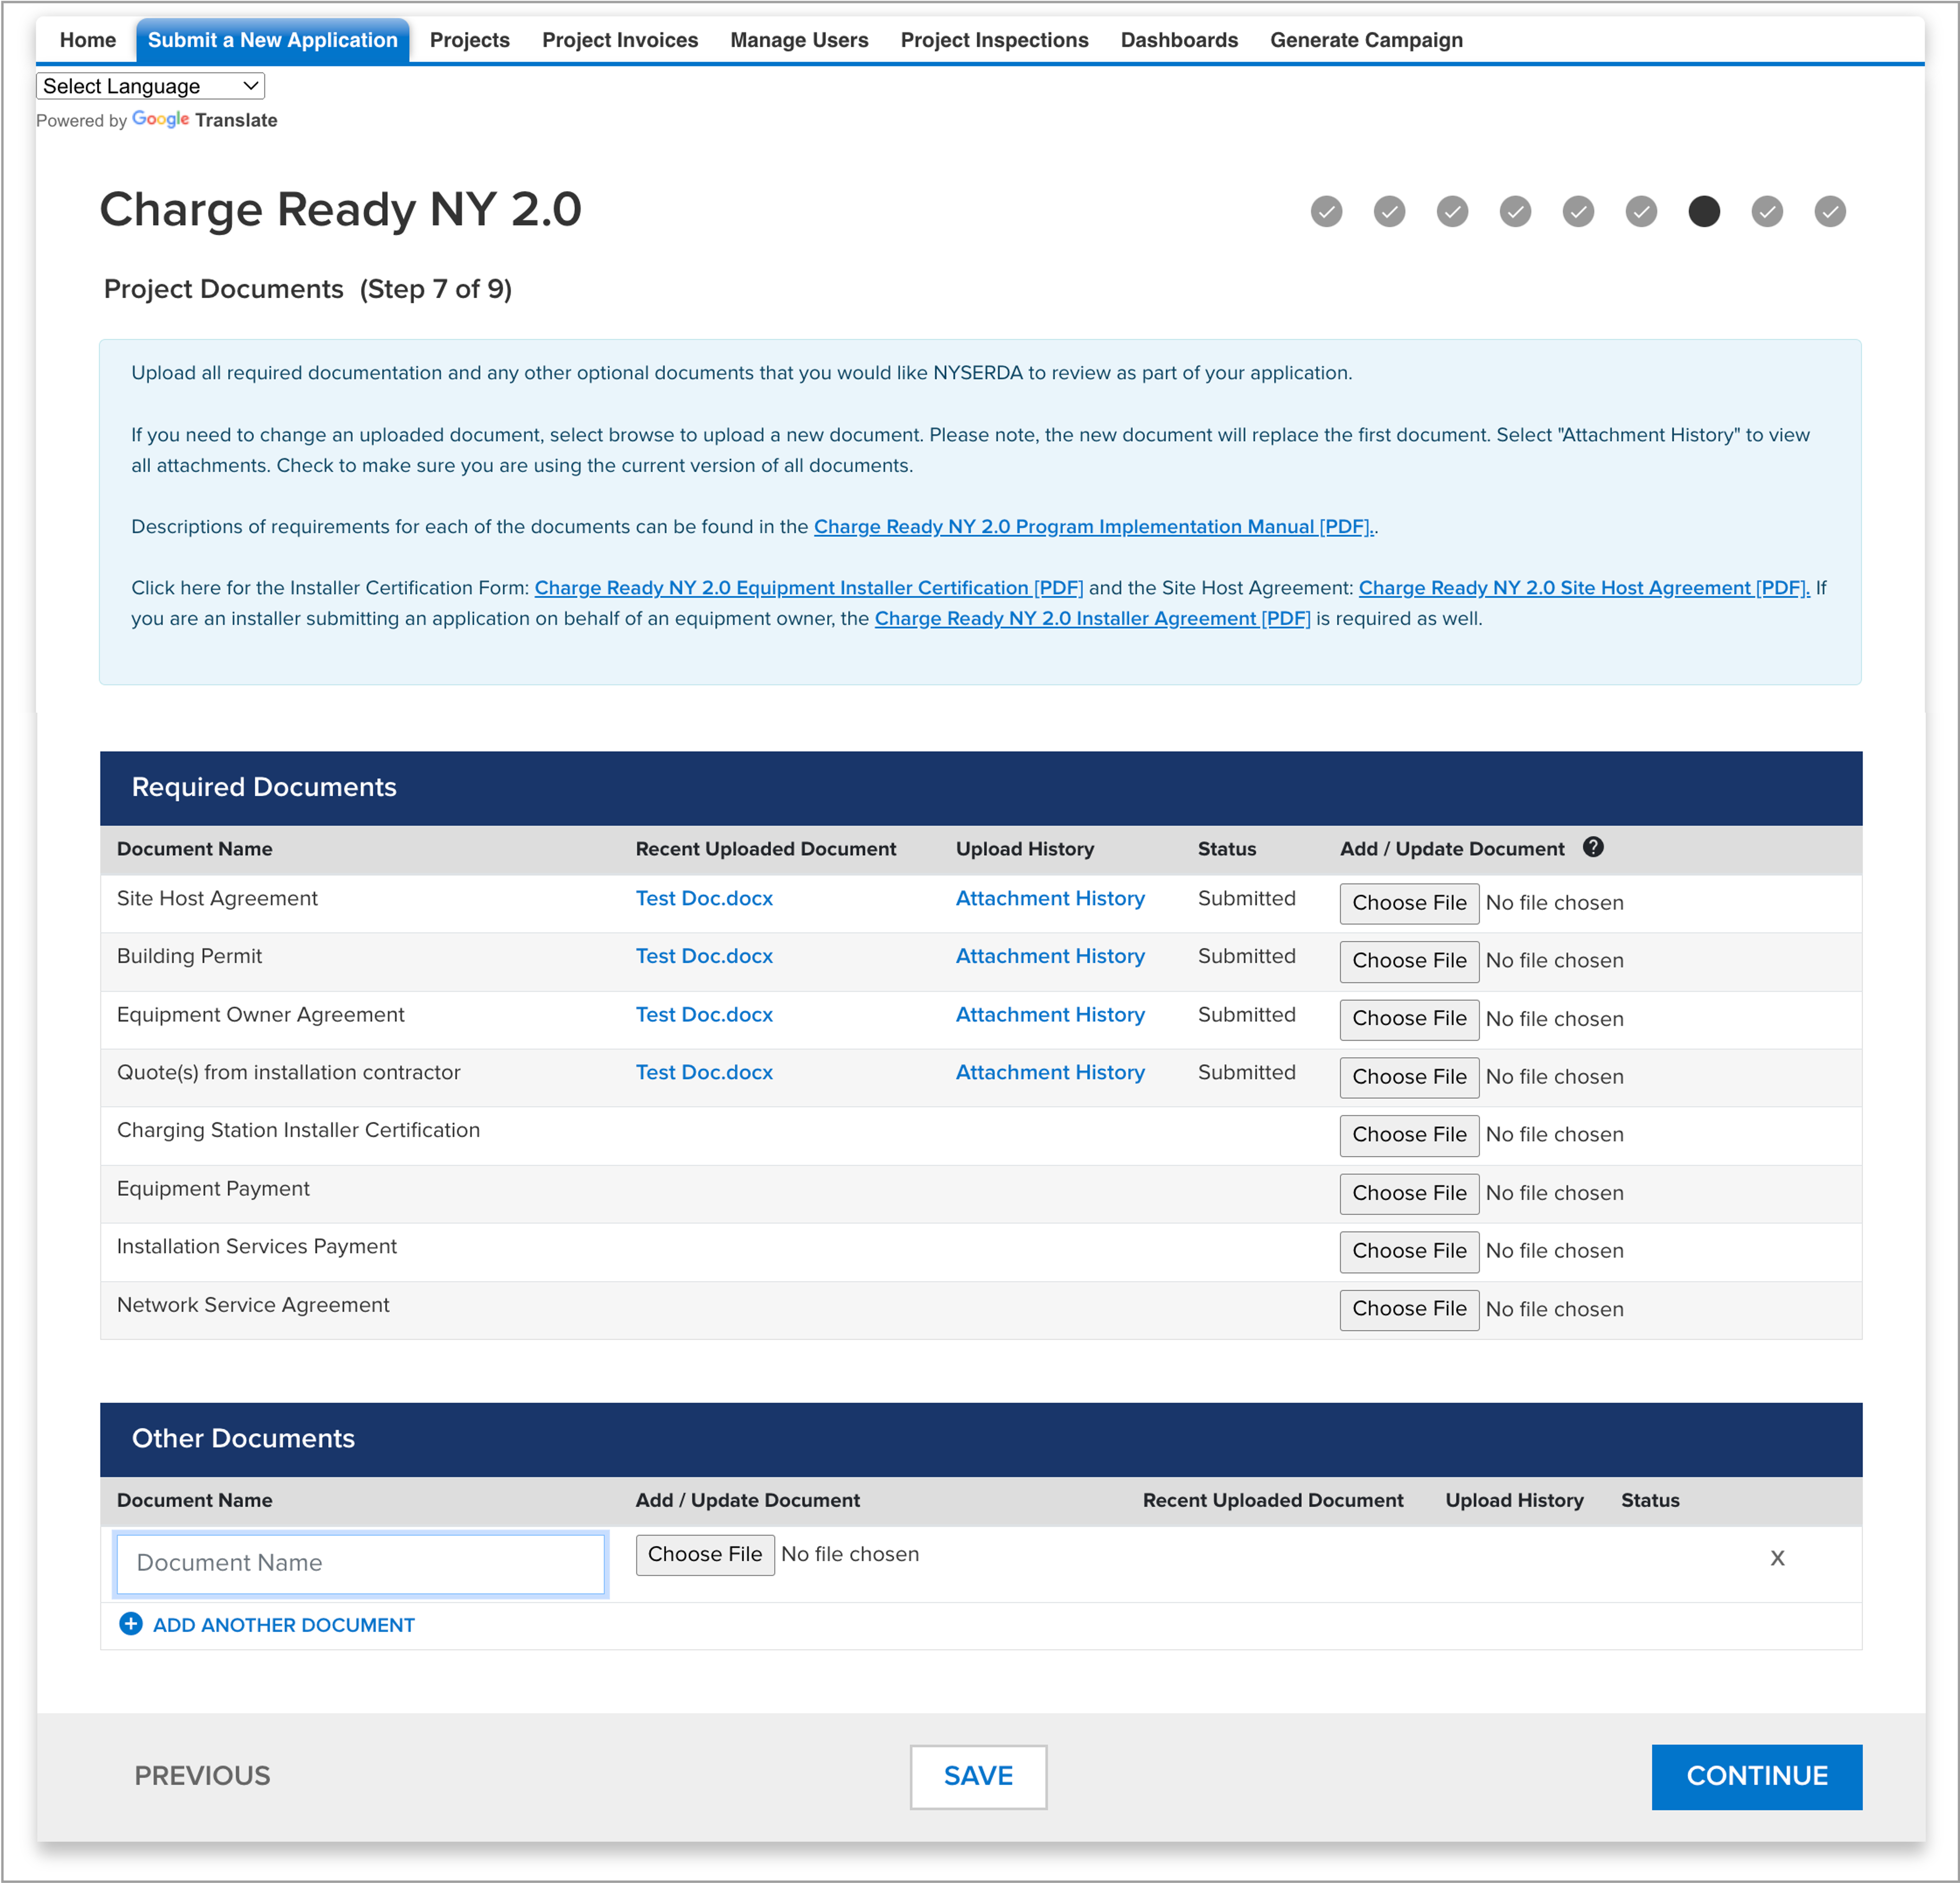
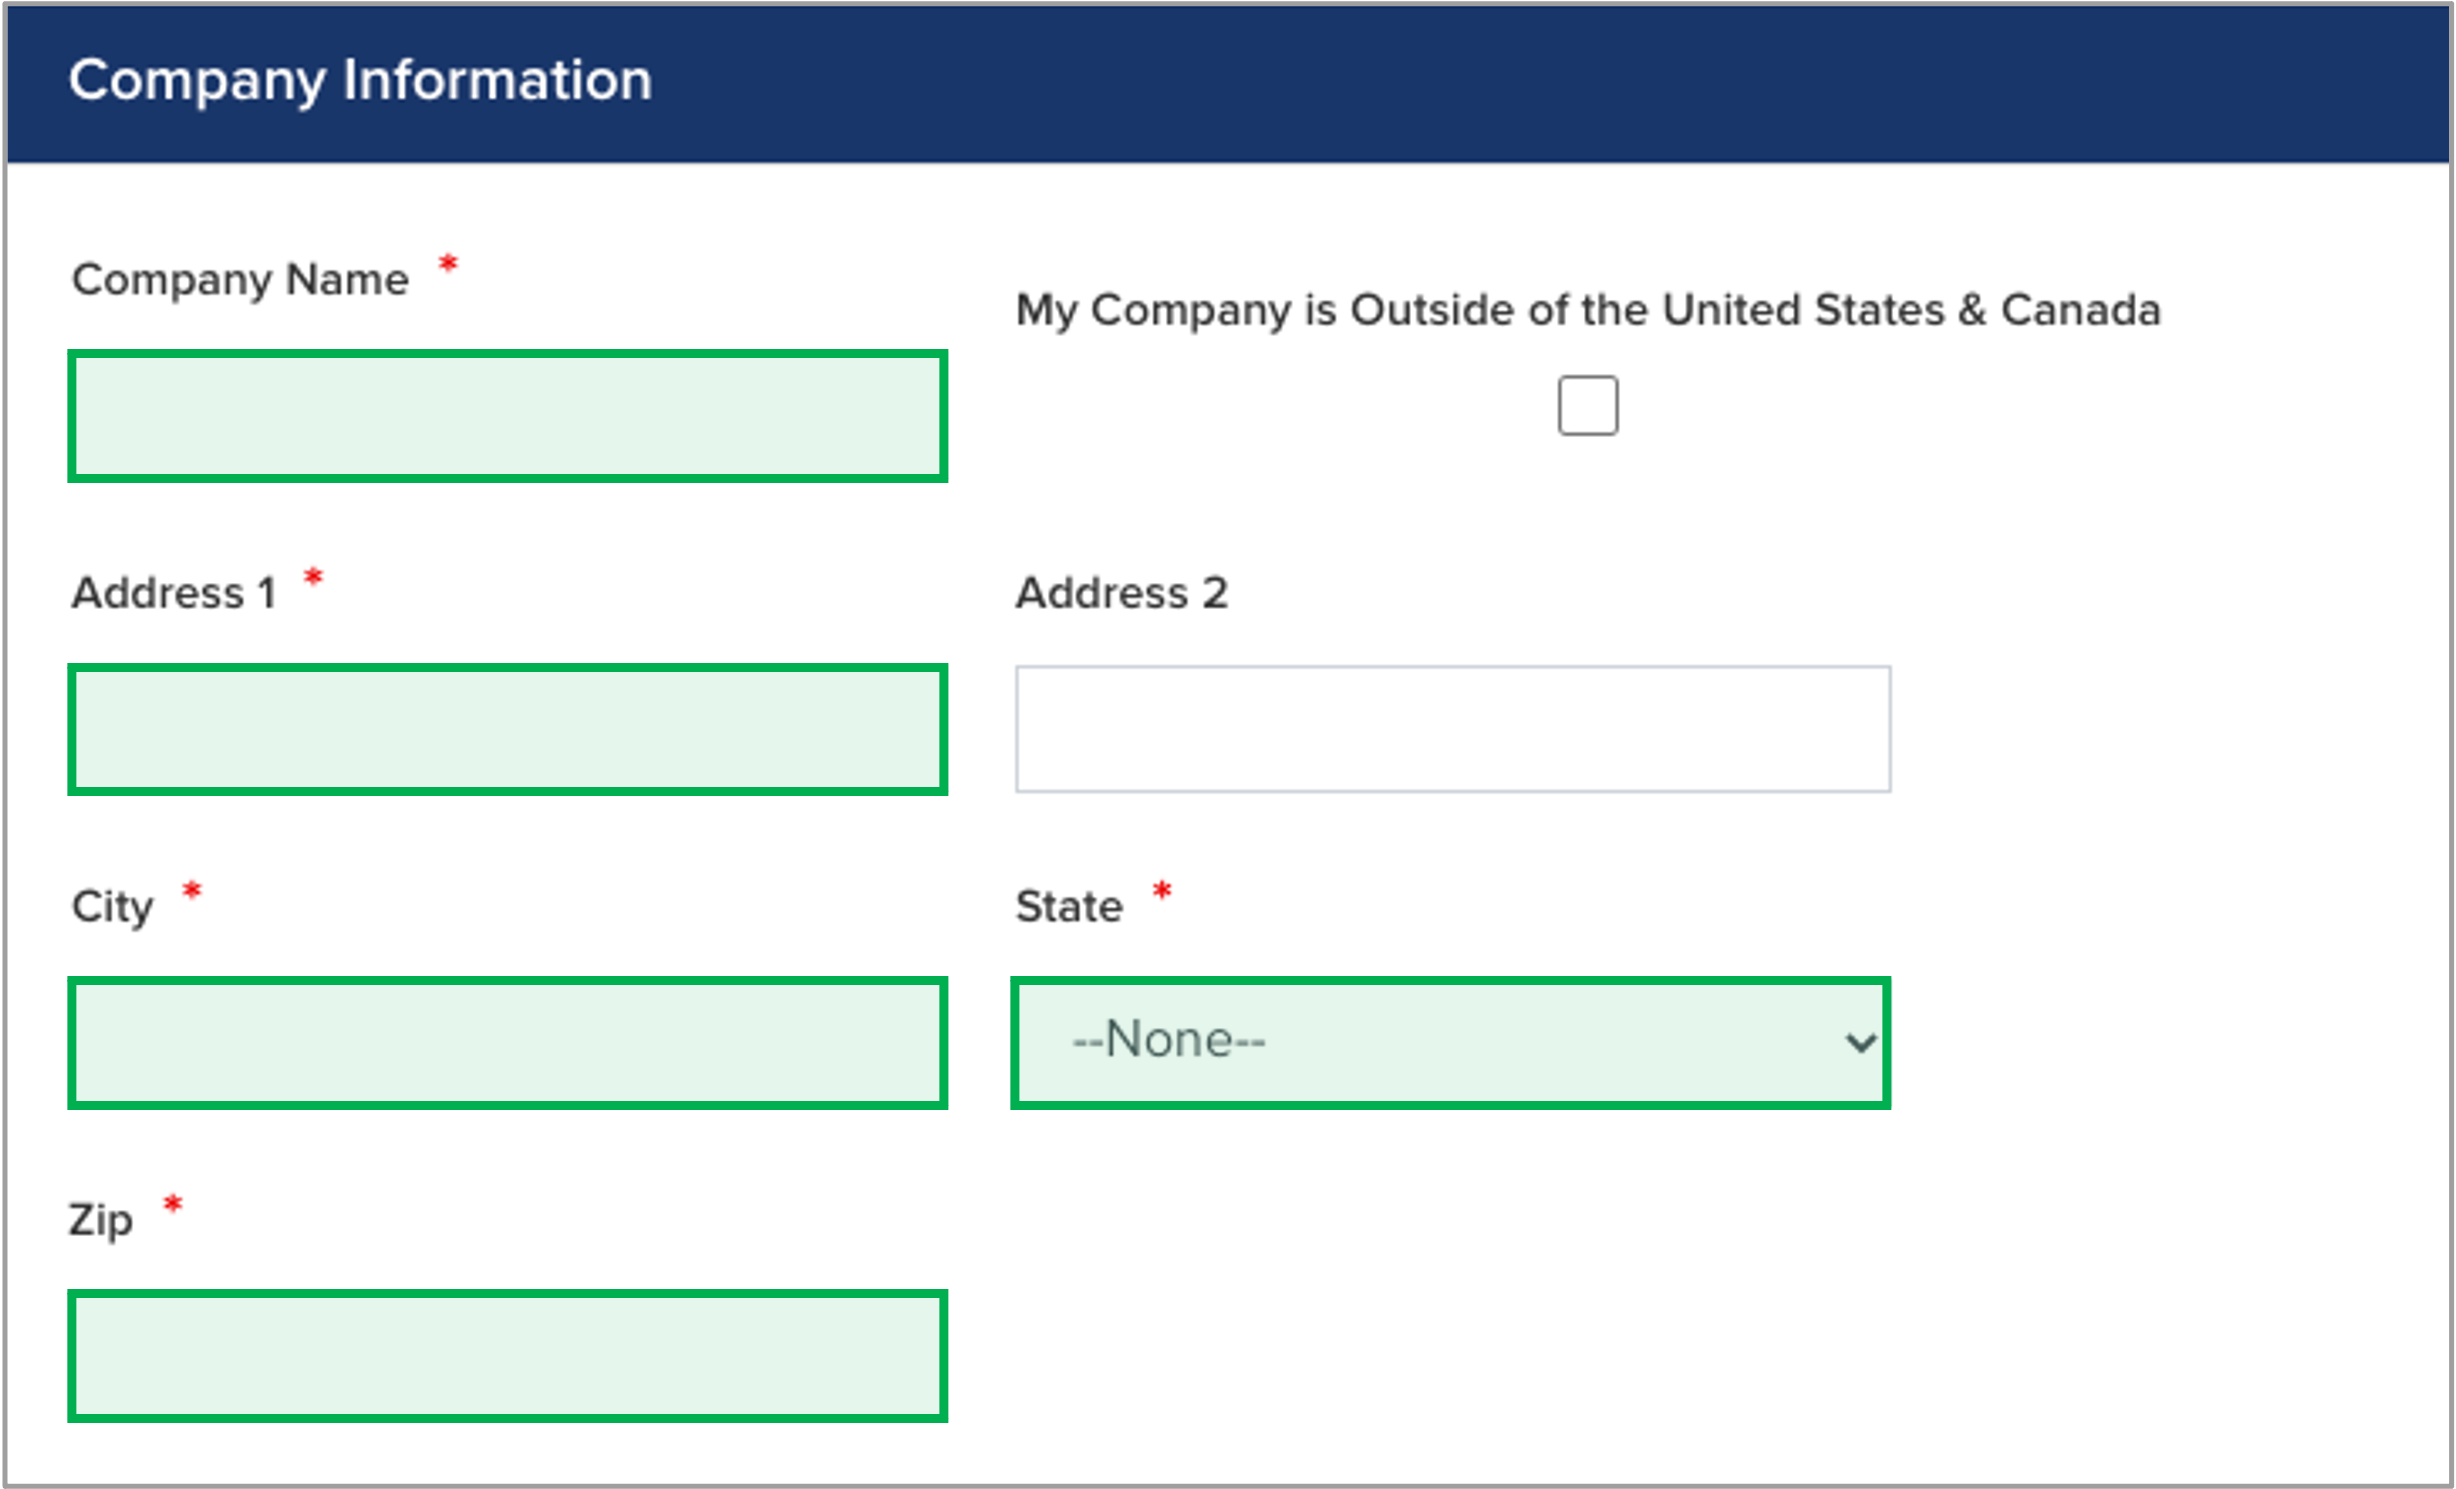
Complete the Company Information section, being sure to populate all required fields (shown with a red asterisk * ).

Warning

Please register with the main company information, not the sub-entity (LLCs, Inc, etc.) information.


Expand
titlescreenshot


UI Step

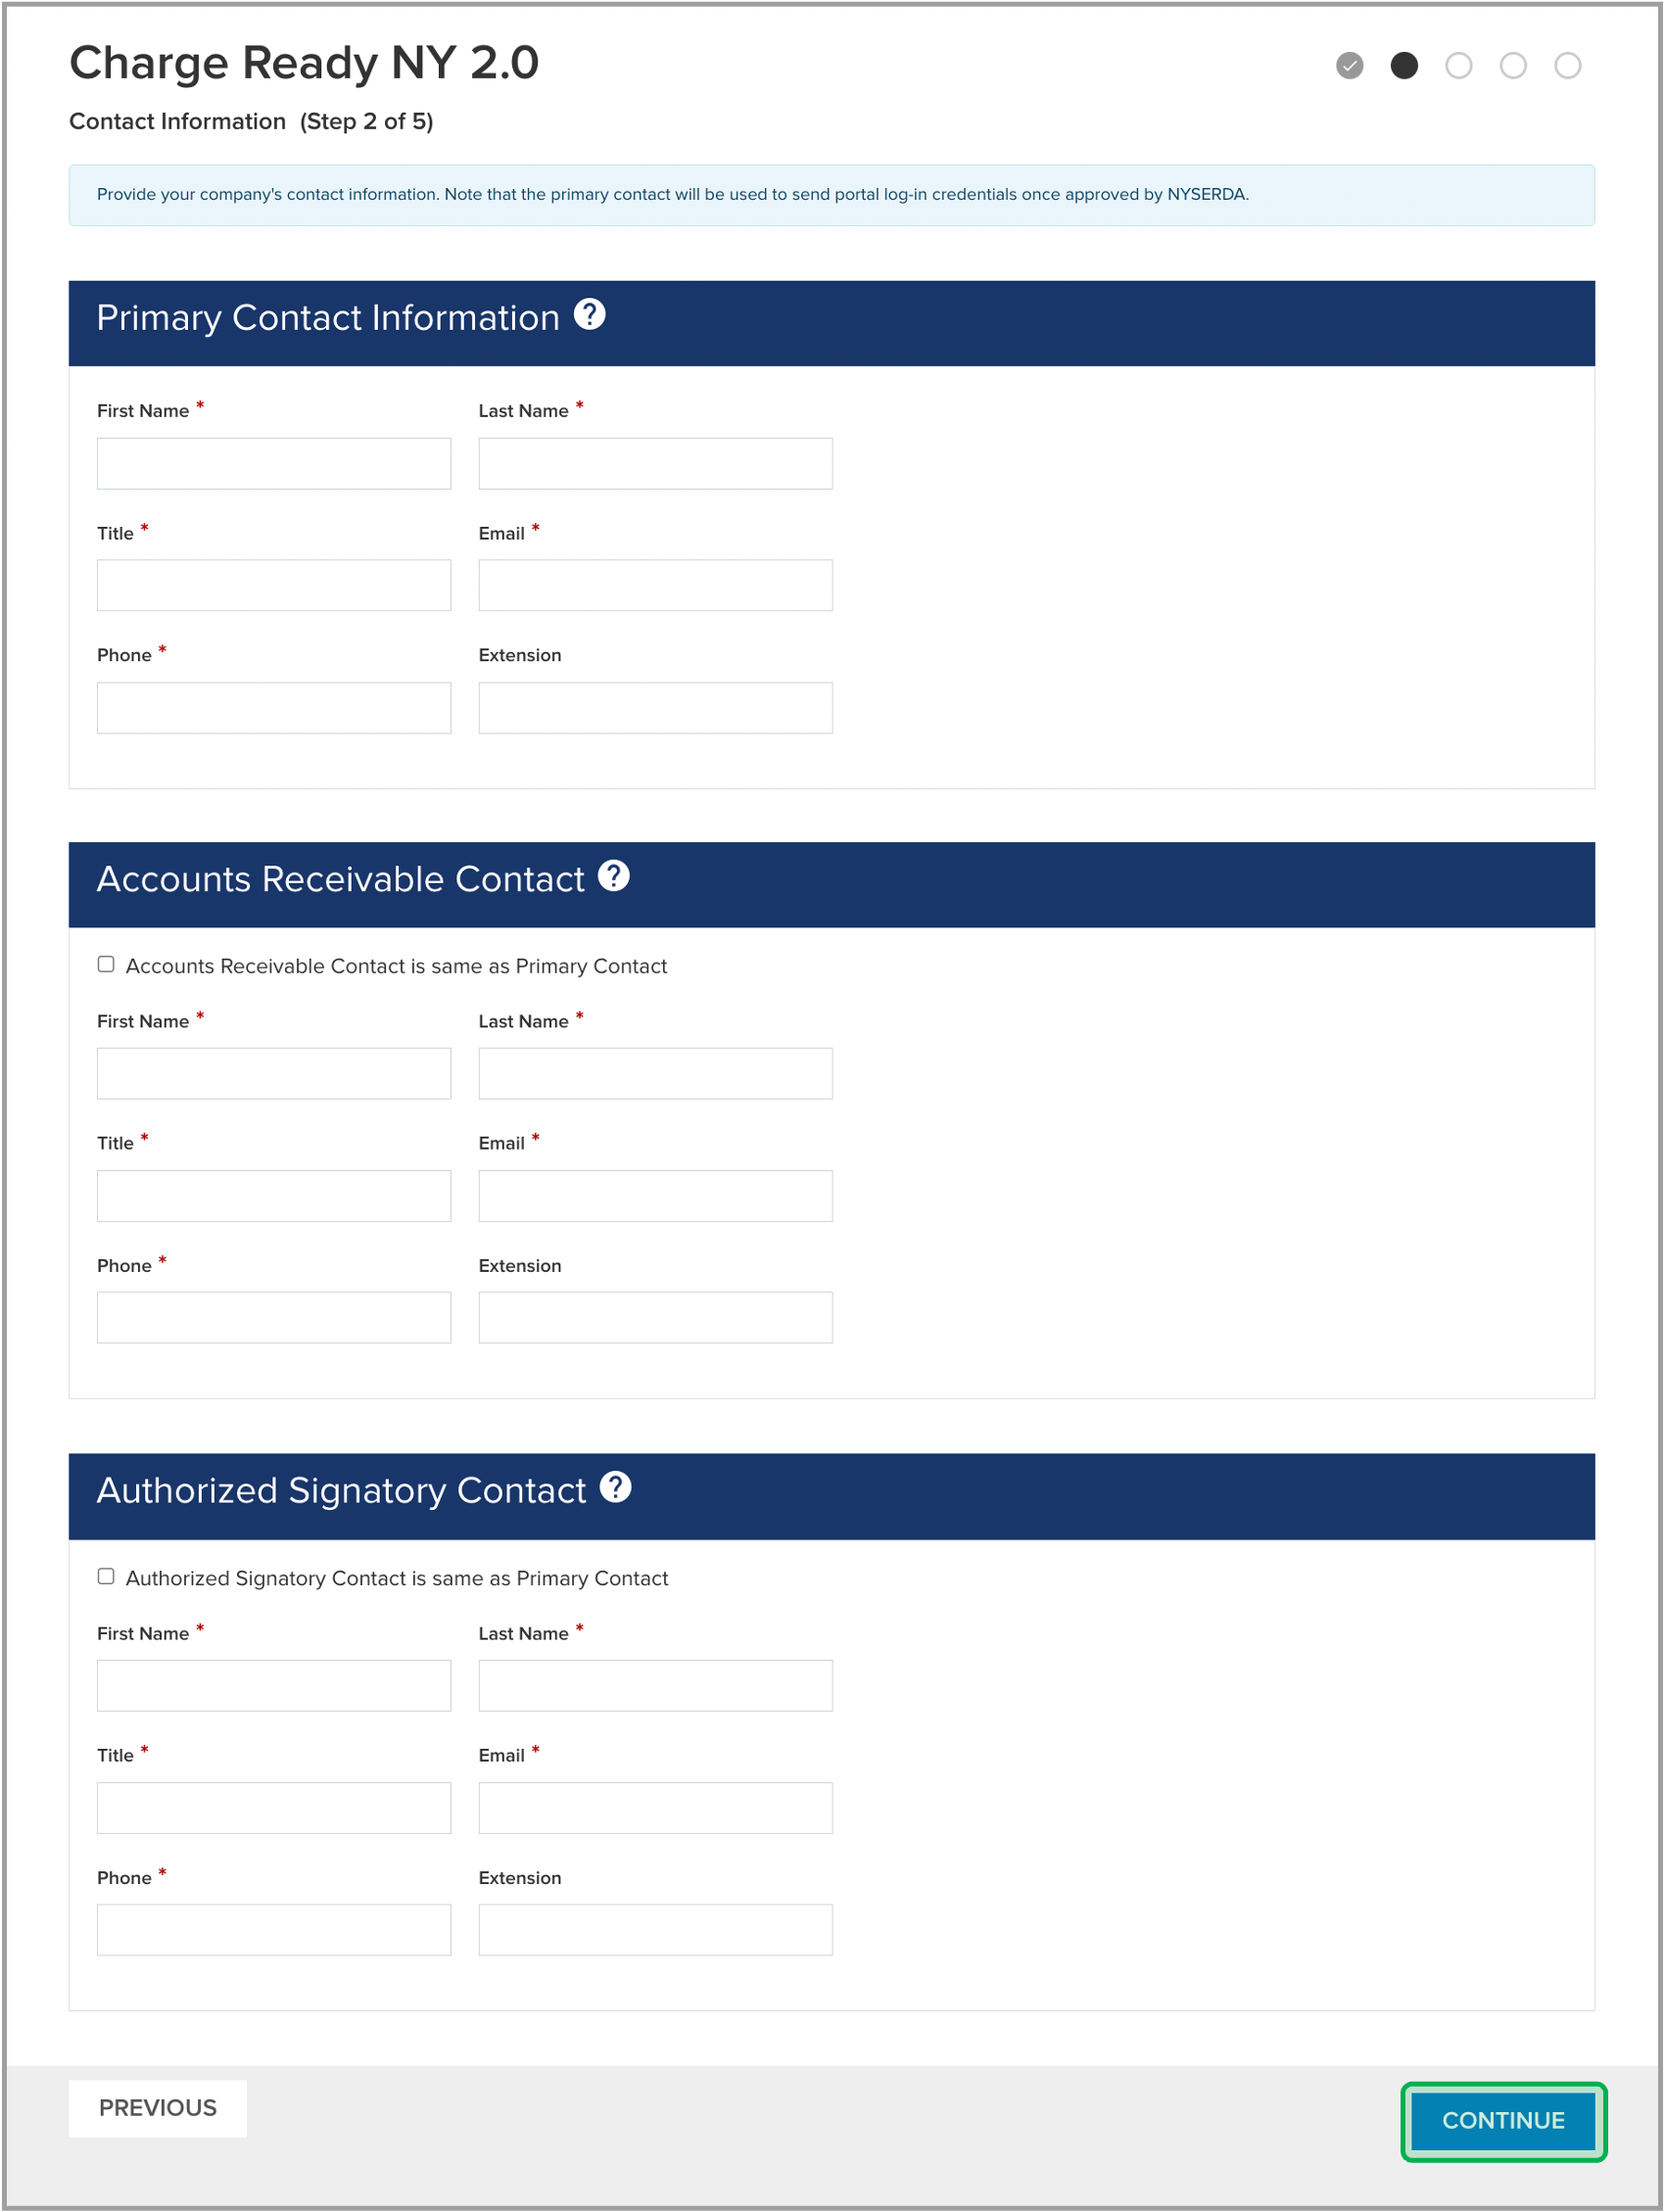
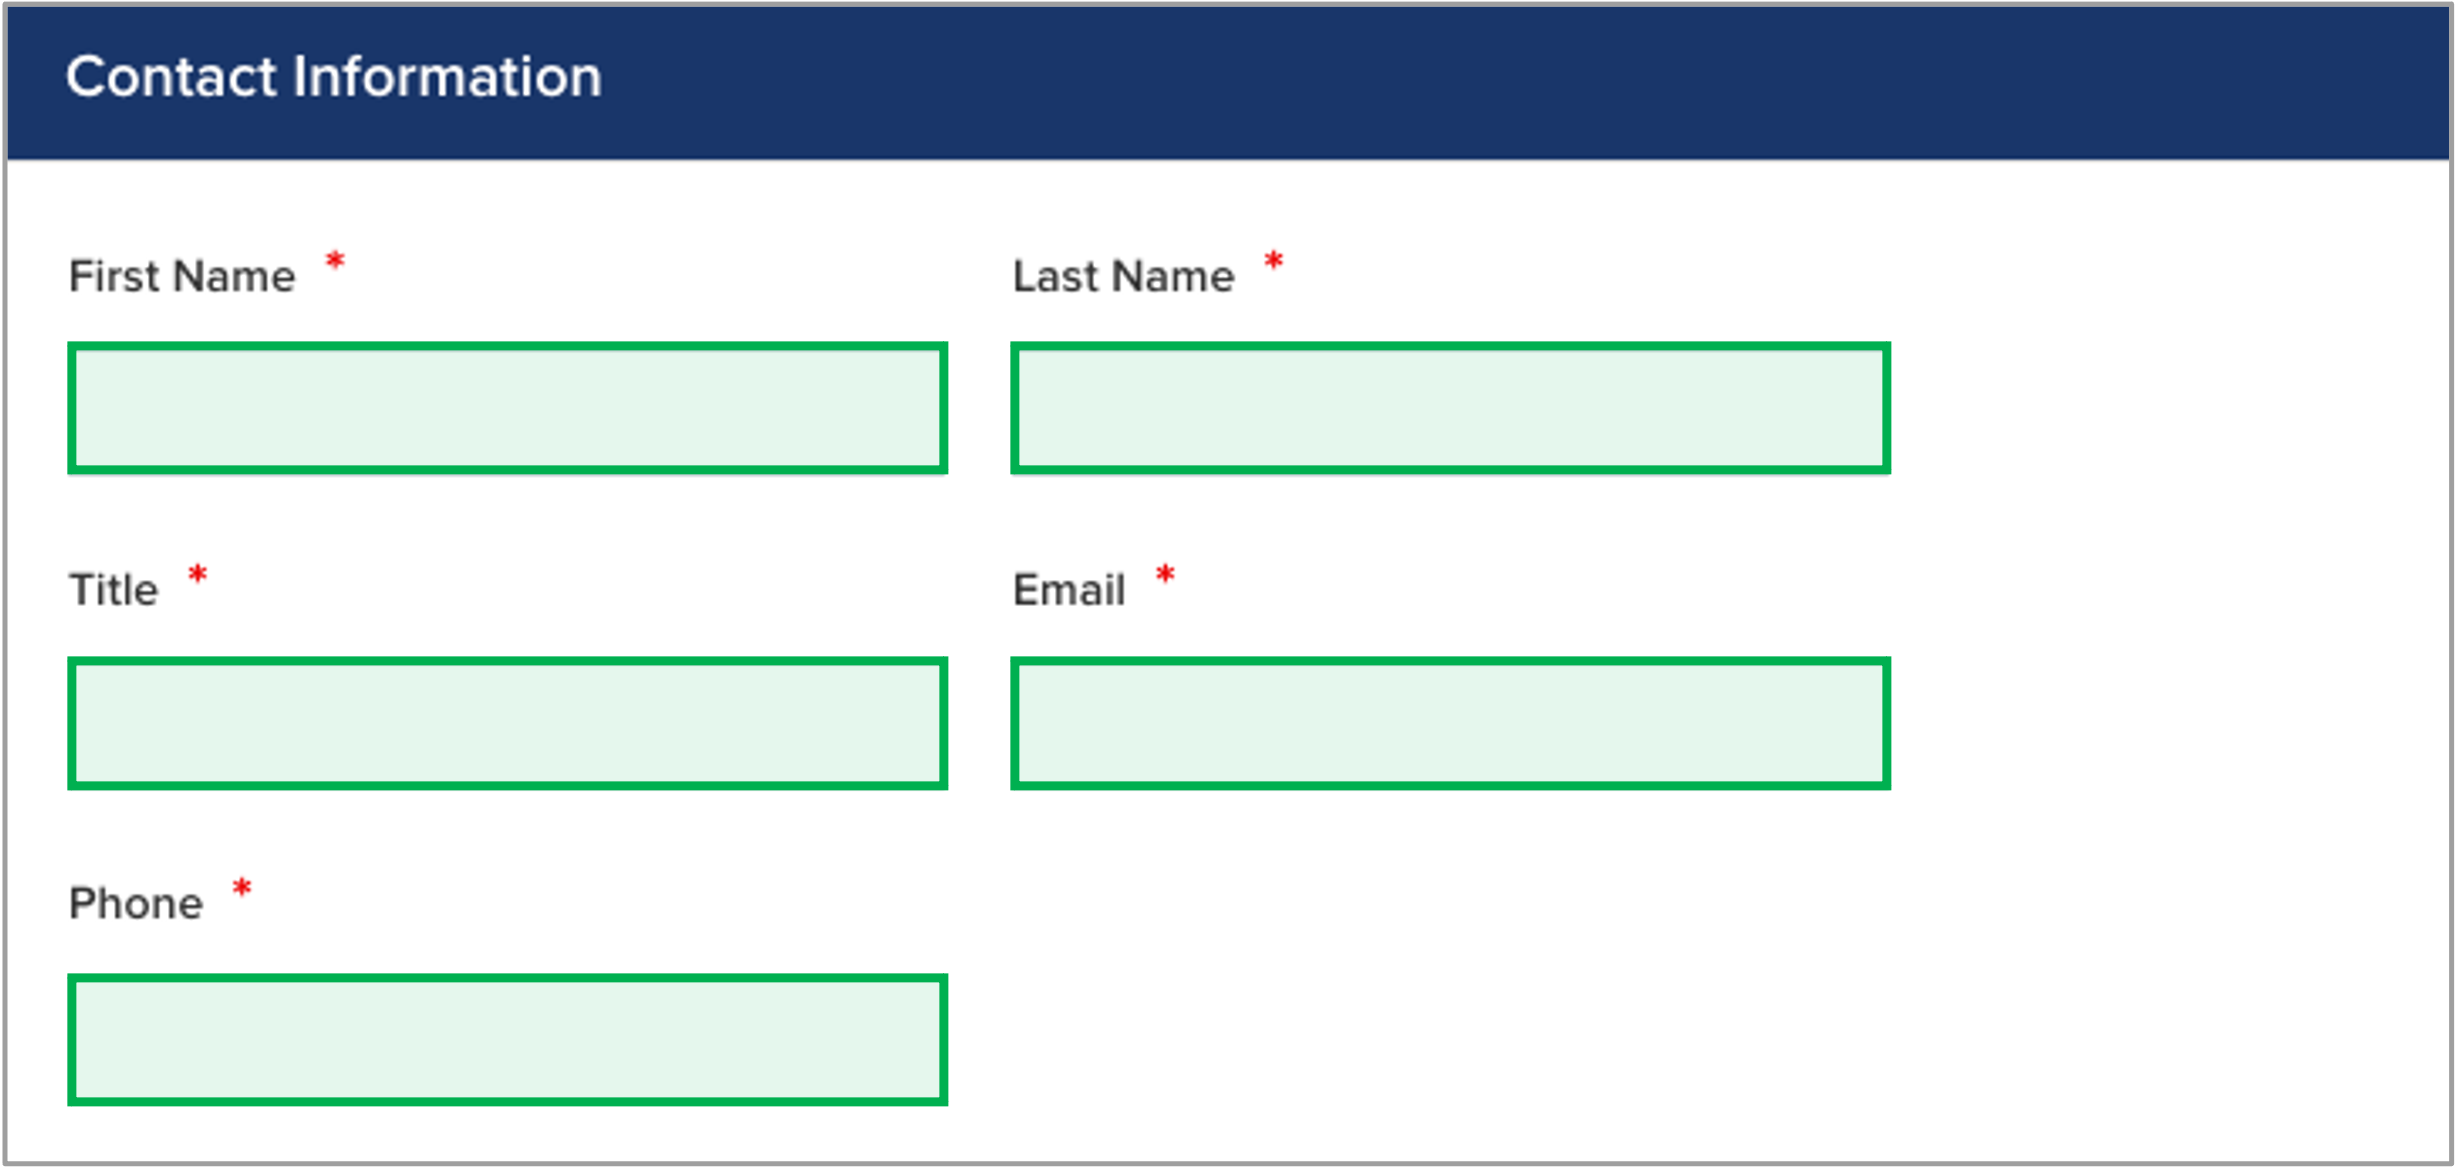
Complete the Contact Information section, being sure to populate all required fields (shown with a red asterisk * ).

Expand
titlescreenshot


UI Step

Click Create at the bottom of the registration form.


UI Step

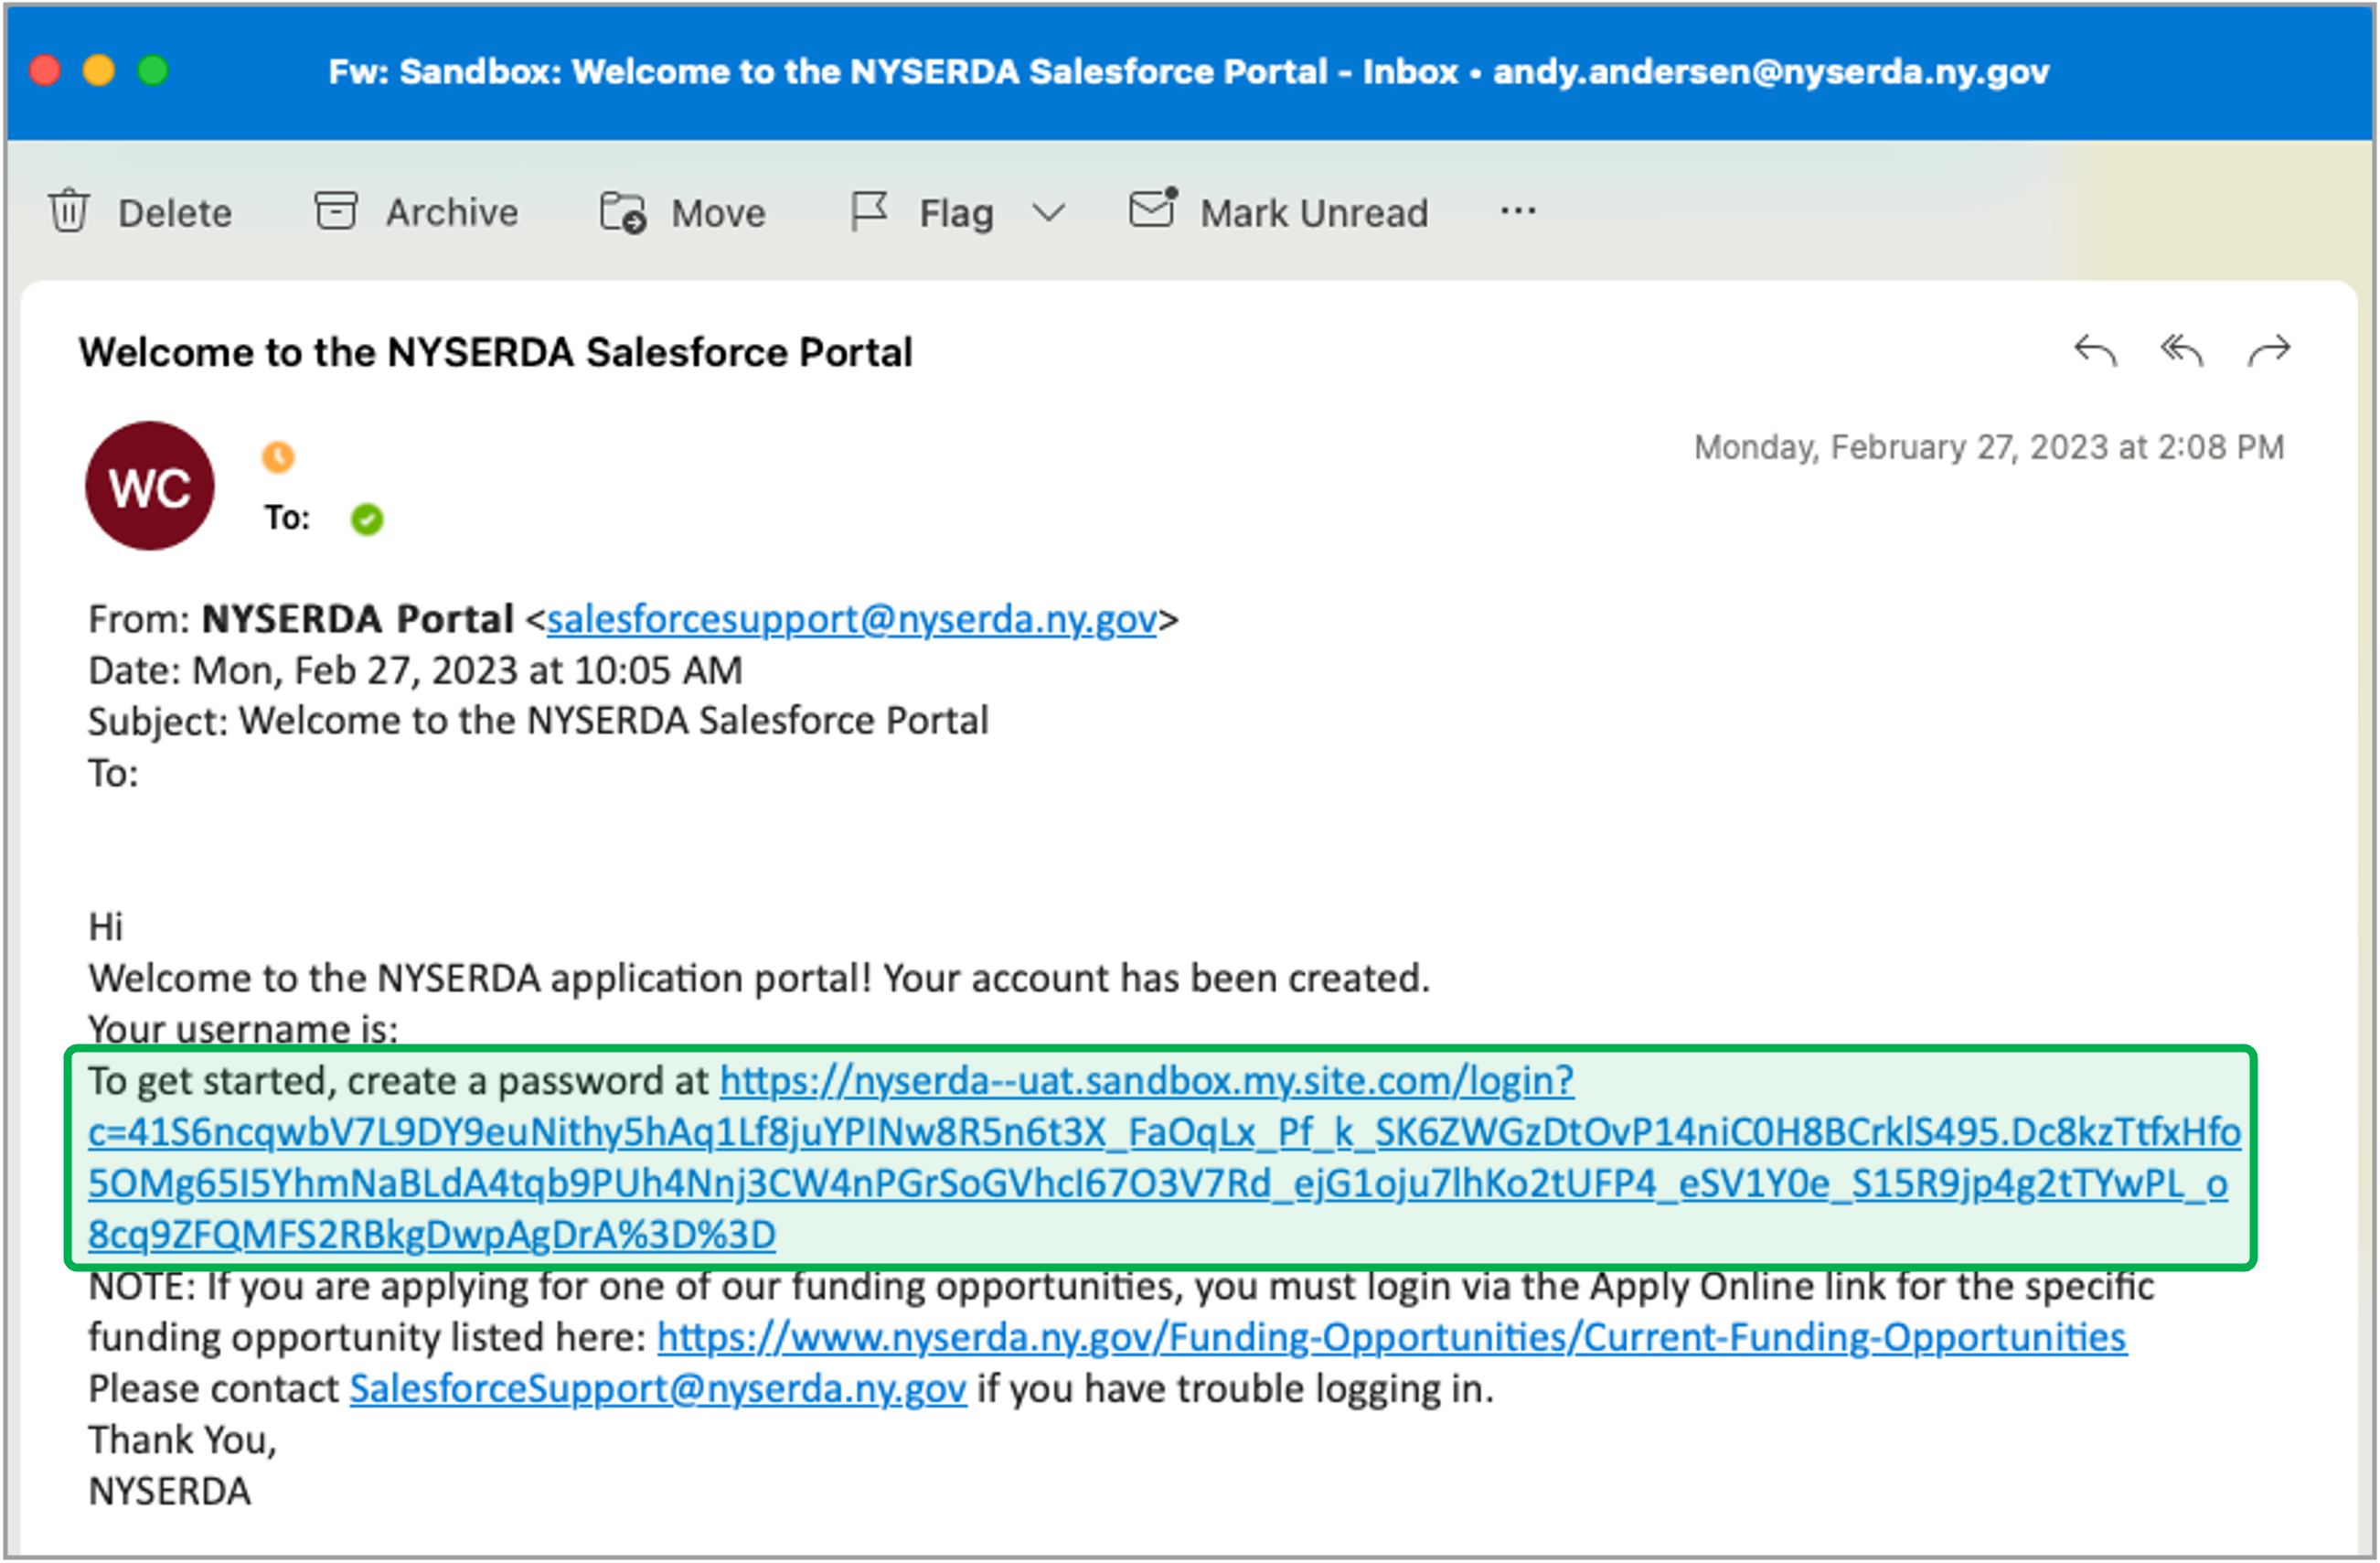
You'll receive an email notification to the address provided in in the Contact Information section of the registration page. Within the email notification, click the create a password link to finalize the registration process by choosing a password.

Expand
titlescreenshot


UI Step

Once your registration is complete and your password set, you can log into the Salesforce Portal at anytime using this link: Salesforce Portal.


UI Expand
titleRelated Training Materials


Column
width50%


Aura - Panel
tab1
styles{"body":{"text":{"color":"#465671","textAlign":"left","fontWeight":"normal","fontSize":14}},"header":{"backgroundColor":{"color":"#ffffff00"}},"headline":{"alignment":{"horizontal":"start"},"text":{"text":"Recorded Webinar","color":"#002d72","textAlign":"left","fontWeight":"bold","fontSize":18},"border":{"color":"#0073a4","style":"solid","top":false,"right":false,"bottom":true,"left":false,"width":5}},"base":{"backgroundColor":{"color":"#ffffff"},"borderRadius":{"radius":4},"boxShadow":{"shadows":[{"color":"rgba(0, 0, 0, 0.08)","x":0,"y":1,"blur":1,"spread":0},{"color":"rgba(0, 0, 0, 0.16)","x":0,"y":1,"blur":3,"spread":1}]}}}
body<p><br /></p>


Info

To watch the below video in full-screen mode, click the icon in the bottom right of the video. Hitting esc on your keyboard will exit full screen mode.

Multimedia
nameCharge Ready 2.0 2.mp4
width100%
height100%


Column
width50%


Aura - Panel
tab1
styles{"body":{"text":{"color":"#465671","textAlign":"left","fontWeight":"normal","fontSize":14}},"header":{"backgroundColor":{"color":"#ffffff00"}},"headline":{"alignment":{"horizontal":"start"},"text":{"text":"Presentation Materials","color":"#002d72","textAlign":"left","fontWeight":"bold","fontSize":18},"border":{"color":"#0073a4","style":"solid","top":false,"right":false,"bottom":true,"left":false,"width":5}},"base":{"backgroundColor":{"color":"#ffffff"},"borderRadius":{"radius":4},"boxShadow":{"shadows":[{"color":"rgba(0, 0, 0, 0.08)","x":0,"y":1,"blur":1,"spread":0},{"color":"rgba(0, 0, 0, 0.16)","x":0,"y":1,"blur":3,"spread":1}]}}}
body<p><br /></p>


Info

To open the presentation, click the item below and scroll up/down to review the presentation.

View file
nameCharge Ready Training Presentation.pptx
height250


Aura - Tab Group
settings{"generalSettings":{"tabSpacing":0,"tabWidth":100,"tabHeight":40,"direction":"horizontal"},"activeSettings":{"backgroundColor":{"color":"#002d72"},"text":{"fontSize":18,"color":"#fff","textAlign":"left","fontWeight":"normal"}},"inactiveSettings":{"backgroundColor":{"color":"#f4f5f7"},"text":{"fontSize":18,"color":"#5e6c84","textAlign":"left","fontWeight":"normal"}},"contentSettings":{"backgroundColor":{"color":"#fff"},"border":{"style":"solid","width":2,"top":true,"bottom":false,"left":false,"right":false,"color":"#002d72"},"padding":{"top":10,"right":10,"bottom":10,"left":10}},"hoverSettings":{"backgroundColor":{"color":"#0073a4"},"text":{"fontSize":18,"color":"#ffffff","textAlign":"left","fontWeight":"normal"}}}
tab1


Aura - Tab
titleStep 1: Participant Agreement


Info

Completing your Participant Agreement is the first step. While you can start a Project Application without a Participant Agreement, you cannot complete it until the Participant Agreement is completed and submitted.

The Participant Agreement contains five (5) separate pages. Review the information in the blue box at the top of the page. It provides high-level guidance and requirements that may be necessary for you to complete each page.

  • Fields marked with a red asterisk ( * ) are required and must be completed before you can move on to the next page. 
  • Fields with thesymbol contain helpful field guidance and instructions that appear as tooltips when hovering your cursor over the symbol. The information in these tooltips is designed to help ensure that you are providing the correct information. Not all fields contain this symbol.
  • Clicking Continue at the bottom of any page will save your progress (if all required fields have been completed) should you be unable to complete the agreement in one sitting.

To complete and submit a Participant Agreement, log into the Salesforce Portal and follow the instructions below.


UI Steps
sizesmall


UI Step

Access the Participant Agreement form

The form is accessed from the Salesforce Portal home page by clicking the Participant Agreement box. Note that the status of your participant agreement is visible in bold at the bottom of this box and will initially show as Not Started.

Expand
titlescreenshot


UI Step

Complete the Company Information page

This page asks you to provide information specific to your company. Once the page is complete, click the Continue button. 

Expand
titleAdditional Page Guidance


Field NameField NotesRequired
Legal Business NameAn organization should enter the name shown on its charter, articles of incorporation, or other legal documents that created the organization. Do not abbreviate names.Yes
Business Name/Disregarded Entity NameIf different from legal business name, enter the name you normally do business as (DBA) or another name your entity is known by.No
Business WebsiteEnter your business website. Use full URL format, e.g.: https://www.example.com.No
Street Address 1Enter your company's primary mailing address.Yes
Street Address 2If Street Address 1 is a P.O. Box, enter the physical street address here.No
CityEnter your company's primary mailing address city.Yes
State ProvinceSelect the state from the drop-down.Yes
Zip/Postal CodeEnter the zip or postal code.Yes
What kind of business do you have?Select the entity type doing business with New York State.Yes
MBE/WBE/SDVOBE Check BoxesSelect all applicable options that apply to your company.No
Exempt Payee CodeIf you are exempt from backup withholding and/or FATCA reporting, provide any EPC that may apply to you. For EPC and additional instructions, please refer to the instructions located on IRS form W-9, which can be found here http://www.irs.gov/forms-instructions No
Tax Identification Type

First, select whether your company uses a EIN or SSN:

  • EIN - an additional field will appear below to document your company's EIN.
  • SSN - Do not submit the SSN on this form. Review the information in the box that appears for additional guidance.
Yes


Expand
titlescreenshot


UI Step

Complete the Contact Information page

This page asks you to provide information specific to your company. Once the page is complete, click the Continue button.

Expand
titleAdditional Page Guidance


Field NameField NotesRequired
Primary Contact InformationThe contact information for the person who makes legal and business decisions in the organization. This person will be contacted with questions regarding contractor information on file.Yes
Accounts Receivable Contact

Checking the box at the top of this section will identify the Primary Contact and the Accounts Receivable Contact as the same person.

The contact information for a representative in accounts receivable who handles payments and company finances.

Yes
Authorized Signatory Contact

Checking the box at the top of this section will identify the Primary Contact and the Authorized Signatory Contact as the same person.

The contact information for a party with the ability view, collaborate on, and sign contract documents.

Yes


Expand
titlescreenshot


UI Step

Complete the Certification page

This page asks you to review the Charge Ready NY Program Implementation Manual (PDF) and the Charge Ready NY Equipment Owner Agreement (PDF).

You must answer the questions on this page before you can sign the document with an Electronic Signature.  Follow the Electronic Signature instruction below for more guidance. Once you have signed the document, the Continue button will appear for you to click.

Expand
titleElectronic Signature Instructions


Info

The steps below guides you on how to sign your application with Electronic Signature.

UI Steps
sizesmall


UI Step

At the bottom of the Certification page, click on the Electronic Signature button.

Expand
titlescreenshot


UI Step

The page will redirect for you to review and sign the document. Check the Box and click Continue.

Tip

You can also click on the Other Actions menu to finish signing later or get other supports.


Expand
titlescreenshot


UI Step

After you review the document, click on the Start button for the page to redirect you to sign.

Expand
titlescreenshot


UI Step

At the bottom of the page, click on the Sign button.

Expand
titlescreenshot


UI Step

Review your signature then click the Adopt and Sign button.

Expand
titlescreenshot


UI Step

Click on the Finish button to complete your Electronic Signature process. The page will redirect back to the Certification page.

Expand
titlescreenshot


Expand
titlescreenshot


UI Step

Documents Page

This page allows you to review your submitted application and its status. 

Click Continue to move forward with the process.

Expand
titlescreenshot


UI Step

Submission Confirmation Page

This page requests you click the Submit button to complete this application.

Warning

Your application is not fully submitted until you click the Submit button and receive the green notification box confirming that your application has been successfully submitted.


Expand
titlescreenshot


UI Step

Electronic Funds Transfer

If the Participant Agreement is approved, the applicant has the option to register for Electronic Funds Transfer

Warning

The Authorized Signatory Contact (as listed on the Participant Agreement) should be the person filling out the form. A phone number should be included because NYSERDA will contact the applicant to fully verify their information.


Aura - Tab
titleStep 2: Project Application


Info

Completing your Project Application is the second step. While you can start a Project Application without a Participant Agreement, you cannot complete it until the Participant Agreement is completed and submitted.

The Project Application contains nine (9) separate pages. Review the information in the blue box at the top of the page. It provides high-level guidance and requirements that may be necessary for you to complete each page.

  • Fields marked with a red asterisk ( * ) are required and must be completed before you can move on to the next page. 
  • Fields with thesymbol contain helpful field guidance and instructions that appear as tooltips when hovering your cursor over the symbol. The information in these tooltips is designed to help ensure that you are providing the correct information. Not all fields contain this symbol.
  • Clicking Continue at the bottom of any page will save your progress (if all required fields have been completed) should you be unable to complete the agreement in one sitting.

To complete and submit a Project Application, log into the Salesforce Portal and follow the instructions below.


UI Steps
sizesmall


UI Step

Access the Project Application form

Access the form via the Submit a New Application tab in the Salesforce Portal and click the Charge Ready NY box.

Expand
titlescreenshot


UI Step

Project Info page

Select the appropriate option under the Who is applying section. Once the option is selected, click the Save button to continue.

Expand
titleRole Definition

Equipment Owner is the entity that purchases the Charging Equipment. The Equipment Owner may be the recipient of the incentive payment and is responsible for providing charging data to NYSERDA for a period of five years.

Installer is the entity that installs the Charging Equipment. The Installer may or may not be the same as the Equipment Owner.

Site Owner is the owner of the site at which the Charging Equipment is installed.  The Site Owner may or may not be the same as the Equipment Owner.

Payee is the entity that will be receiving the incentive payment. The Payee may or may not be the same as the Equipment Owner.


Expand
titlescreenshot


UI Step

Project Contacts page

The Project Contacts page must contain four contacts (Site Owner, Installer, Payee, and Equipment Owner) before you can proceed to the next page. Some contacts for your application may already be populated on this page. To add one or more of the four contacts, click the Add a Contact link for each contact and complete, at minimum, the required fields. Then click the Save Changes button to finish adding a new contact. Once all four contact roles are added, click the Continue button to move to the next page.

Tip

There must be one primary contact for each field, but there can be multiple contacts in each field.


Expand
titlescreenshot


UI Step

Site Information page

This page requires you to document the project site. To add the Project Site, click the Add a Site link to add an eligible site. A modal window will appear. Complete, at minimum, all required fields and click Save. Once you have added the site, click the Continue button. 

Tip

Once you start typing in the Address field, it will provide a list of suggestions. Selecting the suggested address will autofill all required fields except for Site Type.


Info

Assigned parking spaces are reserved for an individual driver/apartment or reserved for fleet vehicles.

Unassigned parking spaces are available for anyone in general parking lot locations. 


Expand
titlesite type definition

Publicly-Owned Facility - If a municipal lot, the price for EV parking can be no more than the municipality’s on-street parking rate.

Multi-Unit Dwelling (MUD) - Must have ten (10) or more connected housing units (Motels/hotels are considered MUDs).

Workplace - More than 50% of available parking must be for employees.


Expand
titlescreenshot


UI Step

Equipment Information page

This page asks you to add eligible equipment models to receive additional incentives. Use the Model drop-down menu to add your equipment, then select the quantity and click Add. Once all eligible modules are added, review your Total Estimated NYSERDA Incentive amount and click the Continue button. 

Expand
titlescreenshot


UI Step

Installation Status

This page asks you to select your application type. Once the application type is selected/filled out, click the Continue button.

Tip

If you are applying for a Rebate for Charging Equipment that has already been installed and is currently operational, additional information is required to be filled out.


Expand
titlescreenshot: pre-approval


Expand
titlescreenshot: rebate


UI Step

Charging Station Information page

This page requires you to enter details for each individual charging station. Once all required fields are completed, click Continue.

Tip

If your network provider uses a unique identification number to track charging stations seperate from serial numbers and network IDs, please enter in the Unique ID field for each station.


Warning

This page will only appear if you selected the rebate for charging equipment that has already been installed and is currently operational.


Expand
titlescreenshot


UI Step

Project Documents page 

This page requires you to upload all required documentation and any optional documents you would like to have reviewed as part of your application. To add required documents, click the  Choose File button for each required document to locate the file on your computer and upload to the application. Repeat for the Other Documents section to upload any optional documents. Once all document are successfully uploaded, click Continue.

Expand
titlescreenshot


UI Step

Application Review page

This page asks you to review all application information carefully to ensure that applicant, project contacts, and project site(s) information is complete and accurate before continuing. Once you finish reviewing the application, click the Continue button.

Expand
titlescreenshot


UI Step

Project Submission page

This page asks you to review and certify all statements within the page before your submission. After you check every box to certify the statements, click the Submit button to submit the project application.

Tip

Your application will be reviewed within 10 days of submission. If any corrections are needed, you will receive a request via email.


Expand
titlescreenshot


UI Step

Application Approval

After the project submission, once your application is approved, an email notification will be sent out notifying your application status.

Warning

If you selected the Pre-Approval Application Type on the previous pages, continue to the Step 3: Pre-Approval Application Resubmission page and follow the remaining steps to complete your pre-approval project application.


Expand
titlescreenshot


Aura - Tab
titleStep 3: Pre-Approval Resubmission


Info

Once you complete the initial Pre-Approval Project Application, an email will be sent out notifying your application status. If application is approved, the applicant will receive 180 days to re-submit the project application for final approval.

The Project Application contains five (5) seperate pages. Review the information in the blue box at the top of the page. It provides high-level guidance and requirements that may be necessary for you to complete each page.

  • Fields marked with a red asterisk ( * ) are required and must be completed before you can move on to the next page. 
  • Fields with thesymbol contain helpful field guidance and instructions that appear as tooltips when hovering your cursor over the symbol. The information in these tooltips is designed to help ensure that you are providing the correct information. Not all fields contain this symbol.
  • Clicking Continue at the bottom of any page will save your progress (if all required fields have been completed) should you be unable to complete the agreement in one sitting.

To complete and submit a Project Application, log into the Salesforce Portal and follow the instructions below.


UI Steps
sizesmall


UI Step

Pre-Approval Application Status

Once your initial Pre-Approval Project Application is approved, an email will be sent out notifying your application status.

Expand
titlescreenshot


UI Step

Projects Tab

Once you have received the email, you will return to the Salesforce Portal and access the Projects tab, then select the appropriate Application under Project Name.

Expand
titlescreenshot


UI Step

Application Wizard

In the Project Details page, click on the Application Wizard button.

Expand
titlescreenshot


UI Step

Installation Status Page

The window will redirect to the installation status page. Select the No option and fill out all of the required fields on this page. Once you finish, click the Continue button.

Warning

If you select the Yes option due to your installation status matching the statements listed on the page. The application will be canceled and the page will prompt you to re-apply.


Expand
titlescreenshot


UI Step

Charging Station Information page

This page requires you to enter details for each individual charging station. Once all required fields are completed, click Continue.

Tip

If you are applying for a Rebate for Charging Equipment that has already been installed and is currently operational, additional information is required to be filled out.


Expand
titlescreenshot


UI Step

Project Documents Page

Expand
titlescreenshot


UI Step

Application Review page

This page asks you to review all application information carefully to ensure that applicant, project contacts, and project site(s) information is complete and accurate before continuing. Once you finish reviewing the application, click the Continue button.

Expand
titlescreenshot


UI Step

Project Submission page

This page asks you to review and certify all statements within the page before your submission. After you check every box to certify the statements, click the Submit button to submit the project application.

Tip

Your application will be reviewed within 10 days of submission. If any corrections are needed, you will receive a request via email.


Expand
titlescreenshot


UI Step

Application Approval

After the project submission, once your application is approved, an email notification will be sent notifying your application status.

Expand
titlescreenshot


HTML
<style type="text/css">
#title-text { display: none;}
</style>


...