| Panel | ||||||
|---|---|---|---|---|---|---|
| ||||||
Procedure |
| Panel | ||||
|---|---|---|---|---|
| ||||
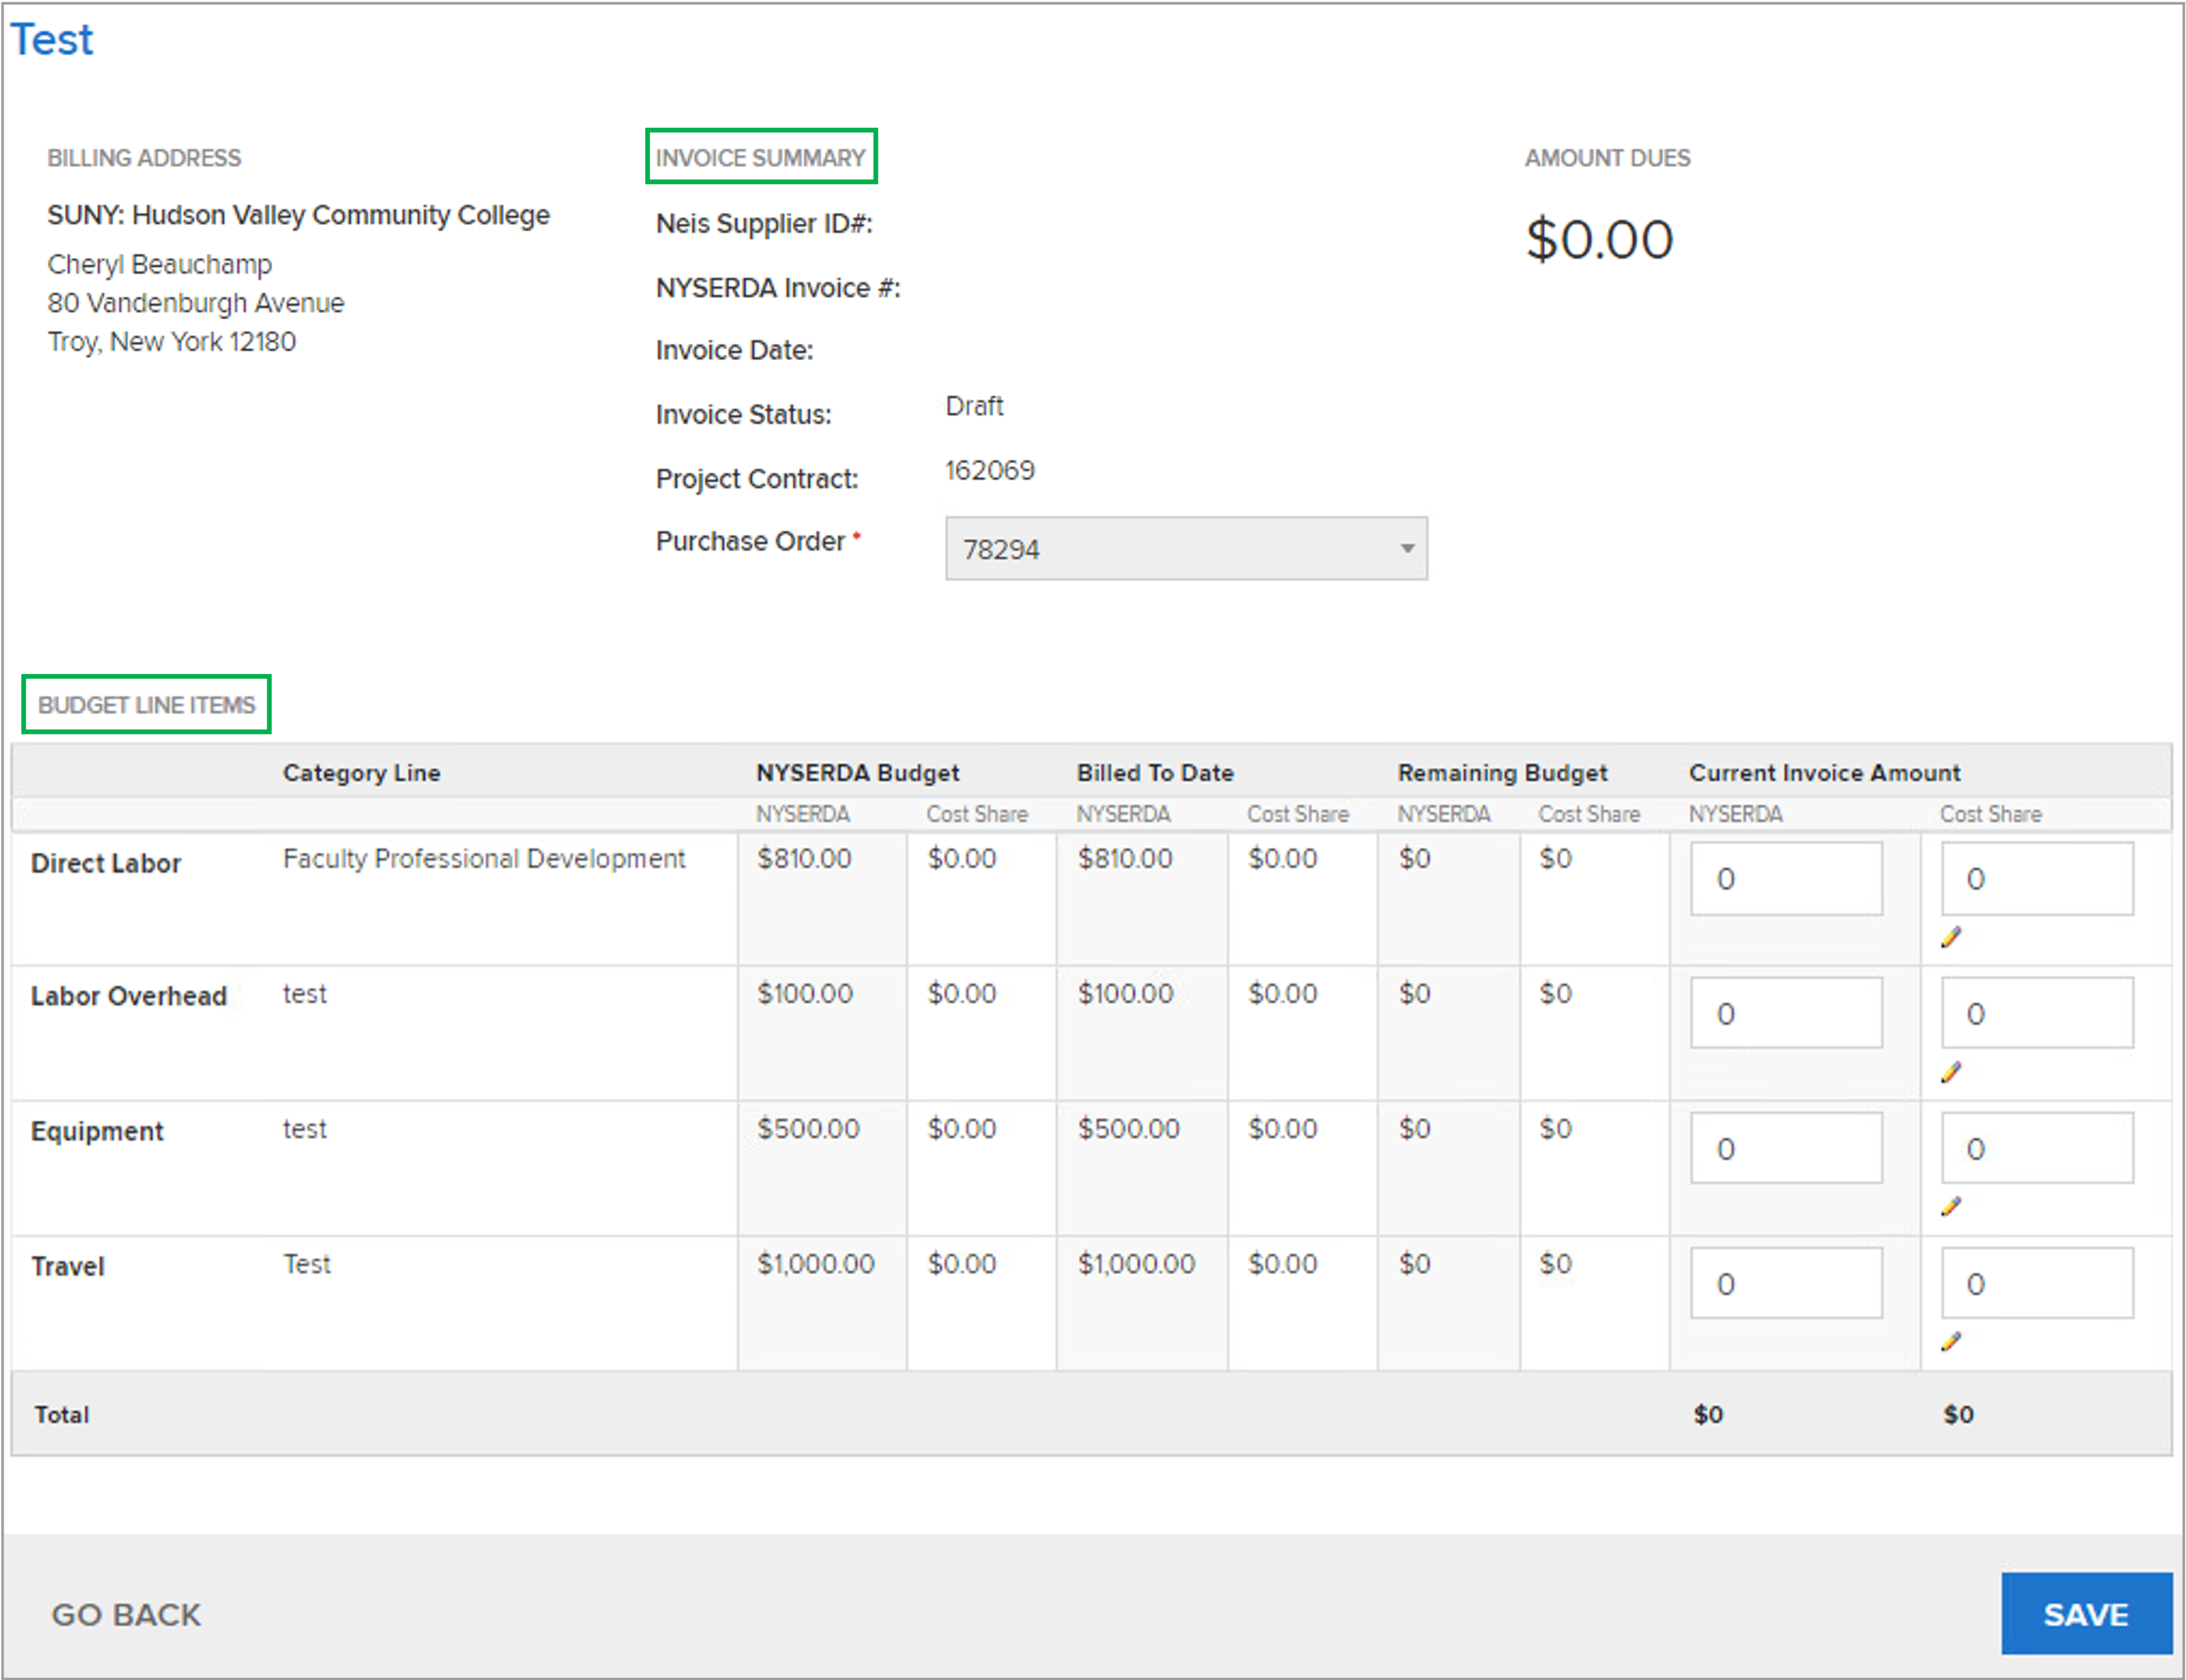
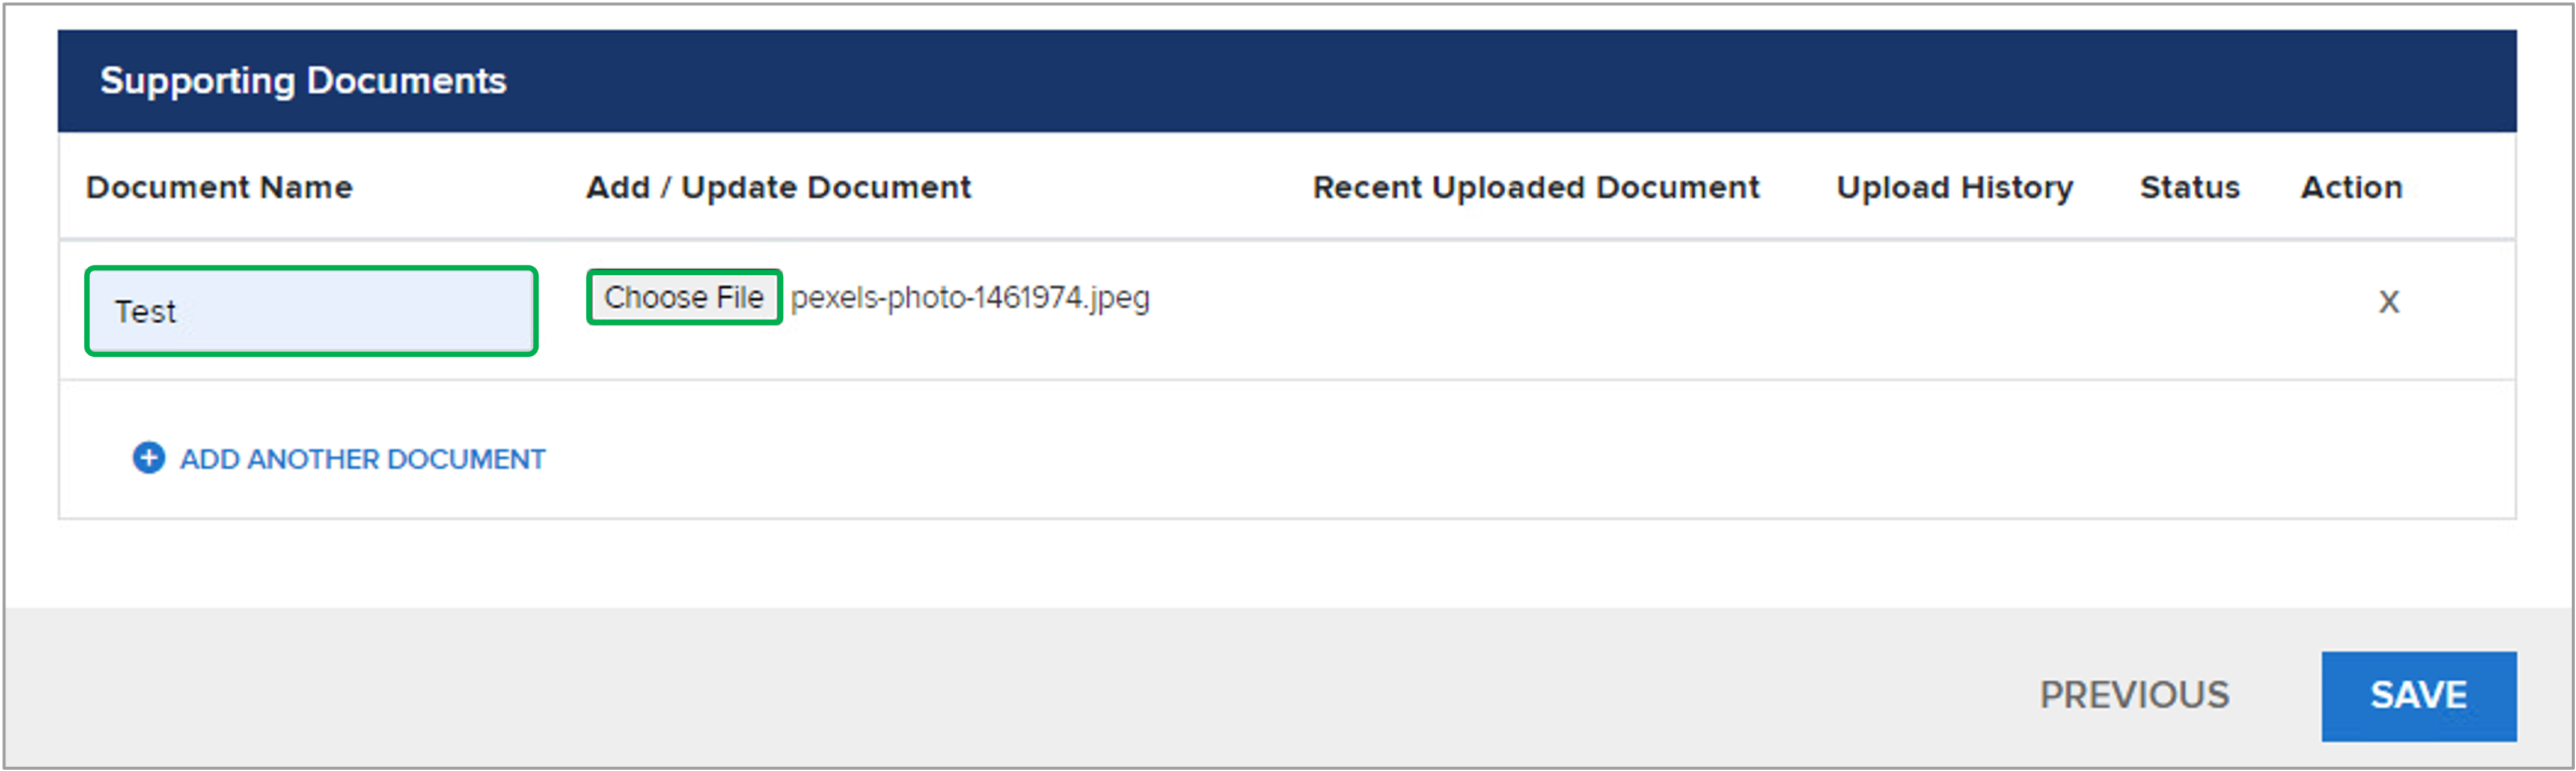
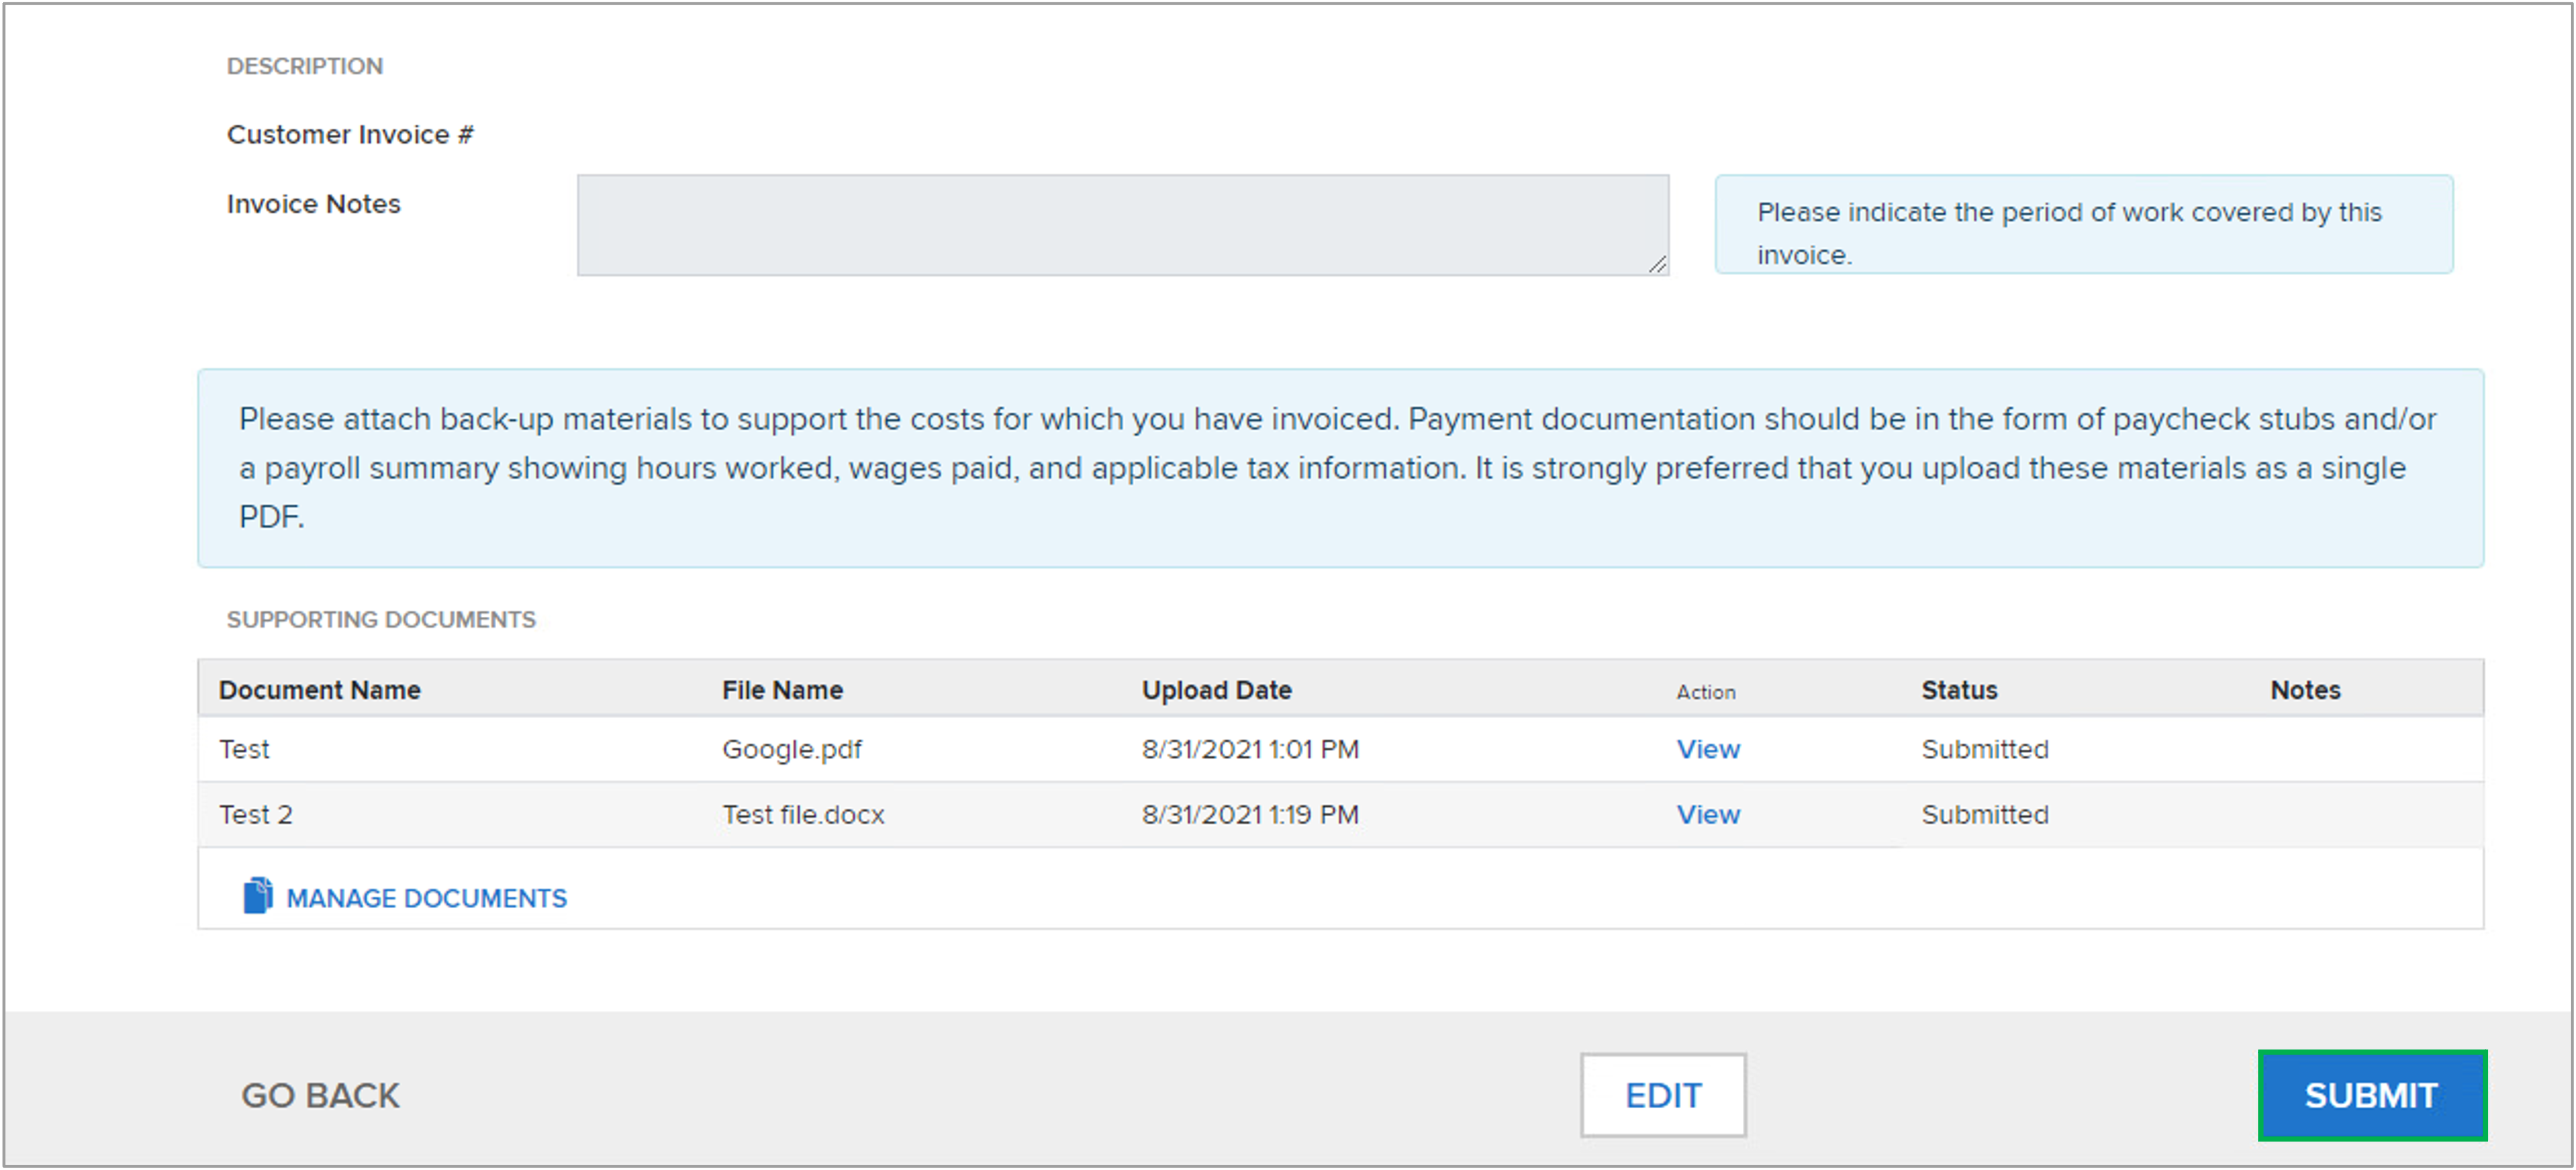
IntroductionContractors will be allowed to submit invoices once a budget has been created in Salesforce and is set to status Approved. These instructions are intended for Portal User Contractors or External Stakeholders when submitting an invoice as part of the project budget. |
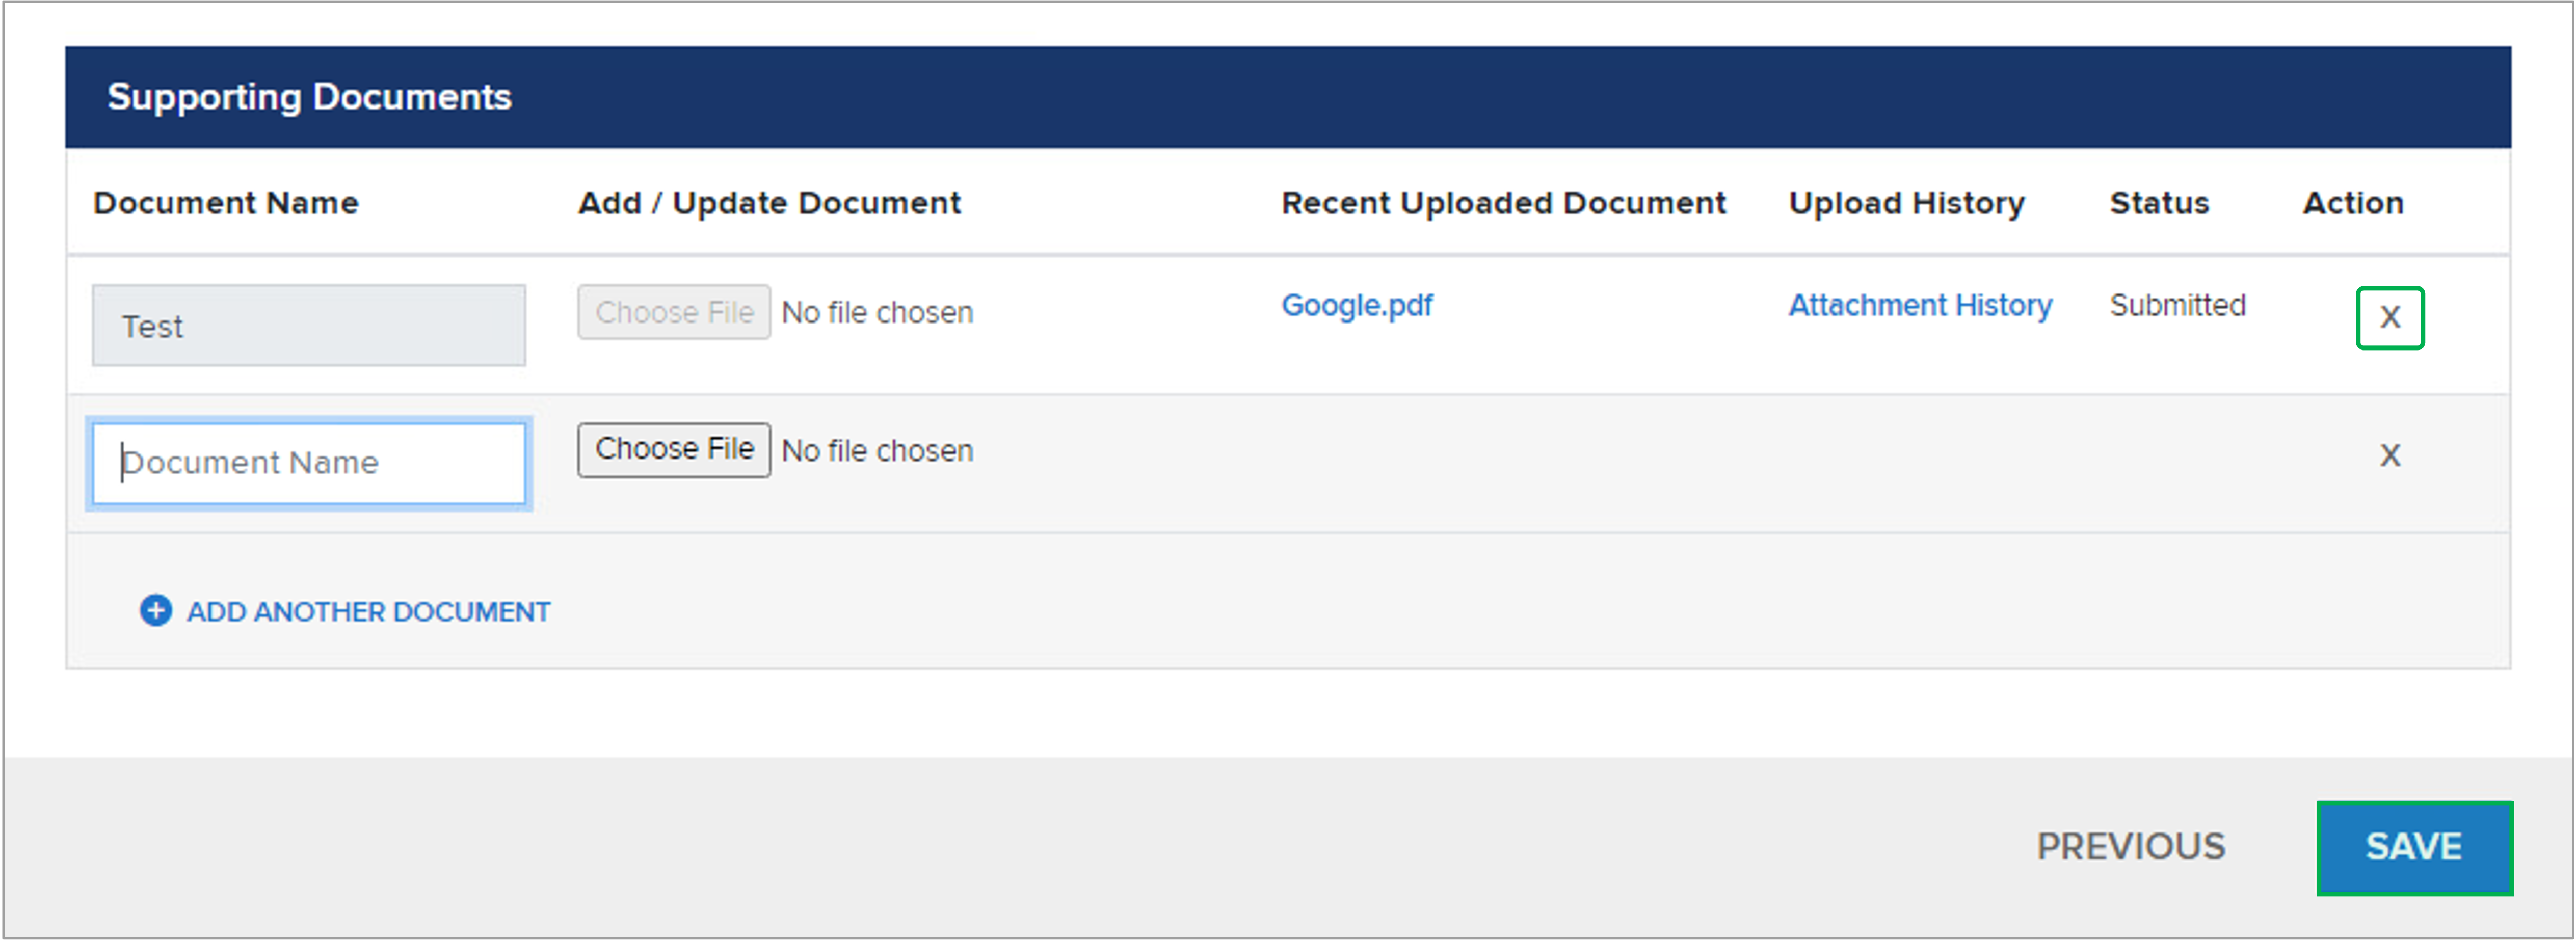
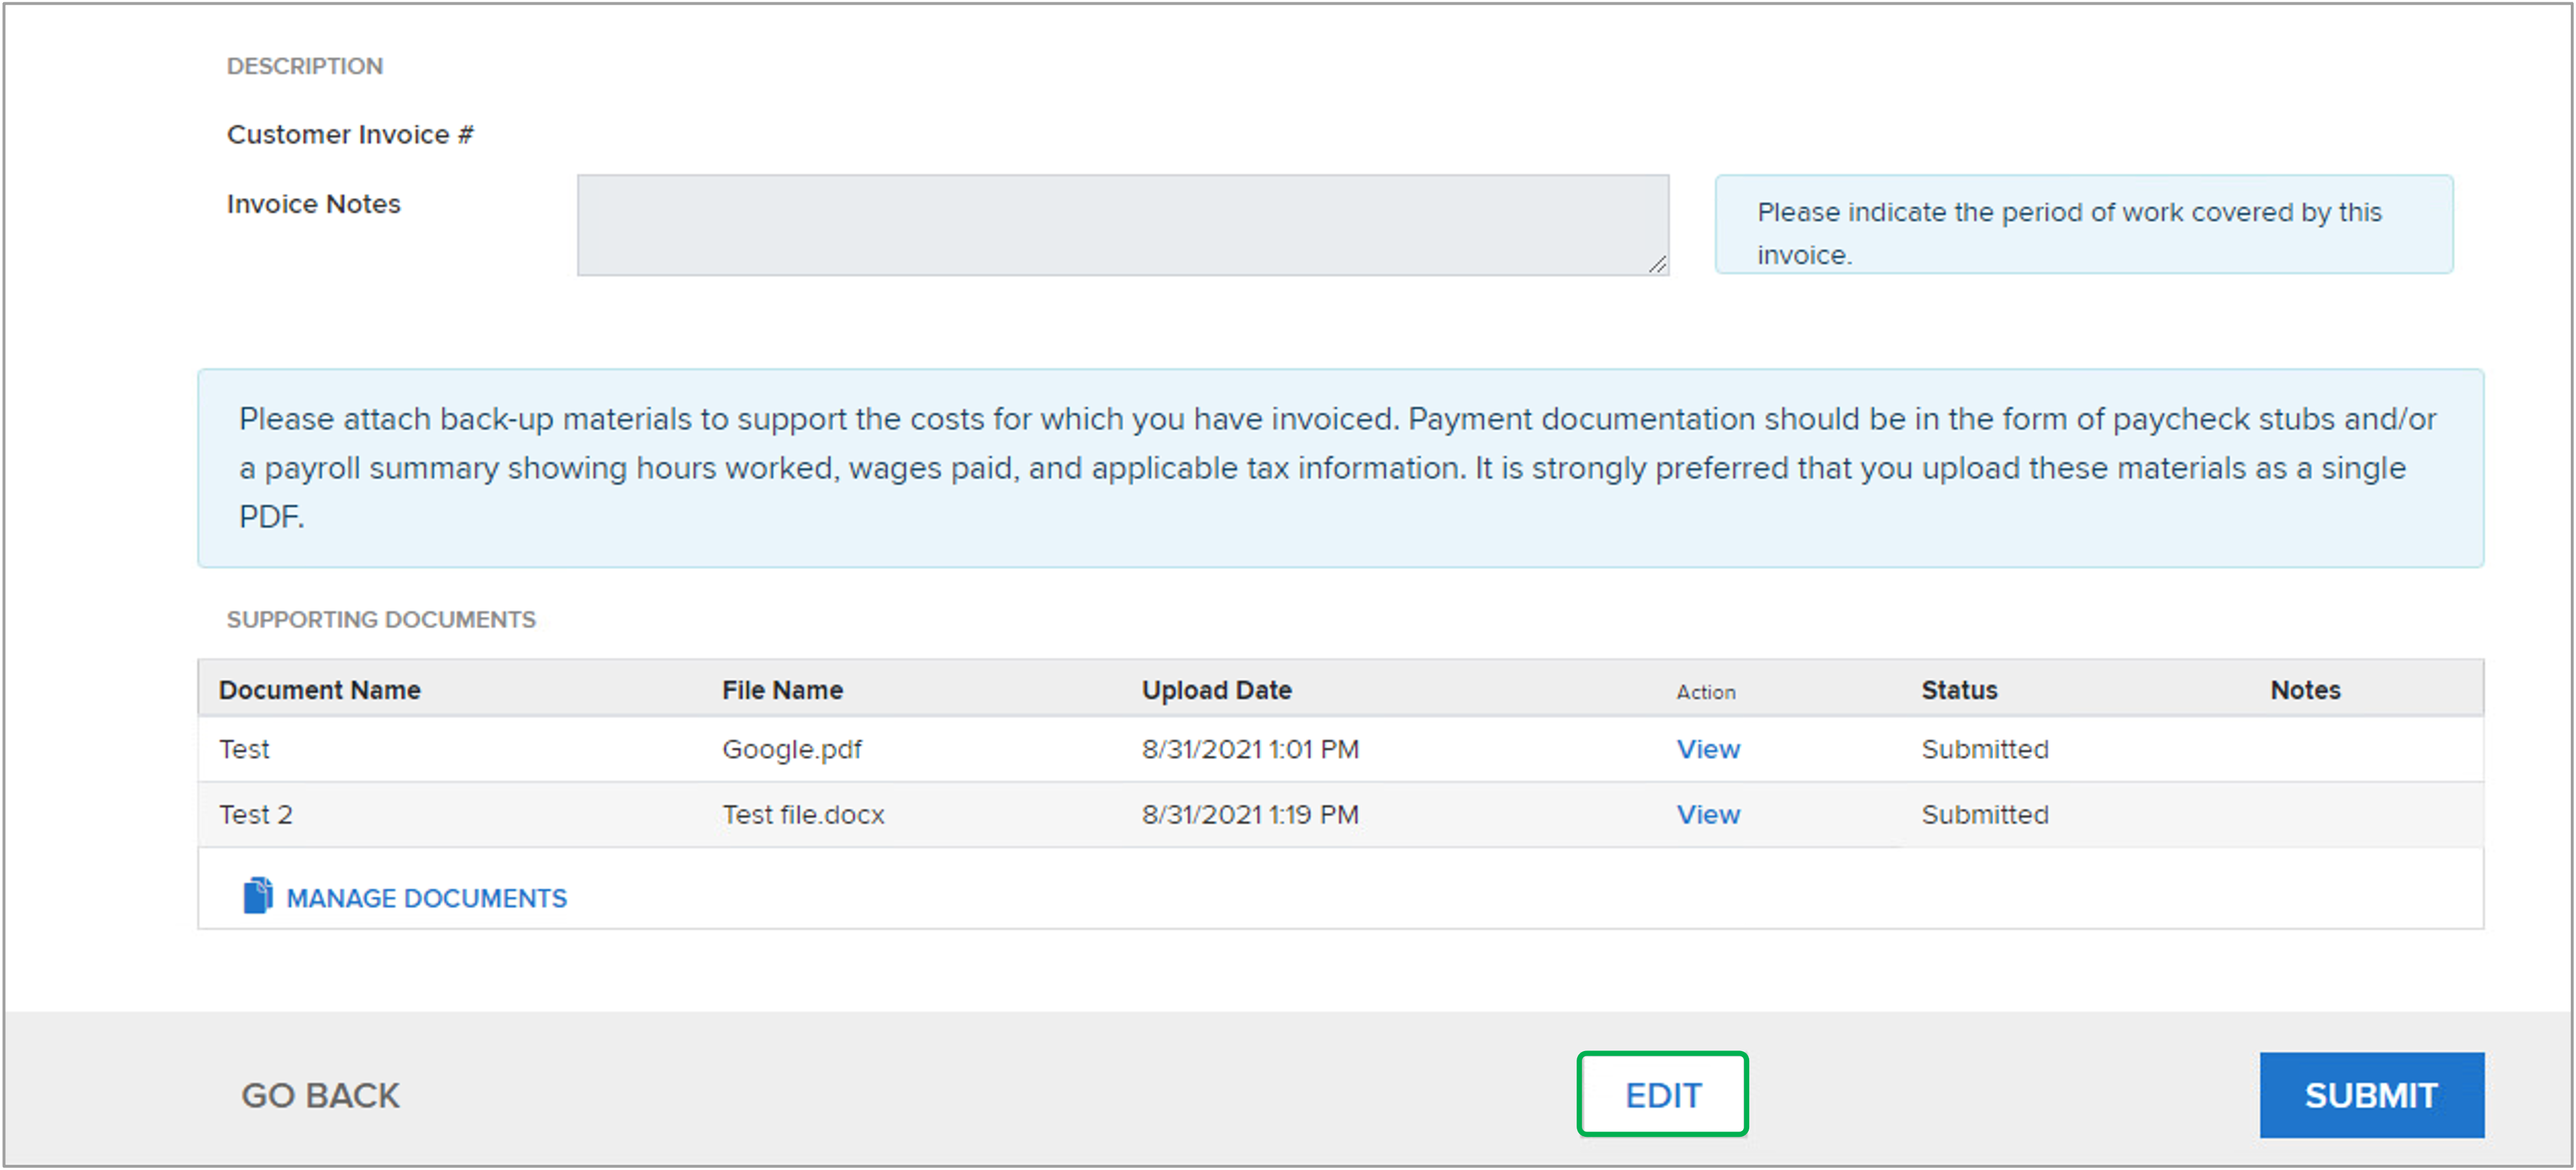
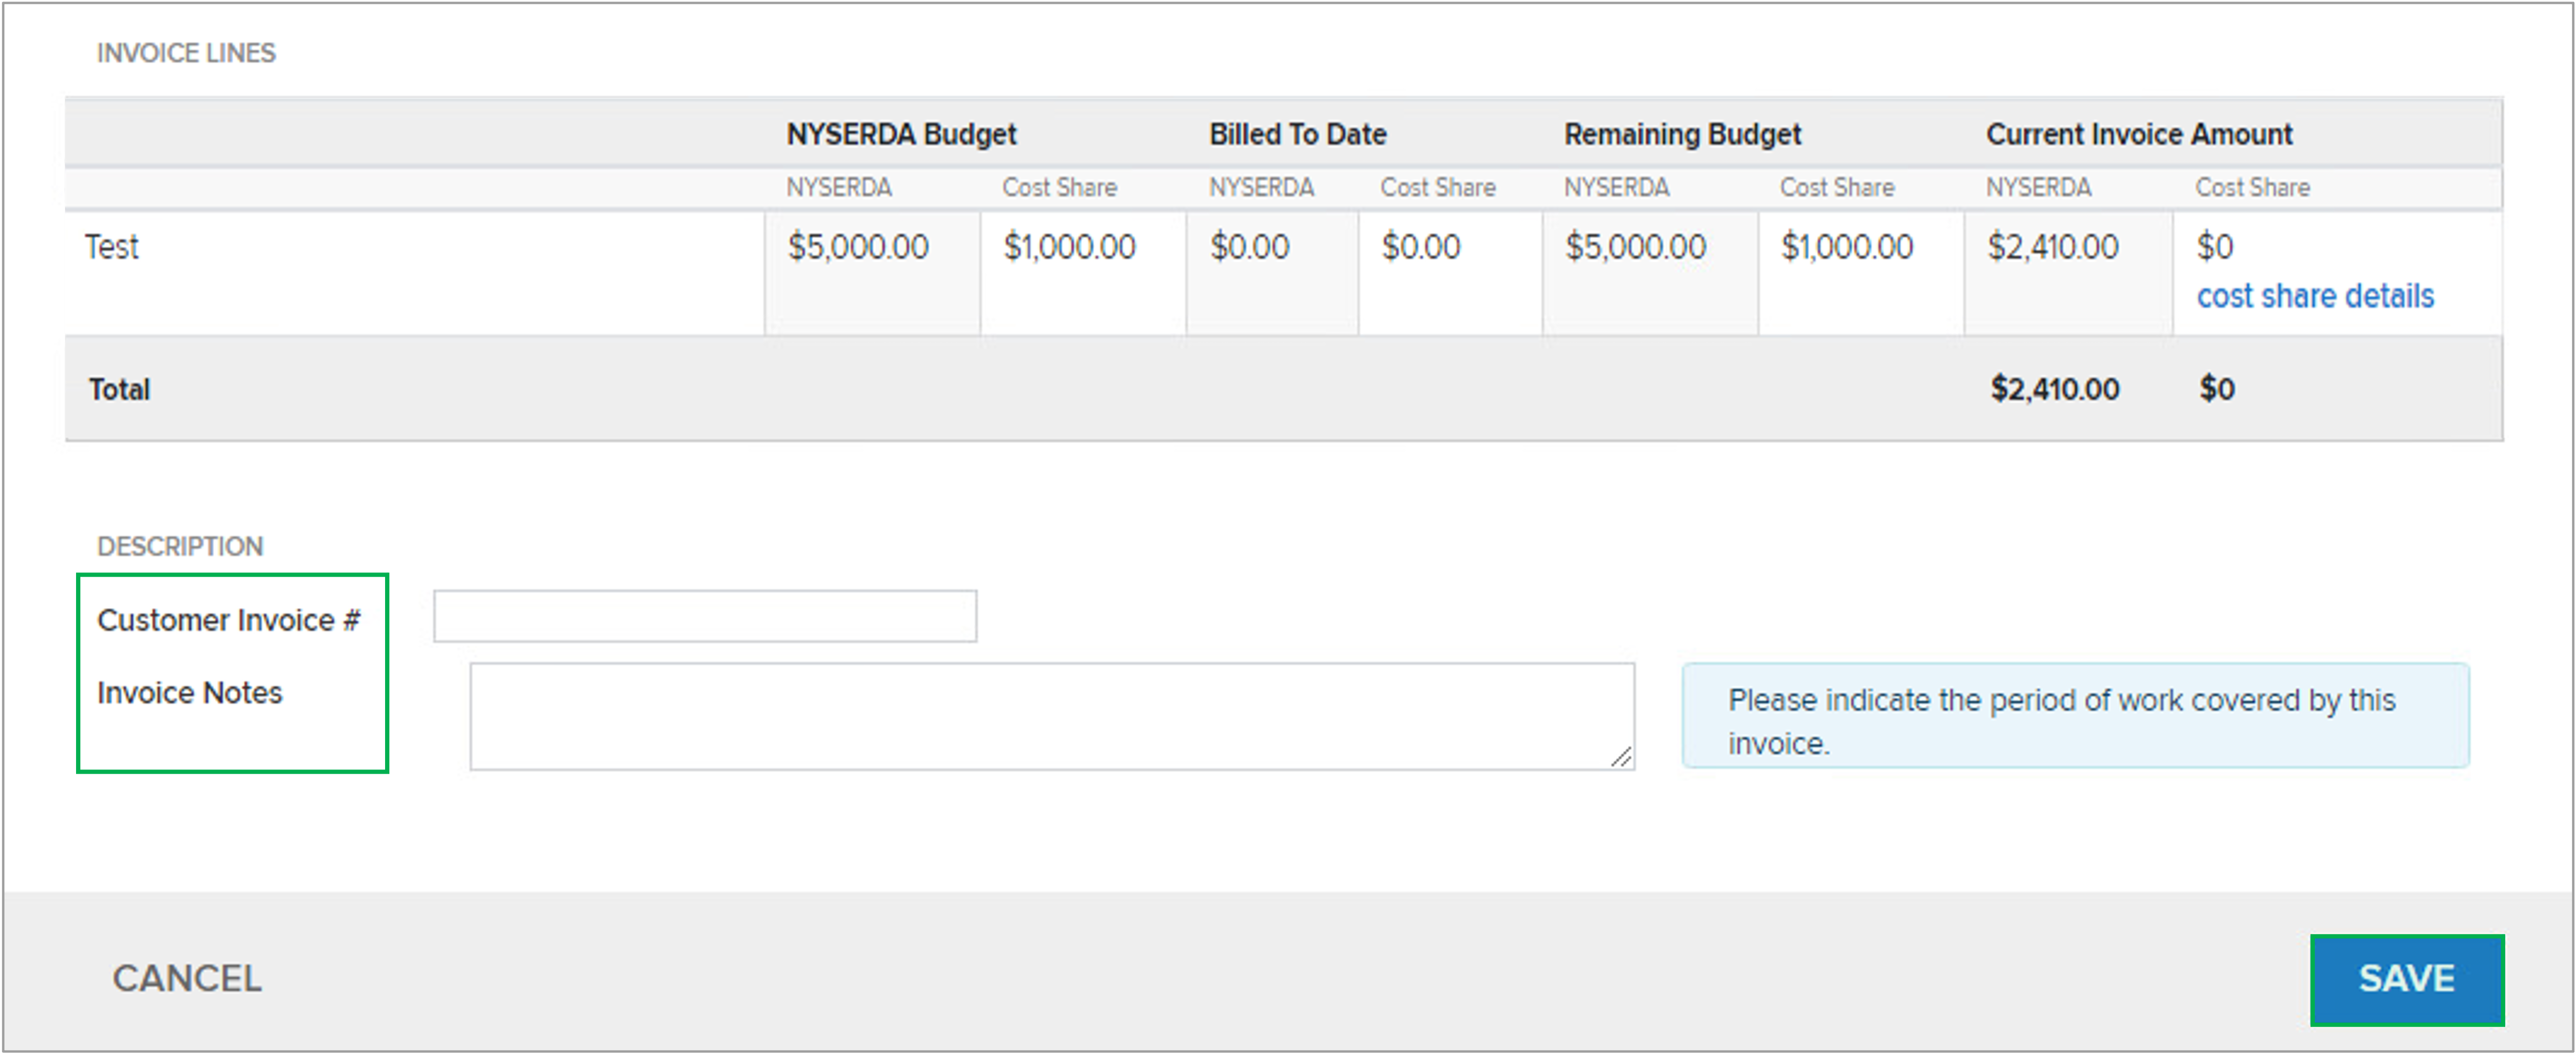
Instructions
| UI Steps | |||||||||||||||||||||||||||||||||||||||||||||||||||||||||||||||||||||||||||||||||||||||||||||||||||||||||||||
|---|---|---|---|---|---|---|---|---|---|---|---|---|---|---|---|---|---|---|---|---|---|---|---|---|---|---|---|---|---|---|---|---|---|---|---|---|---|---|---|---|---|---|---|---|---|---|---|---|---|---|---|---|---|---|---|---|---|---|---|---|---|---|---|---|---|---|---|---|---|---|---|---|---|---|---|---|---|---|---|---|---|---|---|---|---|---|---|---|---|---|---|---|---|---|---|---|---|---|---|---|---|---|---|---|---|---|---|---|---|
| |||||||||||||||||||||||||||||||||||||||||||||||||||||||||||||||||||||||||||||||||||||||||||||||||||||||||||||
|


| HTML |
|---|
<script type="text/javascript" >
   jQuery(document).ajaxComplete(function() {
      if(jQuery('.ia-fixed-sidebar.collapsed').length == 0 ) {
         jQuery('.expand-collapse-trigger').click();

</script> |