Introduction Placeholder - will come from team. The instructions below provide guidance for the Salesforce Partner Portal. You will need an active portal account to submit a Participant Agreement and a Project Application. To learn how to create a portal account, expand the link below. If you already have a portal account, you can log in using this link: Salesforce Portal. Once you have an active portal account, use the two tabs below to learn how to submit a Participation Agreement, which should be completed first, and a Project Application. | Expand |
|---|
| title | Register for a Portal Account |
|---|
|
| Info |
|---|
To register for a portal account, access this link: Portal Registration Link. The Portal Registration website contains two messages at the top. The first provides some guidance on what company information should be entered into the Company Information section of the registration form. The second message provides a link to the Salesforce Portal login page should you lose it. To register a new Salesforce Portal account, follow the instructions below. |
| UI Steps |
|---|
|
| UI Step |
|---|
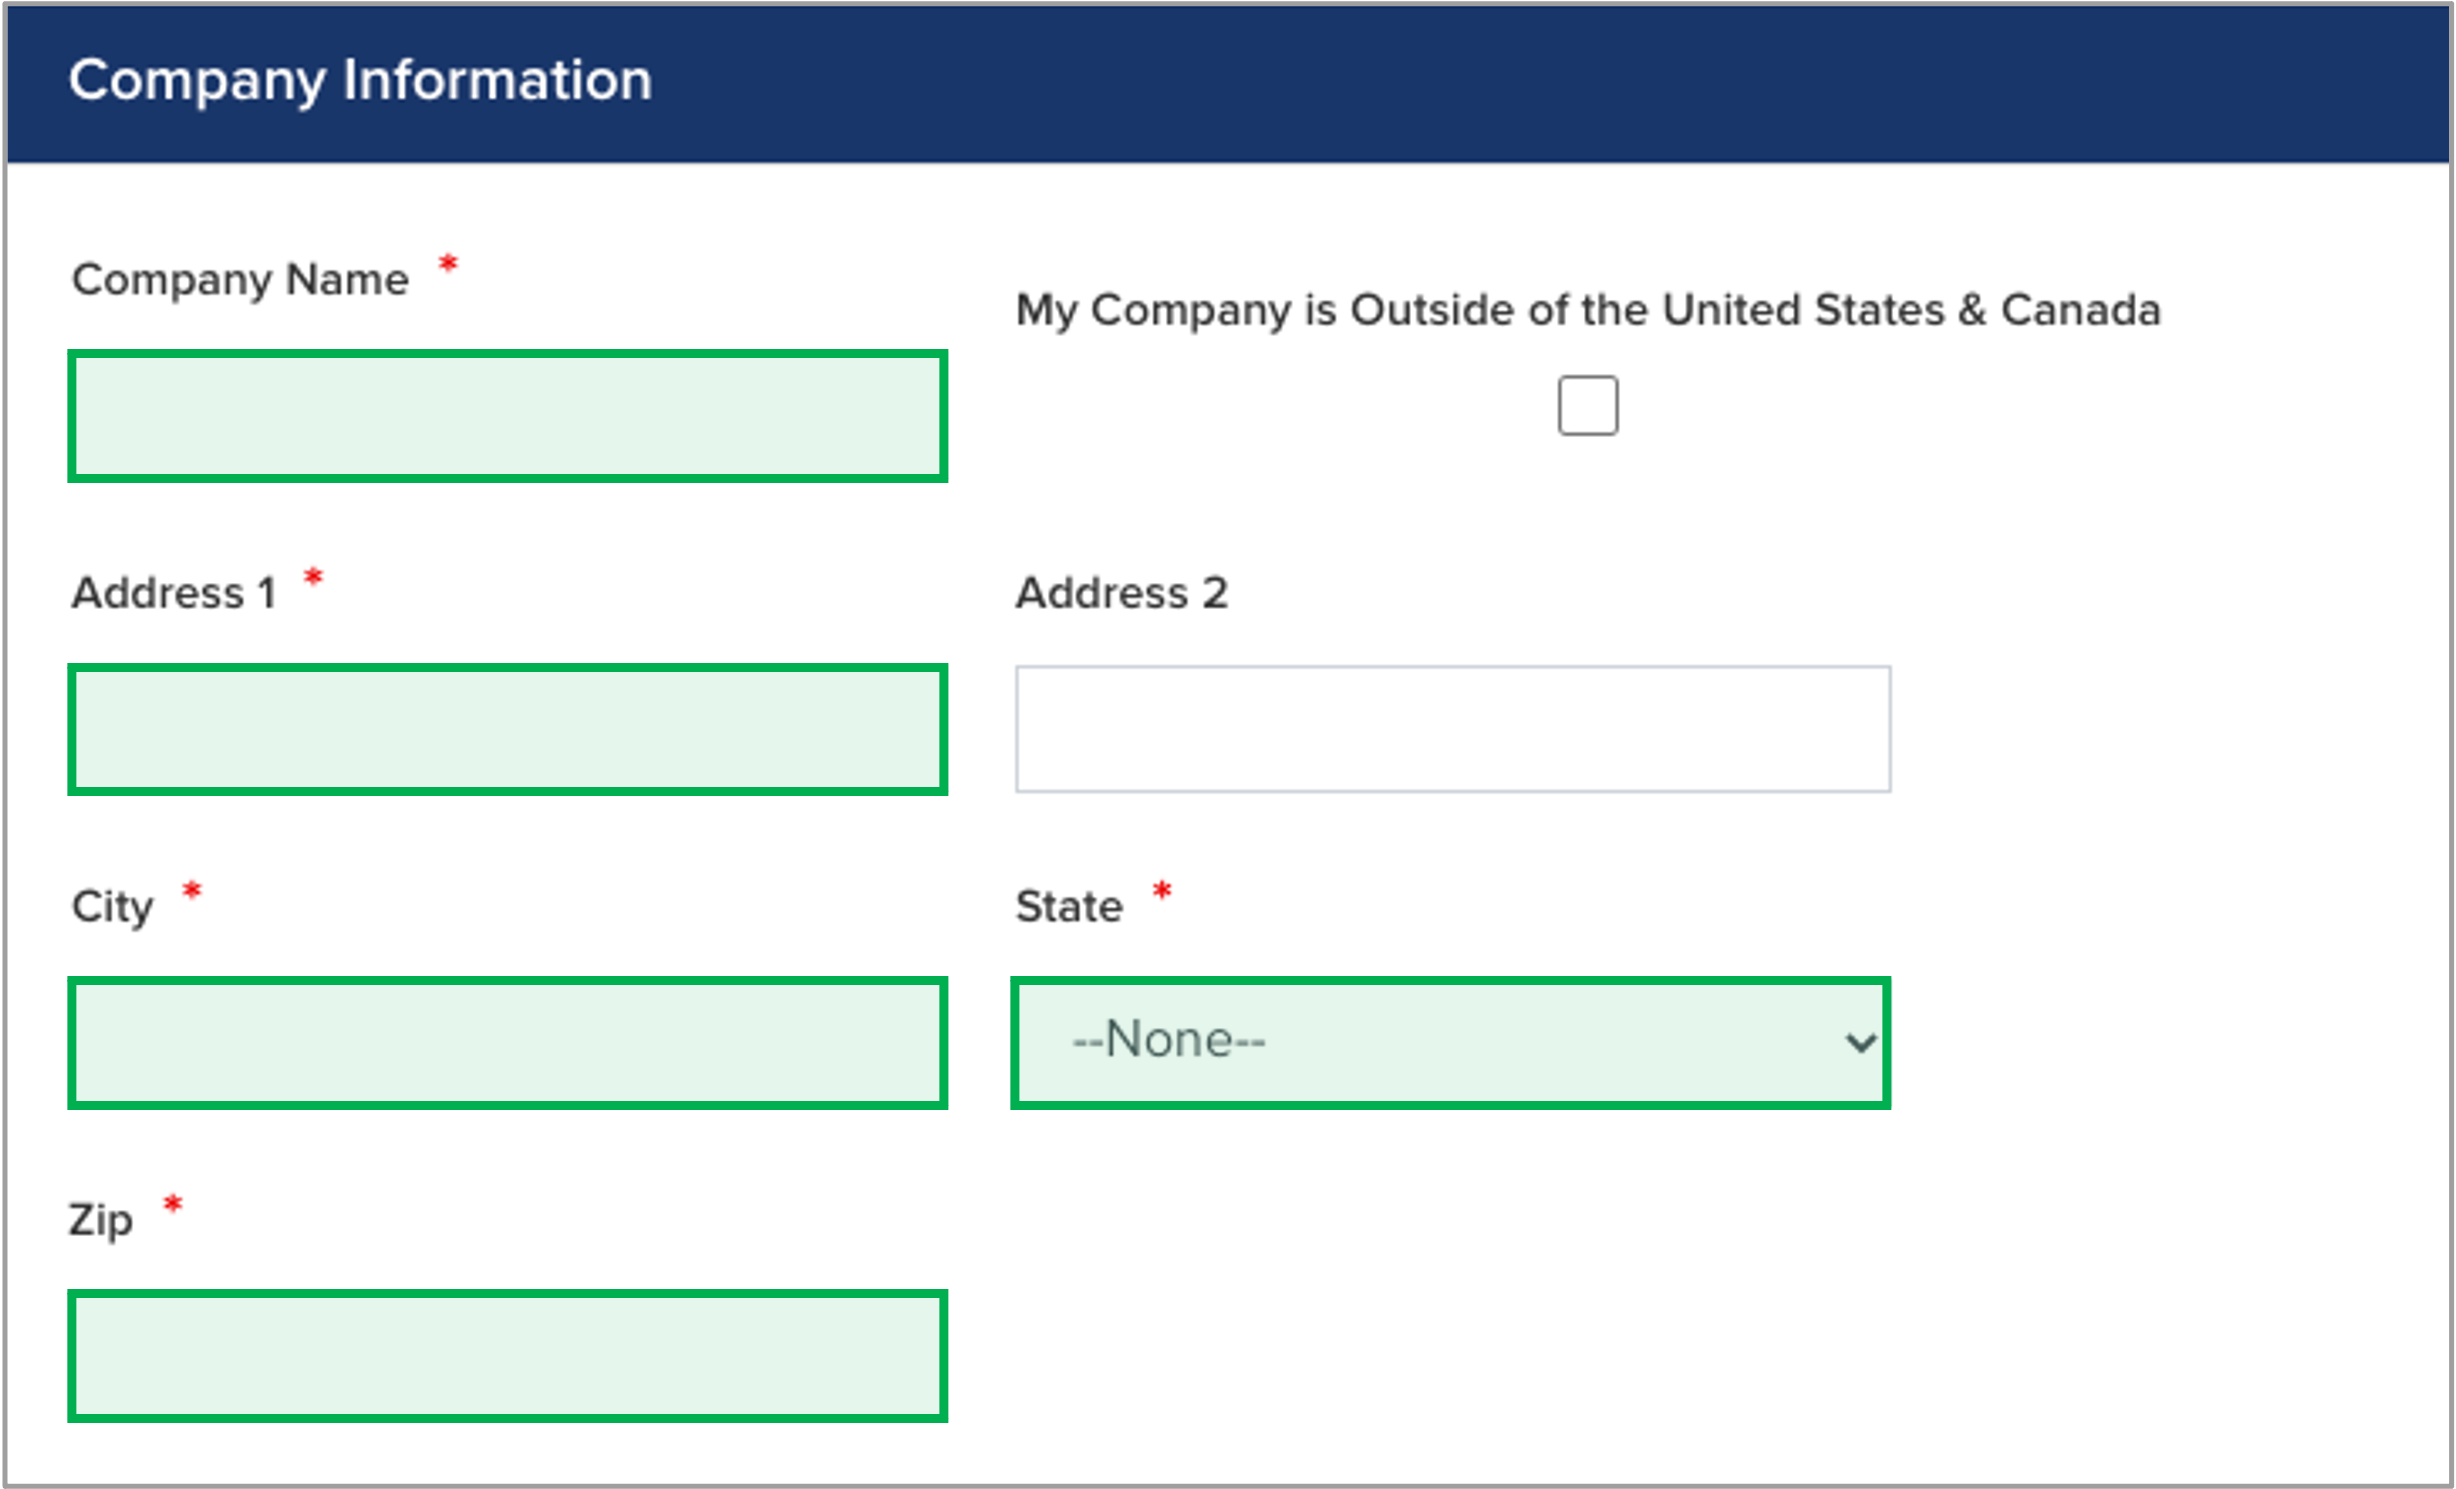
Complete the the Company Information section, being sure to populate all required fields (shown with a red asterisk *) | Warning |
|---|
Please register with the main company information, not the sub-entity (LLCs, Inc, etc.) information. |
| Expand |
|---|
|  Image Added Image Added
|
|
| UI Step |
|---|
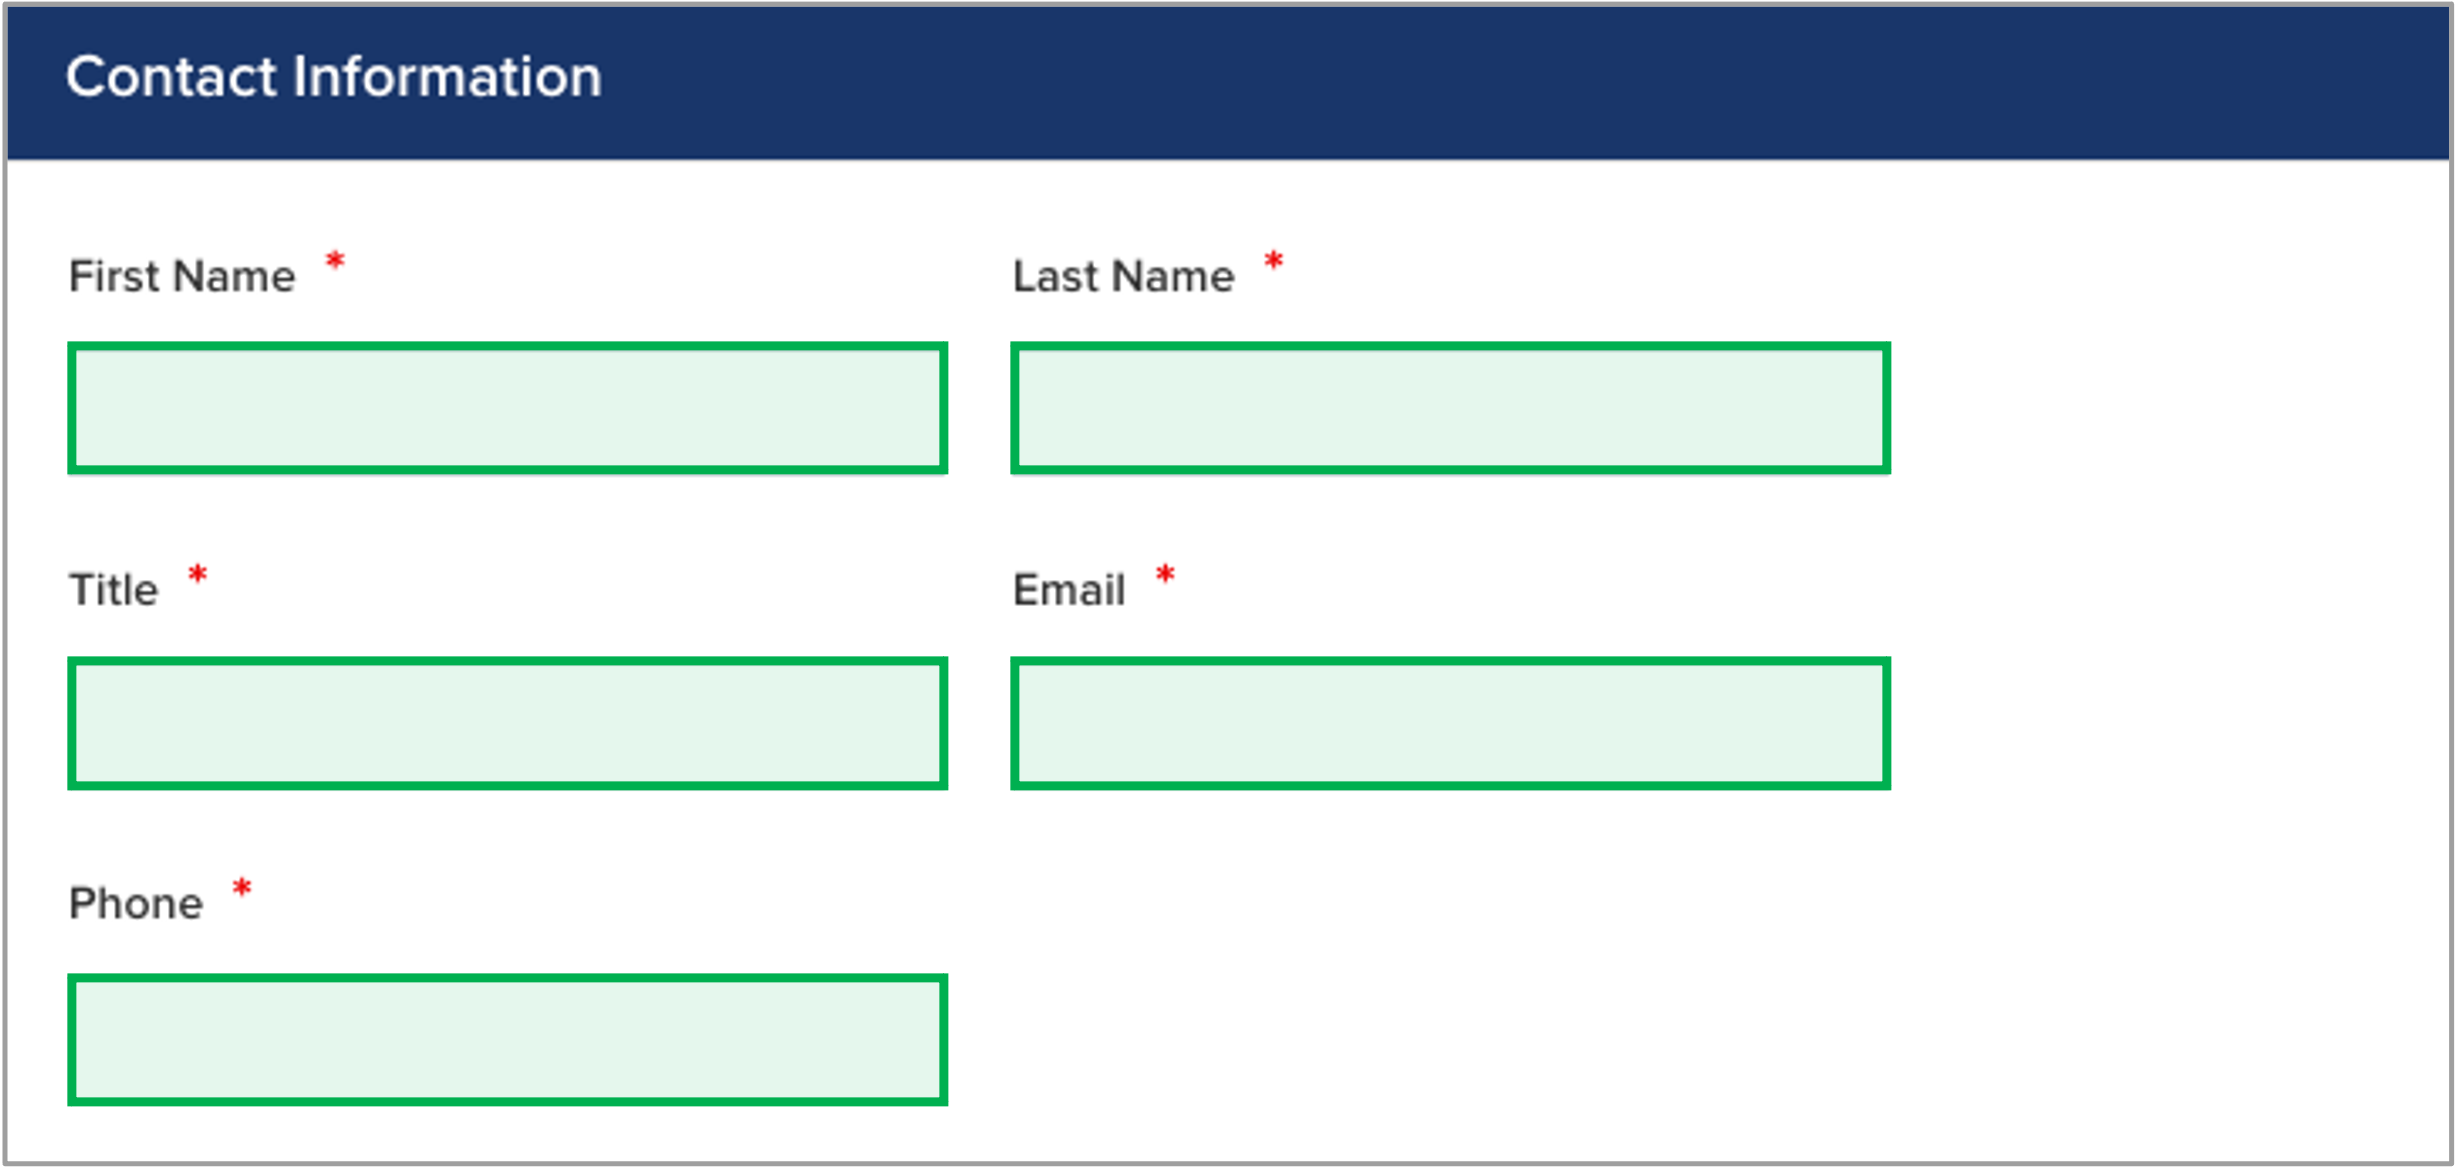
Complete the Contact Information section, being sure to populate all required fields (shown with a red asterisk *) | Expand |
|---|
|  Image Added Image Added
|
|
| UI Step |
|---|
Click Create at the bottom of the registration form. |
| UI Step |
|---|
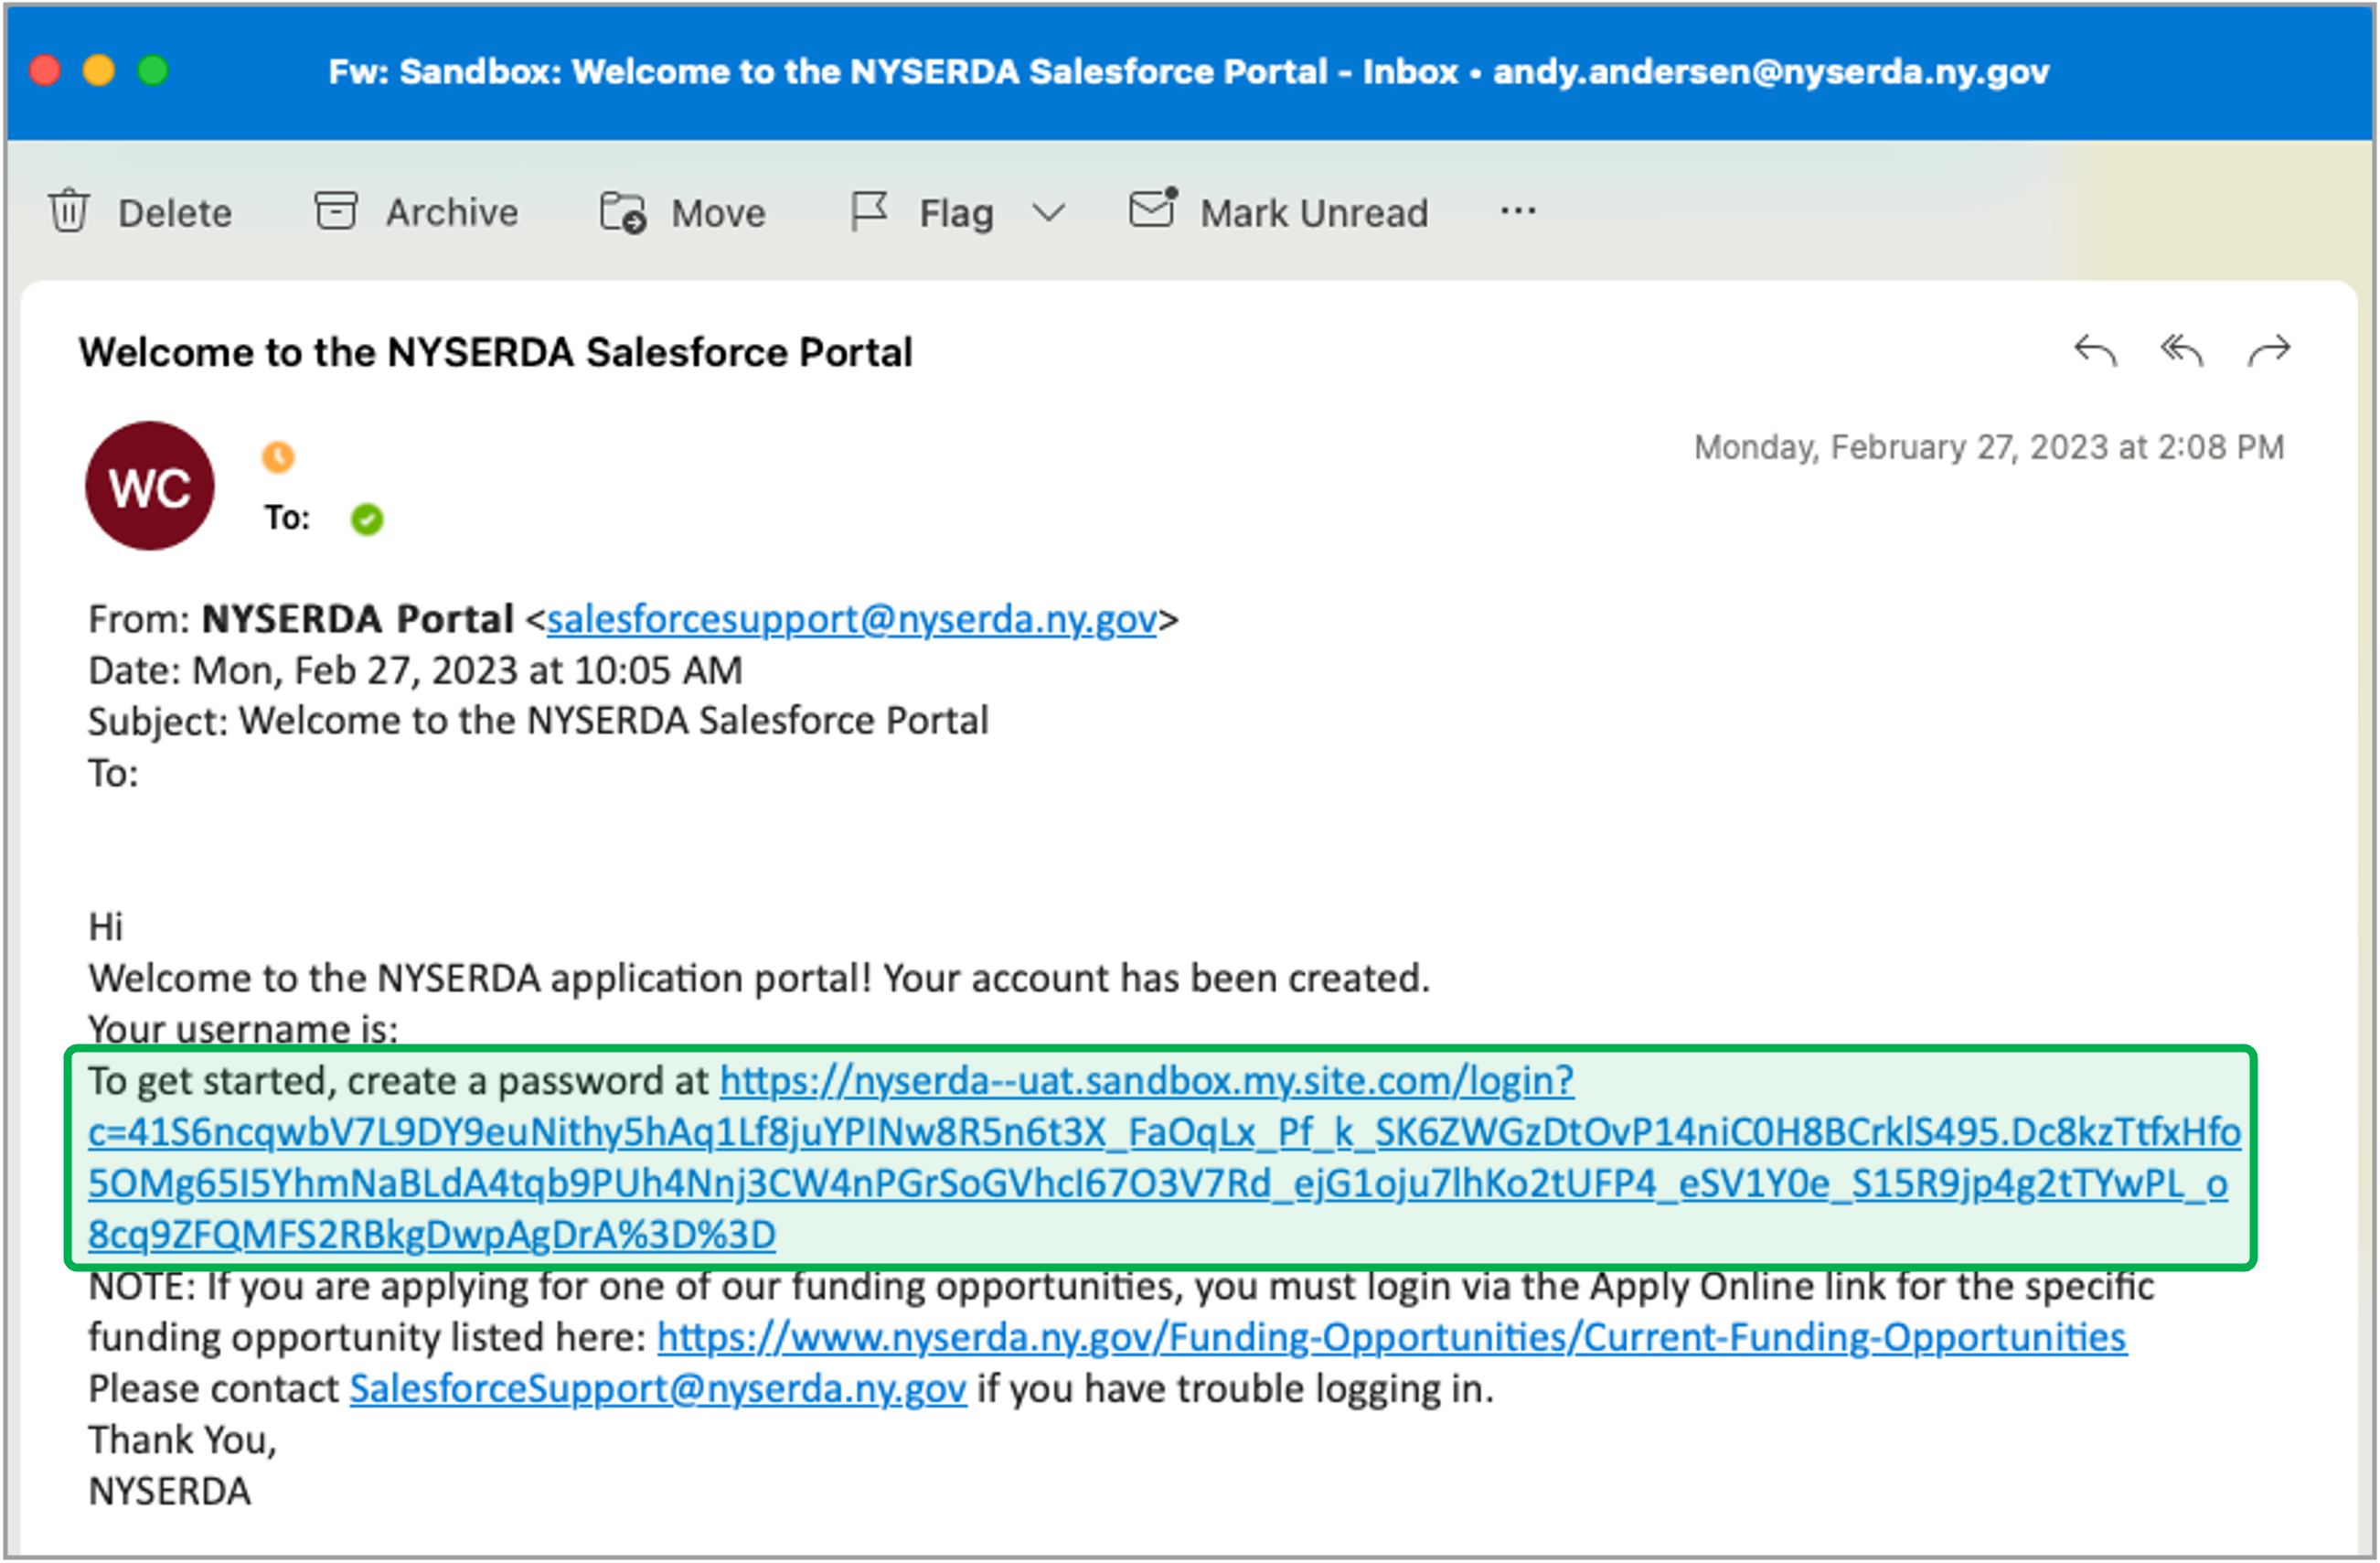
You'll receive an email notification to the address provided in in the Contact Information section of the registration page. Within the email notification, click the link to set your password for the create a password link to finalize the registration process by choosing a password. | Expand |
|---|
|  Image Added Image Added
|
|
| UI Step |
|---|
Once your registration is complete and your password set, you can log into the Salesforce Portal at anytime using this link: Salesforce Portal. |
|
|
| 

